kashurst
Well-Known Member
Can you spray Plastikote directly onto Zinsser BIN?Wrapping and spray finishes will look great! I would prime with zinseer bin to seal the ply up first. Expensive but goes along way.
Can you spray Plastikote directly onto Zinsser BIN?Wrapping and spray finishes will look great! I would prime with zinseer bin to seal the ply up first. Expensive but goes along way.
I really like the colour scheme.You have to leave something for the new owner to tinker with
It rotates so you can have it landscape or portraitAll very nice.
The ipad like thingy would look better if you could recess it.
Can you spray Plastikote directly onto Zinsser BIN?


I remember finding something similar on a GK29 of my father's. He had just bought the boat and we were investigating a smell from behind the heads.Weather has been better so I have done some more:
We now have a cutlery drawer! Quite pleased with it, it's on roller bearing slides (screwfix) .Tucks in under the Airfryer. Needs a bit of trim either side.

Pretty much finished the port side paneling/boxing ready to be covered in foam vinyl and wood effect stuff: All the screws that keep the big components all in place are underneath so you won't see any screw heads when it's finished. The over hanging sections just under the windows will have LED strip lighting too.

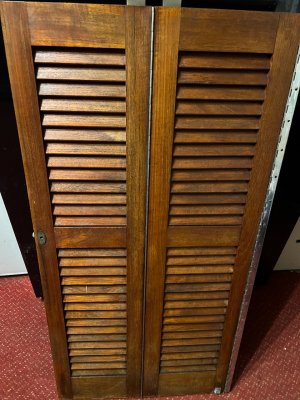
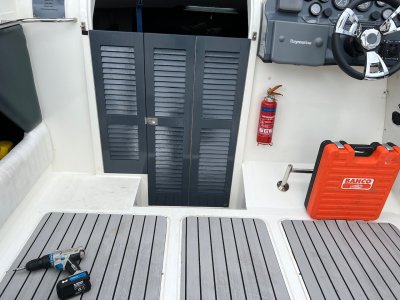
The saloon side board now has doors that match and the internal cupboard openings are enlarged.

Now this next pick is not very nice at all. And no it is not from the toilet! There has been a nasty niff that wouldn't go away under the galley. Finally discovered a way into this trapped space to discover about four gallons of water and some icky gunge stuck to the bottom. euch! You can see a tide mark on the fibreglass where the water level has been going up and down. The water and gunge is from the shower. Not the shower drain but shower spray getting through the gaps around the toilet pipes. This is not unusual but unfortunately there is no way for water to get out of this section into the main bilge to get rid of it so it has accumulated over nearly 40 years. So once it is all cleaned out, disinfected and properly dry I will drill a 50mm hole through the rib and line it with plastic pipe into the next section of bilge where there is a bilge pump. Plus now I have a small hatch to get in there with a sponge if required and keep it clean. When I fit the new electric loo I will endeavour to minimise any gaps around the pipe work too. If you are squeamish look away.

Weather permitting this week I shall be cutting a big hole in the transom for the fold down transom door. Bit nervous about that as I can't cut it twice.
I've had, and am sure others have too, ideas about changing things in the boat but have been put off because then the boat becomes non standard. I think sometimes though, after living with a boat for a few years, you'll have a better understanding than the original designers of what works and what doesn't. Trouble is, when you come to sell it, buyers won't believe you, tbh I probably wouldn't either if I was buyingAll great stuff K.... I also get nervous when modifying the boat...everything is designed to make it more livable but it probably is detracting from the resell value....I keep every spare bit so most can be returned to original
I haven't done it before either. I saw this video on Youtube. The owner did a very good job.Coming on great! What’s the plan for the transom door? Not a job I’ve ever done but often thought a few previous boats could have done with it.
strength? Capping of the edges left etc….?
Excited to see the process!I haven't done it before either. I saw this video on Youtube. The owner did a very good job.
At 2:20 you can see what he did with the transom and if you watch for a few minutes you will get the idea. I will do it a little bit differently so the hinges won't be on show and radius the corners to minimise stress points. I suspect those sharp corners will start developing gel coat stress cracks. It will also need vertical side pieces on the boat side to take a soft foam seal, otherwise if the rain blows from the stern I will end up with a puddle in the cockpit.
I have seen Corniche 31s with a moded transom with a full stainless gate, but I am worried that removing so much material with the existing design of the deck and mouldings it would compromise the transom strength and the internal cockpit deck. If you watch the video closely you will see a vertical step section. I think its structural to the cockpit deck so will leave it alone. Hence a fold down door rather than a vertical hinged door.
Once I have removed what will become the fibreglass door. I will reinforce and close over the various gaps with 18mm marine ply, polyurethane glue, stainless screws etc then firbreglass over it all to make it water proof. The door section will be boxed in and suitably reinforced as well. Then on a decent day gel coat it all.
That was a fantastic reno Mr G, a real credit to you. I really enjoy seeing the old boats being bought back to looking new again.
check all the terminal connections on the engine sensors to start with, loose fitting on the spade terminals, verdigris or not crimped tightly enough, then move to any junction terminals and the backs of the gauges themselves, assuming analogue. It doesn’t take much to create voltage drop/resistance.Plus half the gauges don't seem to work or have a mind of their own, so it will be back to multimeters and infra red thermometers to work out what is really going on.
Many years after working for Decca Radar I got a phone call from a friend that was trying to sort out a radar on a fishing boat, voltage was there but the radar would not work.check all the terminal connections on the engine sensors to start with, loose fitting on the spade terminals, verdigris or not crimped tightly enough, then move to any junction terminals and the backs of the gauges themselves, assuming analogue. It doesn’t take much to create voltage drop/resistance.
Its a great thread K, and a great transformation, sometimes you have to dig deep to get some of the jobs completed, but very satisfying when completed, and sometimes a little bit addictive ;-)
Indeed, it’s a harsh corrosive environment, and that’s without getting partially submerged! You can understand why tinned wire is the preference for marine installs, another layer of protection. It can be a fine line between connectivity and not!Many years after working for Decca Radar I got a phone call from a friend that was trying to sort out a radar on a fishing boat, voltage was there but the radar would not work.
When I got to the harbour I recognised the boat, I had installed the radar some 15 years previous, in the mean time the boat had partially foundered and been raised and my friend was trying to get the electronics up and running, the radar was a Decca 101, sure enough the radar was getting full voltage but when switching it on it dropped to 0V. Tracing the wires back to a junction box where the shielded wires entered the box they were just verdigris and under no load were not letting any current past, sea water really can corrode copper wire.