Steel boat build - Almarine 1200fa

JOHNPEET

Well-known member
Joined
24 Sep 2002
Messages
426
Location
Anglesey
Visit site
Just a quick question at this stage.
I thought that GRP (I assume Polyester) shrinks "big time" when you mould it round a plug like the one you made for the tanks.
I thought in those cases, you had to make the plug dismantleable or the GRP "grips/squeezes it too tight to get the plug out.
How did you manage to mould the tanks? maybe slight tapers to the plugs???

Yes you’re right, the plug I made was made such that I was able to take it apart. I had made it with a slight taper, but it was too tight to get the plug out in one piece. Taking it apart was my backup plan. I had even inserted tyre valves to allow it to be “blown out with compressed air, but that didn’t work!
 

burgundyben

Well-known member
Joined
28 Nov 2002
Messages
7,486
Location
Niton Radio
Visit site
On your HT6's did you to the plumbing mod to put the coolant in the exhaust manifold? Or will you have sea water in the manifold still? Or perhsps keel cooling?
 

JOHNPEET

Well-known member
Joined
24 Sep 2002
Messages
426
Location
Anglesey
Visit site
On your HT6's did you to the plumbing mod to put the coolant in the exhaust manifold? Or will you have sea water in the manifold still? Or perhsps keel cooling?

As things stand, I will still have sea water in the manifolds. Interested in your suggestion though! Do you have any photos of the pipework routing etc?
 

JOHNPEET

Well-known member
Joined
24 Sep 2002
Messages
426
Location
Anglesey
Visit site
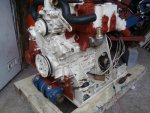
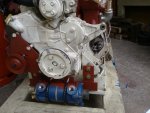
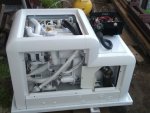
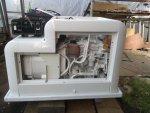
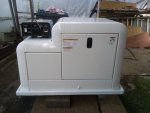
Today’s instalment covers the generator and some of the through hull fittings.
The generator was an eBay find for a few hundred pounds. It was bought on the basis of a good running engine but not producing any power. On arrival it was found to be exactly as described and on further investigation I found that the stator windings were open circuit.
The unit is a Kohler 6.5EFOZ . I have to say that I found the Kohler manuals to be absolutely excellent with full fault finding and diagnostic instructions within!
I stripped the unit and took the stator windings to a local motor rewind shop and they rewound the stator for £450 and tested everything for me. While the unit was stripped, I took the advantage of giving the ancillary items a good checking over - replacing /repairing whatever was required. I fitted a new starter motor as the mounting flange on the original unit was broken, new raw water pump complete, swapped out the heat exchanger for a better unit and replaced all the pipes. On reassembly, I set up the engine speed and AVR and load tested the unit for a few hours - all good. Coat of paint to finish and in the boat it went!

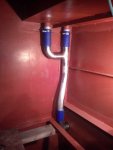
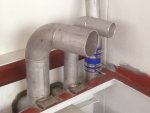
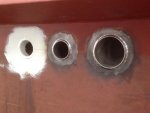
Other photos today are of the sea water intakes and the through hull arrangements for the exhausts and deck drains. I decided to route the engine exhausts through the sides of the boat instead of taking them out through the transom. This reduces the exhaust back pressure and avoids having to route pipe work which would have been difficult to access later, through the aft cabin.

Where the stainless was welded to the mild steel hull, this was done with TIG using a 309L filler rod. My understanding is the when you weld stainless to mild, some of the chromium in the stainless leaches out into the mild. The 309L filler rod has a high chromium content to try to counteract that. The important detail really with these welds is that they are well protected with epoxy afterwards to keep moisture away from the junction of dissimilar metals.

803EBD5A-527E-4EDB-BFDF-E311DFCC6D87.jpegAB82ADAB-0199-48D9-970B-575E84B6EE37.jpegF3735AA3-EF19-401D-BBC7-9E1EEB886DC9.jpegAD691711-AECD-4BCB-ACA3-42146FB2A896.jpeg446EE598-0EA2-4351-9FE8-315D7216D930.jpegD24C6E18-BF69-4469-95B6-8E9EC7598BAA.jpeg9D7183DC-C282-45C4-B20E-A4739FB2B853.jpegE2C69F79-4DDA-46BB-913A-145A467C9EDE.jpeg11495FAE-A7BC-4E80-A3F0-7F8AFB228275.jpeg278FA55D-574C-4C4B-81FD-7DADE0774EAA.jpeg
 

Seastoke

Well-known member
Joined
20 Sep 2011
Messages
11,433
Visit site
If you get her in the water for the queens weekend , hundred of boats are heading to IOM to inspect Google’s rebuild .
 

JOHNPEET

Well-known member
Joined
24 Sep 2002
Messages
426
Location
Anglesey
Visit site
So by this time, the larger items of kit were in the boat, the welding on the hull itself was complete - time to start all of the bright work as I was working towards getting to a point where all welding on the boat structure was completed so that the paint could be sorted.

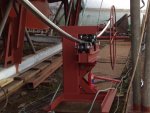
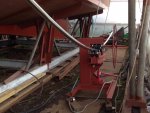
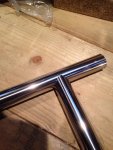
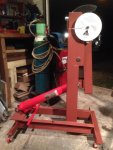
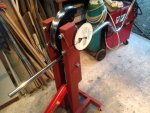
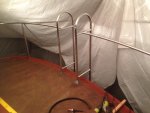
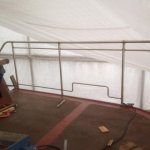
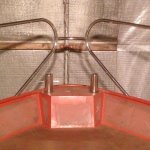
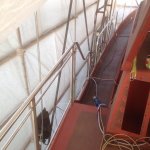
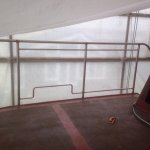
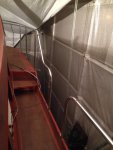
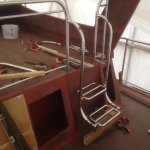
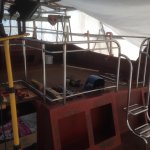
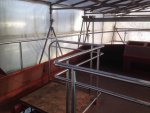
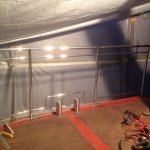
After looking around at similar boats, I decided to use 11/4” OD for the majority of the handrailing with 1”OD for the fly bridge and the upper frame on the radar arch and 3/4”OD for the inner trim around the aft deck and fly bridge for attaching dodgers to. First job was to make two benders for bending the 11/4” tube - one for the long curves and one for the tighter radii. Plenty of info and examples of this sort of thing on YouTube, so I adapted the ideas I saw to what I had and could achieve with available tooling. The draw former and rollers were obtained from Stakesys. The 8t long stroke Jack from eBay. The hydraulic bender produces an almost perfect bend with barely any distortion and no rippling. For the smaller diameter tubes, I bought pre-formed bends (hygienic tube bends) and polished them on my buffer.

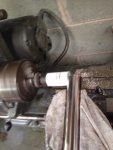
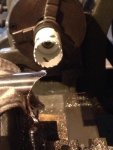
I have a small Myford lathe in my workshop so I used this to do all of the tube notching. I replaced the tool post on the cross slide with a small machine vice and by fitting a suitable hole saw in the chuck and carefully feeding the work into the rotating cutter, a fair quality notch can be cut. All of the tube joints were cut in this way.

The tube was formed and all tacked together across the various sections of the boat prior to doing the final welding. All welding on the tube was with TIG using 316L filler for stainless to stainless and 309L for stainless to mild steel.

I’ll cover the distortion issue tomorrow and more photos of the bright work as it progresses.

C14A52DC-8389-44E3-B207-E388E5015627.jpegE1B013A6-25EA-48C9-85F6-BDD9F3B12CE4.jpeg1A3DB247-059E-4371-9A25-0847ECDB3879.jpegDC5C4126-24E3-4C40-92F8-12DE50AA59B8.jpegD2D4902A-512B-4B48-8E03-DEE722E110E9.jpegCED9B5FE-817C-46B7-B5A1-ECE48326CA08.jpeg9A8C8CAB-28E4-4B88-93B4-05628FD569D6.jpeg2EE8F63D-B6C9-4757-9A52-709CAE26E957.jpegA7EEB52F-8CA6-44BD-AD66-76FE512E5FC9.jpegF5A2BE4A-F348-4E8D-9155-4802E0412FA9.jpeg
 

Bouba

Well-known member
Joined
6 Sep 2016
Messages
38,665
Location
SoF
Visit site
So by this time, the larger items of kit were in the boat, the welding on the hull itself was complete - time to start all of the bright work as I was working towards getting to a point where all welding on the boat structure was completed so that the paint could be sorted.

After looking around at similar boats, I decided to use 11/4” OD for the majority of the handrailing with 1”OD for the fly bridge and the upper frame on the radar arch and 3/4”OD for the inner trim around the aft deck and fly bridge for attaching dodgers to. First job was to make two benders for bending the 11/4” tube - one for the long curves and one for the tighter radii. Plenty of info and examples of this sort of thing on YouTube, so I adapted the ideas I saw to what I had and could achieve with available tooling. The draw former and rollers were obtained from Stakesys. The 8t long stroke Jack from eBay. The hydraulic bender produces an almost perfect bend with barely any distortion and no rippling. For the smaller diameter tubes, I bought pre-formed bends (hygienic tube bends) and polished them on my buffer.

I have a small Myford lathe in my workshop so I used this to do all of the tube notching. I replaced the tool post on the cross slide with a small machine vice and by fitting a suitable hole saw in the chuck and carefully feeding the work into the rotating cutter, a fair quality notch can be cut. All of the tube joints were cut in this way.

The tube was formed and all tacked together across the various sections of the boat prior to doing the final welding. All welding on the tube was with TIG using 316L filler for stainless to stainless and 309L for stainless to mild steel.

I’ll cover the distortion issue tomorrow and more photos of the bright work as it progresses.

View attachment 133185View attachment 133186View attachment 133187View attachment 133188View attachment 133189View attachment 133190View attachment 133191View attachment 133192View attachment 133193View attachment 133194
You know John, before I followed you...Vas was my hero..
 

mucklestone

Member
Joined
7 Nov 2011
Messages
97
Visit site
Beautiful boat. Looks properly built as well. Always dream of such a project but time money and skill are lacking (as always!) When I see a project like yours I see the hours and hours of work that has gone into it and think it makes the boat so much more valuable. Well done. Hats off to you.
 

paradave

Well-known member
Joined
12 Dec 2019
Messages
440
Visit site
I’ve been more than impressed so far but this stainless steel work is incredible! It’s also convinced me that notwithstanding many other reasons, I could not do this job!!
 

Bouba

Well-known member
Joined
6 Sep 2016
Messages
38,665
Location
SoF
Visit site
I’ve been more than impressed so far but this stainless steel work is incredible! It’s also convinced me that notwithstanding many other reasons, I could not do this job!!
He is more than impressive....the only fault as far as I can see is that he finished the job before he reported it...so we lost the chance to advise him on how to proceed...
 

JOHNPEET

Well-known member
Joined
24 Sep 2002
Messages
426
Location
Anglesey
Visit site
I’m not sure that I can cope with all these kind words! I may have to stop posting on this thread ??

To be absolutely honest, I think the one thing that has carried me through this project, is that I have masses of patience! I almost never give up on anything! Ive also found the majority of the various aspects of the project genuinely interesting and enjoyable.
 

Bouba

Well-known member
Joined
6 Sep 2016
Messages
38,665
Location
SoF
Visit site
I’m not sure that I can cope with all these kind words! I may have to stop posting on this thread ??

To be absolutely honest, I think the one thing that has carried me through this project, is that I have masses of patience! I almost never give up on anything! Ive also found the majority of the various aspects of the project genuinely interesting and enjoyable.
I am interested in how you get to the fly bridge....steps or ladder?
 

JOHNPEET

Well-known member
Joined
24 Sep 2002
Messages
426
Location
Anglesey
Visit site
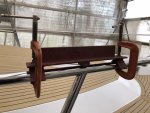
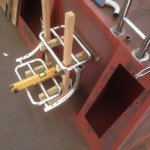
More photos today of the stainless steel work. One of the things that you really have to get to grips with with welding, is how the metal distorts due to the welding, heat and contraction. Stainless seems to be particularly challenging in this respect and I have to say that many test pieces were completed and a few hours of YouTube watched prior to completing any work for real! For the handrailing, Tee joints are the worst! having Notched the end of the tube and placed it against another, if you then proceed to complete the weld without any other control of distortion, what was the straight section of tube will be bent like a banana following the weld! To counteract this, with ideas stolen from the internet and YouTube, I made the clamp shown in the first photo. This has a raised central nib such that when tightened onto the tube with the g-clamps, bends the tube in the opposite direction slightly. The clamp was then left in place whilst the weld was completed and when everything cools and the clamp is removed, hopefully you end up with a straight section of tube and a nice Tee joint. It was a case of learning through experience as to how much “counter bend pressure” to put into the tube prior to welding. This wasn’t required for the tack welds, just the final full welds.
After all the welding was completed, all the welds had a pickling acid applied to remove the weld tarnish which was then washed off and the welds polished using small 60mm buffing wheels in a drill.

Bouba - I think your question is answered in these photos!

22640423-C5D4-4776-B924-7321E52706D9.jpeg3733177B-52D8-4A97-BA25-17A8D62C5352.jpegDDCF0F08-2C8A-4497-AE6E-279E7D4A2712.jpegC6190CD5-88E8-49BF-98A4-70C1A1BFB2D3.jpeg623D755B-D64E-42D2-A1BD-A13A1ED3749E.jpeg16A7983F-A22E-41A3-B896-9E79877212C3.jpeg36F09857-E62A-4D00-80C7-E54D5B98BF08.jpeg65F29A95-3F14-4059-9F4F-862730274E65.jpegEE25DB6A-8728-4BA1-ADC8-465CD772C2C2.jpeg0C475E4F-2181-4E00-968F-B03A0D1CD2F2.jpeg
 
Top