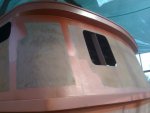
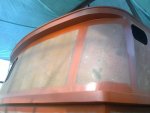
Steel boat build - Almarine 1200fa

JOHNPEET

Well-known member
Joined
24 Sep 2002
Messages
426
Location
Anglesey
Visit site
Are there any precautions you can take this early on regarding electrolysis and/or galvanic corrosion? Fascinating thread, thanks for taking the trouble.

In terms of actual actions taken at this stage there were none taken. The steel was grit blasted and primed prior to cnc cutting, so has good protection against immediate corrosion. The cut edges just didn’t seem to corrode for some reason! A feature that the plasma cutting provides it seems!

What I did do however is to start thinking about the various aspects of the hull and superstructure where dissimilar metals were likely to come into contact with each other and how those junctions in materials needed to be designed and treated. So the sorts of areas that needed a lot of forethought were - any hull penetrations above or below the waterline, points of attachment for hand railings etc, drive shafts, rudder shafts etc.

The steel kit only contains the basic hull and superstructure and none of the equipment, e.g. shafts or seals - at least that was the option that I took. (It was actually possible to have anything between the CAD plans to a finished boat) So everything that fits into or onto the steel hull has to be designed, made or bought!

I‘ll cover some of that detail as I get to each stage in the sequence ?
 

Bouba

Well-known member
Joined
6 Sep 2016
Messages
38,205
Location
SoF
Visit site
Hi John..great project ? tell us about your welding skill level and how are your seam welds going to be tested for integrity ?
 

JOHNPEET

Well-known member
Joined
24 Sep 2002
Messages
426
Location
Anglesey
Visit site
Hi John..great project ? tell us about your welding skill level and how are your seam welds going to be tested for integrity ?

I’m a time served mechanical maintenance fitter and worked for 12 years on the tools in a building services environment within the NHS. So that’s where my basic mechanical engineering skills originate from. I then moved into a management role working my way through the ranks prior to taking early retirement in 2020. The various roles that I held included design and project management of electrical and mechanical maintenance and new works.

The seam welds were all undertaken using sound standard welding engineering practice. The seams were prepped by grinding a vee into the seam either both sides or one only where access was hindered by a frame. All seams below the waterline are welded both sides and above the waterline just on one side. This is in accordance with the designer’s manual. The welding was then by the use of MIG. Each weld being of around 100mm with the start of the weld ground out and then the next weld run as a back weld onto the first - then repeat. Welds on the inside of the hull are not ground off. Numerous sample welds were made and cut apart to ensure settings were correct and good penetration was being obtained. All welding was within the weatherproof enclosure and so I didn’t suffer any problems with the shielding gas being blown off.
No actual NDT testing was undertaken - my risk!
 

Mr Googler

Well-known member
Joined
11 Apr 2008
Messages
5,496
Visit site
I’m a time served mechanical maintenance fitter and worked for 12 years on the tools in a building services environment within the NHS. So that’s where my basic mechanical engineering skills originate from. I then moved into a management role working my way through the ranks prior to taking early retirement in 2020. The various roles that I held included design and project management of electrical and mechanical maintenance and new works.

The seam welds were all undertaken using sound standard welding engineering practice. The seams were prepped by grinding a vee into the seam either both sides or one only where access was hindered by a frame. All seams below the waterline are welded both sides and above the waterline just on one side. This is in accordance with the designer’s manual. The welding was then by the use of MIG. Each weld being of around 100mm with the start of the weld ground out and then the next weld run as a back weld onto the first - then repeat. Welds on the inside of the hull are not ground off. Numerous sample welds were made and cut apart to ensure settings were correct and good penetration was being obtained. All welding was within the weatherproof enclosure and so I didn’t suffer any problems with the shielding gas being blown off.
No actual NDT testing was undertaken - my risk!
@Bouba will be sending you a fuel tank to weld up shortly ?
 

Hurricane

Well-known member
Joined
11 Nov 2005
Messages
9,393
Location
Sant Carles de la Ràpita
Visit site
I thought I recognised your user name, John.
It will be good to see the boat as it progresses - I did see some photos of the deck that you sent me a year or so ago when we discussed the synthetic teak.
To see the rest will be really interesting.
Mike
 

JOHNPEET

Well-known member
Joined
24 Sep 2002
Messages
426
Location
Anglesey
Visit site
I thought I recognised your user name, John.
It will be good to see the boat as it progresses - I did see some photos of the deck that you sent me a year or so ago when we discussed the synthetic teak.
To see the rest will be really interesting.
Mike

Hi Mike,

The help and support that you provided on the decking, through the thread that you wrote at the time, describing the work that you were undertaking proved to be invaluable for me. It definitely gave me the confidence to tackle my decking project myself. Cheers for that ??
 

JOHNPEET

Well-known member
Joined
24 Sep 2002
Messages
426
Location
Anglesey
Visit site
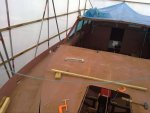
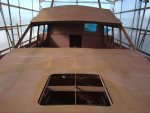
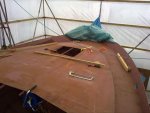
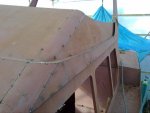
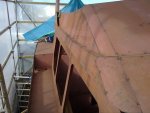
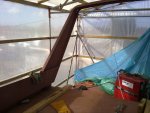
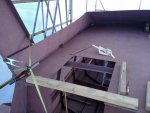
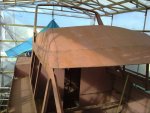
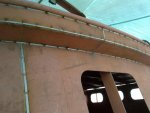
So the process of lifting, aligning and tacking plates continued. Today‘s photos show the superstructure being tacked in place.
At this point of the build, I also had to start thinking about how I was going to get some of the larger items of equipment actually in to the boat and at what stage. Although some of the windows in the superstructure are quite large, they’re not large enough to lift engines and tanks through. So on that basis, I had decided to leave the windscreen as a panel that would only be finally welded in place once all the larger items of kit were in the boat. Prior to welding the windscreen in, I also lifted in 24 sheets of ply - half of which was 18mm and half of 9mm thick. This would provide me with a good start for the floors and internal linings. So the windscreen panel was tacked into place initially to make sure the overall superstructure was square and true, then once the final welding was completed on the other panels, it was taken out again.

8E1BAF35-910F-4A78-BB7C-7E75C7FDAC27.jpeg9F772622-B595-4054-AC93-6739D9D34E91.jpegD13CB52E-61AC-4941-9109-A5C08B8EAAED.jpeg9631B364-A7C9-48E0-B444-160D94B9391C.jpeg04EB6490-DB90-46FF-A710-3CEDCB139828.jpegF0F67DCE-9545-4D70-95E3-0711F05F9F8E.jpeg7AD79B1B-7C4C-4B02-9F3B-B9D473B7F479.jpeg0DAA1373-D0CB-4720-9811-0C5EF5C13369.jpegDE82F576-DAF6-4936-90B2-56744152684A.jpegA6512BC7-CEE8-4A91-B0E8-76AD2327D1A8.jpeg
 

Bouba

Well-known member
Joined
6 Sep 2016
Messages
38,205
Location
SoF
Visit site
So the process of lifting, aligning and tacking plates continued. Today‘s photos show the superstructure being tacked in place.
At this point of the build, I also had to start thinking about how I was going to get some of the larger items of equipment actually in to the boat and at what stage. Although some of the windows in the superstructure are quite large, they’re not large enough to lift engines and tanks through. So on that basis, I had decided to leave the windscreen as a panel that would only be finally welded in place once all the larger items of kit were in the boat. Prior to welding the windscreen in, I also lifted in 24 sheets of ply - half of which was 18mm and half of 9mm thick. This would provide me with a good start for the floors and internal linings. So the windscreen panel was tacked into place initially to make sure the overall superstructure was square and true, then once the final welding was completed on the other panels, it was taken out again.

View attachment 132751View attachment 132752View attachment 132753View attachment 132754View attachment 132755View attachment 132756View attachment 132757View attachment 132758View attachment 132759View attachment 132760
So...at this point in time the whole structure is supported by tack welds? By now is must be weighing quite a bit....amazing build thread?
 

JOHNPEET

Well-known member
Joined
24 Sep 2002
Messages
426
Location
Anglesey
Visit site
Yes, the whole structure at this point in time was only tack welded together. The tack welds probably varied in size between 3mm and 20mm. The structure needed to have a small degree of flexibility to allow the various parts to be pulled or pushed into place. Easy to cut a few tacks out as well where required to allow repositioning.

The steel kit delivery was 5500kg. according to the delivery note!
 

JOHNPEET

Well-known member
Joined
24 Sep 2002
Messages
426
Location
Anglesey
Visit site
So as stated, at this point in time, the whole structure is tack welded together only.

This was when the finish welding process began and there were detailed instructions in terms of what sequence this was to be undertaken:

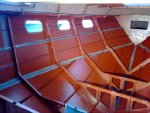
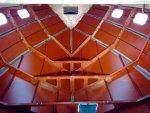
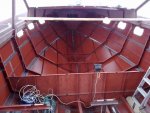
1. Fully weld all of the seams/joints in the transverse frames - but not to the hull at this stage.
2. Fully weld all slotted connections between the frames and stringers/longitudinals - these were welded on at least two opposite faces of the connection.
3. Apply intermittent welds between the frames and the hull using the rule - 50mm weld, 150mm clear, 50mm weld, with the welds alternated each side of the frames.
4. Apply intermittent welds between the stringers and the hull as per the rule above.

All welding work was to be alternated between each side of the boat to even out the forces from the welding process and produce as fair a hull as possible. When welding the stringers to the hull, it was also essential to keep checking the hull plating for flatness or fair curvature as very often the “stronger” hull plating needed to be persuaded into place before the stringers were welded to it.

5. Fully weld all seams on the hull using the preparation and welding techniques as described in one of my earlier responses. Again, important to keep alternating work between port and starboard sides of the boat to even out forces. All seams below the waterline were prepped and welded both sides. Seams above - prepped and welded outside only with some internal stitch welding applied so as to produce a flat joint transition where required.

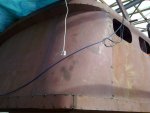
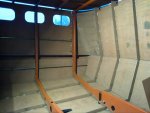
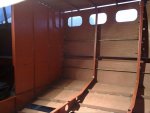
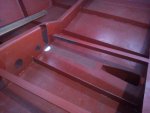
In terms of attempting to prevent corrosion on the steel, I took the approach of applying epoxy primer (Jotun87) to all areas internally that would not suffer damage through further welding and externally to welds that had been finished.

436C57DC-B9B4-40FD-B80D-977212C0909B.jpeg9F145621-42C5-453A-818B-C4CCACF8E82D.jpegD3658B9D-45F3-4729-B82D-09CF529BAB53.jpeg379845A5-9867-41FC-9CC6-722FCF3FC33A.jpeg1A462B58-63EE-4806-A009-6AAA9DE87F44.jpeg83A51038-1D13-4673-B053-CCD37C6CD27D.jpeg88E813F5-28BC-4E5D-9971-E8302239B132.jpeg6BA5961A-0C1A-4CE1-A582-65C777836D22.jpeg8405240E-FCCE-4D91-96CA-4B74E21C55C1.jpeg9C0918E8-C097-4509-B580-F307A817C63D.jpeg
 

Bouba

Well-known member
Joined
6 Sep 2016
Messages
38,205
Location
SoF
Visit site
So as stated, at this point in time, the whole structure is tack welded together only.

This was when the finish welding process began and there were detailed instructions in terms of what sequence this was to be undertaken:

1. Fully weld all of the seams/joints in the transverse frames - but not to the hull at this stage.
2. Fully weld all slotted connections between the frames and stringers/longitudinals - these were welded on at least two opposite faces of the connection.
3. Apply intermittent welds between the frames and the hull using the rule - 50mm weld, 150mm clear, 50mm weld, with the welds alternated each side of the frames.
4. Apply intermittent welds between the stringers and the hull as per the rule above.

All welding work was to be alternated between each side of the boat to even out the forces from the welding process and produce as fair a hull as possible. When welding the stringers to the hull, it was also essential to keep checking the hull plating for flatness or fair curvature as very often the “stronger” hull plating needed to be persuaded into place before the stringers were welded to it.

5. Fully weld all seams on the hull using the preparation and welding techniques as described in one of my earlier responses. Again, important to keep alternating work between port and starboard sides of the boat to even out forces. All seams below the waterline were prepped and welded both sides. Seams above - prepped and welded outside only with some internal stitch welding applied so as to produce a flat joint transition where required.

In terms of attempting to prevent corrosion on the steel, I took the approach of applying epoxy primer (Jotun87) to all areas internally that would not suffer damage through further welding and externally to welds that had been finished.

View attachment 132816View attachment 132817View attachment 132818View attachment 132819View attachment 132820View attachment 132822View attachment 132823View attachment 132824View attachment 132825View attachment 132826
Superb! Couple of questions...did you dress the welds after or just leave them? And the worst thing that you could ask me to do is weld overhead...I might as well just weld my own face☹️....but I presume that you are very good at overhead welding ?
 

Croftie

Active member
Joined
19 May 2015
Messages
736
Visit site
Great stuff!! How long did it take to get to this stage/fully welded up? You said earlier you could buy any stage from just plans to fully compleded boat. Did you consider a half way stage of buying the welded up hull for you to do the engine install and fit out etc. Would have got you on the water quicker. Was there much difference in price between a kit of panels and a bare welded up hull?
 

JOHNPEET

Well-known member
Joined
24 Sep 2002
Messages
426
Location
Anglesey
Visit site
Superb! Couple of questions...did you dress the welds after or just leave them? And the worst thing that you could ask me to do is weld overhead...I might as well just weld my own face☹....but I presume that you are very good at overhead welding ?

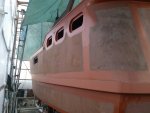
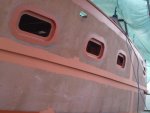
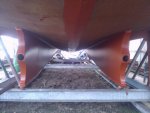
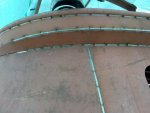
All of the welds on the outside of the hull apart from the keels were dressed. Thinking ahead from a paint/coatings perspective, it’s important to avoid any sharp corners on the steel anywhere! So all of the corners on the boat exterior, whether welded or not are finished to a radius. This is to aid the epoxy coatings in forming an even thickness coat around the corner. With a sharp corner - the coating will naturally become thinner on the corner and will be a risk point for corrosion breaking through.
None of the welds internally were dressed with a grinder after welding - just a light going over with a wire brush on the grinder.

Welding overhead is definitely not my favourite pastime! My overhead welds do not look as pretty as my other welds! I did four runs on the keel to hull welds in order to add extra metal and none of the keel welds were ground off to finish. Just removed any spatter that would have otherwise formed a sharp point.

ED2EE264-7827-4EC7-9D60-5EFC9F26D42A.jpeg208FC738-06F6-4804-AA7E-5FF5D4553DD8.jpegFA13E052-F73E-470B-B061-61CB13248B70.jpegC2D97C9D-7ADB-400C-B821-653B31326071.jpeg
 

JOHNPEET

Well-known member
Joined
24 Sep 2002
Messages
426
Location
Anglesey
Visit site
Looks bloody fantastic John ?. Does having the twin keels around the shafts mean you will be able to dry out ?.

Mmmmm good question!

It probably could dry out but I intend avoiding doing so!

Firstly, I don’t want to risk damaging the expoxy coatings on the hull.

Secondly, You will see in future instalments that the rudders are supported on skews, so if it sat awkwardly with a lot of weight on a skeg, it could damage it I think.
 

JOHNPEET

Well-known member
Joined
24 Sep 2002
Messages
426
Location
Anglesey
Visit site
Great stuff!! How long did it take to get to this stage/fully welded up? You said earlier you could buy any stage from just plans to fully compleded boat. Did you consider a half way stage of buying the welded up hull for you to do the engine install and fit out etc. Would have got you on the water quicker. Was there much difference in price between a kit of panels and a bare welded up hull?

It probably took me about three years to get to the stage of having the basic hull finish welded. That was working about 22 hours a week.

Ive built this boat on a very tight budget, so I never seriously considered anything other than the steel kit. Although much later than expected, I now have a boat which is fully paid for! I can’t remember for sure, but I think a fully welded hull would have been in the region of three times the cost of a kit.
 

Sticky Fingers

Well-known member
Joined
21 Feb 2004
Messages
5,599
Location
Saffron Walden, Essex
Visit site
It probably took me about three years to get to the stage of having the basic hull finish welded. That was working about 22 hours a week.

Ive built this boat on a very tight budget, so I never seriously considered anything other than the steel kit. Although much later than expected, I now have a boat which is fully paid for! I can’t remember for sure, but I think a fully welded hull would have been in the region of three times the cost of a kit.
When I was looking at this (2004) the prices were as follows, so roughly about 3-4x the kit cost for a welded shell but it was pretty inconsistent:

1649163664195.png
 
Last edited:
Top