DIY Synthetic Teak

John100156

Well-known member
Joined
31 Oct 2007
Messages
2,627
Location
SANT CARLES DE LA RAPITA
Visit site
The fellow boat owner you refer to has what I call “The Quartermasters” store in his Panole / boat

Yes, to include a very large expensive slip-ring water pump pliers, for removing immersion heating elements :ROFLMAO: but that's another story..... I think we tried every tool shop in Amposta to try to find a simple £5 immersion heater spanner....!
 

Hurricane

Well-known member
Joined
11 Nov 2005
Messages
9,404
Location
Sant Carles de la Ràpita
Visit site
Yes, to include a very large expensive slip-ring water pump pliers, for removing immersion heating elements :ROFLMAO: but that's another story..... I think we tried every tool shop in Amposta to try to find a simple £5 immersion heater spanner....!
Ahh yes
Maybe you can help again!
I have a pump that needs to check its flow rate.
I think it might need testing when you are next out in Spain!!!

BTW - That was a long time ago - I have a proper immersion spanner these days.
 

John100156

Well-known member
Joined
31 Oct 2007
Messages
2,627
Location
SANT CARLES DE LA RAPITA
Visit site
Hope to get out again in June, after SWMBO's second jab, that is if I can smuggle my commissioning kit out, happy to take some readings...!

Great fun comparing theoretical with practical.
 

Hurricane

Well-known member
Joined
11 Nov 2005
Messages
9,404
Location
Sant Carles de la Ràpita
Visit site
Hope to get out again in June, after SWMBO's second jab, that is if I can smuggle my commissioning kit out, happy to take some readings...!

Great fun comparing theoretical with practical.
Like you, I'm hoping to be out there from the second week in June.
Guess what - it will be hot enough to need Aircon!!!
So I will probably be fitting that pump as soon as I get there.
It was unbearable last September when the old pump failed!!!
 

Hurricane

Well-known member
Joined
11 Nov 2005
Messages
9,404
Location
Sant Carles de la Ràpita
Visit site
If you are taking the horse box out, let me know, I can always send you my commissioning kit to take out. We're hoping to fly out and bring the Audi back via ferry.
Yes please, John
I'll be in touch nearer the time.
I could take your test kit out and you could bring it back.

BTW - it isn't a "Horse Box" - it is a "Donkey Box"!!!!
 

John100156

Well-known member
Joined
31 Oct 2007
Messages
2,627
Location
SANT CARLES DE LA RAPITA
Visit site
No problem - I will await an email in due course.

Just negotiating with a supplier in Barcelona, to supply the following to SC:

Gala Atlantis Model A300L to include:
  • Light Grey Hypalon Tubes
  • Cover for all
  • Dark Grey Décor
  • White Paint
  • Silvertex Upholstery
  • Double Seat
  • Yamaha 20HP (Electric start & electric tilt)
  • Flush mount control box
  • Mocha / Black SeaDek Anti-Slip Flooring
  • Bow step plate with cleat and soft seat back
  • Deluxe Steering Console
  • Tachometer and speedometer
  • Electric Package (NAV Lights, Bilge Pump, Horn, Battery, Isolator Switch & Dashboard Switches)
  • Anchor, Chain and Line
  • Inclusive of all taxes and associated costs
  • Inclusive of safe delivery at the end of May, to: Sant Carles Marina
The crane on the P45 will only take 200kg so the above fits the bill nicely, whether it will fit on the BP is another matter :cool:
 

Hurricane

Well-known member
Joined
11 Nov 2005
Messages
9,404
Location
Sant Carles de la Ràpita
Visit site
That looks nice.
One comment - you MUST instil on people that use it.
Don't pull hard on those handles - we have similar ones on the Novurania.
They aren't very strong.
Just be masterful or assertive and you will gave a great dinghy.
Are you sure that the 330 wouldn't fit???????
 

John100156

Well-known member
Joined
31 Oct 2007
Messages
2,627
Location
SANT CARLES DE LA RAPITA
Visit site
Yes 330 might fit but would fill the entire BP on the P45, even if I hung it out a bit. Which could be a pain when visiting local marinas, acting as a large stern fender; I may sit it on an Aqua Dock when in SC but not found a decent used one at a sensible price!

There was more room on my old F43's BP and the crane had a much greater lifting capacity (only 200kg on the P45).

We would only use it infrequently, its more a toy for the G/Kids in the lagoon and a perfect little tender for just me and SWMBO I reckon, we would rarely need to ferry more than 4p otherwise I would have chanced a bigger one.

Love the Williams jets, but cost and concerns about reliability put me off, whereas the Yam is a well known and reliable motor, so the setup should suit us well, I think, only time will tell....

Still 9m until I retire....
 

Hurricane

Well-known member
Joined
11 Nov 2005
Messages
9,404
Location
Sant Carles de la Ràpita
Visit site
Just briefly reviving this thread.
Still out on the boat so a full report when I get home.

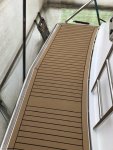
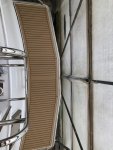
Good progress with the flybridge teak replacement.
Very very very hard work.
Biggest thanks to SWMBO - between just the two of us this is the result.

Photo_6553882_DJI_282_jpg_4372753_0_2021799238_photo_original.resized.jpg

The Flybridge was and probably will be the hardest area to do.
The cockpit and stairs are the only old teak left.
As I say - full report to follow.
 

TNLI

Active member
Joined
20 Jul 2020
Messages
593
Visit site
Chapter 2
Joining the Material

OK so lets look at the easy bit first – back welding. That means the whole joint is made on the back of the material. With this type of joint, the extruded material is designed to give a perfect finish on to top side whilst being welded underneath.

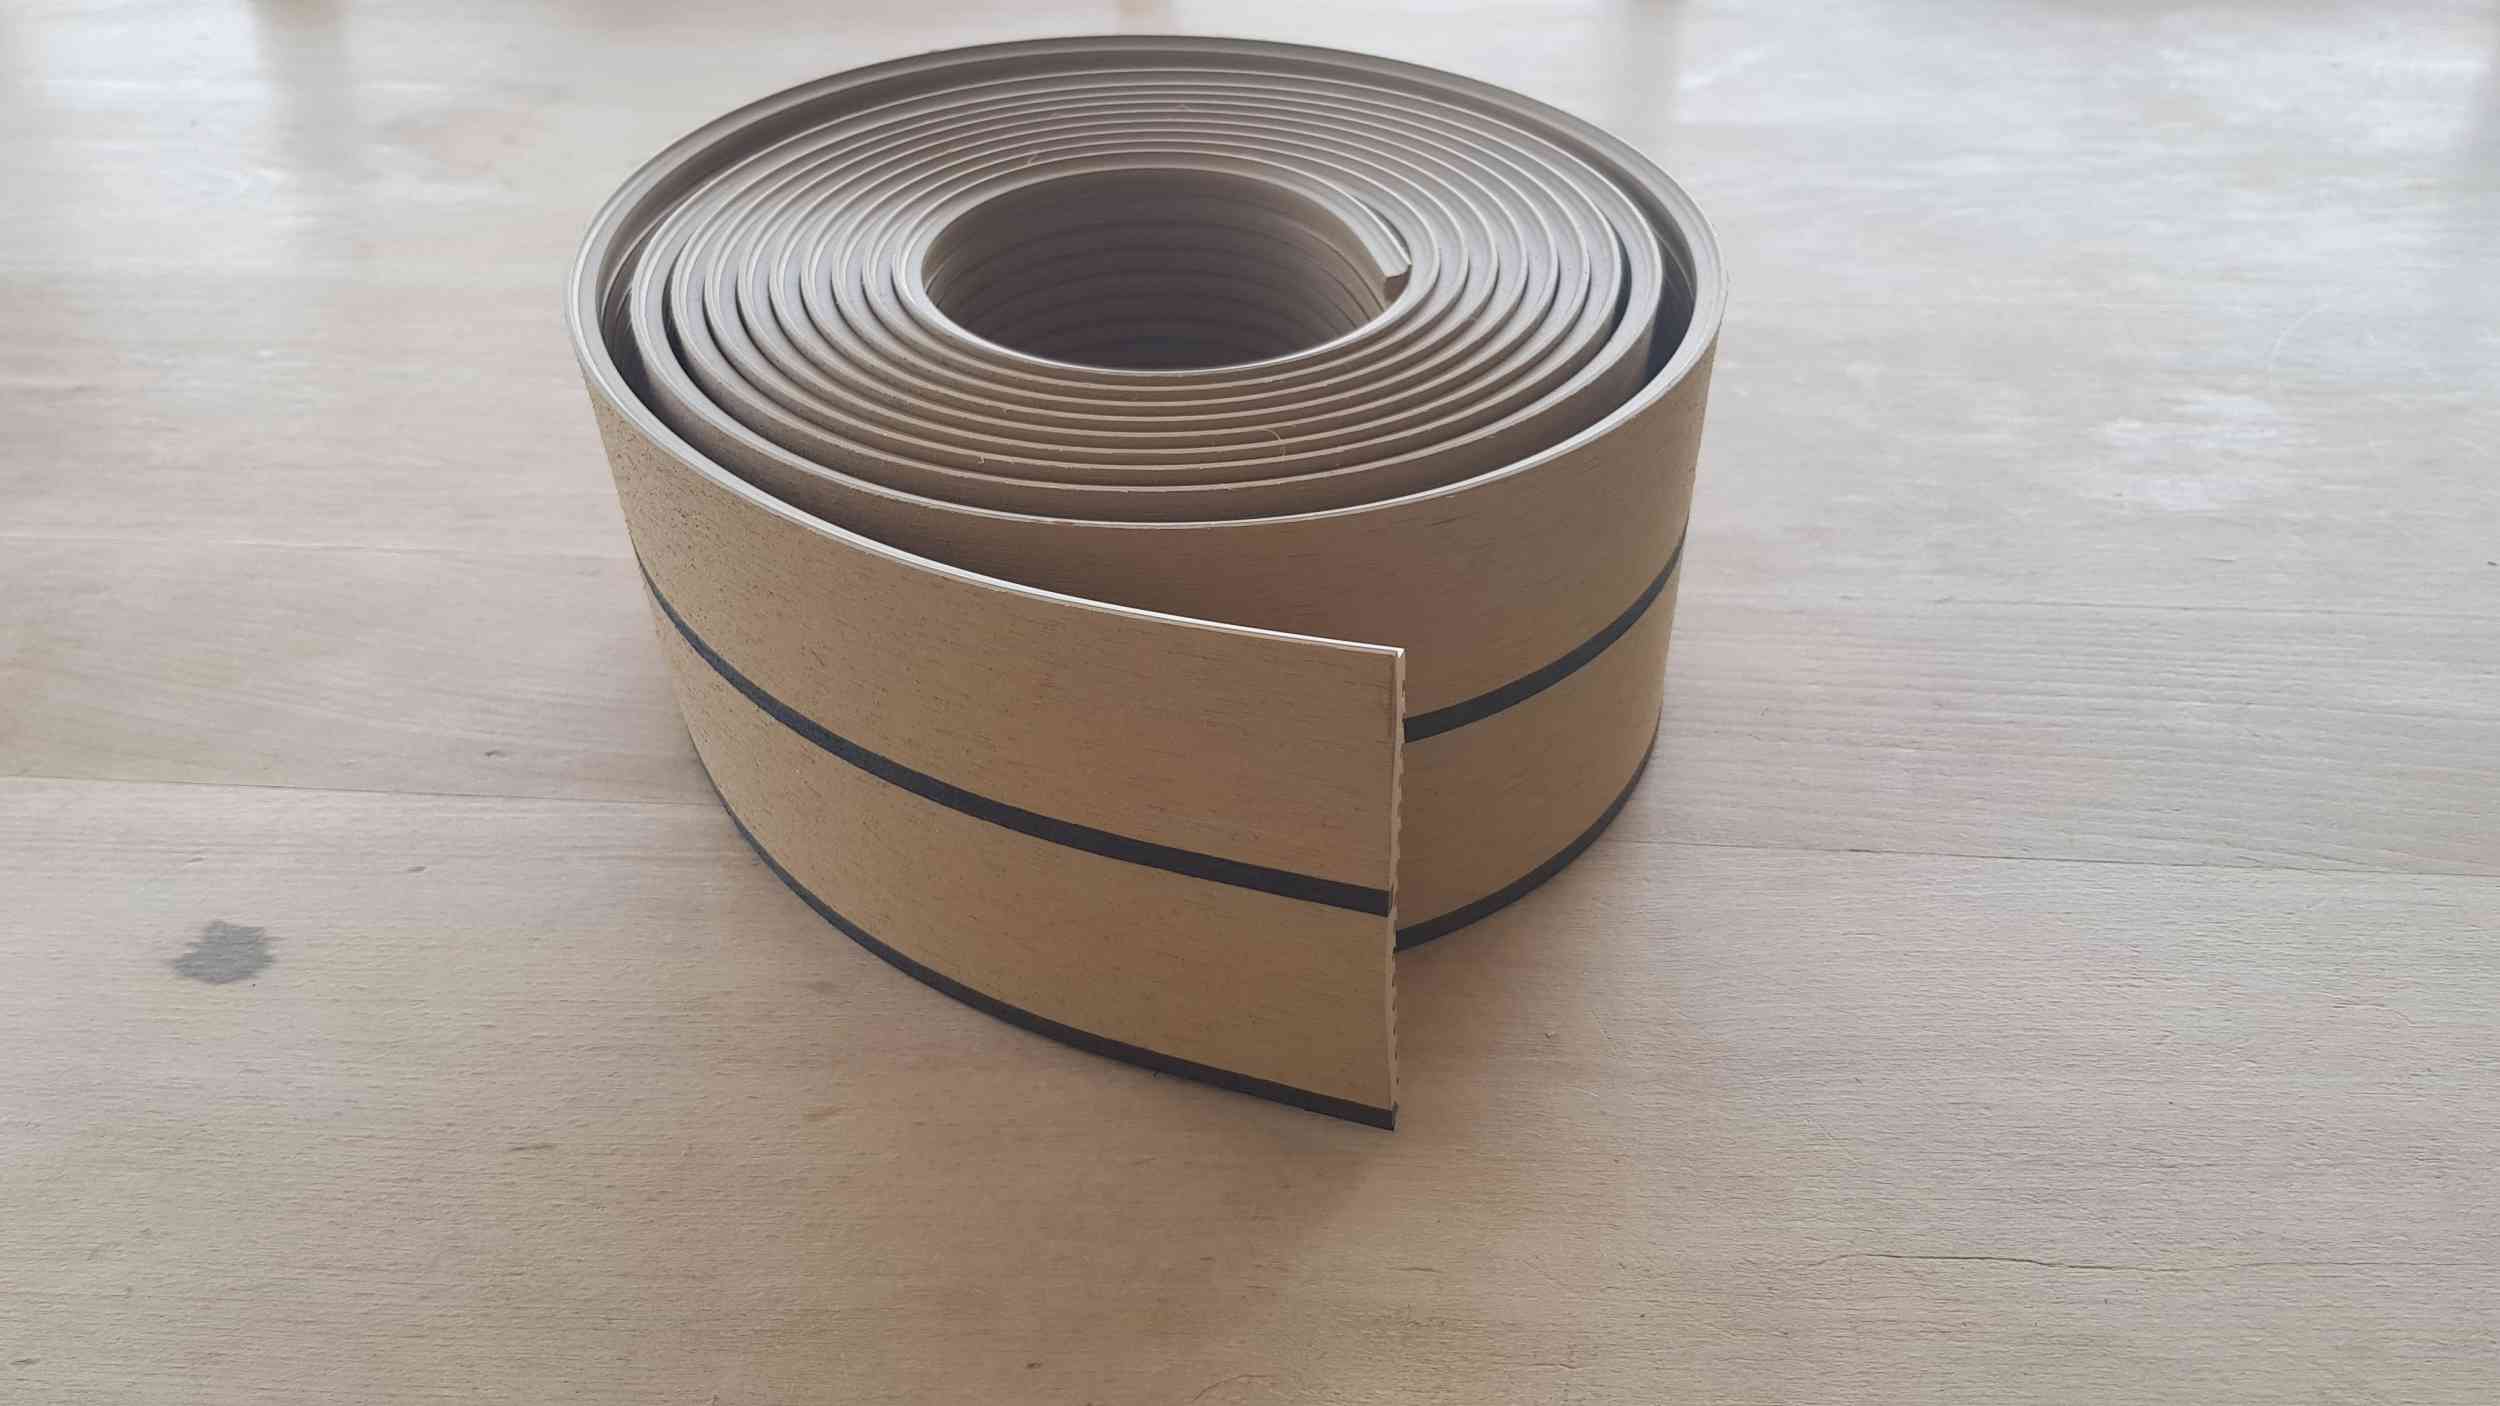
Trakmark supply their material in a range of colours and plank sizes with the inter plank caulking already moulded into the extrusion. When making a panel you are most likely to use the “double plank” extrusion. Like in this pic.
serve.php


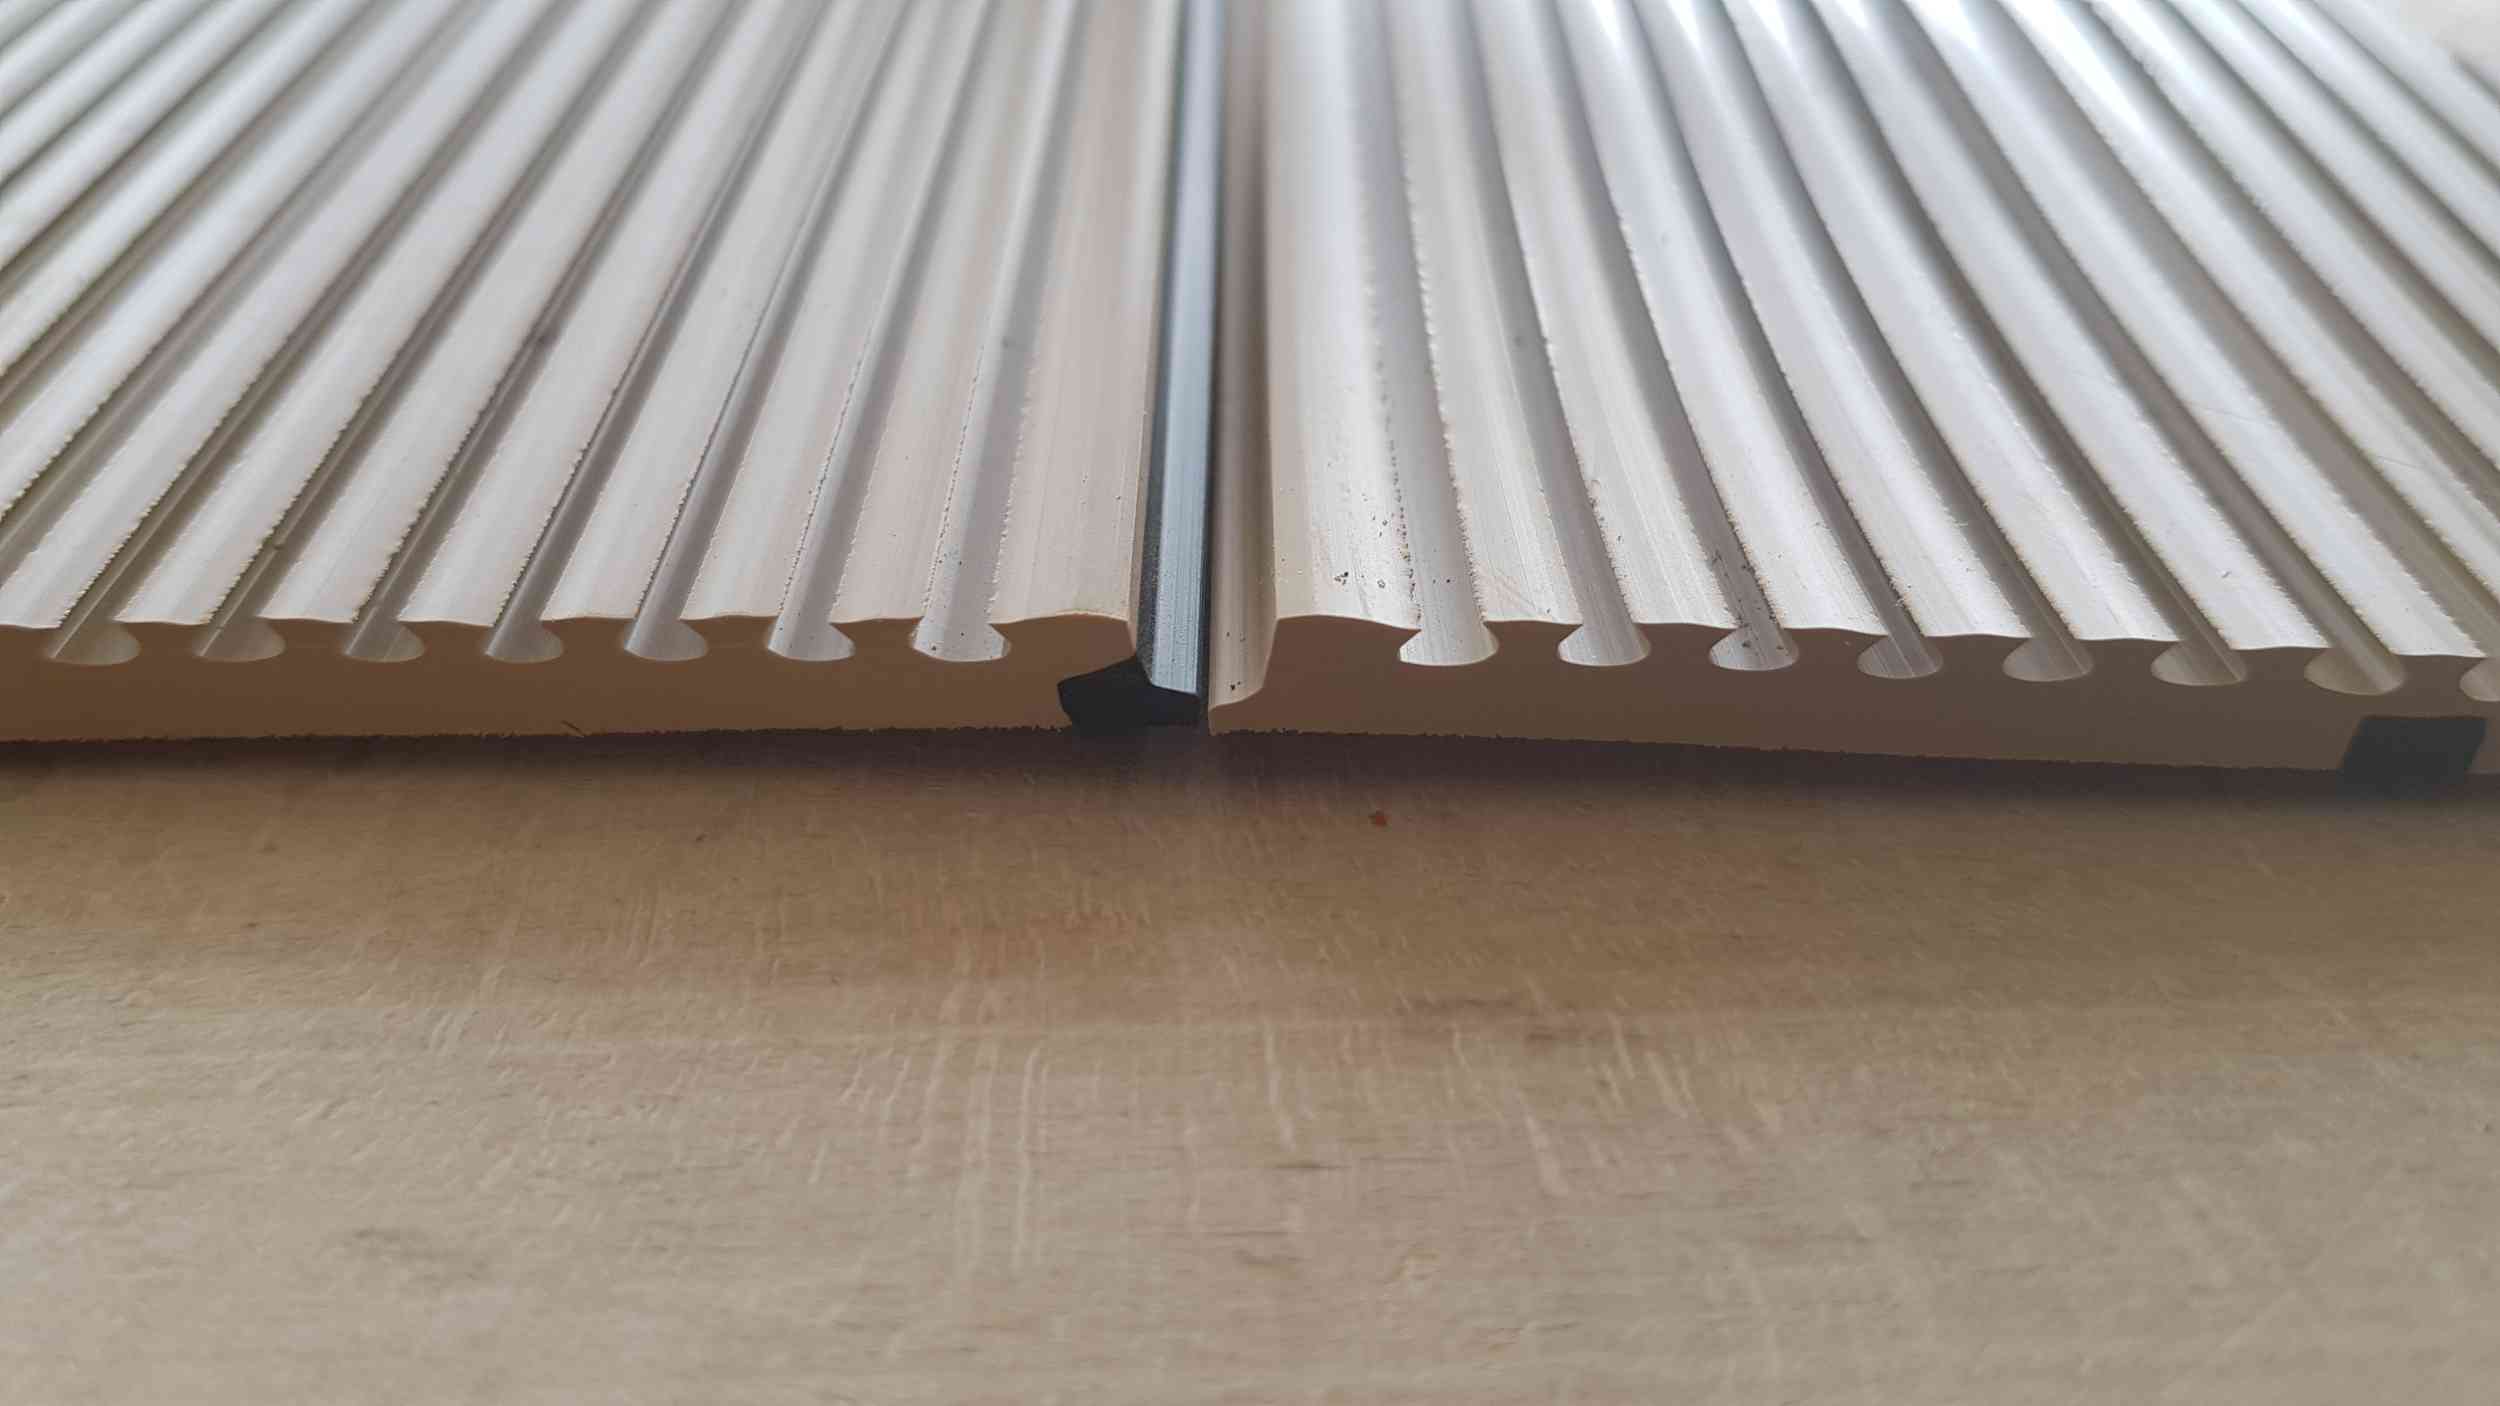
Most of the time, planks are joined by welding a 5mm plastic flexible rod onto the back of each joint. Trakmark’s double plank extrusion forms a “V” groove where two double planks are joined. See in this pic:-
serve.php


To weld two planks together, you heat up the groove that is formed between the planks and at the same time run hot plastic weld rod into the groove. The idea is to melt the plastic so that the planks and the weld rod fuse together without burning through the material.

To do this a hot air welding gun is used. This is mine.
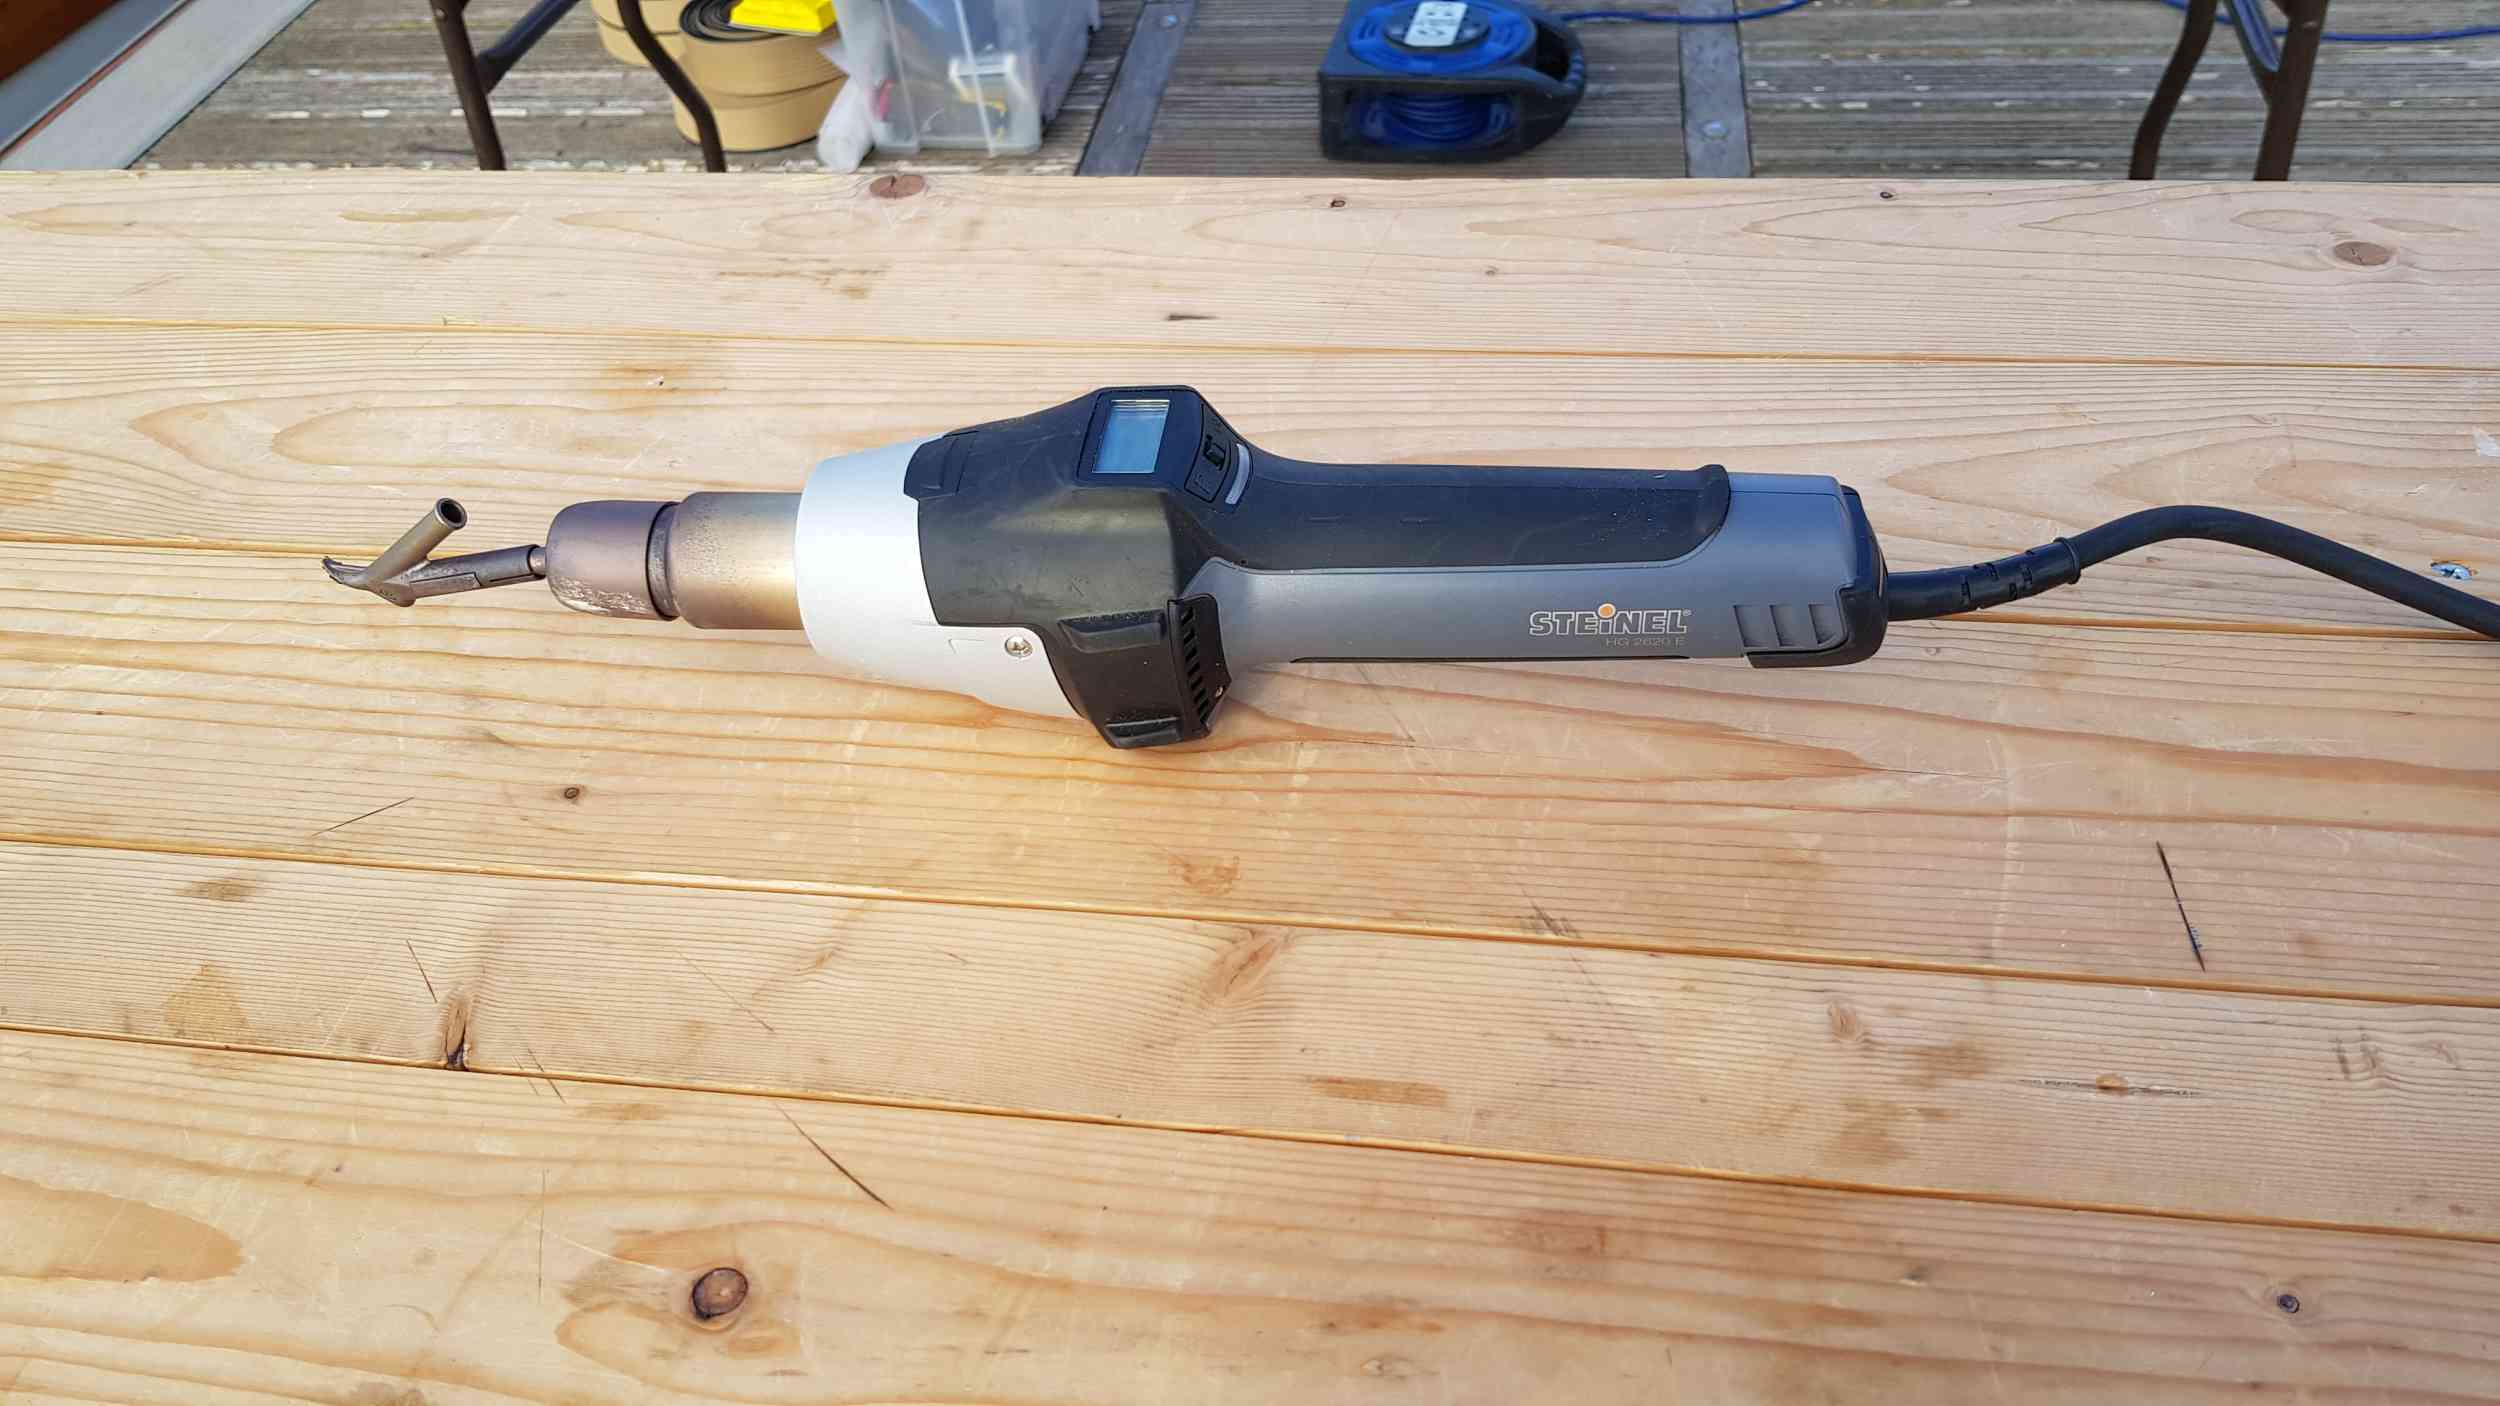
serve.php


Manually, that would be quite difficult to get right for large areas so a “Speed Nozzle” is used on the welding gun. A speed nozzle looks like this:-
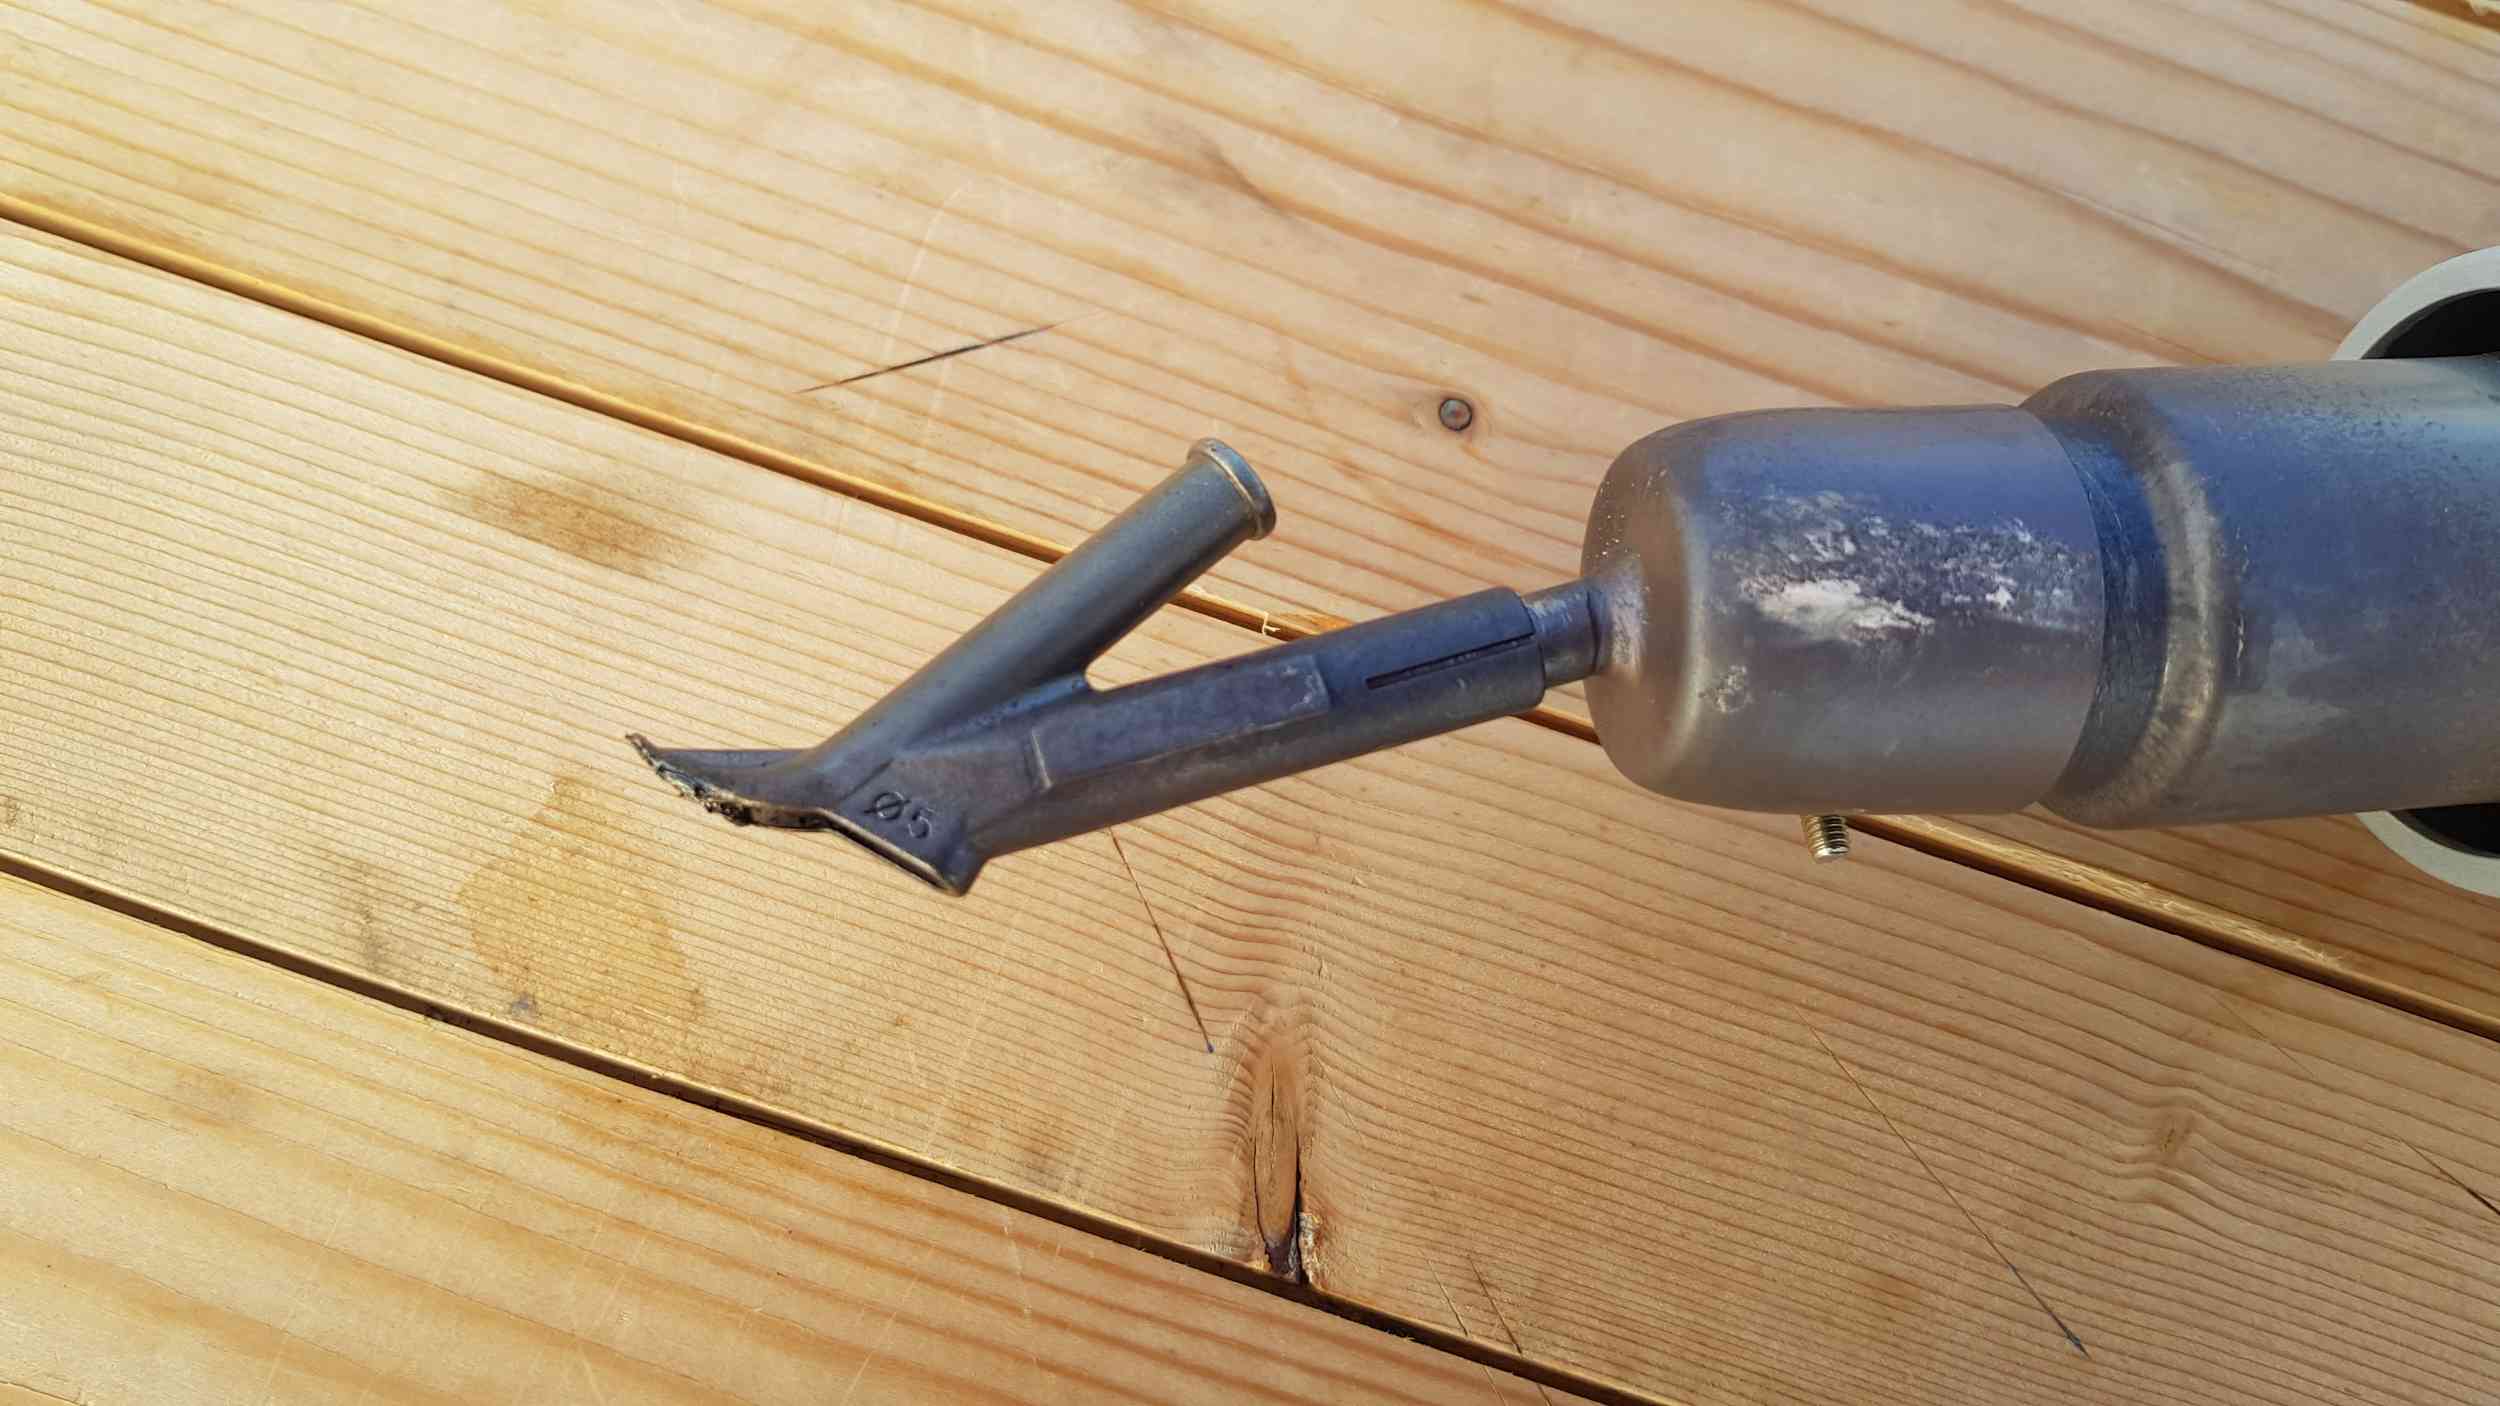
serve.php


As you would expect, just holding one piece against another and welding won’t work. Before welding I found that it is crucial to squeeze the two planks together so that they are tight enough together that you can’t see any gap. Also, each plank needs to be clamped down tightly to a flat surface before any welding can take place. To do this Trakmark suggested some tools.

A Good Working Surface
Firstly a large flat white base board. Something like Contiboard. I used a couple of sheets of 18mm MDF and stuck some white Formica to them. The base board needs to be white so that you can see any gaps when you place the two Trakmark planks together. I put my working boards onto some old trestle tables that I have so that everything is at a good working height. I suppose you could do it on the floor but I prefer to stand whilst welding.

Weights
I can’t emphasise just how important is it to have lots of weights available. In their workshop, Trakmark use lots of approx 150mm x approx 10mm x approx 75mm mild steel plates joined together in threes. They use these to hold the material down whilst welding.

These are Trakmark’s weights
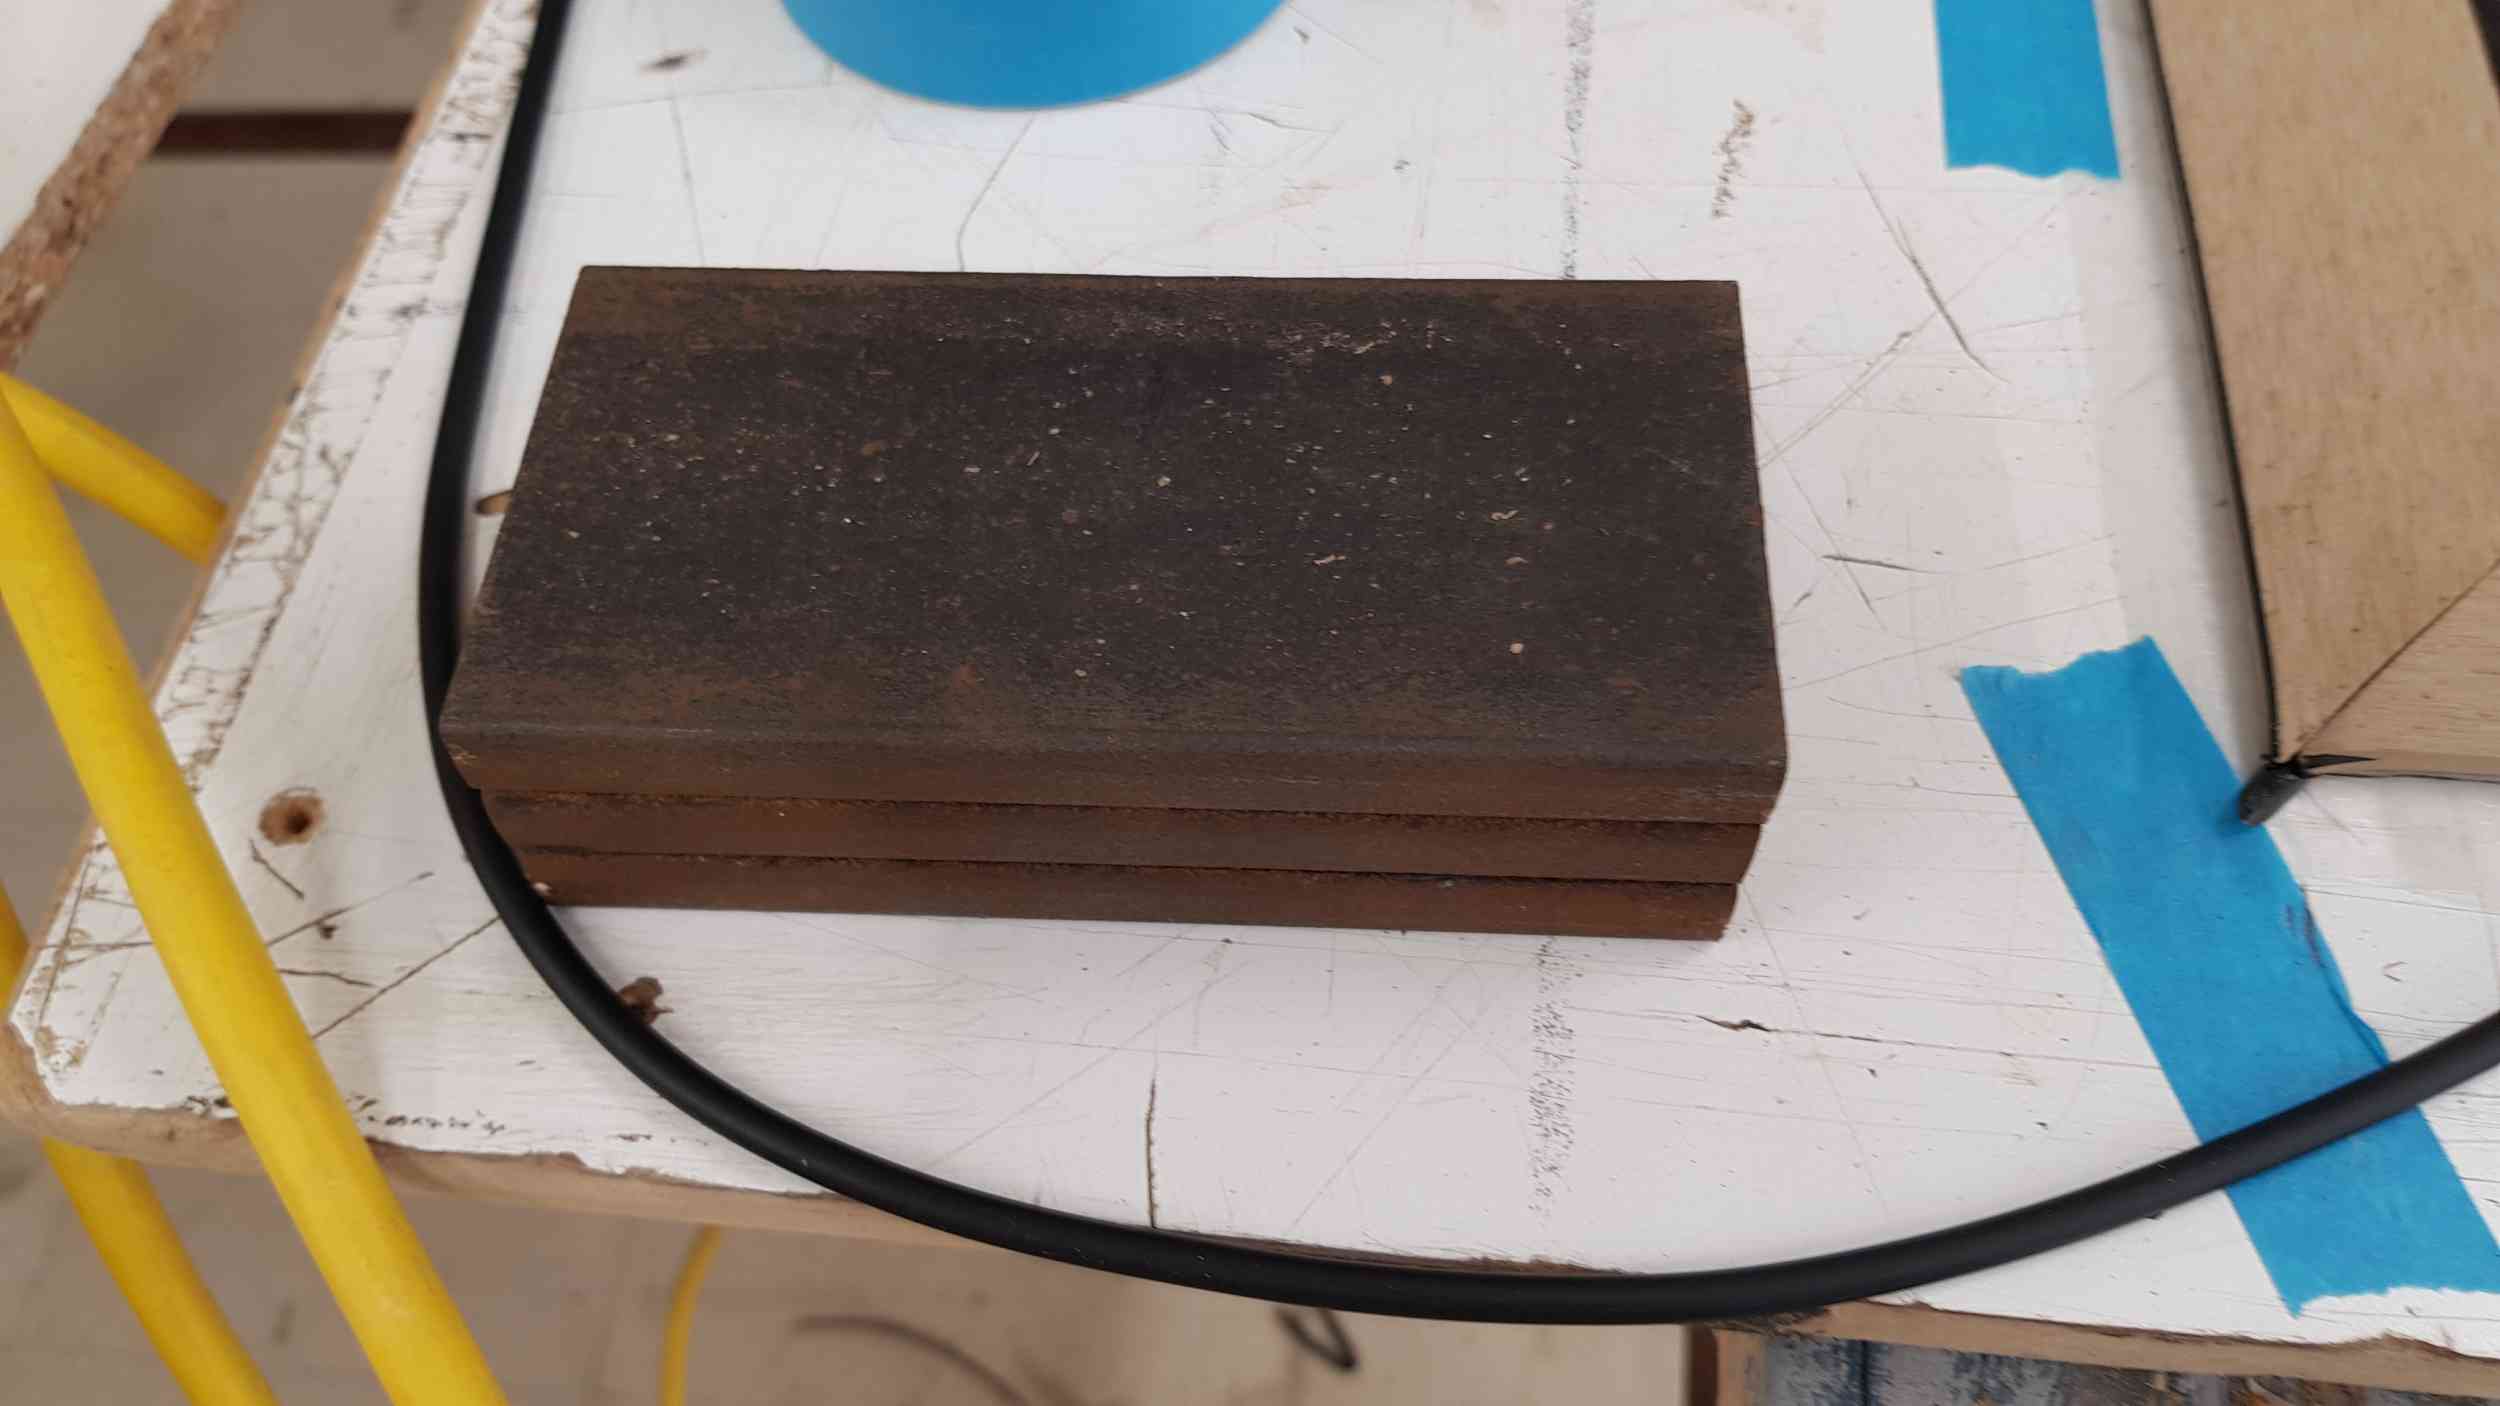
serve.php


I chose to make some weights that I could also use when installing the teak onto the boat later. I made mine from some mild steel 40mm x 80mm x square section tube that I cut into 150mm lengths and filled with lead.

These are my weights – I made about 28 of them.
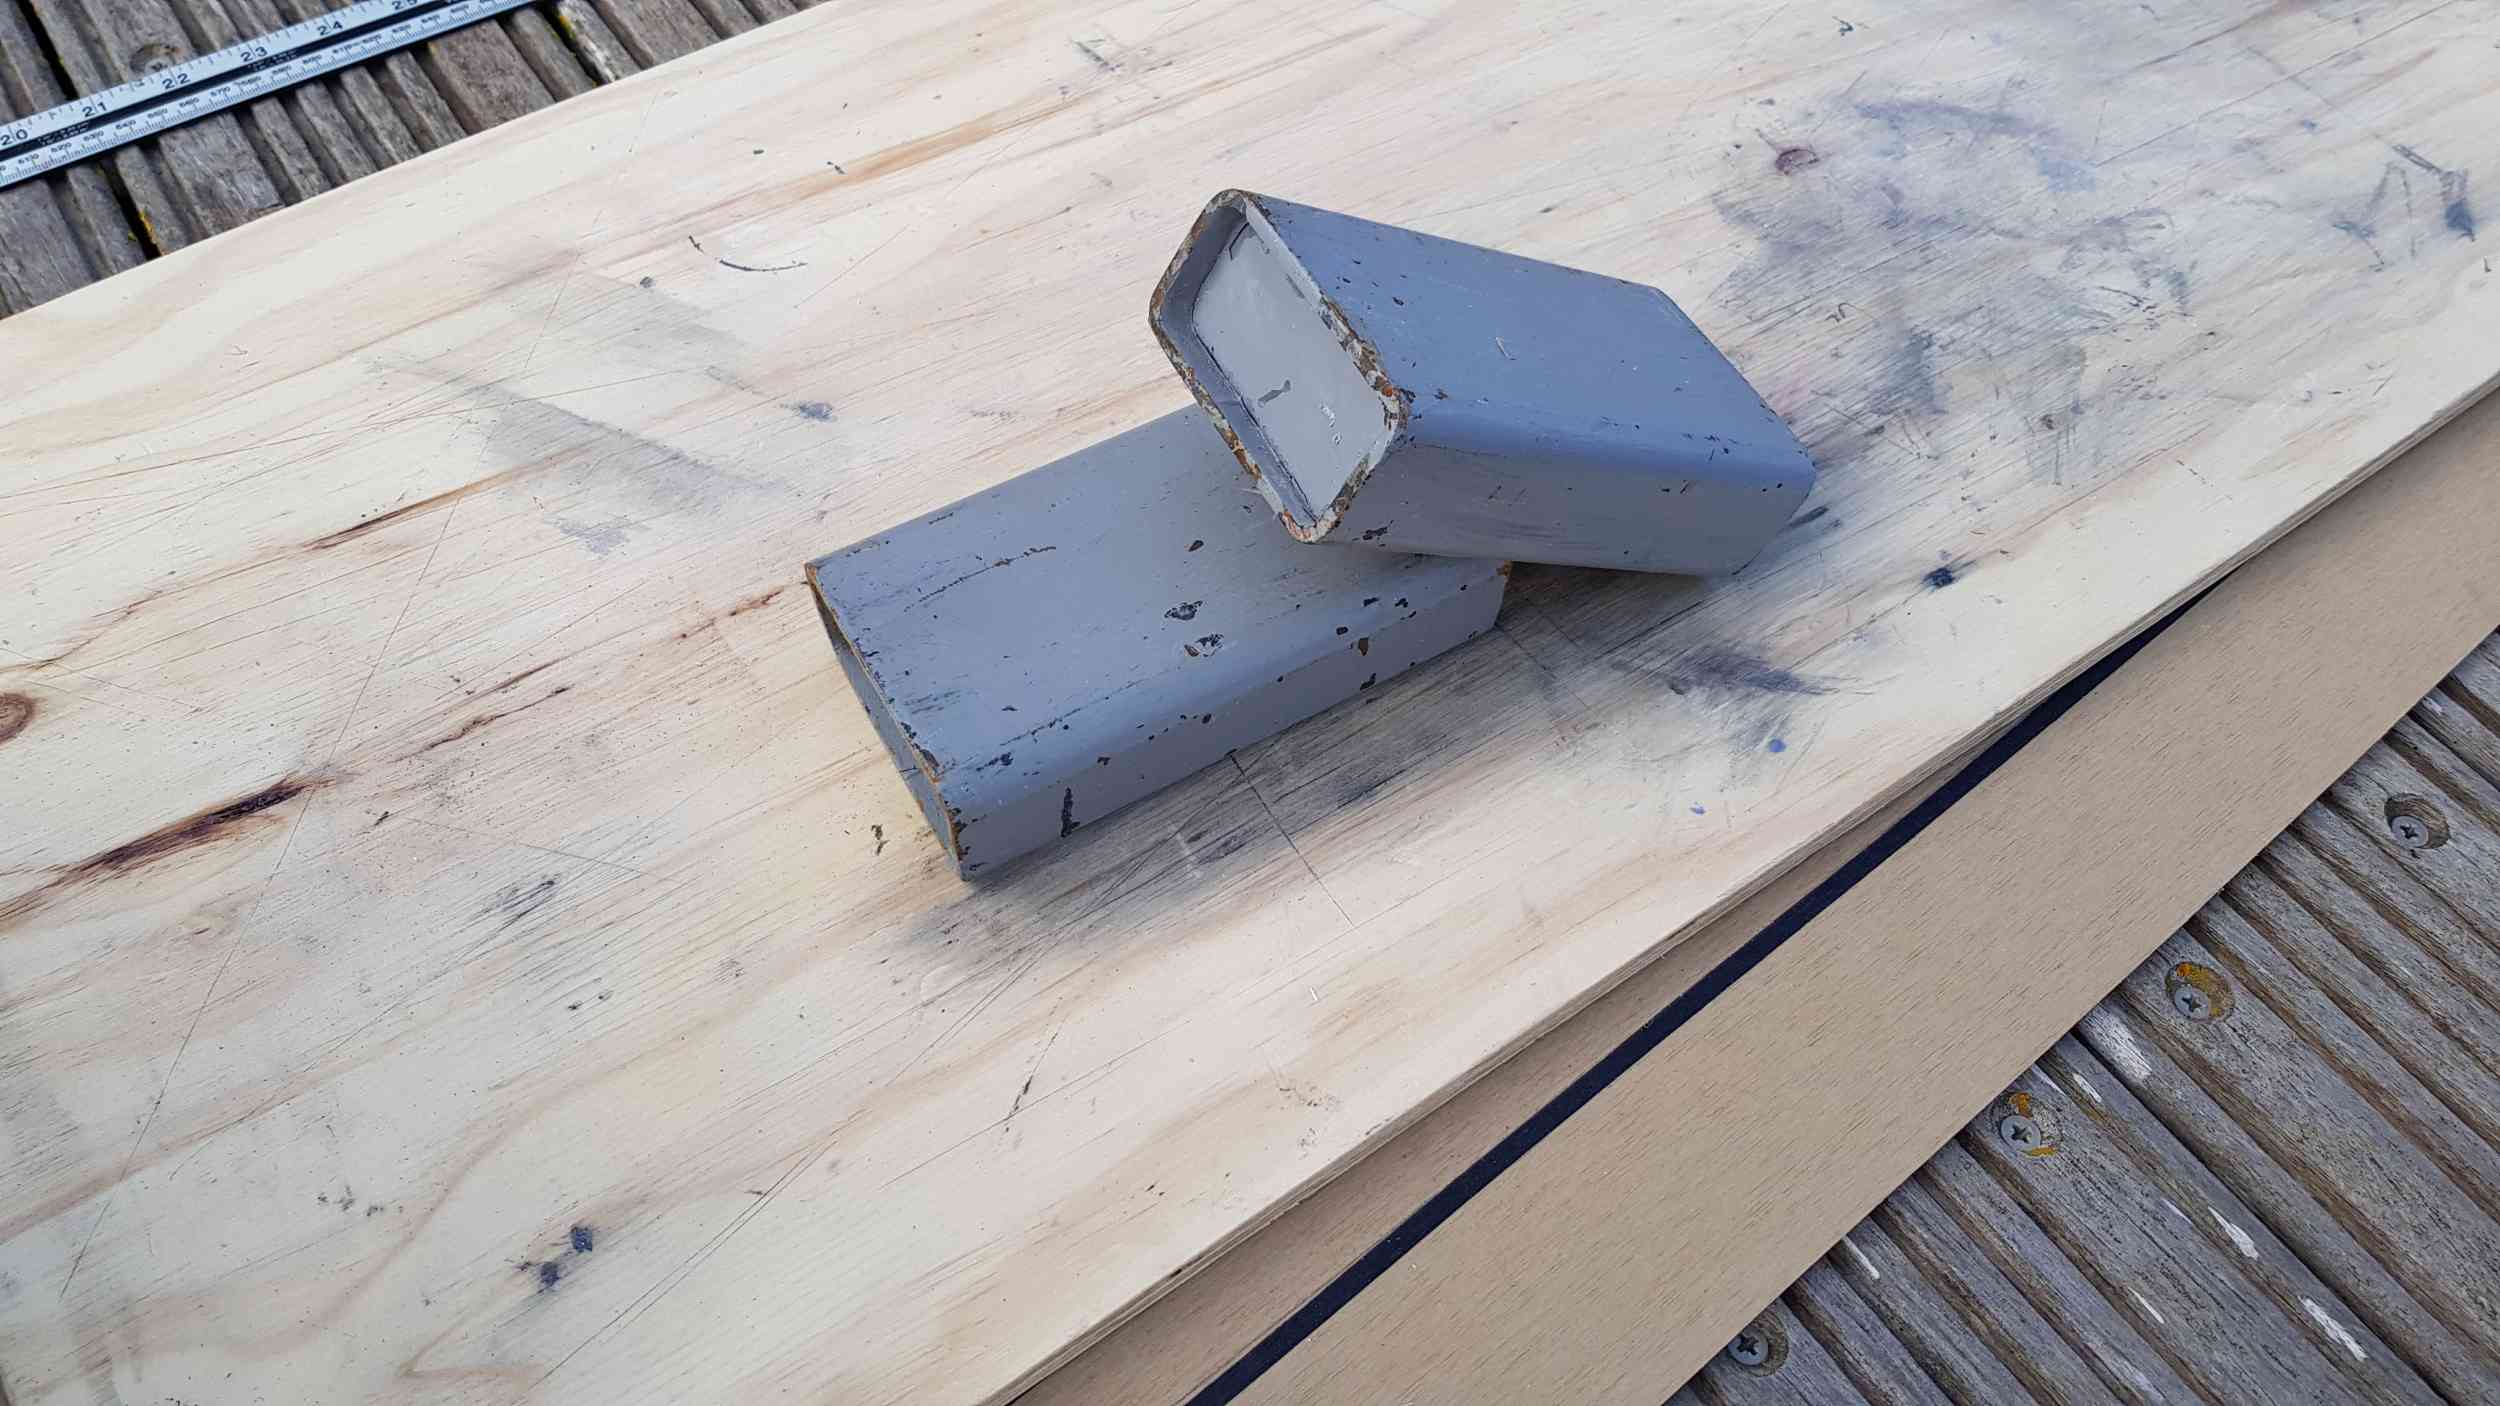
serve.php


The idea is that you put these weights either side of the groove that you are going to weld. But if you did that, you wouldn’t be able to get the welder into the groove to make the weld. The solution is a tool like this:-
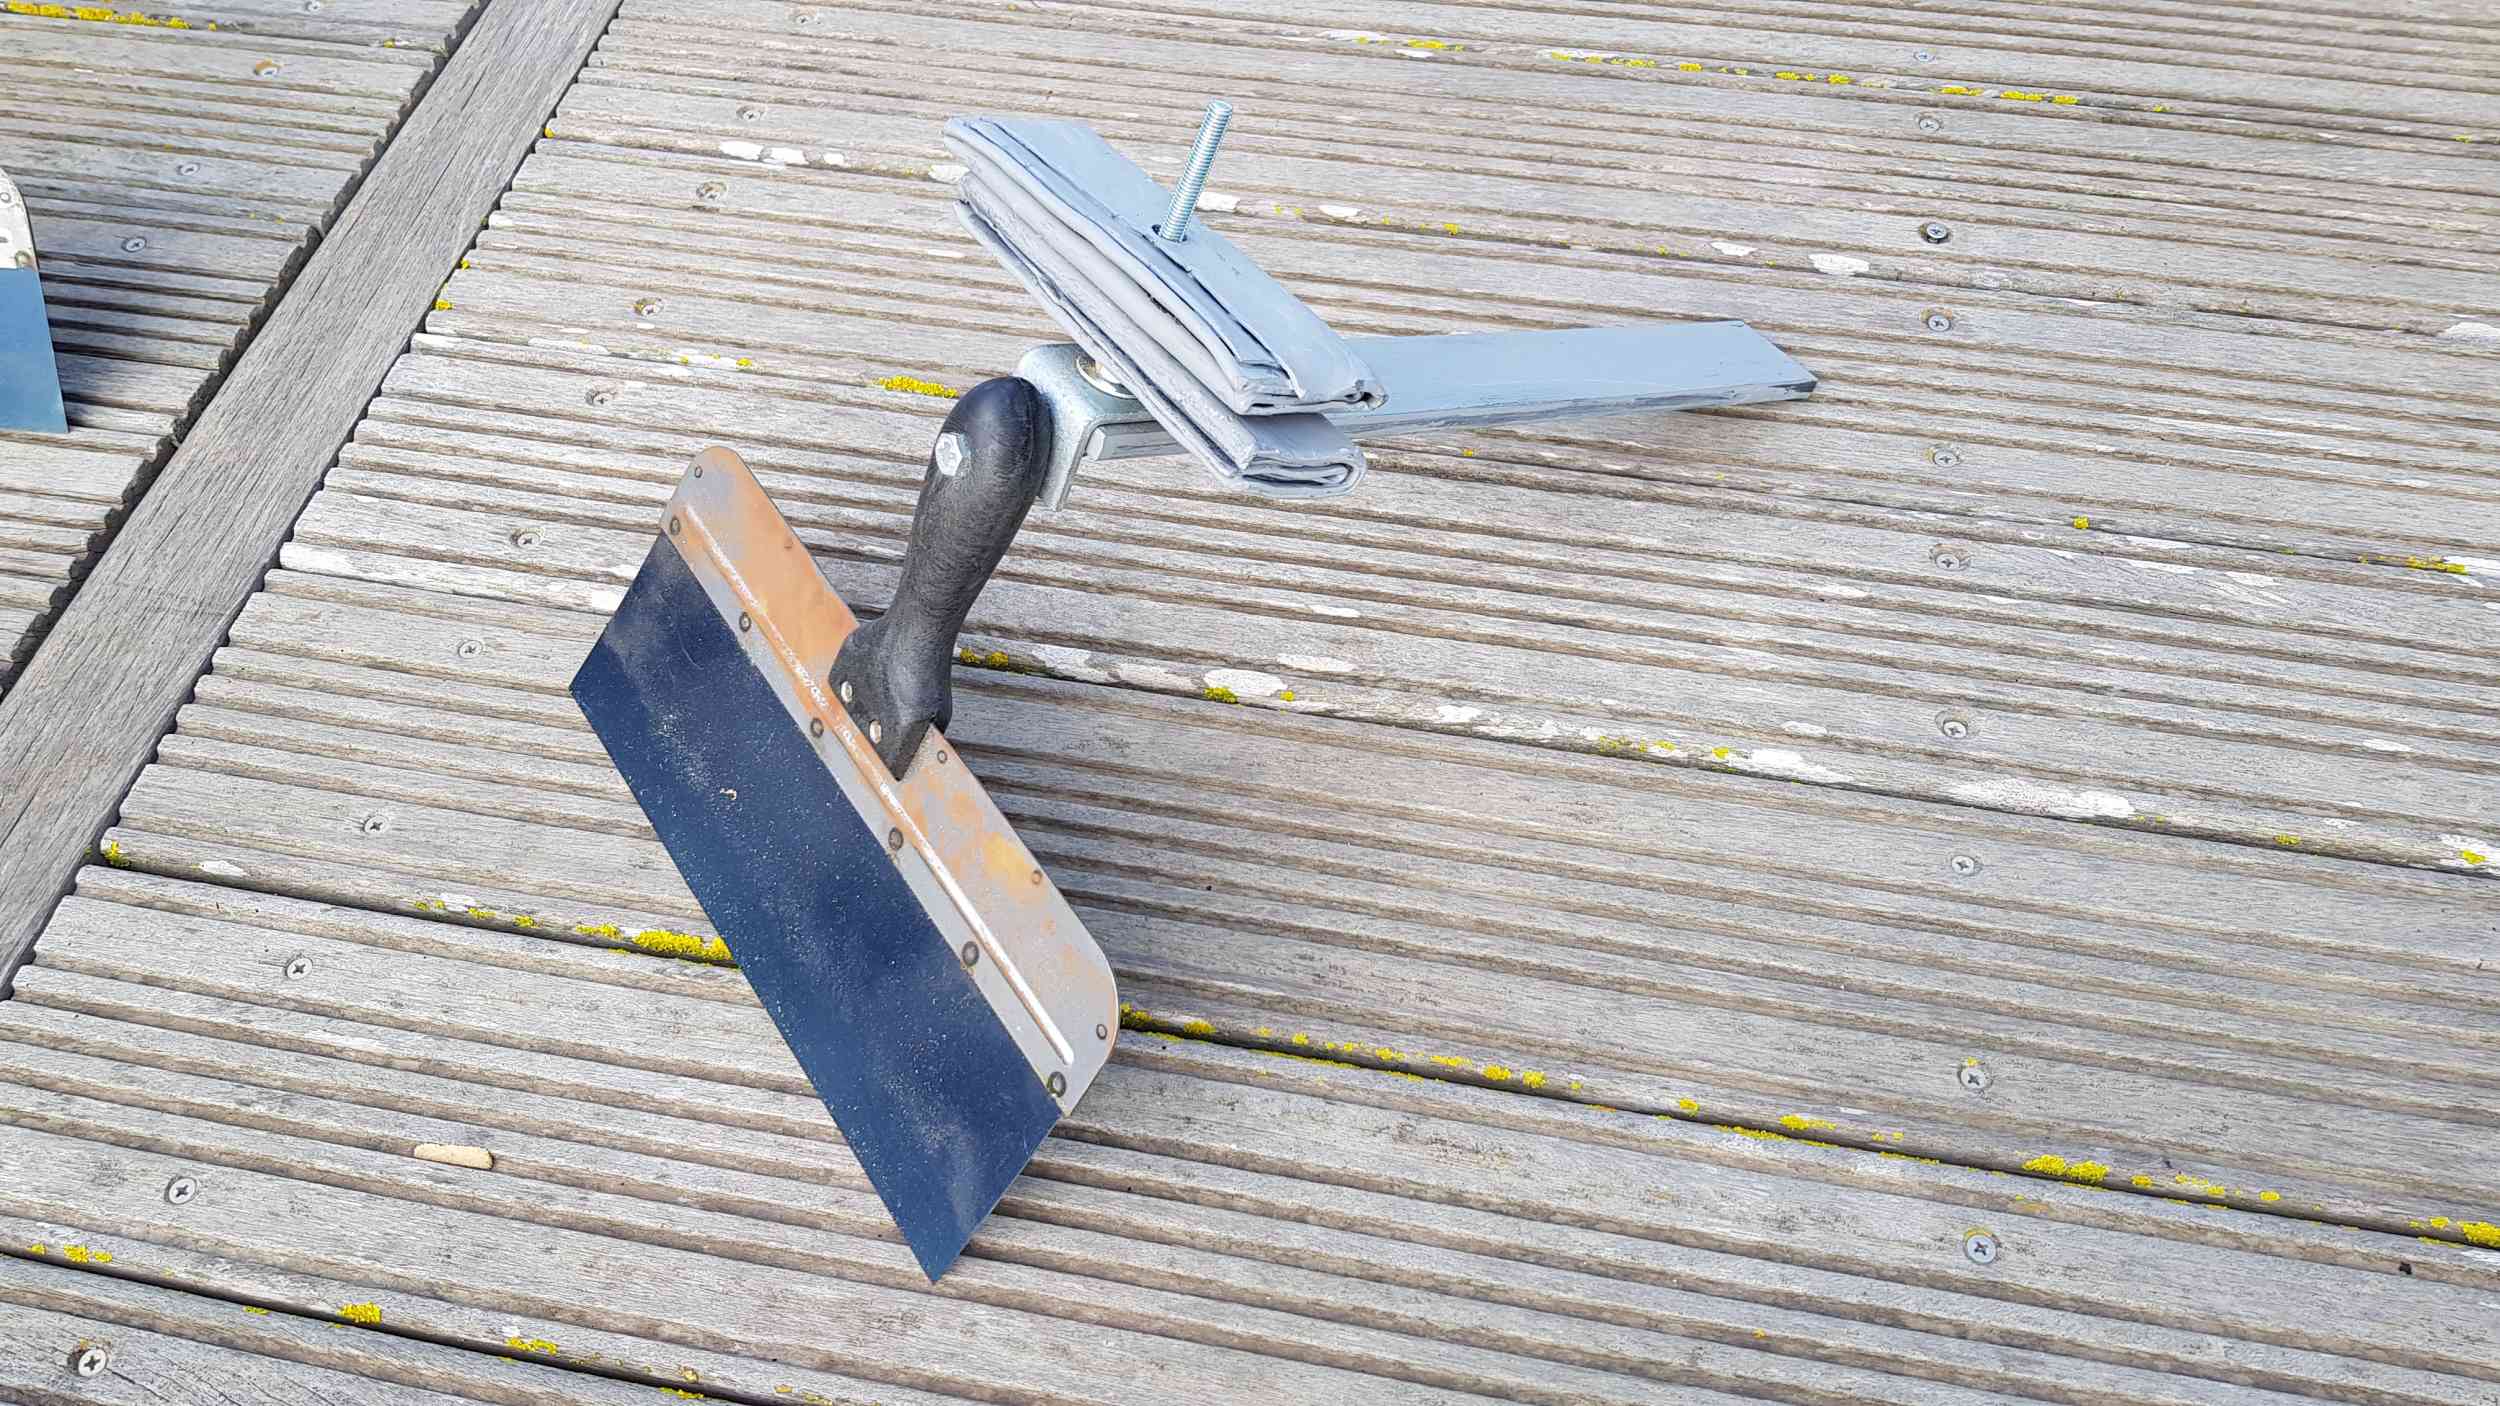
serve.php


Trakmark now supply these but I made mine from the same components that they use.

Hot Air Gun
Synthetic teak is quite rigid until you get it hot. All you need is a cheap “paint stripper” type hot air gun. I bought this for about 10 quid from Screwfix.
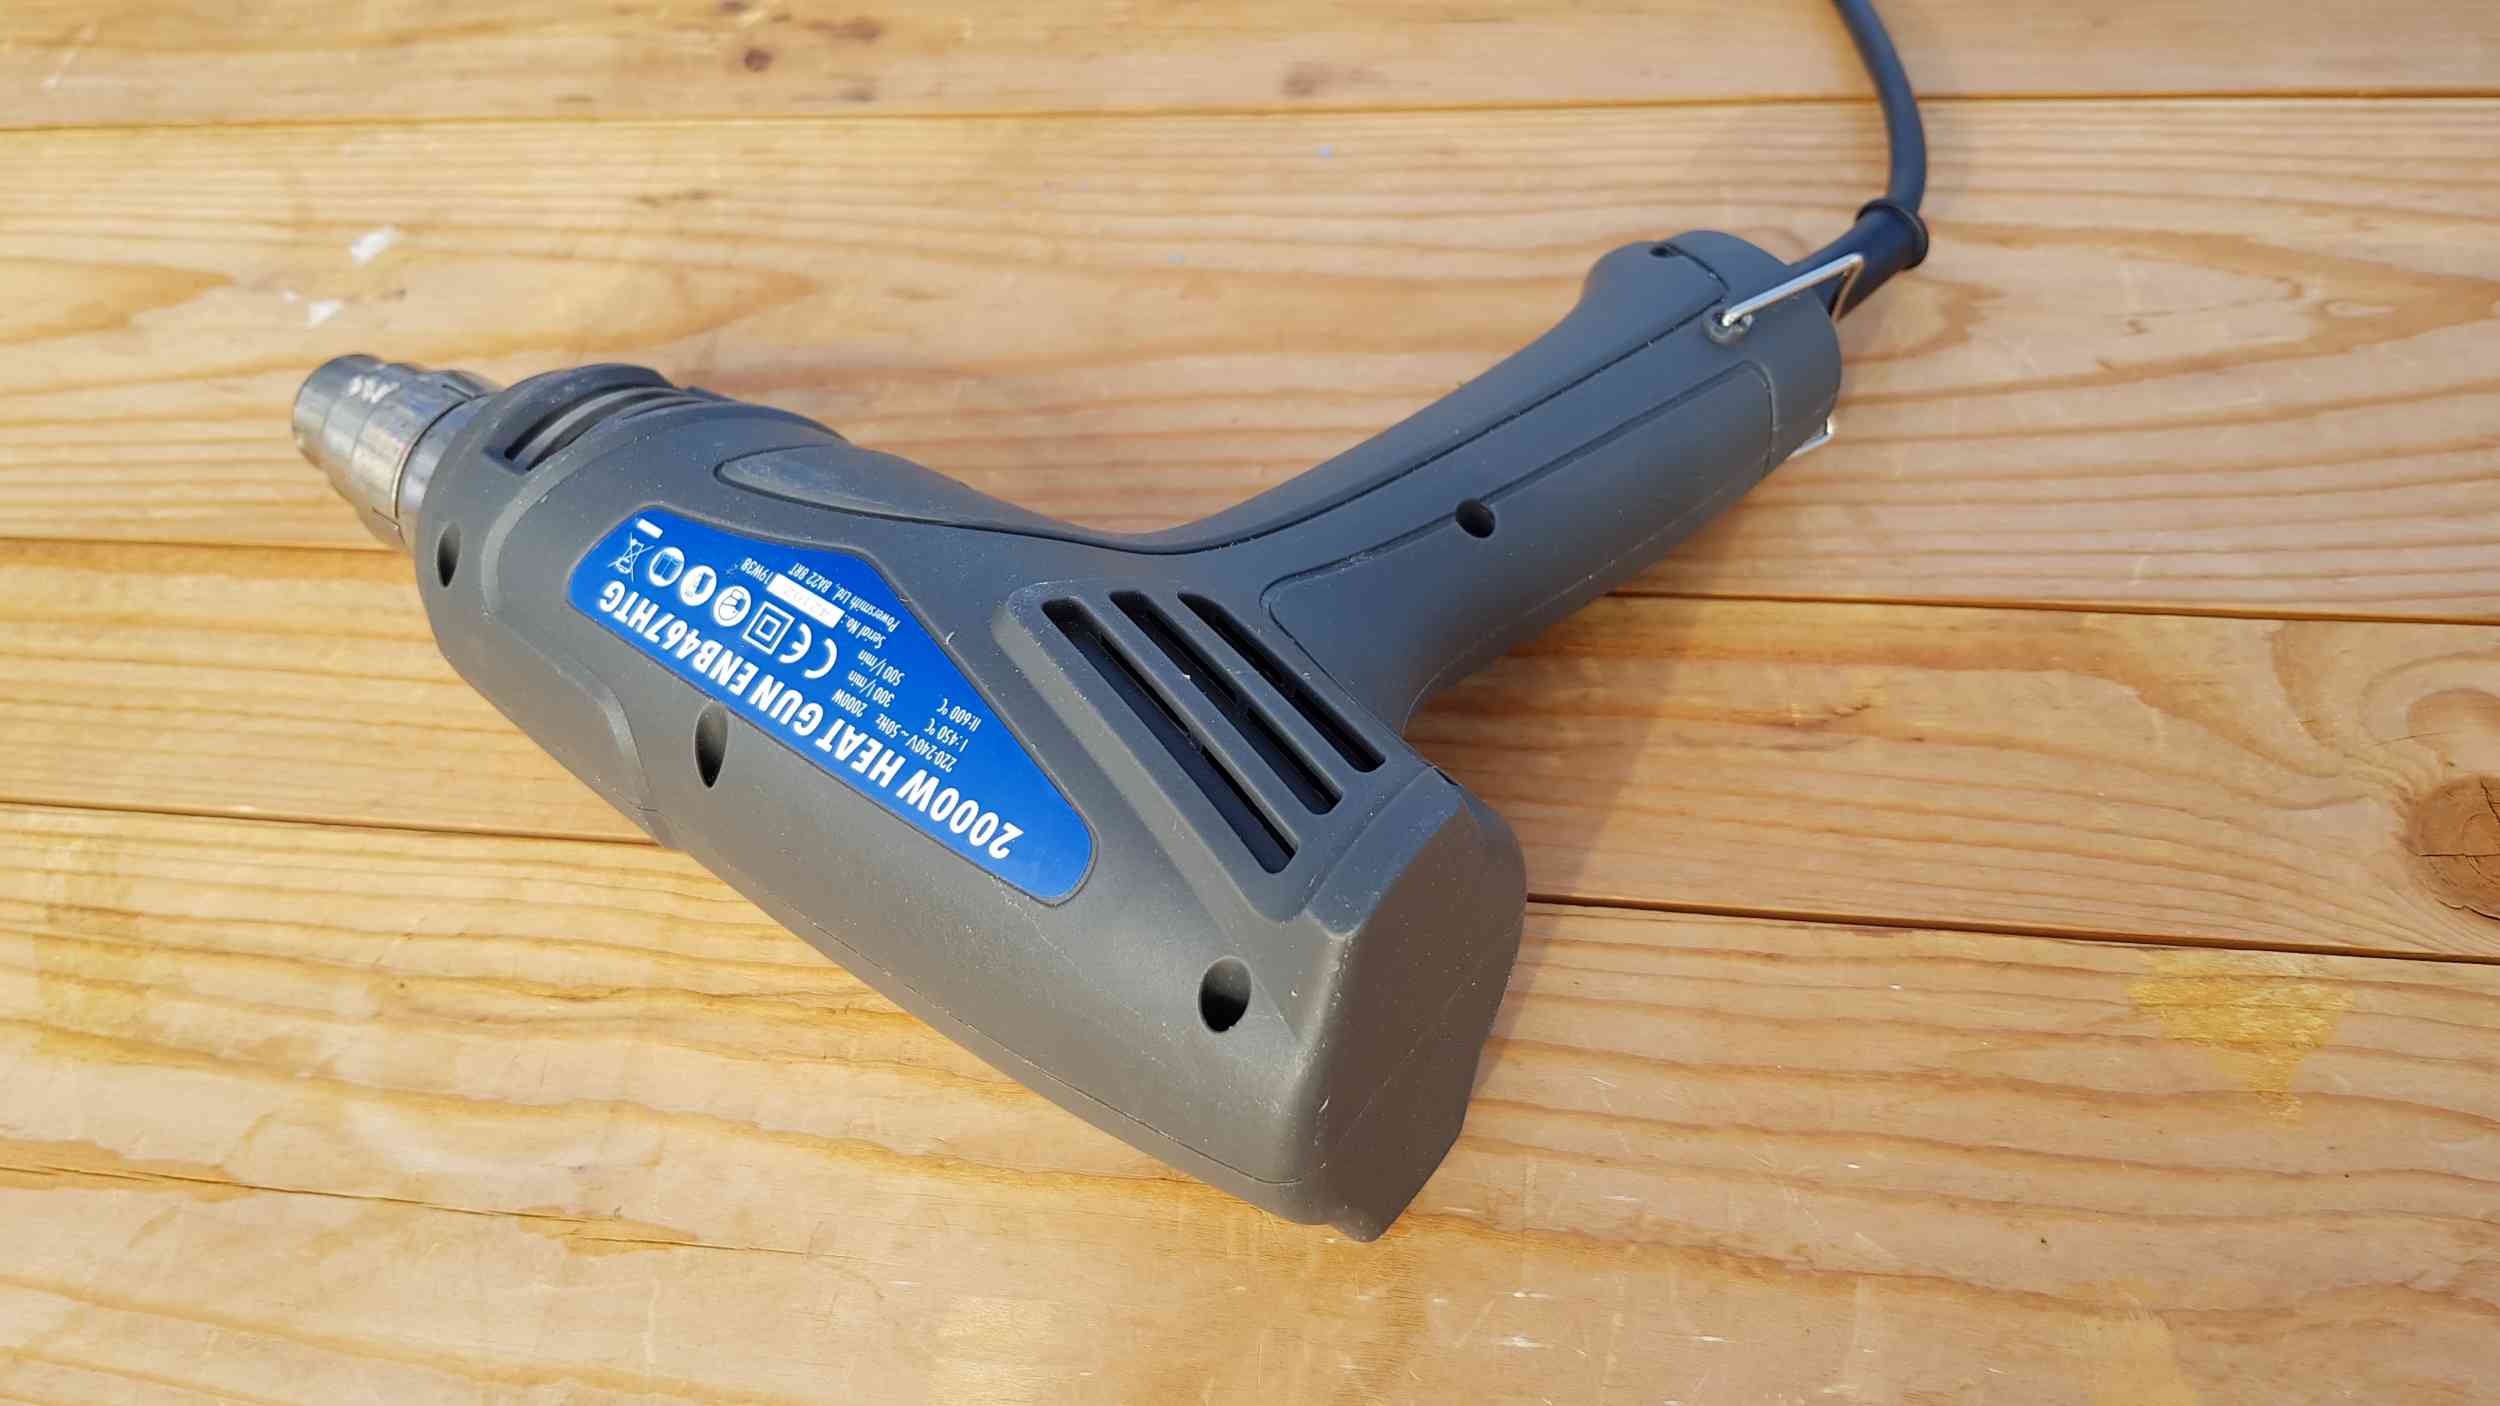
serve.php


Finally, before I show you how to make the weld, I want to add a little technique that helps me. I also have some 30mm x 4mm x 150mm long mild steel plates that I lay on their side to keep the welded joint tight down to Working Surface.

The following pics show how each joint is assembled before welding.

The Work Table
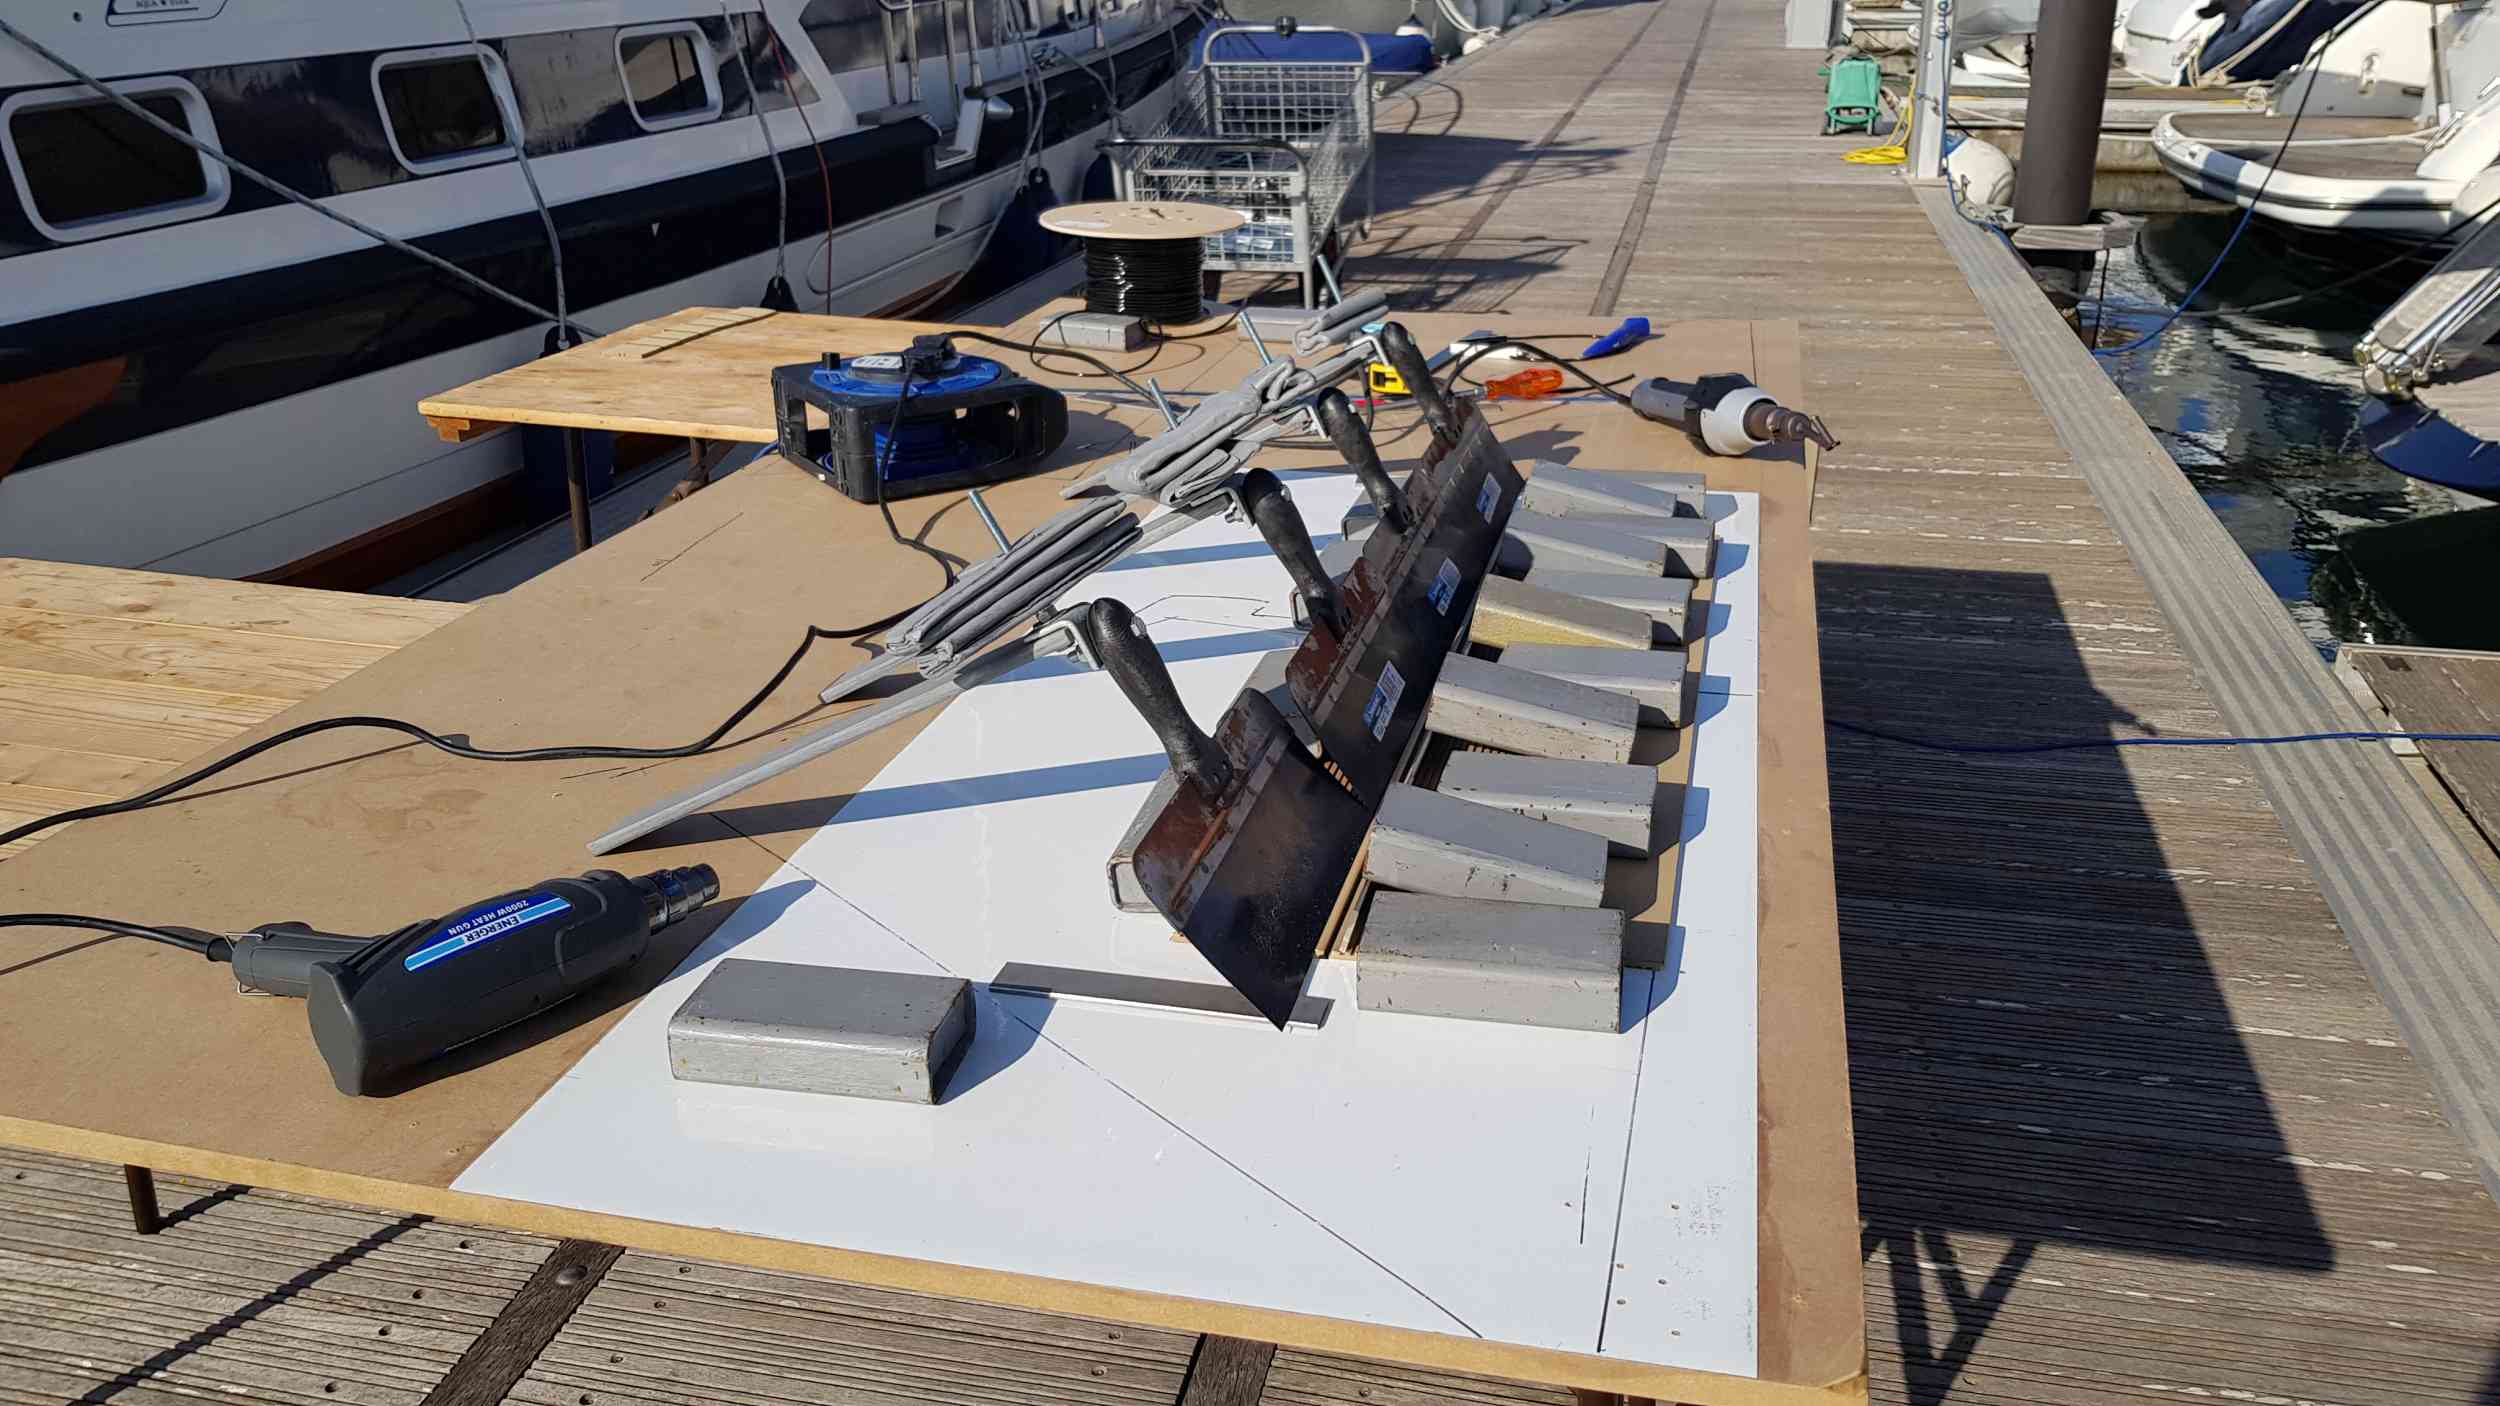
serve.php


The joint ready for welding

serve.php


In this pic you can see my addition of the small steel plates to keep the joint in place.
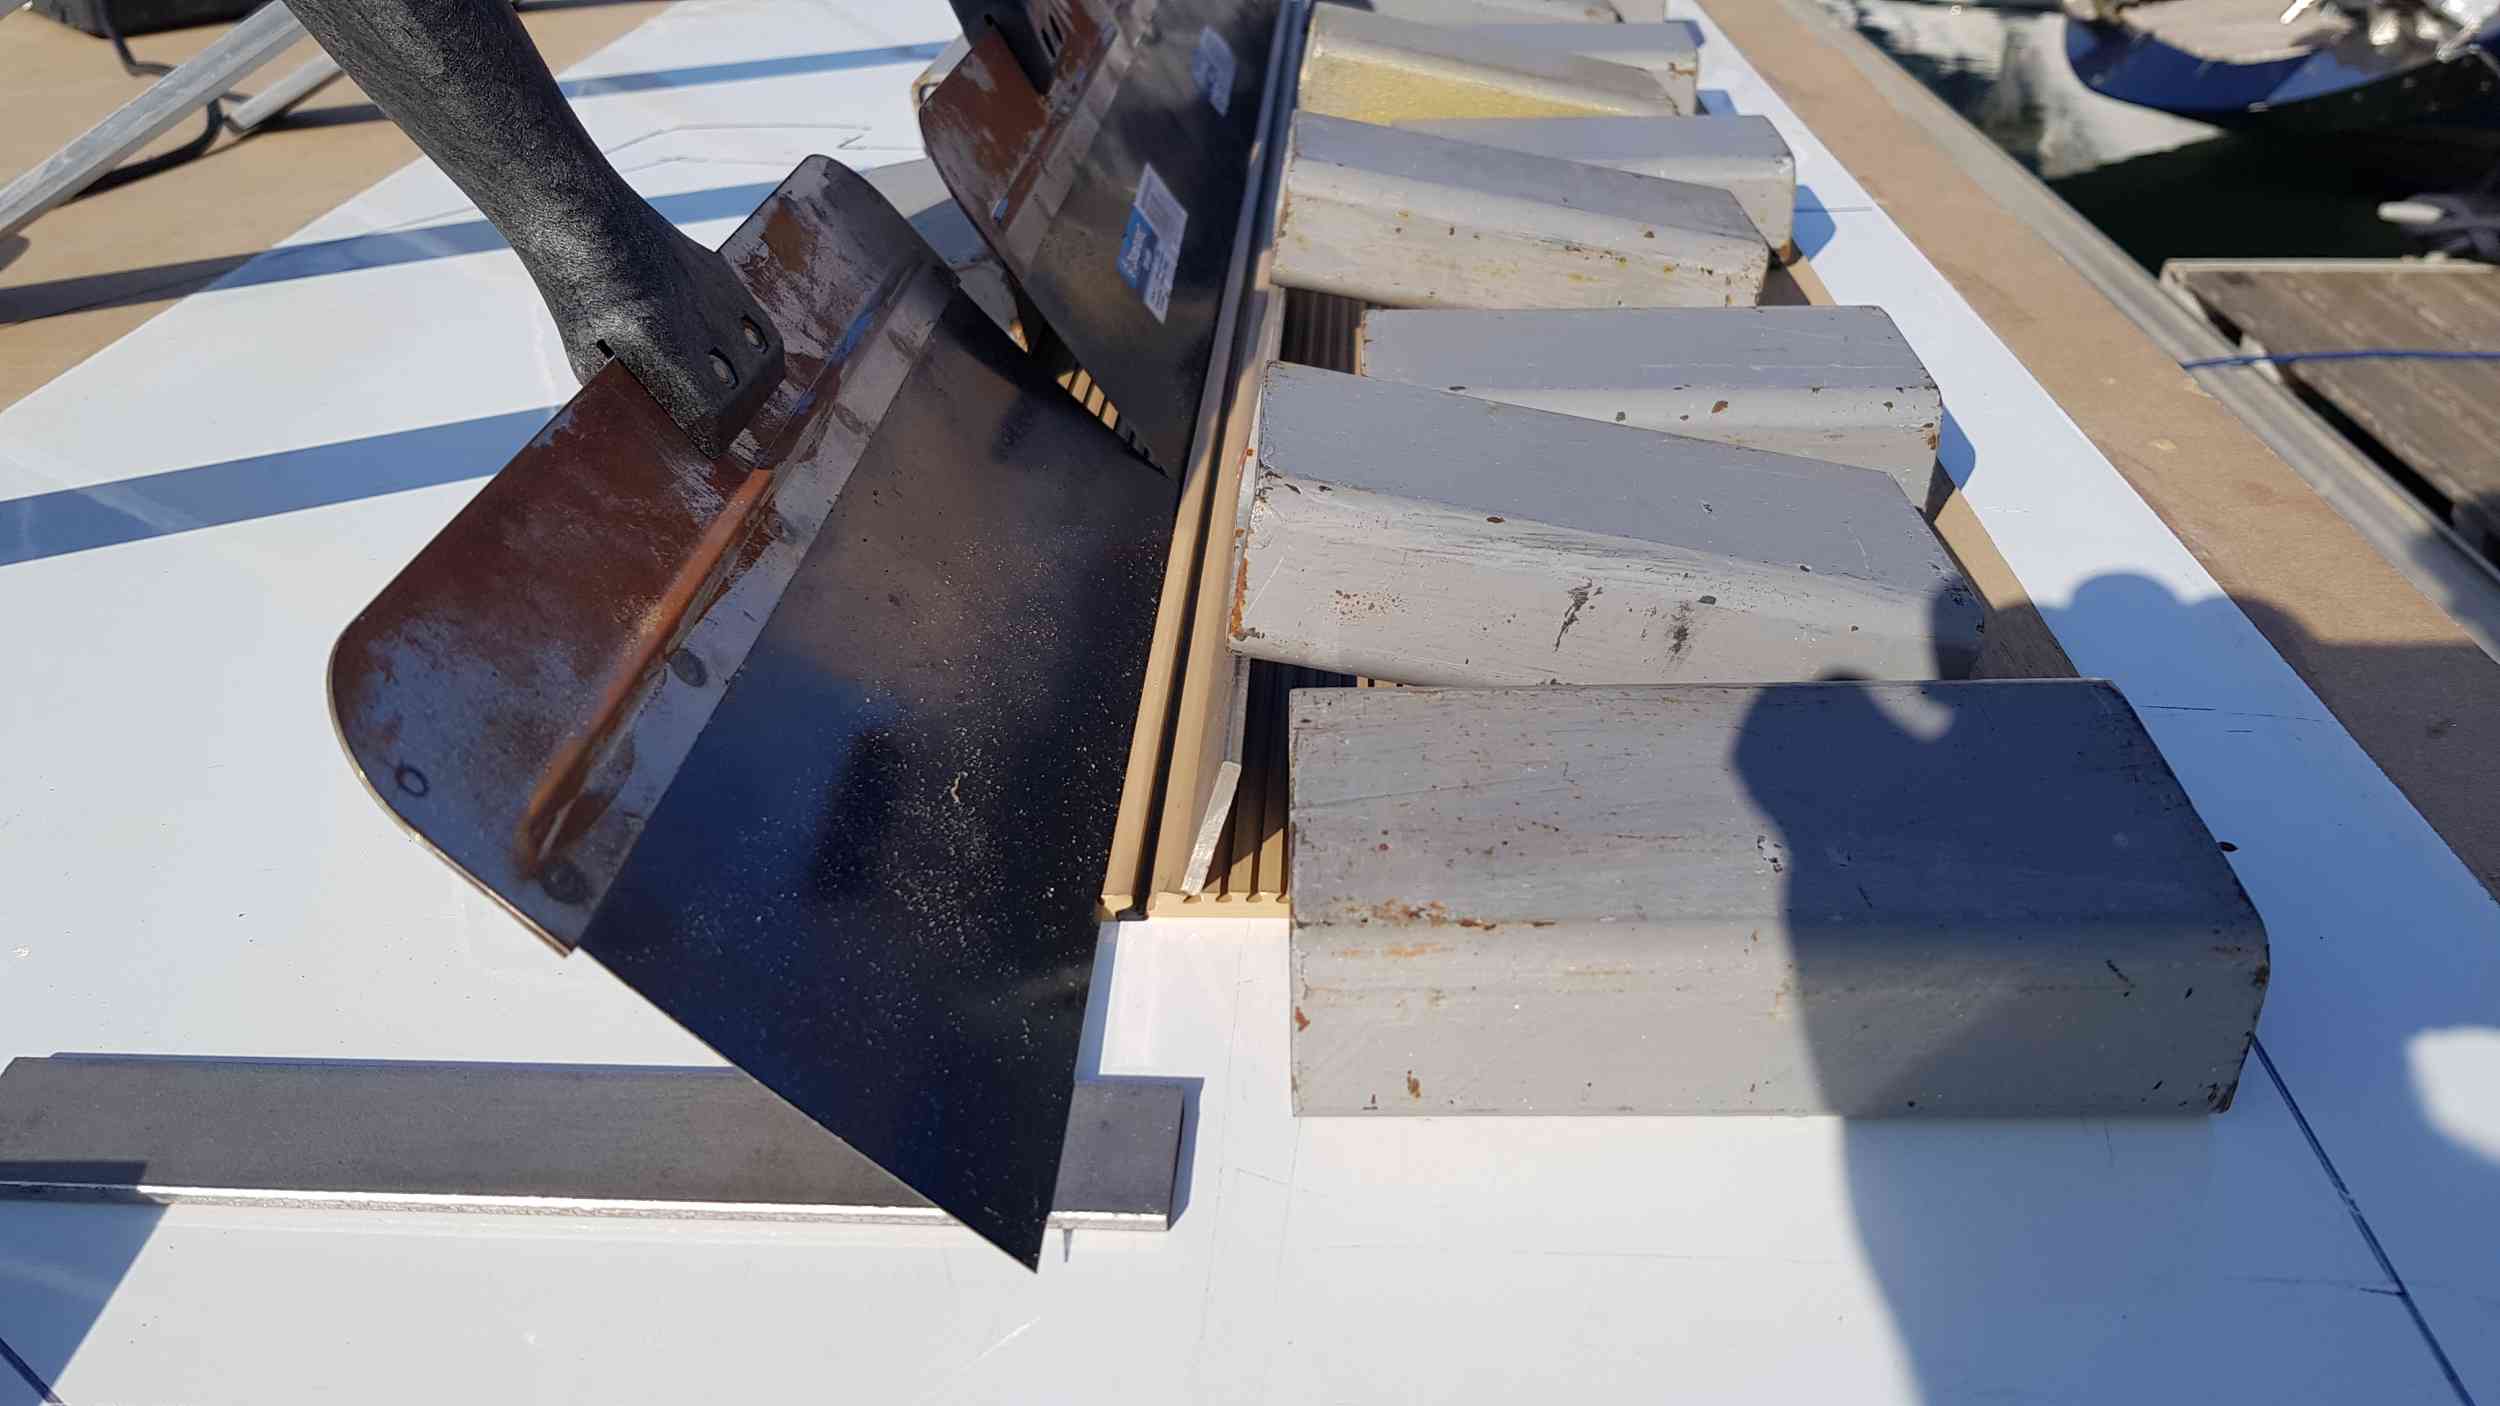
serve.php


The Welding Process
Remember, this is how I’ve learned to do the process. There are probably better techniques out there and people who do this every day probably have better methods.

Firstly, I heat the joint using the “pain stripper” heat gun – backwards and forwards a few times.
Then I run a screw driver down the joint to ensure that both surfaces are laying flat on the white surface. I then double check that there are no white bits showing through the joint from below. Then I start the welder, feed some welding rod into the speed nozzle and slowly draw the welder along the joint being careful to make sure that the welder melts the plastic without burning a hole through. You have to push quite hard on the joint with the welder to force the heated weld rod into the joint. Without all the weights holding the joint together the force of the welding process would move the material apart.

Here is a video of the whole process.


In a perfect joint, the weld rod will end up flush with the back surface of the plank. But in the real world, you may have to trim it off to help the joint lay flat when it is the correct way up.

So to finish this post, here is the final result of the weld in the above video.
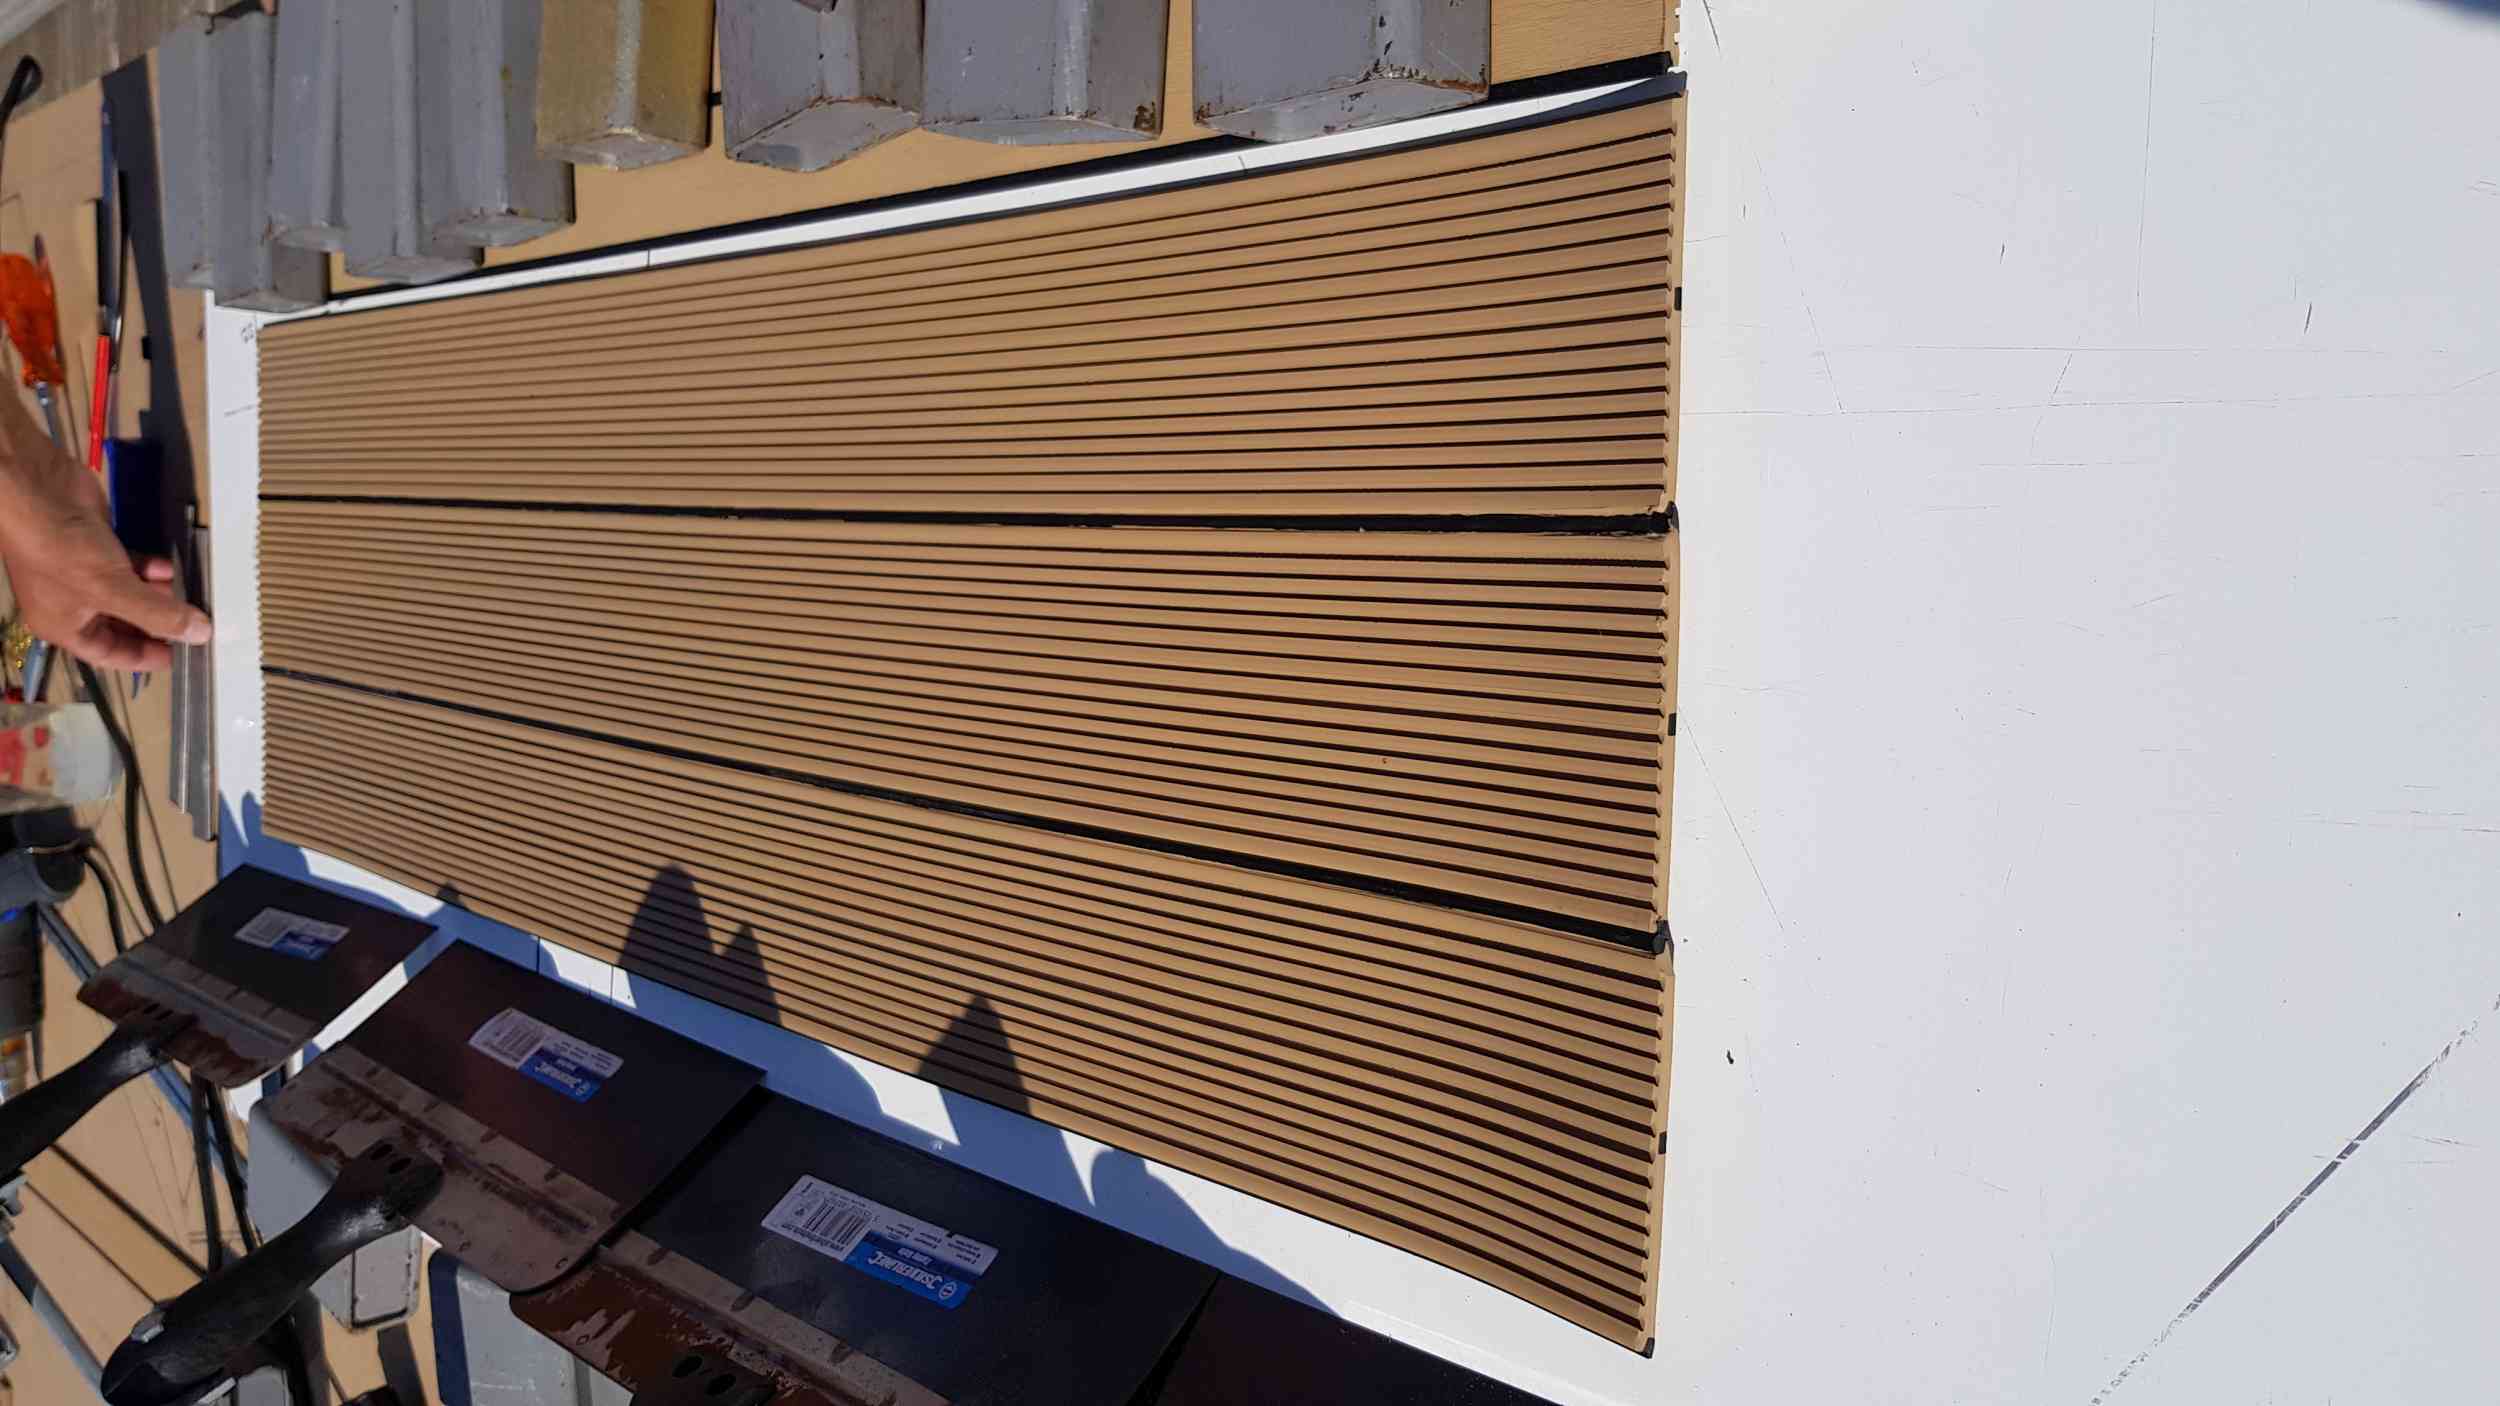
serve.php


and when turned over it looked like this
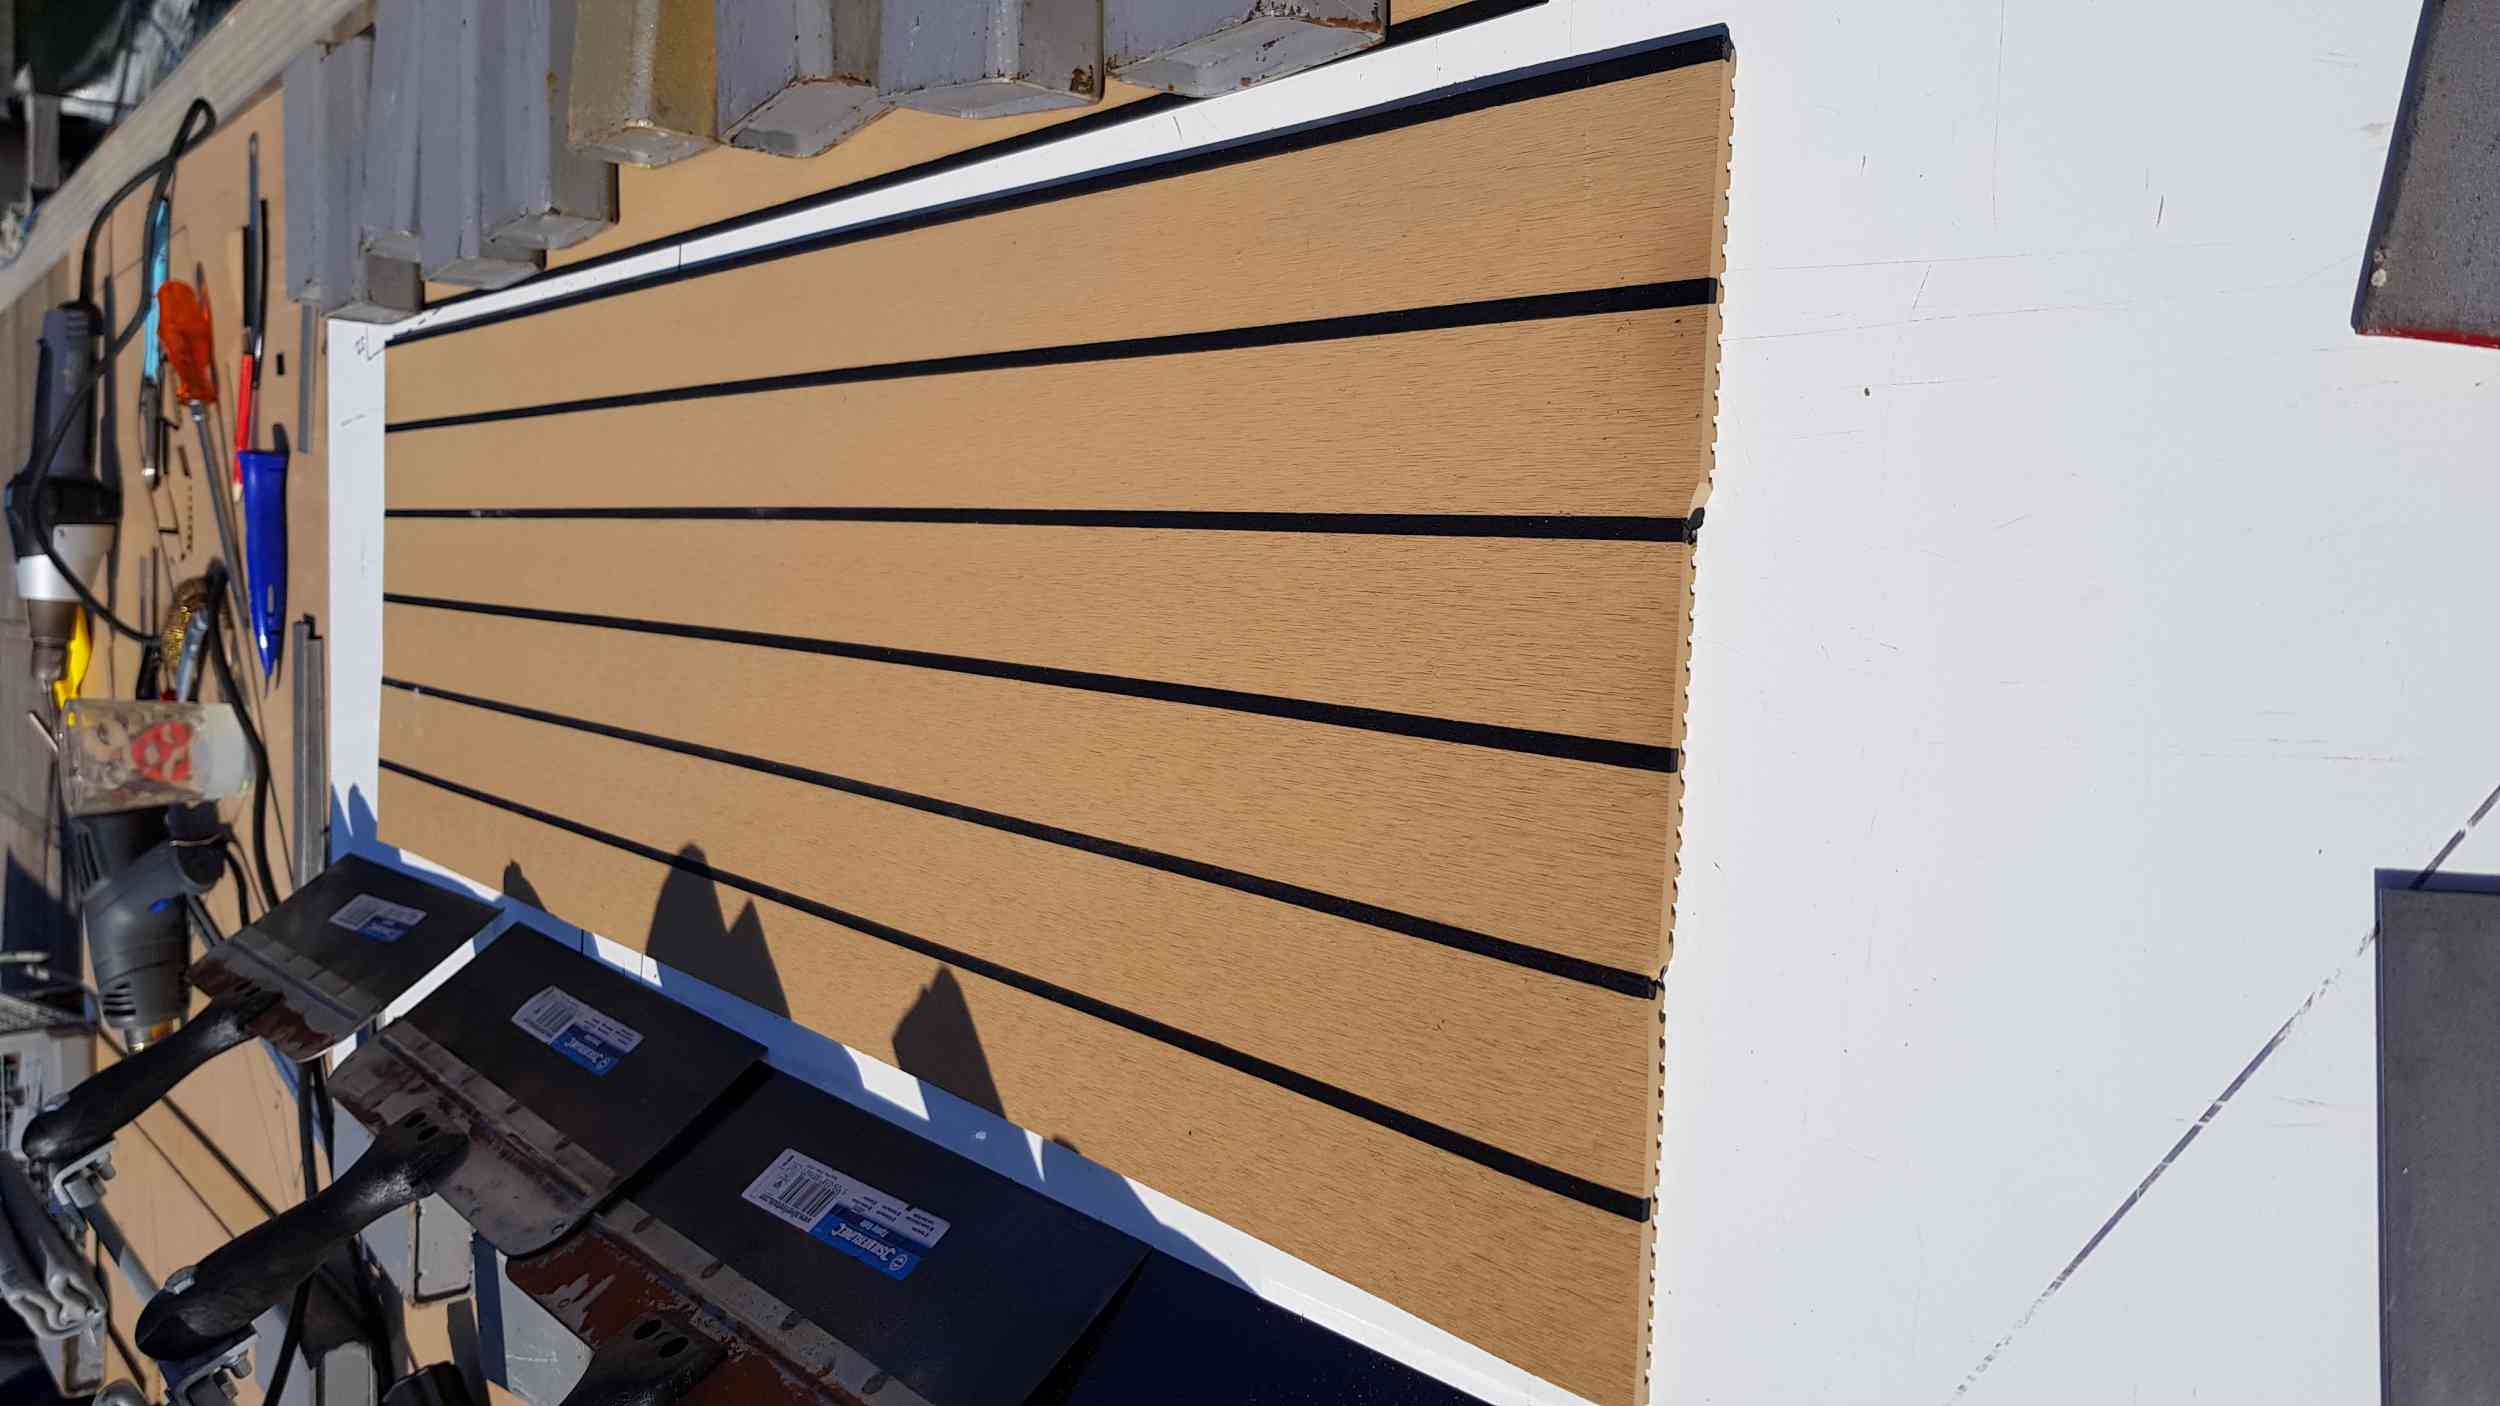
serve.php


So thats how the bulk of the joints are made – back welding.

The more complicated jointing (top welding etc) will follow in subsequent posts.

I did most of my welding during the winter in my garage in the UK but we had to finish some of it on site. Done during lock down whilst we were stuck in Spain!!!

In the March sunshine – nobody else in the marina – we had the place to ourselves.
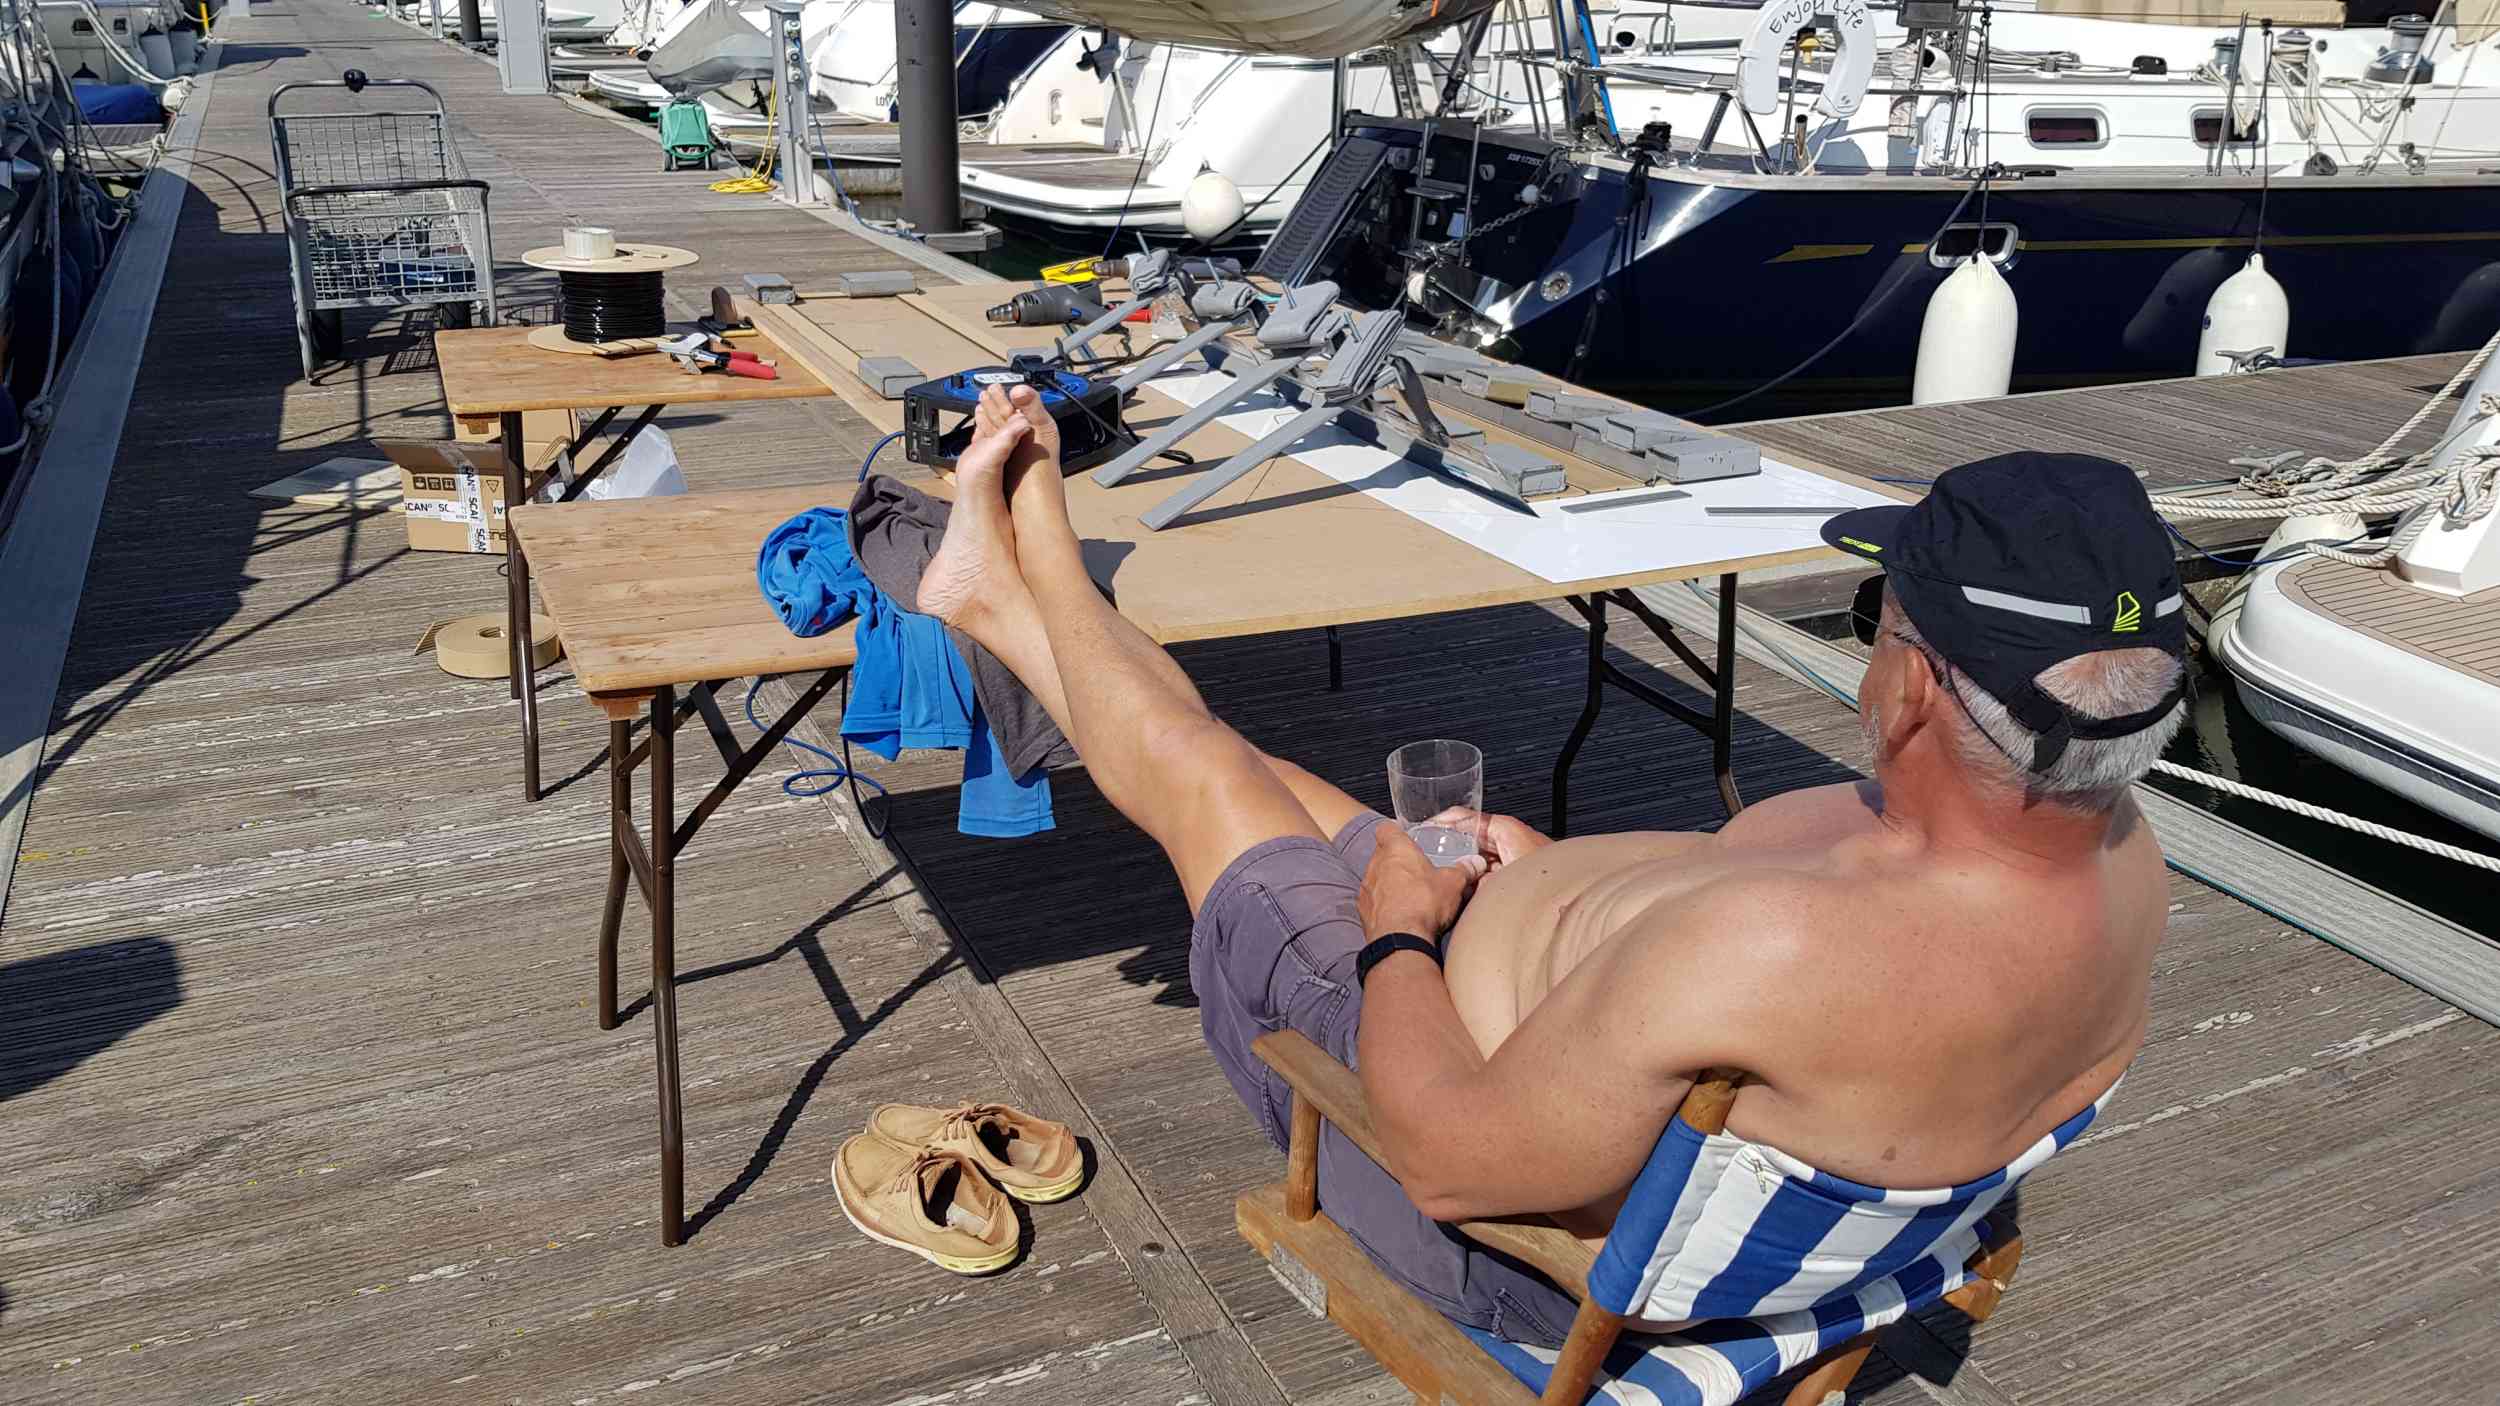
serve.php
 

Hurricane

Well-known member
Joined
11 Nov 2005
Messages
9,404
Location
Sant Carles de la Ràpita
Visit site
Just adding some more photos to this thread.
This was the flybridge after the furniture had been removed - ready for the hard work of removing the old teak.

20210614_205127.resized.jpg

20210614_204947.resized.jpg

Then after one day's hard work stripping it off

20210615_201001.resized.jpg

And then another day's work

20210616_190159.resized.jpg

And finally ready to dry fit the new stuff that had been made at home in the garage over the winter months.

20210619_092741.resized.jpg

Dry fitting the new panels

20210622_162303.resized.jpg

20210627_090254.resized.jpg

And the final results

20210712_082244.resized.jpg

20210712_082139.resized.jpg

20210712_081946.resized.jpg
 

kashurst

Well-known member
Joined
10 Oct 2003
Messages
10,927
Location
Spain
Visit site
Terrific result H, how did you measure up to make the panels at home?

edit: apologies just re-read the whole thread. Brilliant work.
 
Last edited:

EricJ

Active member
Joined
17 Apr 2016
Messages
211
Location
Amsterdam
Visit site
This is a truly amazing job, Hurricane! Looks fantastic. Seeing the time it takes to get the old teak removed it must be a lot more expensive to have such job done in a boat with old teak in place vs installing it on a new boat on plain grp.
Great thread for anyone planning do this himself, probably on a bit smaller boat than yours.:D
 

Hurricane

Well-known member
Joined
11 Nov 2005
Messages
9,404
Location
Sant Carles de la Ràpita
Visit site
Terrific result H, how did you measure up to make the panels at home?

edit: apologies just re-read the whole thread. Brilliant work.
I didn't post any pics of the templating process.
I used the same templating material that I bought for my canvas sewing projects.

20200721_085157.resized.jpg

20200721_085139.resized.jpg

And then the templates in my garage at home - in this pic laid over one of the larger panels after welding.

20210130_181748.resized.jpg

But it would be really great if the boat were closer to the garage!!!

When I did the foredeck, I wasn't sure that my work would be good enough so, before ripping the decks up, I booked an Easyjet flight, rolled up the port deck and took it out to check.
The kind of thing we would love to have been able to do during the last couple of years but Covid got in the way.
EDIT
These were the pieces that I took out on the aeroplane as a test to see if it would work.

serve.php


Getting the curved lines on that long side deck to look right, took lots of planning.
 

JOHNPEET

Well-known member
Joined
24 Sep 2002
Messages
426
Location
Anglesey
Visit site
Mike has kindly invited me to share the following in regard to my project involving synthetic teak decking as part of this thread - so here goes!

I’m presently in the final stages of finishing a completely self built Almarine 1200FA - a 12 metre steel, aft cabin, fly bridge motor boat. The hull and superstructure of which originates from a steel kit supplied by Bonito Boats BV In 2009 - yes, it’s been a long project!
A few weeks ago, as part of my ongoing research for information relating to the available options for synthetic teak for all of the deck areas on my boat, I was very fortunate to come across the initial post by Mike of this thread.
I had been looking for options for the supply of materials only, as I intended to do all of the panel making and installation myself. At that time, it was becoming apparent that there were very few options available on a materials supply only basis and it appeared that I was heading towards the use of Isiteek. I wasn’t overly thrilled about that as the colour choice is very limited and the product itself appears to be very limited in the sections of material available.
Mike‘s thread pointed me towards Trakmark as an alternative manufacture/supplier which I hadn’t previously come across. I requested colour samples via their website and things went on from there.
Mike had also mentioned within his post that he would be willing to provide help and advice to anyone interested in his experience . Based on his offer of support, I made initial contact with Mike and since then we have had an ongoing exchange of emails. I honestly can’t thank Mike enough for the support that he has provided me with. His sharing of information and advice has certainly resulted in me using a much better quality product than I would have otherwise used and also my learning curve for making the panels has been shortened considerably.

I must also give credit to the team at Trakmark. The advice and support from them around the product and tooling has been absolutely brilliant.

So getting down to the detail - I have chosen to use the Trakmark product and in terms of colour, I’m using the ”light teak” option.

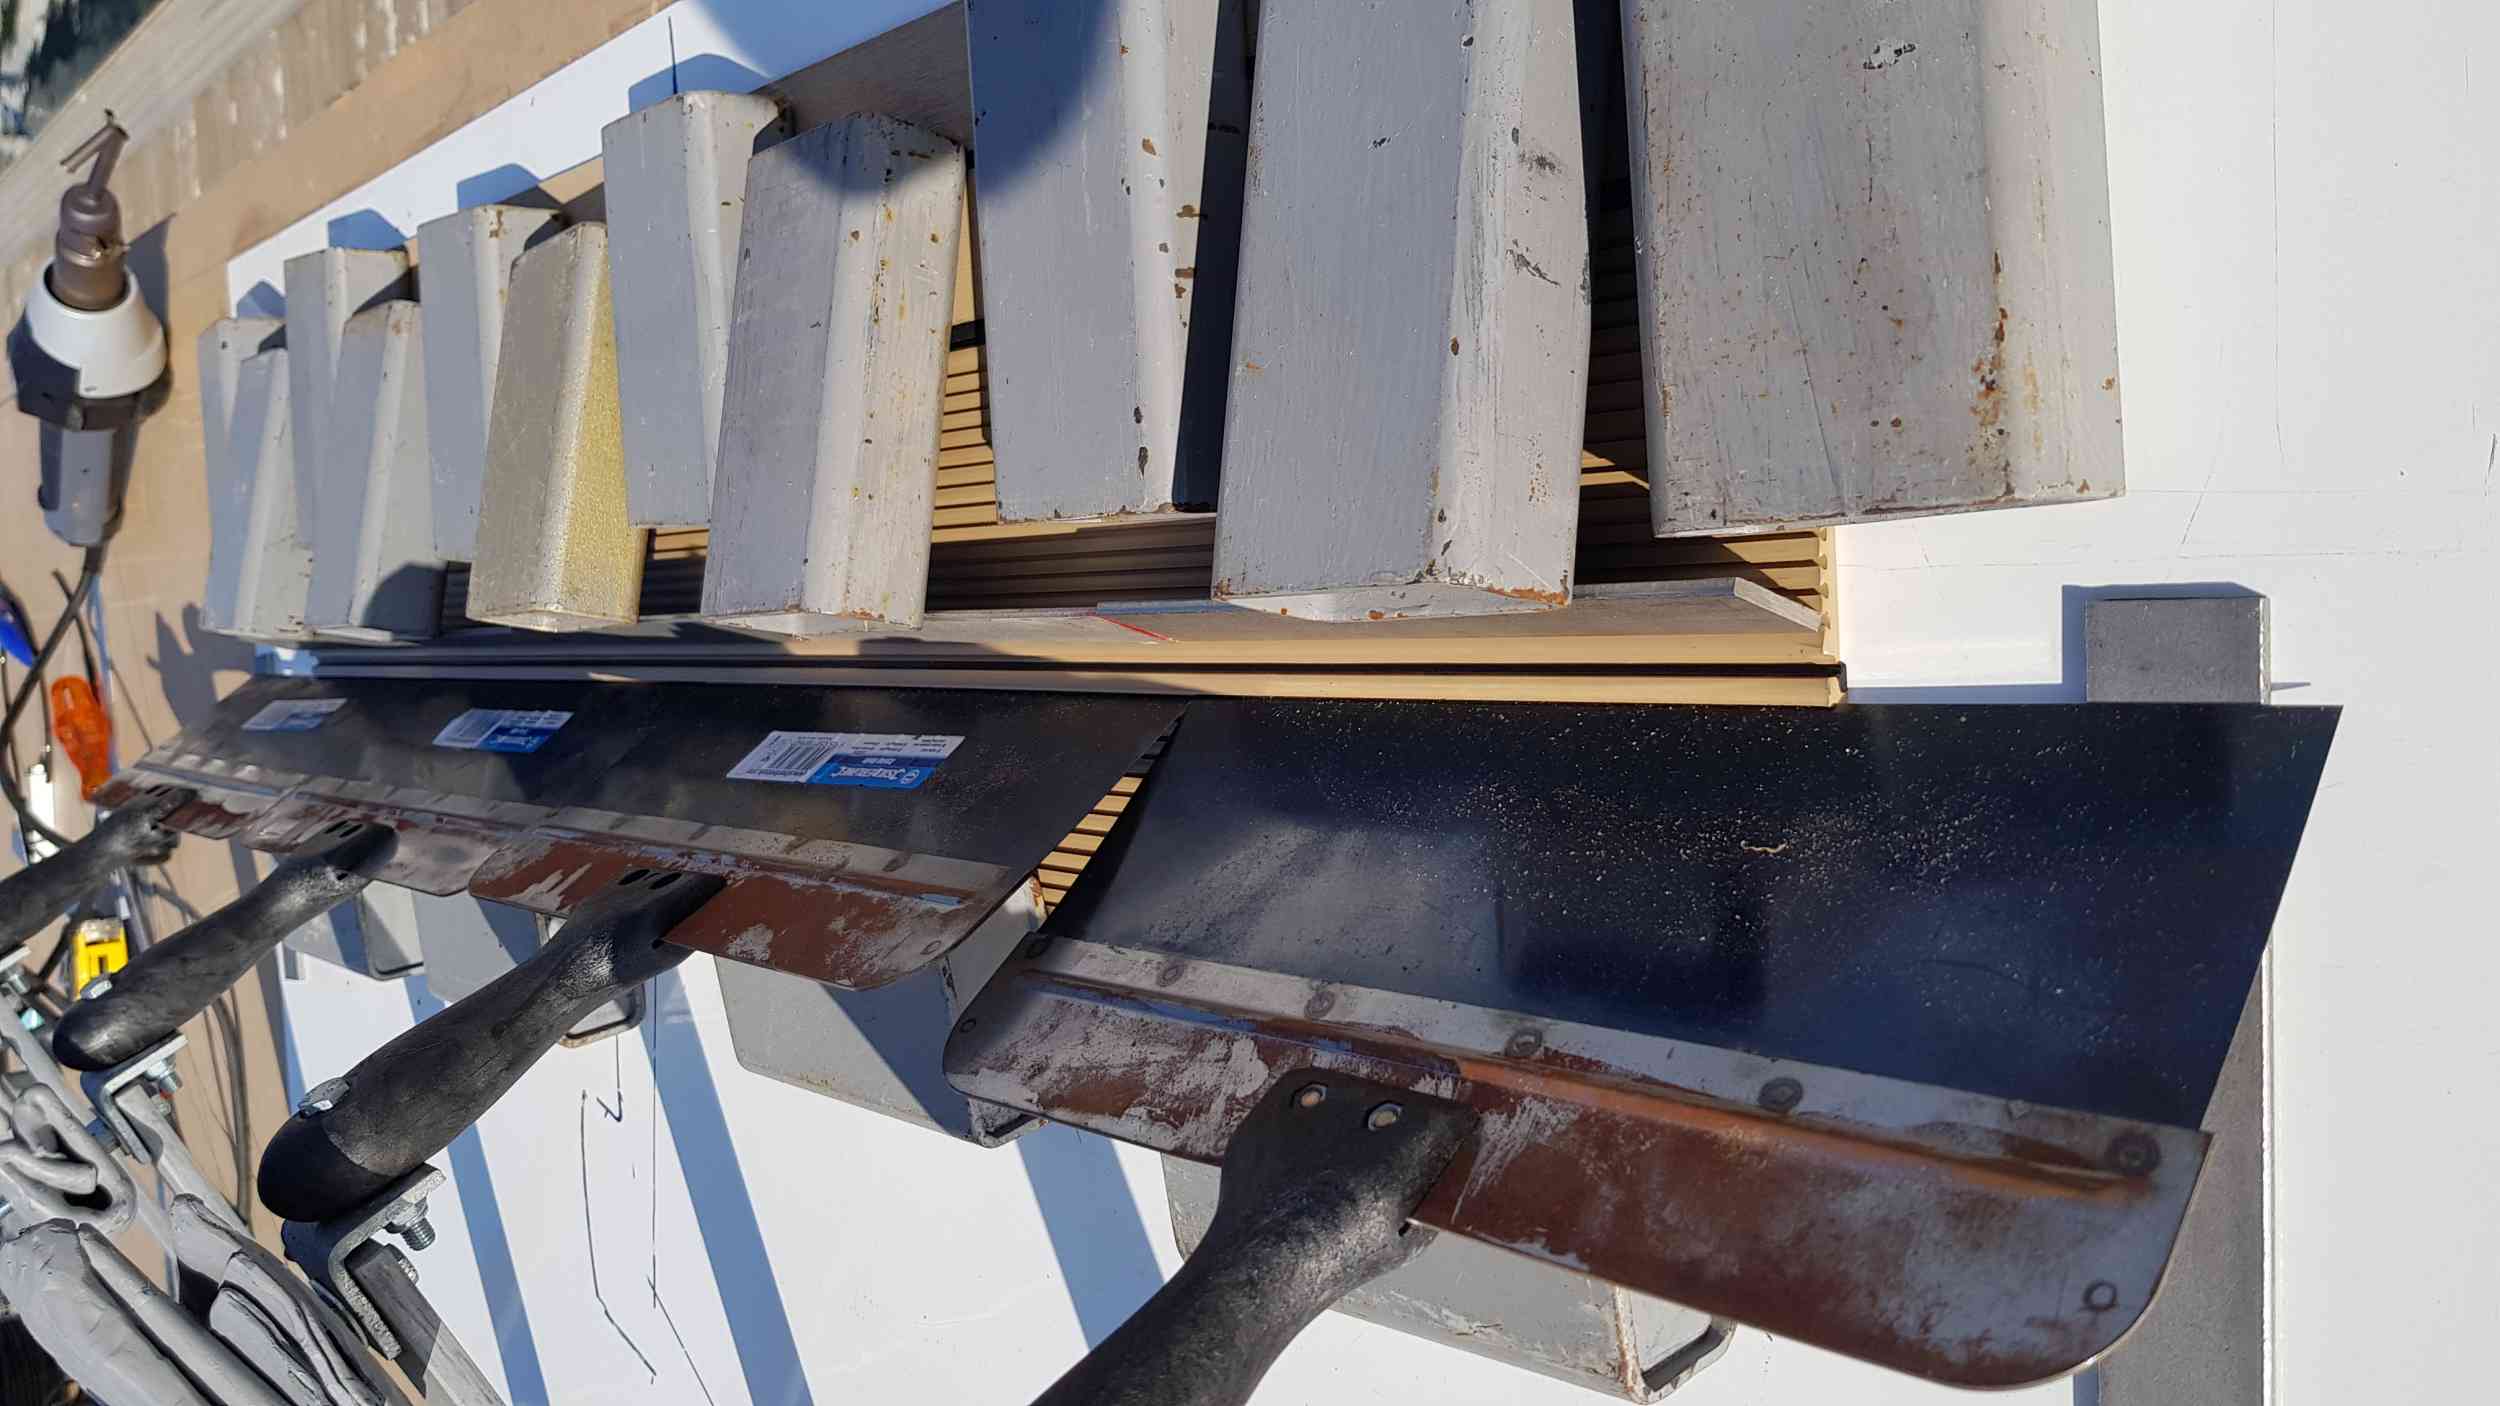
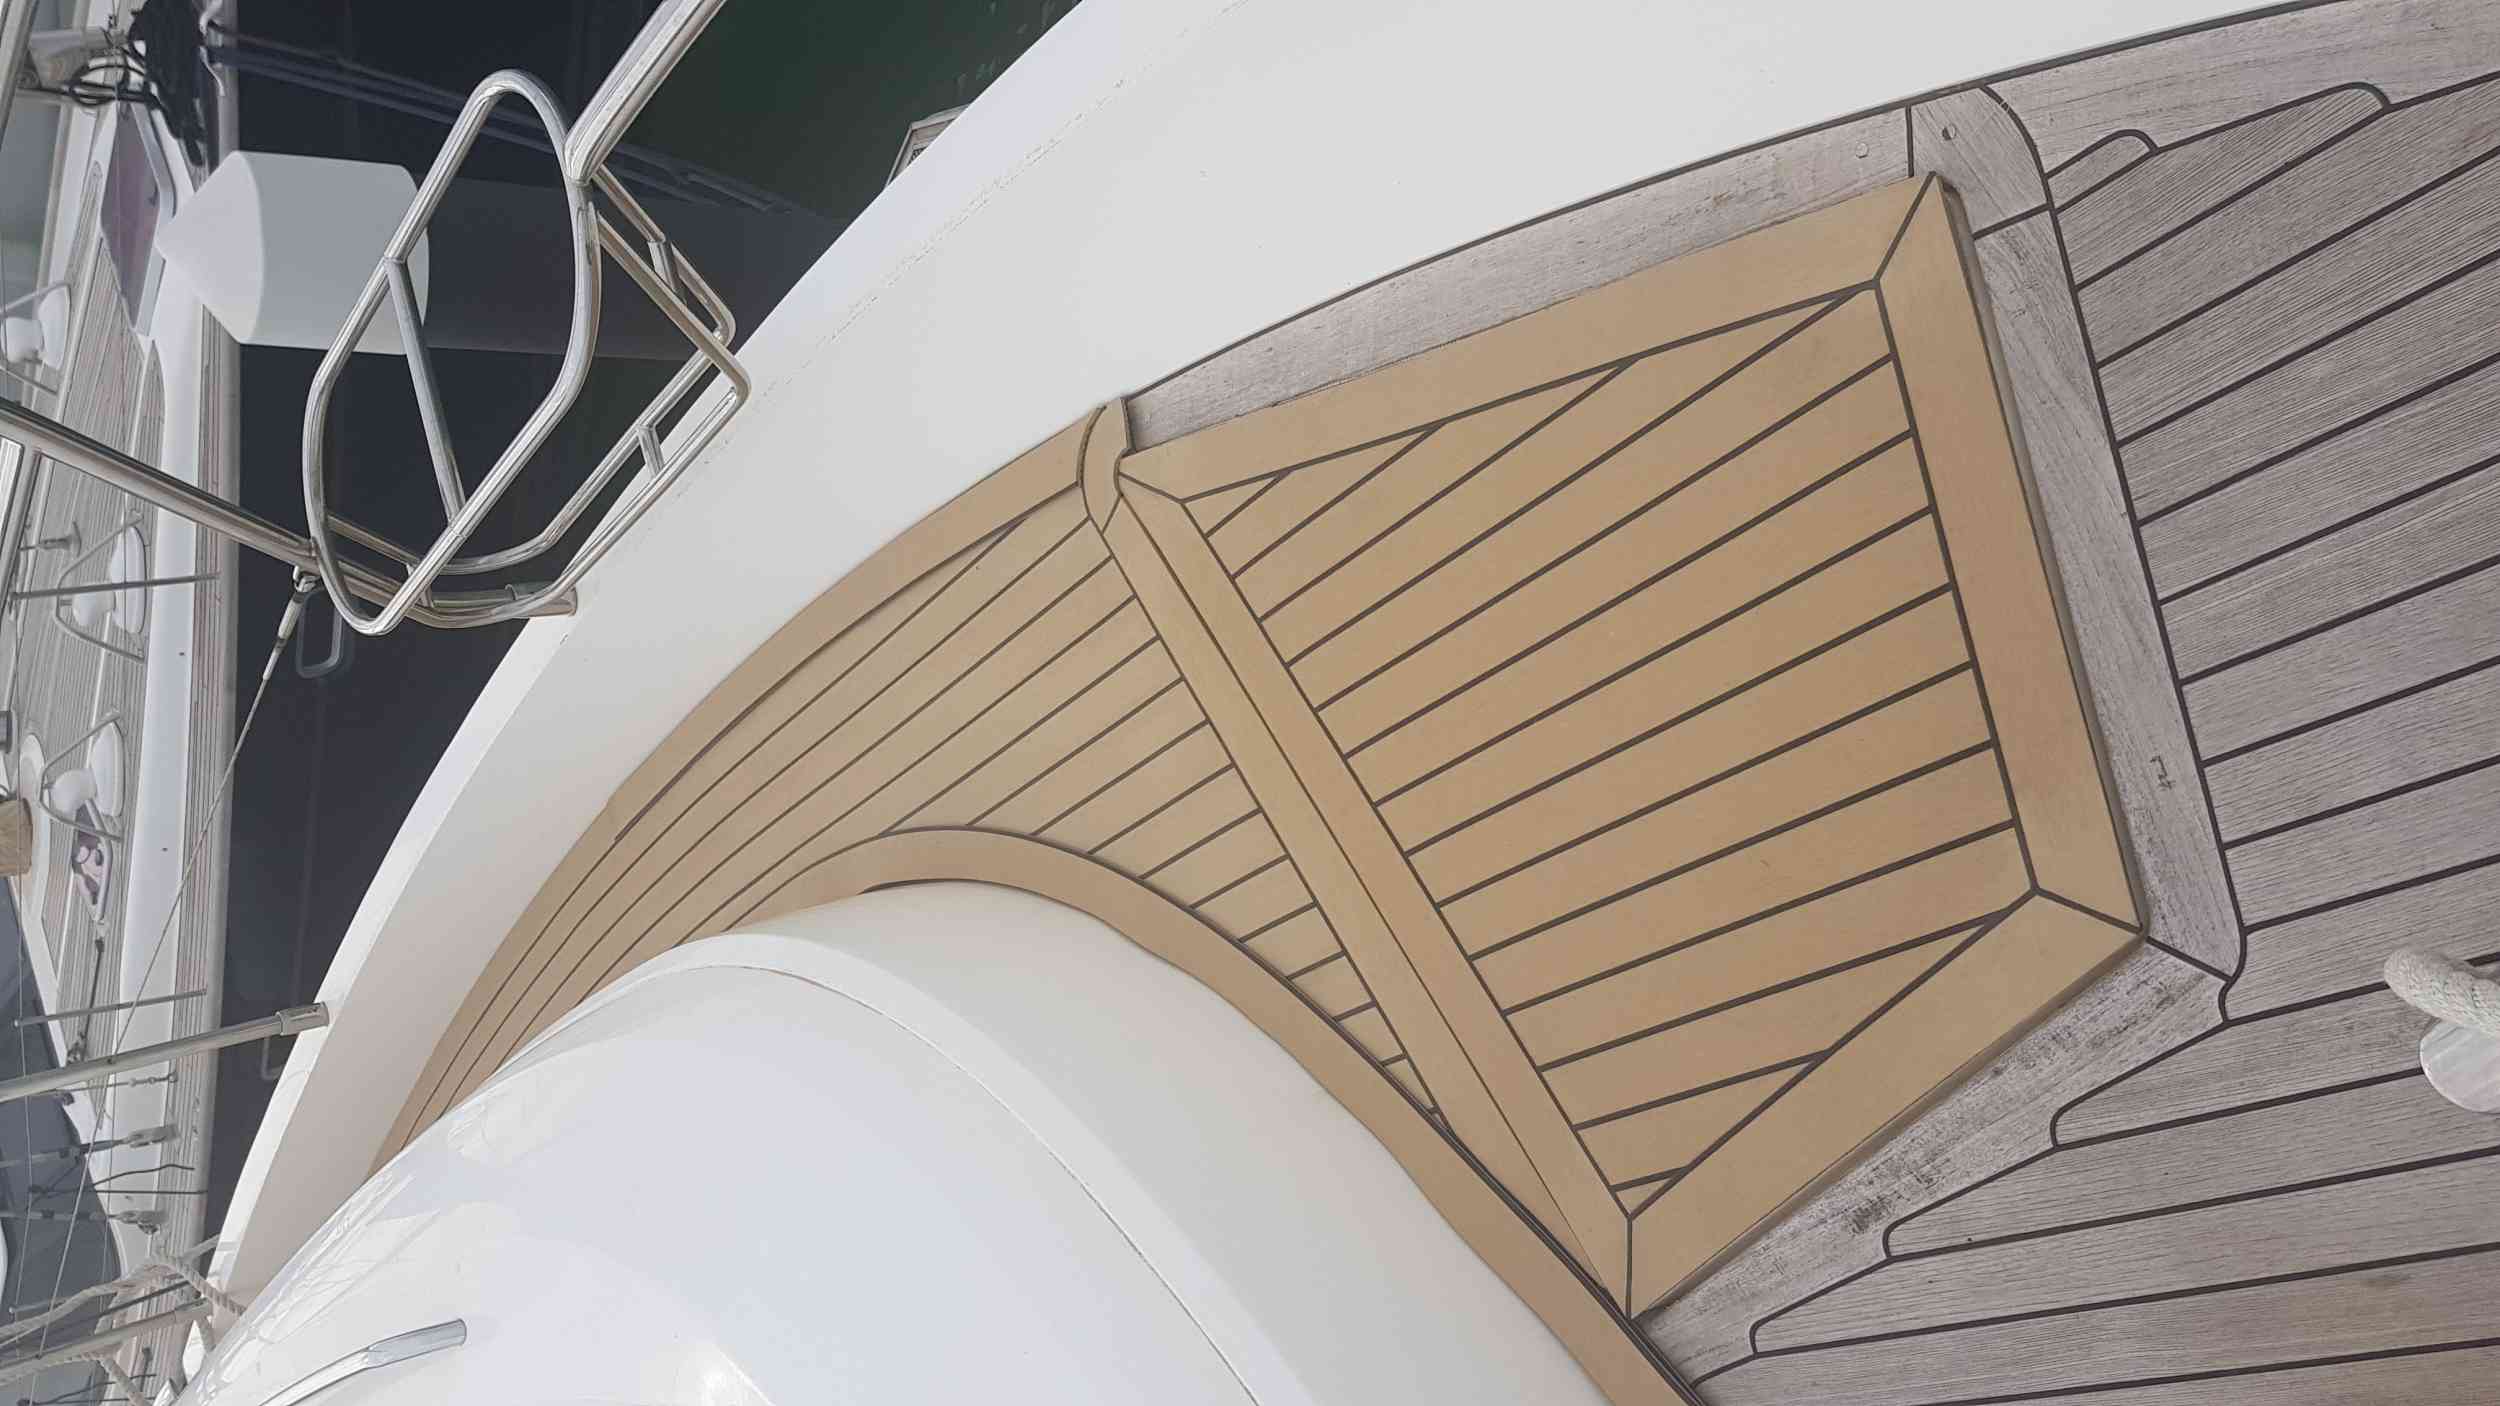
I initially ordered sufficient materials to complete the deck covering on my swim platform. This was to be my “test area”, prior to proceeding to order materials to complete the whole boat which is approx 30 sq metres in total. I just wanted to re-assure myself that I was going to be able achieve an acceptable standard prior to going the whole hog so to speak! I also ordered the required tooling and made up the lead weights that Mike had advised me about and shows in his photos.

I have now completed the swim platform and to be honest, I’m very pleased with the standard that I have achieved. I am now awaiting delivery of the rest of the materials to complete the remaining areas on my boat which will hopefully arrive on Friday.

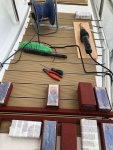
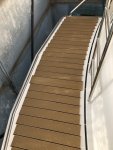
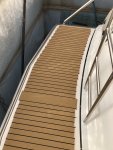
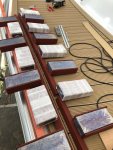
I have attached some photos of what I have completed to date for interest.

9B1CA361-B86B-4C7F-AC03-9FC4F0F25EF5.jpeg
16DE2F41-AF68-4679-ABDE-C09A2D1AEC70.jpeg8E47CA93-B0C7-4642-A5C0-5344458688DE.jpeg2563D561-D3BB-42EA-853E-10098F7AA985.jpeg5340B515-43B6-4E24-9482-98A350FB48D1.jpeg5B2B1B48-6571-416B-A7E6-0817D523E728.jpeg87397479-57F2-4BE2-B0DD-0C4FCE6E72A9.jpeg955E3625-6825-428F-9885-8604BF2BCBAC.jpeg
 

timbad

Active member
Joined
15 Apr 2005
Messages
586
Location
UK & The Med
Visit site
Mike has kindly invited me to share the following in regard to my project involving synthetic teak decking as part of this thread - so here goes!

I’m presently in the final stages of finishing a completely self built Almarine 1200FA - a 12 metre steel, aft cabin, fly bridge motor boat. The hull and superstructure of which originates from a steel kit supplied by Bonito Boats BV In 2009 - yes, it’s been a long project!
A few weeks ago, as part of my ongoing research for information relating to the available options for synthetic teak for all of the deck areas on my boat, I was very fortunate to come across the initial post by Mike of this thread.
I had been looking for options for the supply of materials only, as I intended to do all of the panel making and installation myself. At that time, it was becoming apparent that there were very few options available on a materials supply only basis and it appeared that I was heading towards the use of Isiteek. I wasn’t overly thrilled about that as the colour choice is very limited and the product itself appears to be very limited in the sections of material available.
Mike‘s thread pointed me towards Trakmark as an alternative manufacture/supplier which I hadn’t previously come across. I requested colour samples via their website and things went on from there.
Mike had also mentioned within his post that he would be willing to provide help and advice to anyone interested in his experience . Based on his offer of support, I made initial contact with Mike and since then we have had an ongoing exchange of emails. I honestly can’t thank Mike enough for the support that he has provided me with. His sharing of information and advice has certainly resulted in me using a much better quality product than I would have otherwise used and also my learning curve for making the panels has been shortened considerably.

I must also give credit to the team at Trakmark. The advice and support from them around the product and tooling has been absolutely brilliant.

So getting down to the detail - I have chosen to use the Trakmark product and in terms of colour, I’m using the ”light teak” option.

I initially ordered sufficient materials to complete the deck covering on my swim platform. This was to be my “test area”, prior to proceeding to order materials to complete the whole boat which is approx 30 sq metres in total. I just wanted to re-assure myself that I was going to be able achieve an acceptable standard prior to going the whole hog so to speak! I also ordered the required tooling and made up the lead weights that Mike had advised me about and shows in his photos.

I have now completed the swim platform and to be honest, I’m very pleased with the standard that I have achieved. I am now awaiting delivery of the rest of the materials to complete the remaining areas on my boat which will hopefully arrive on Friday.

I have attached some photos of what I have completed to date for interest.

View attachment 120912
View attachment 120913View attachment 120914View attachment 120915View attachment 120916View attachment 120919View attachment 120920View attachment 120921
Congratulations John
Your swim platform looks great, having seen Mikes project from start to finish including seeing the finished article you are in very safe hands indeed. Looking forward to seeing your next stages.
 
Top