cherod
N/A
Great post
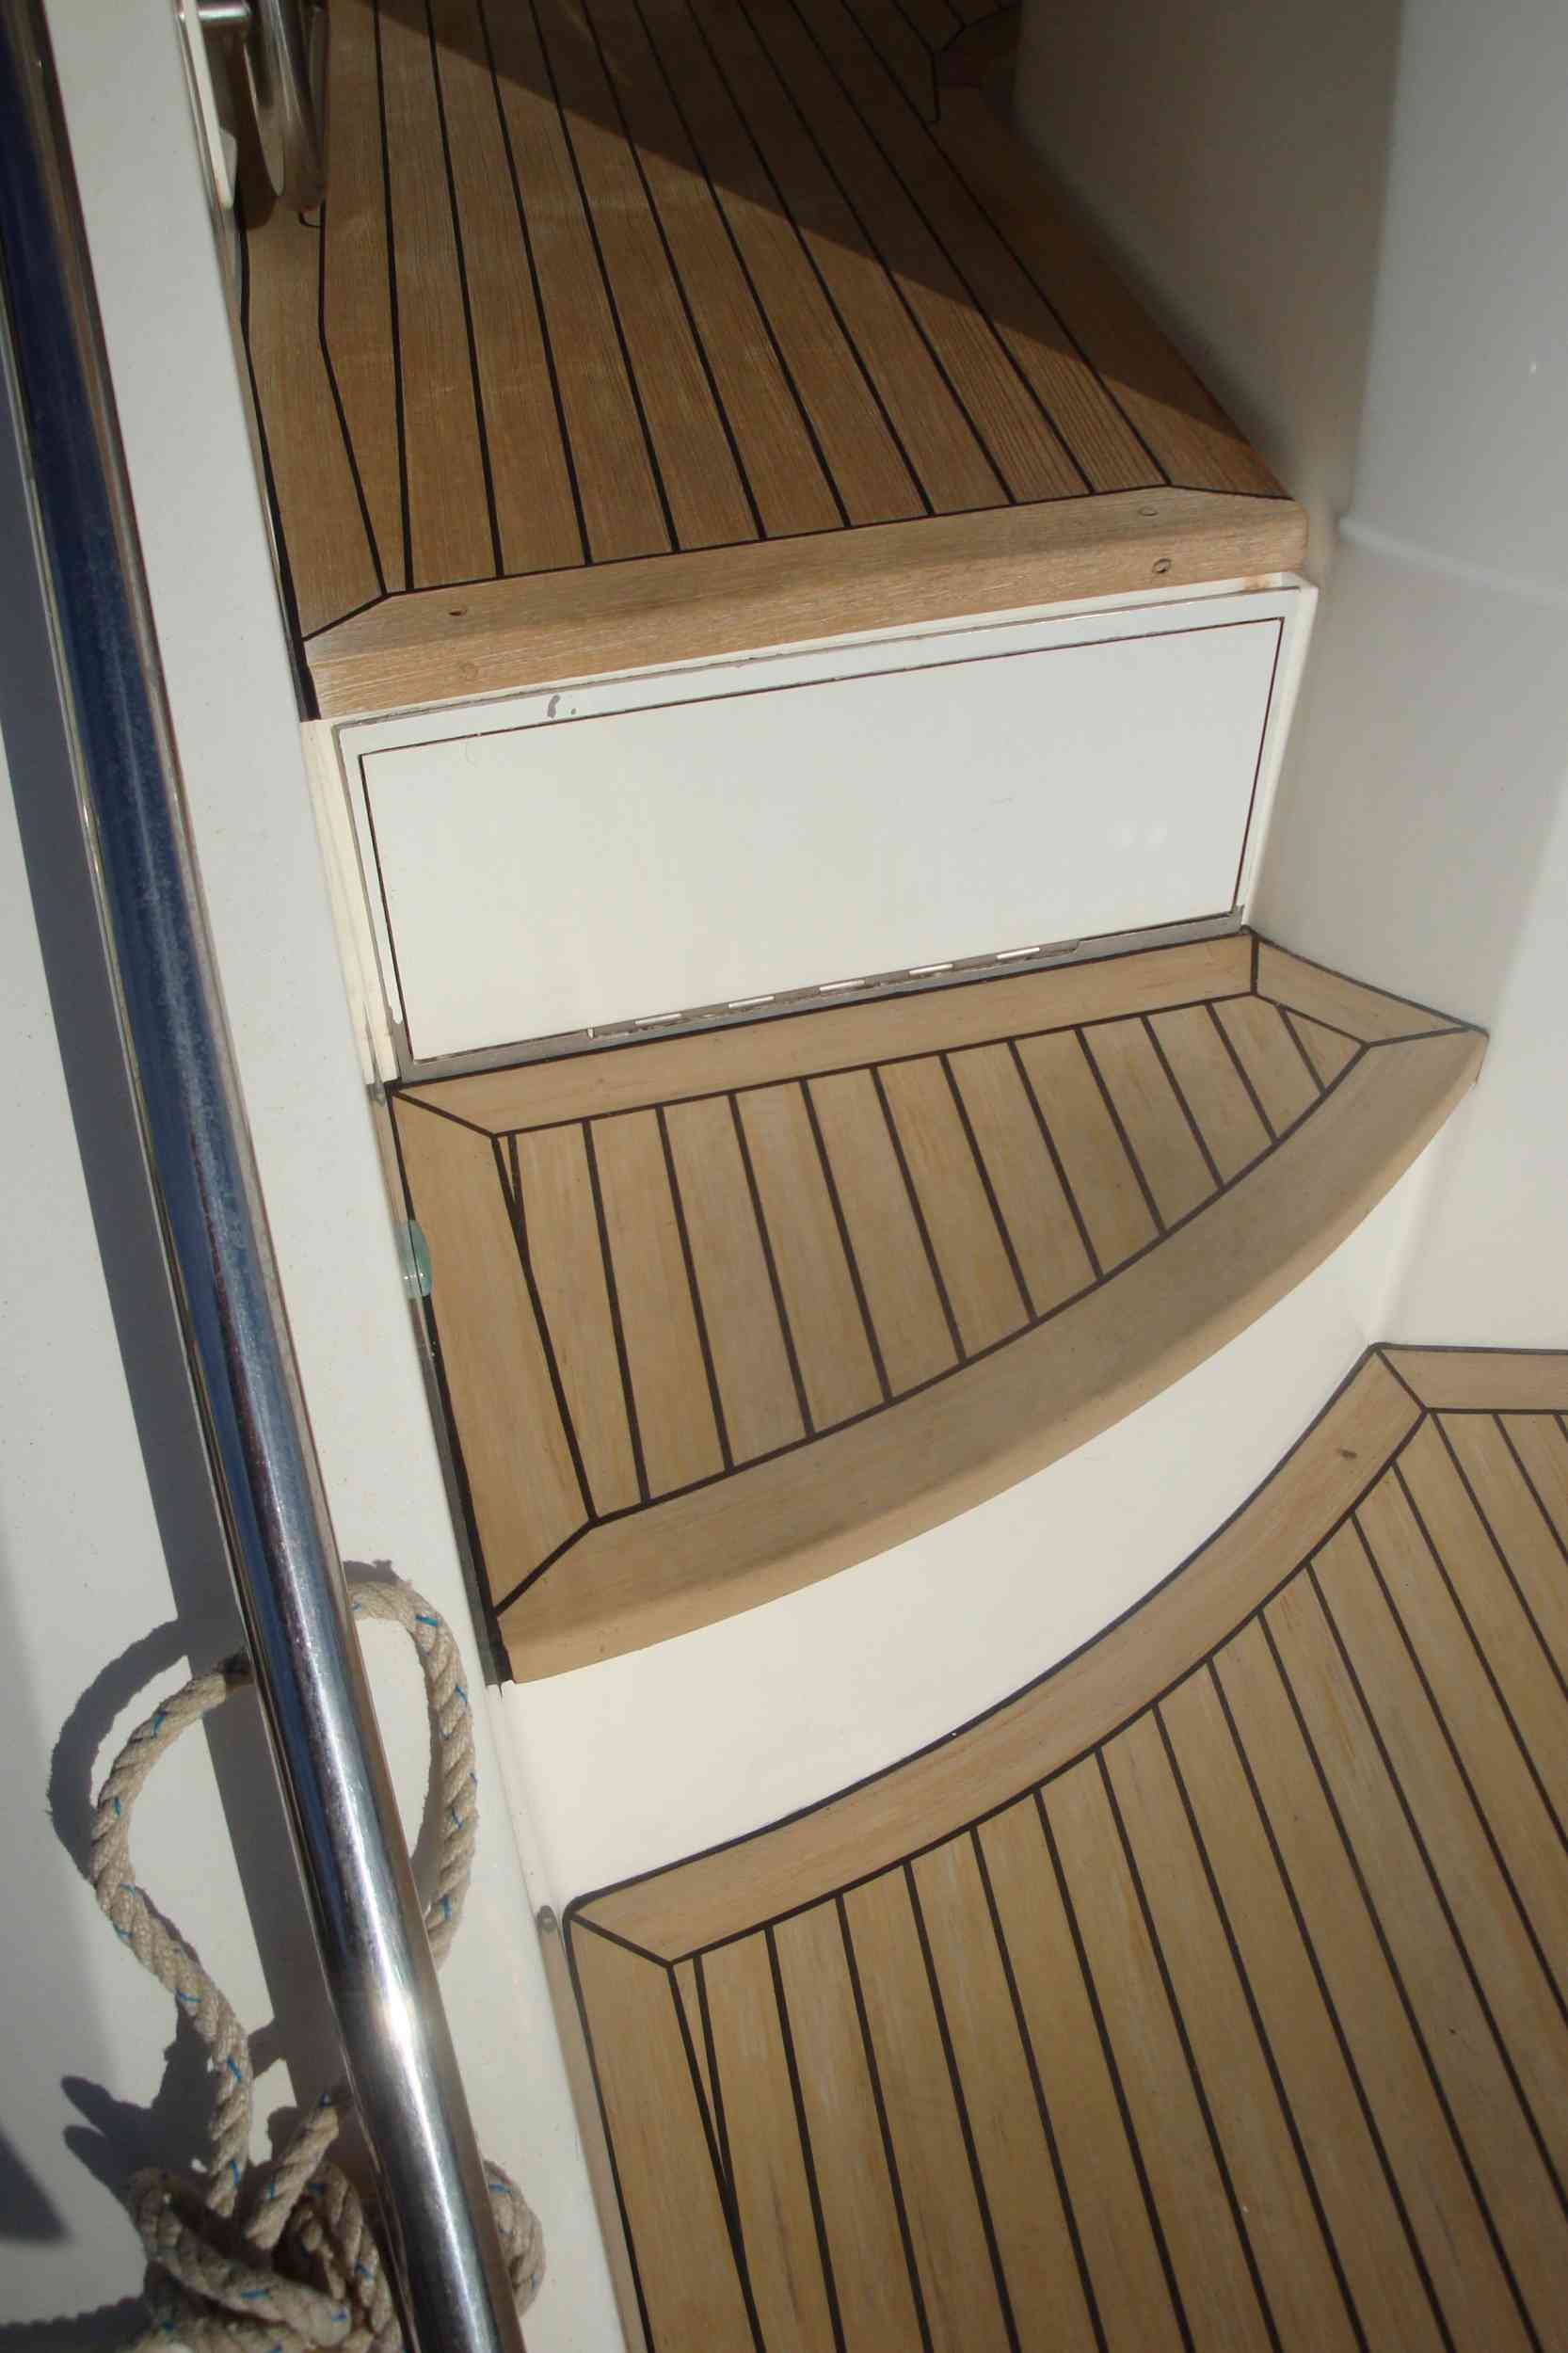
Might i venture a guess , the top step is the original ?First some background on the subject
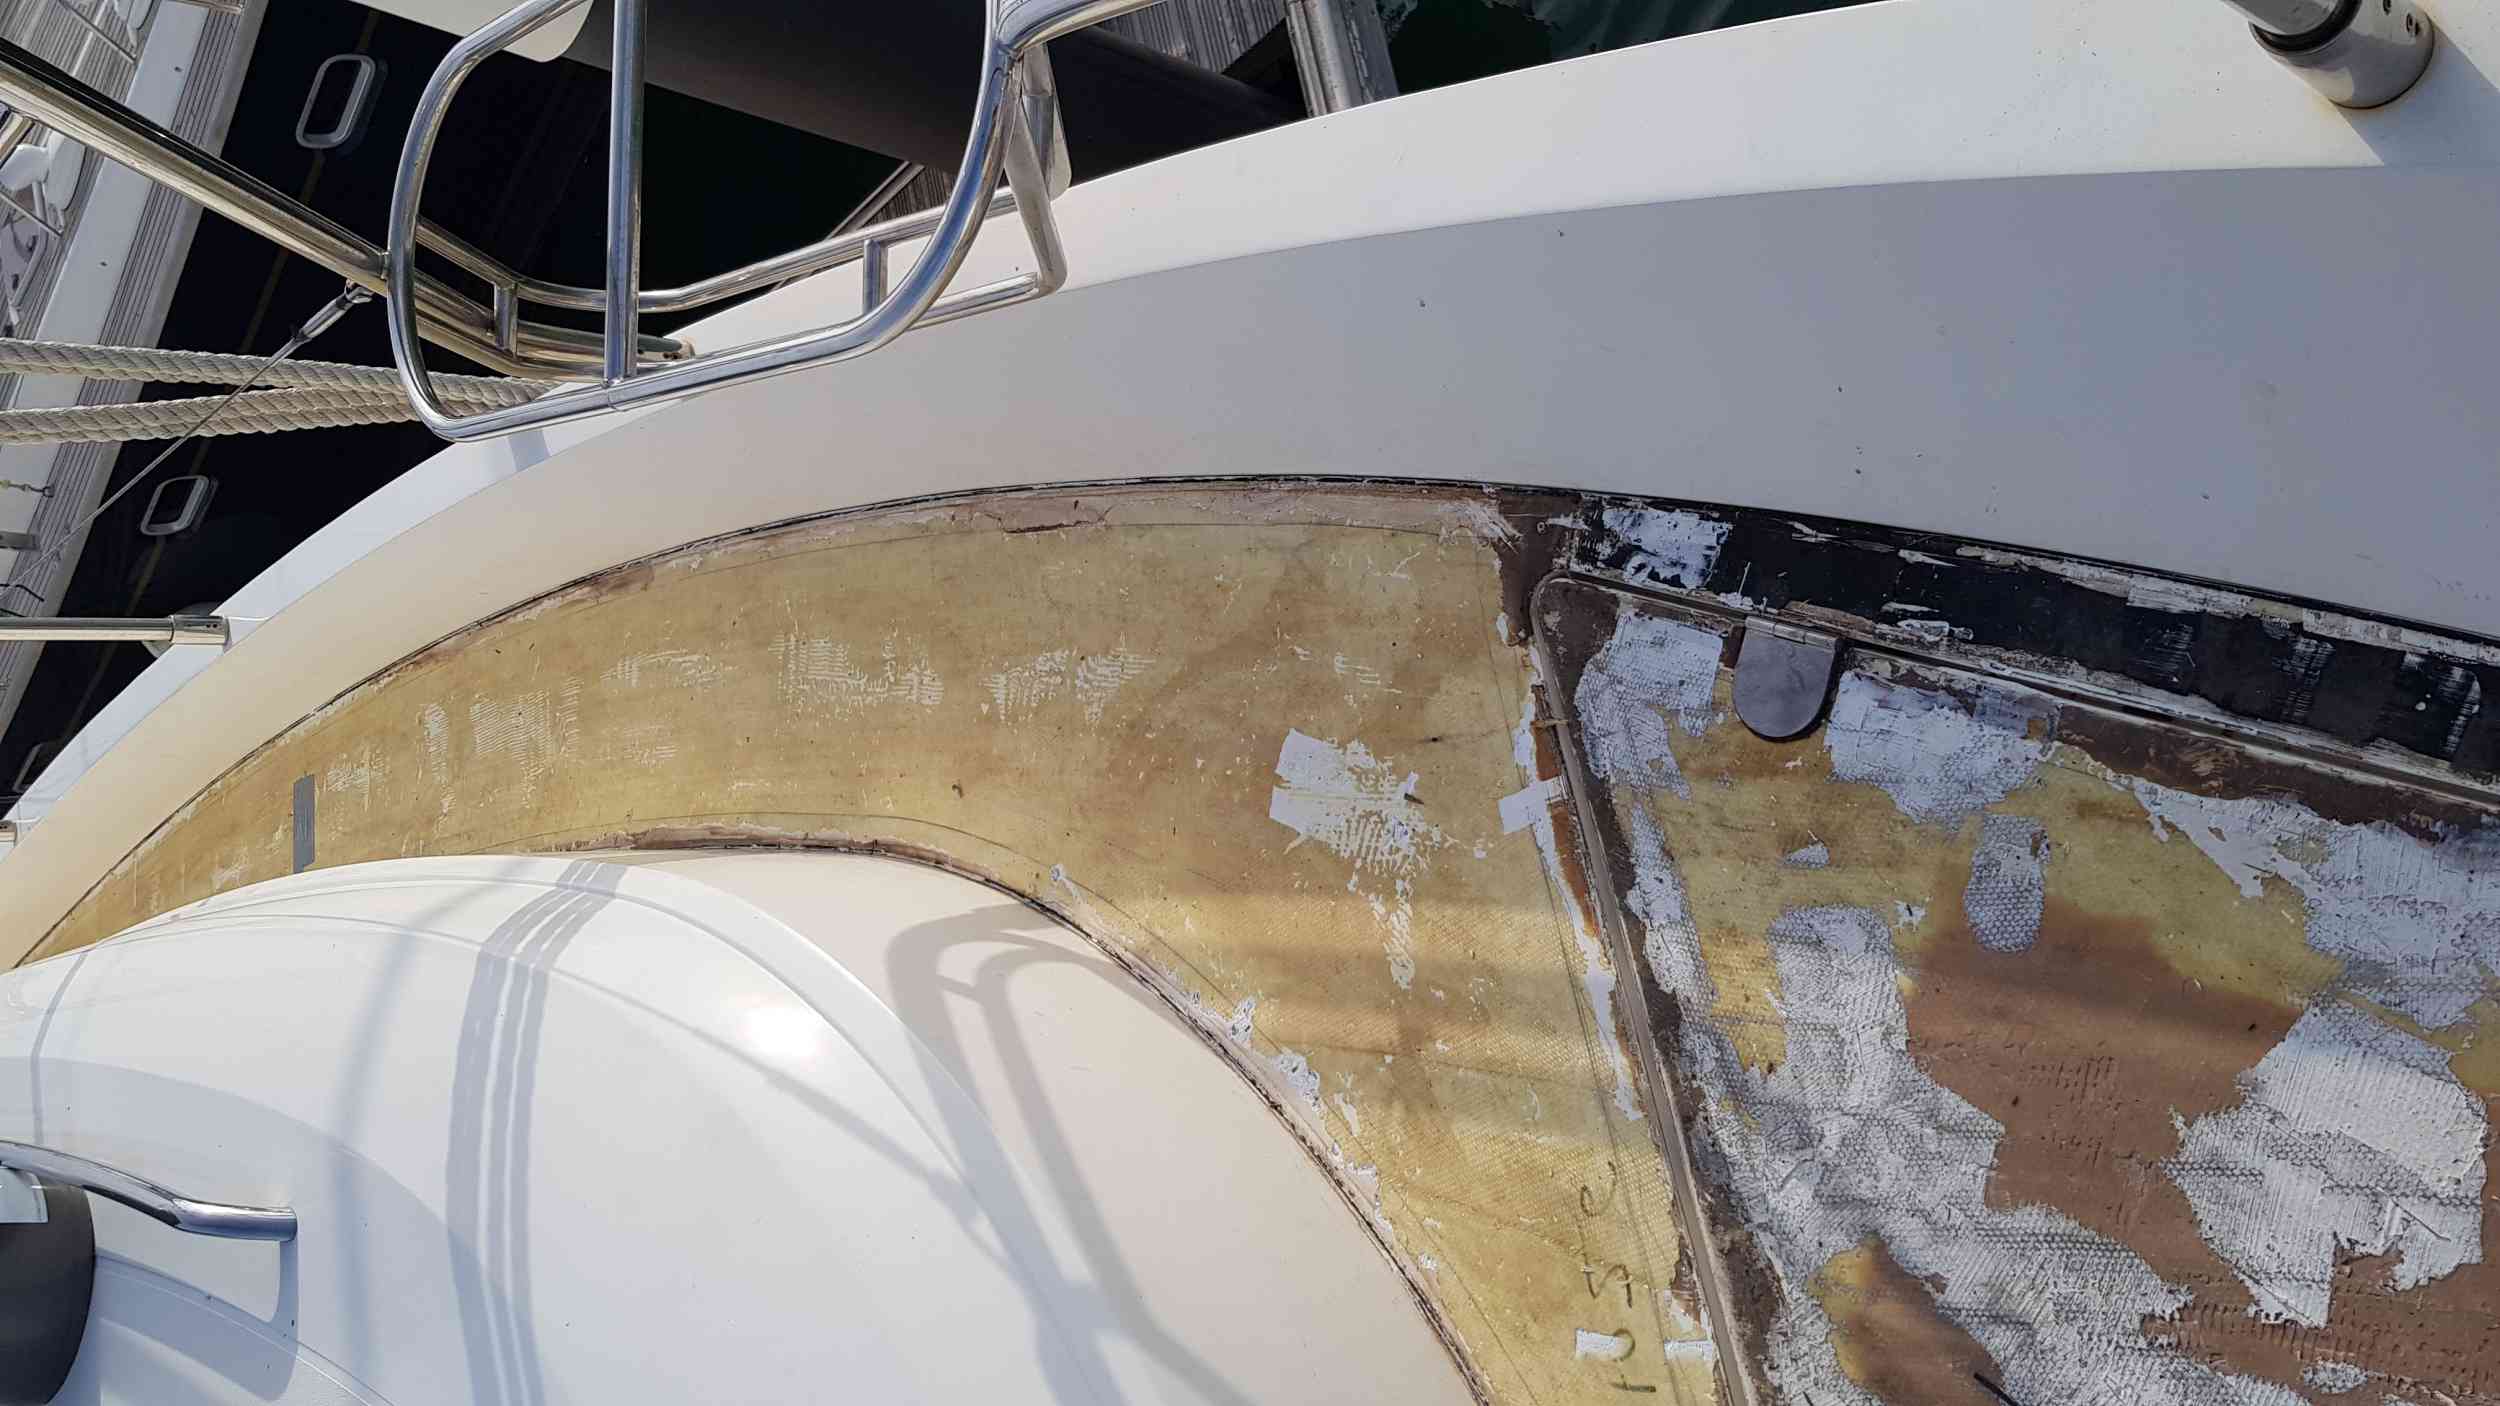
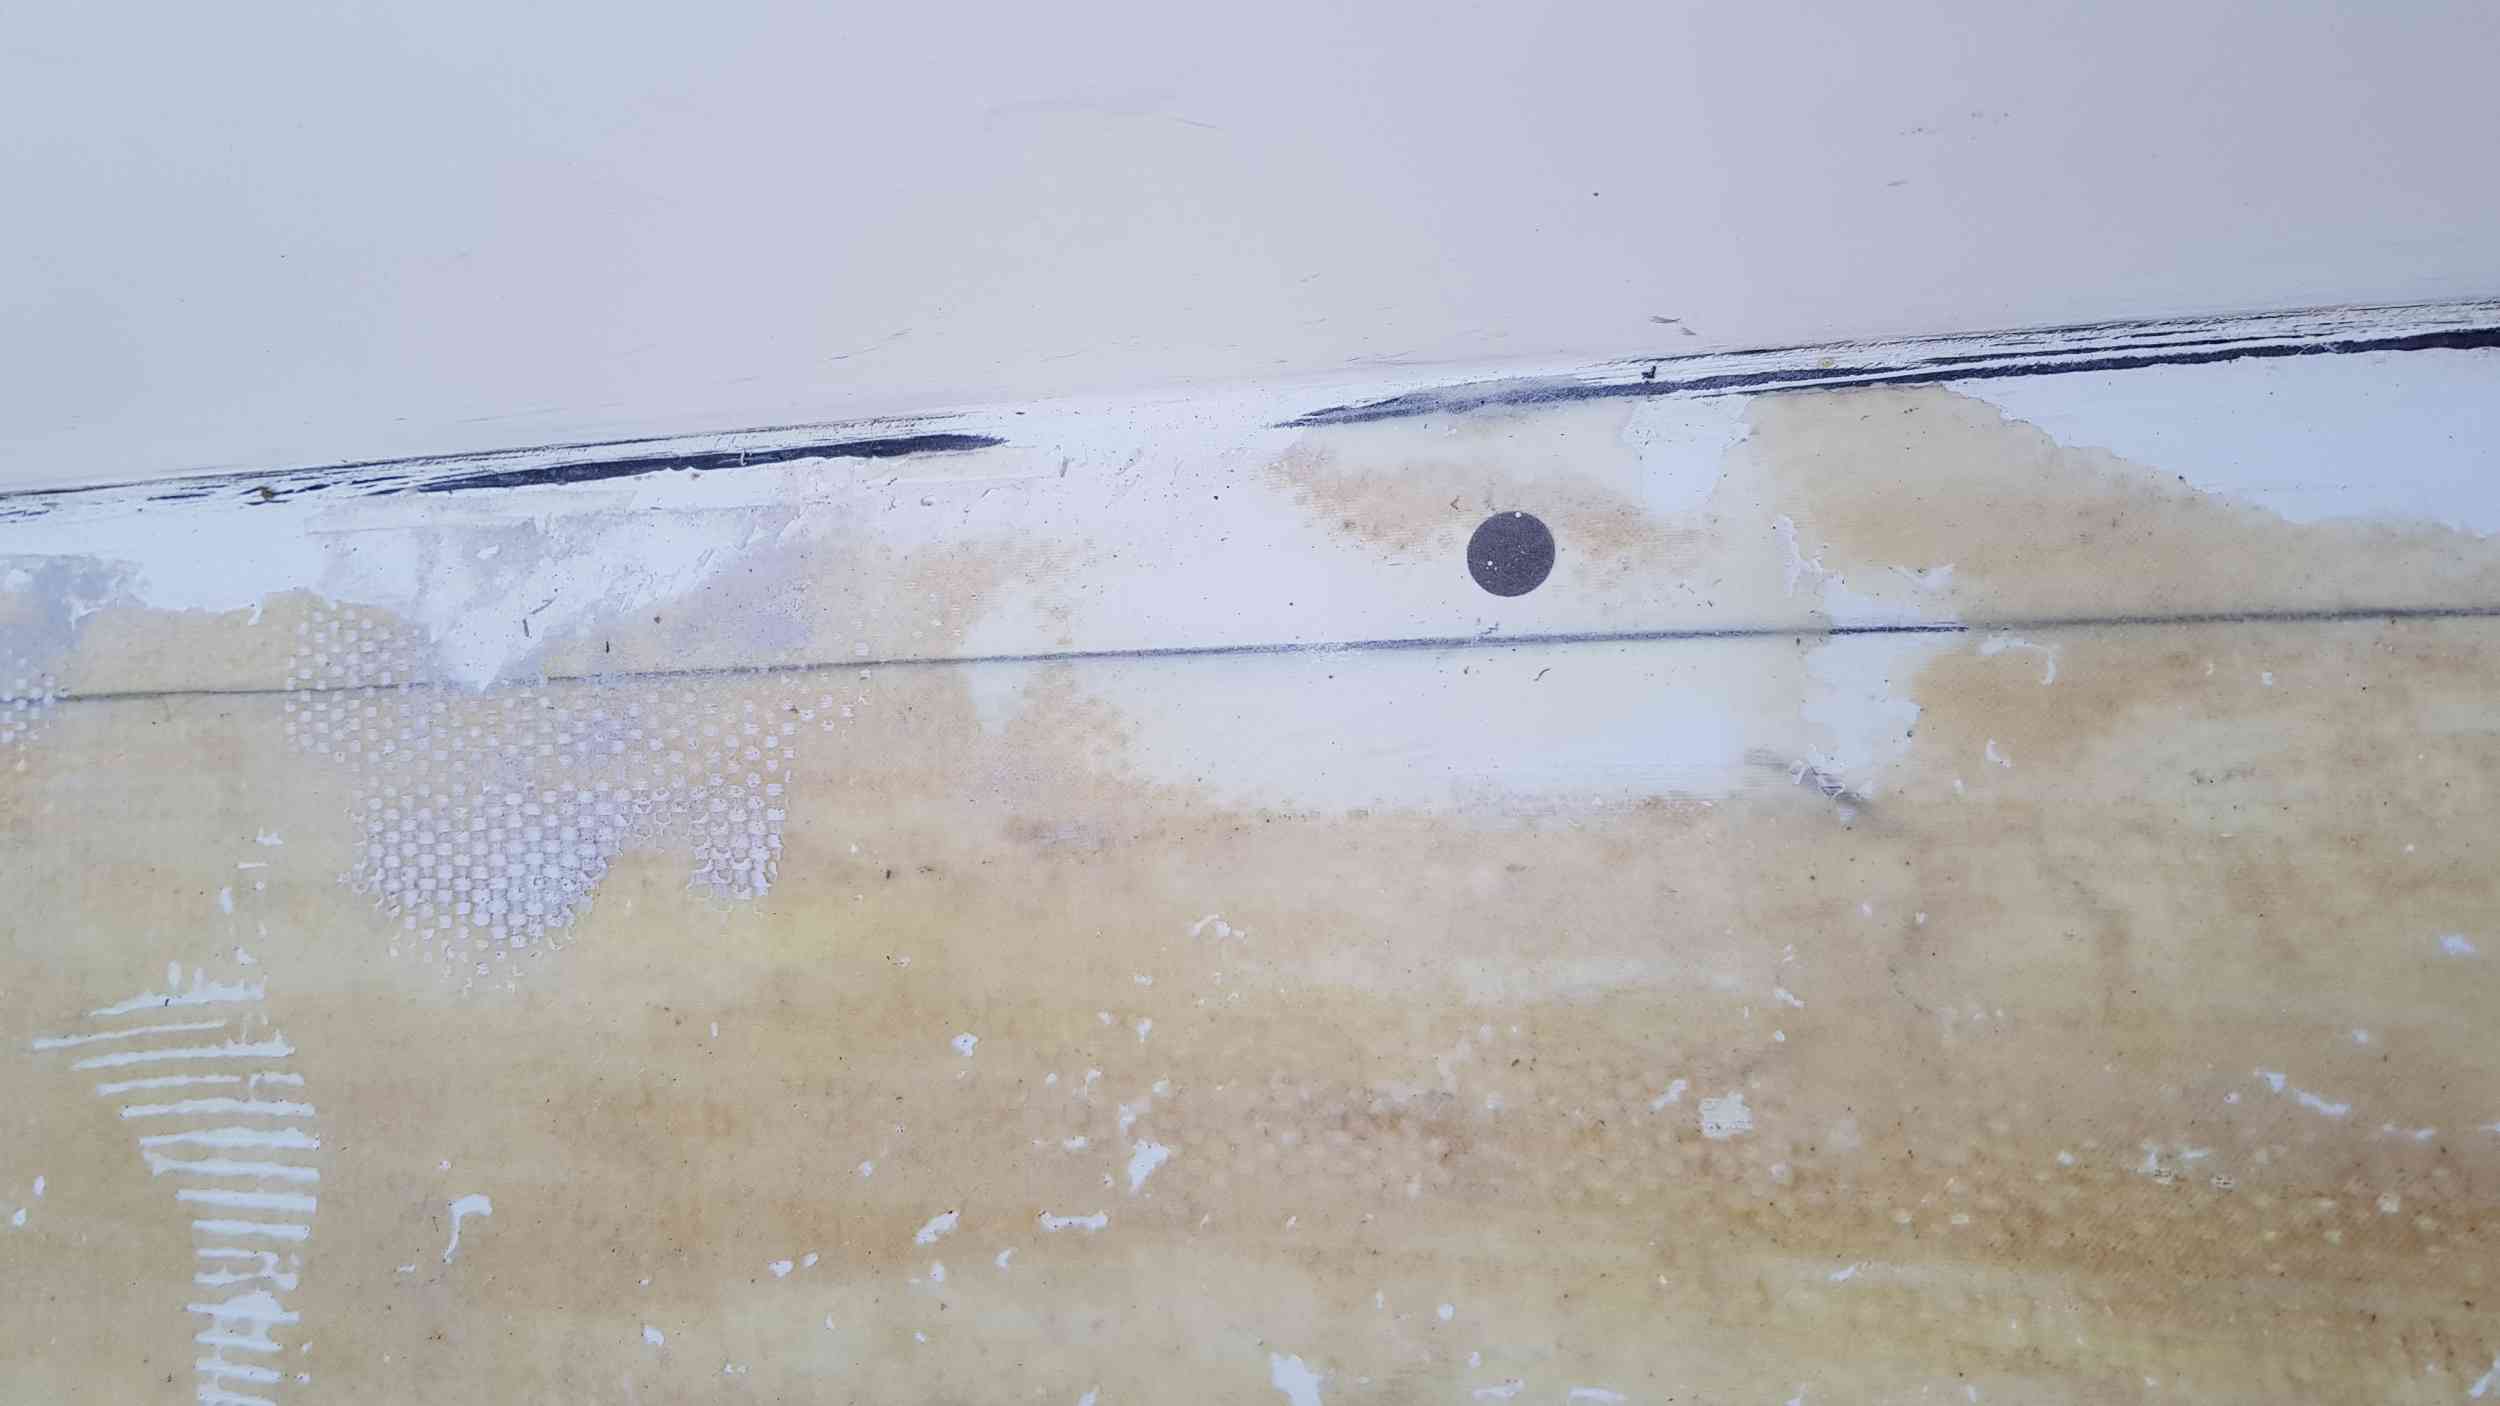
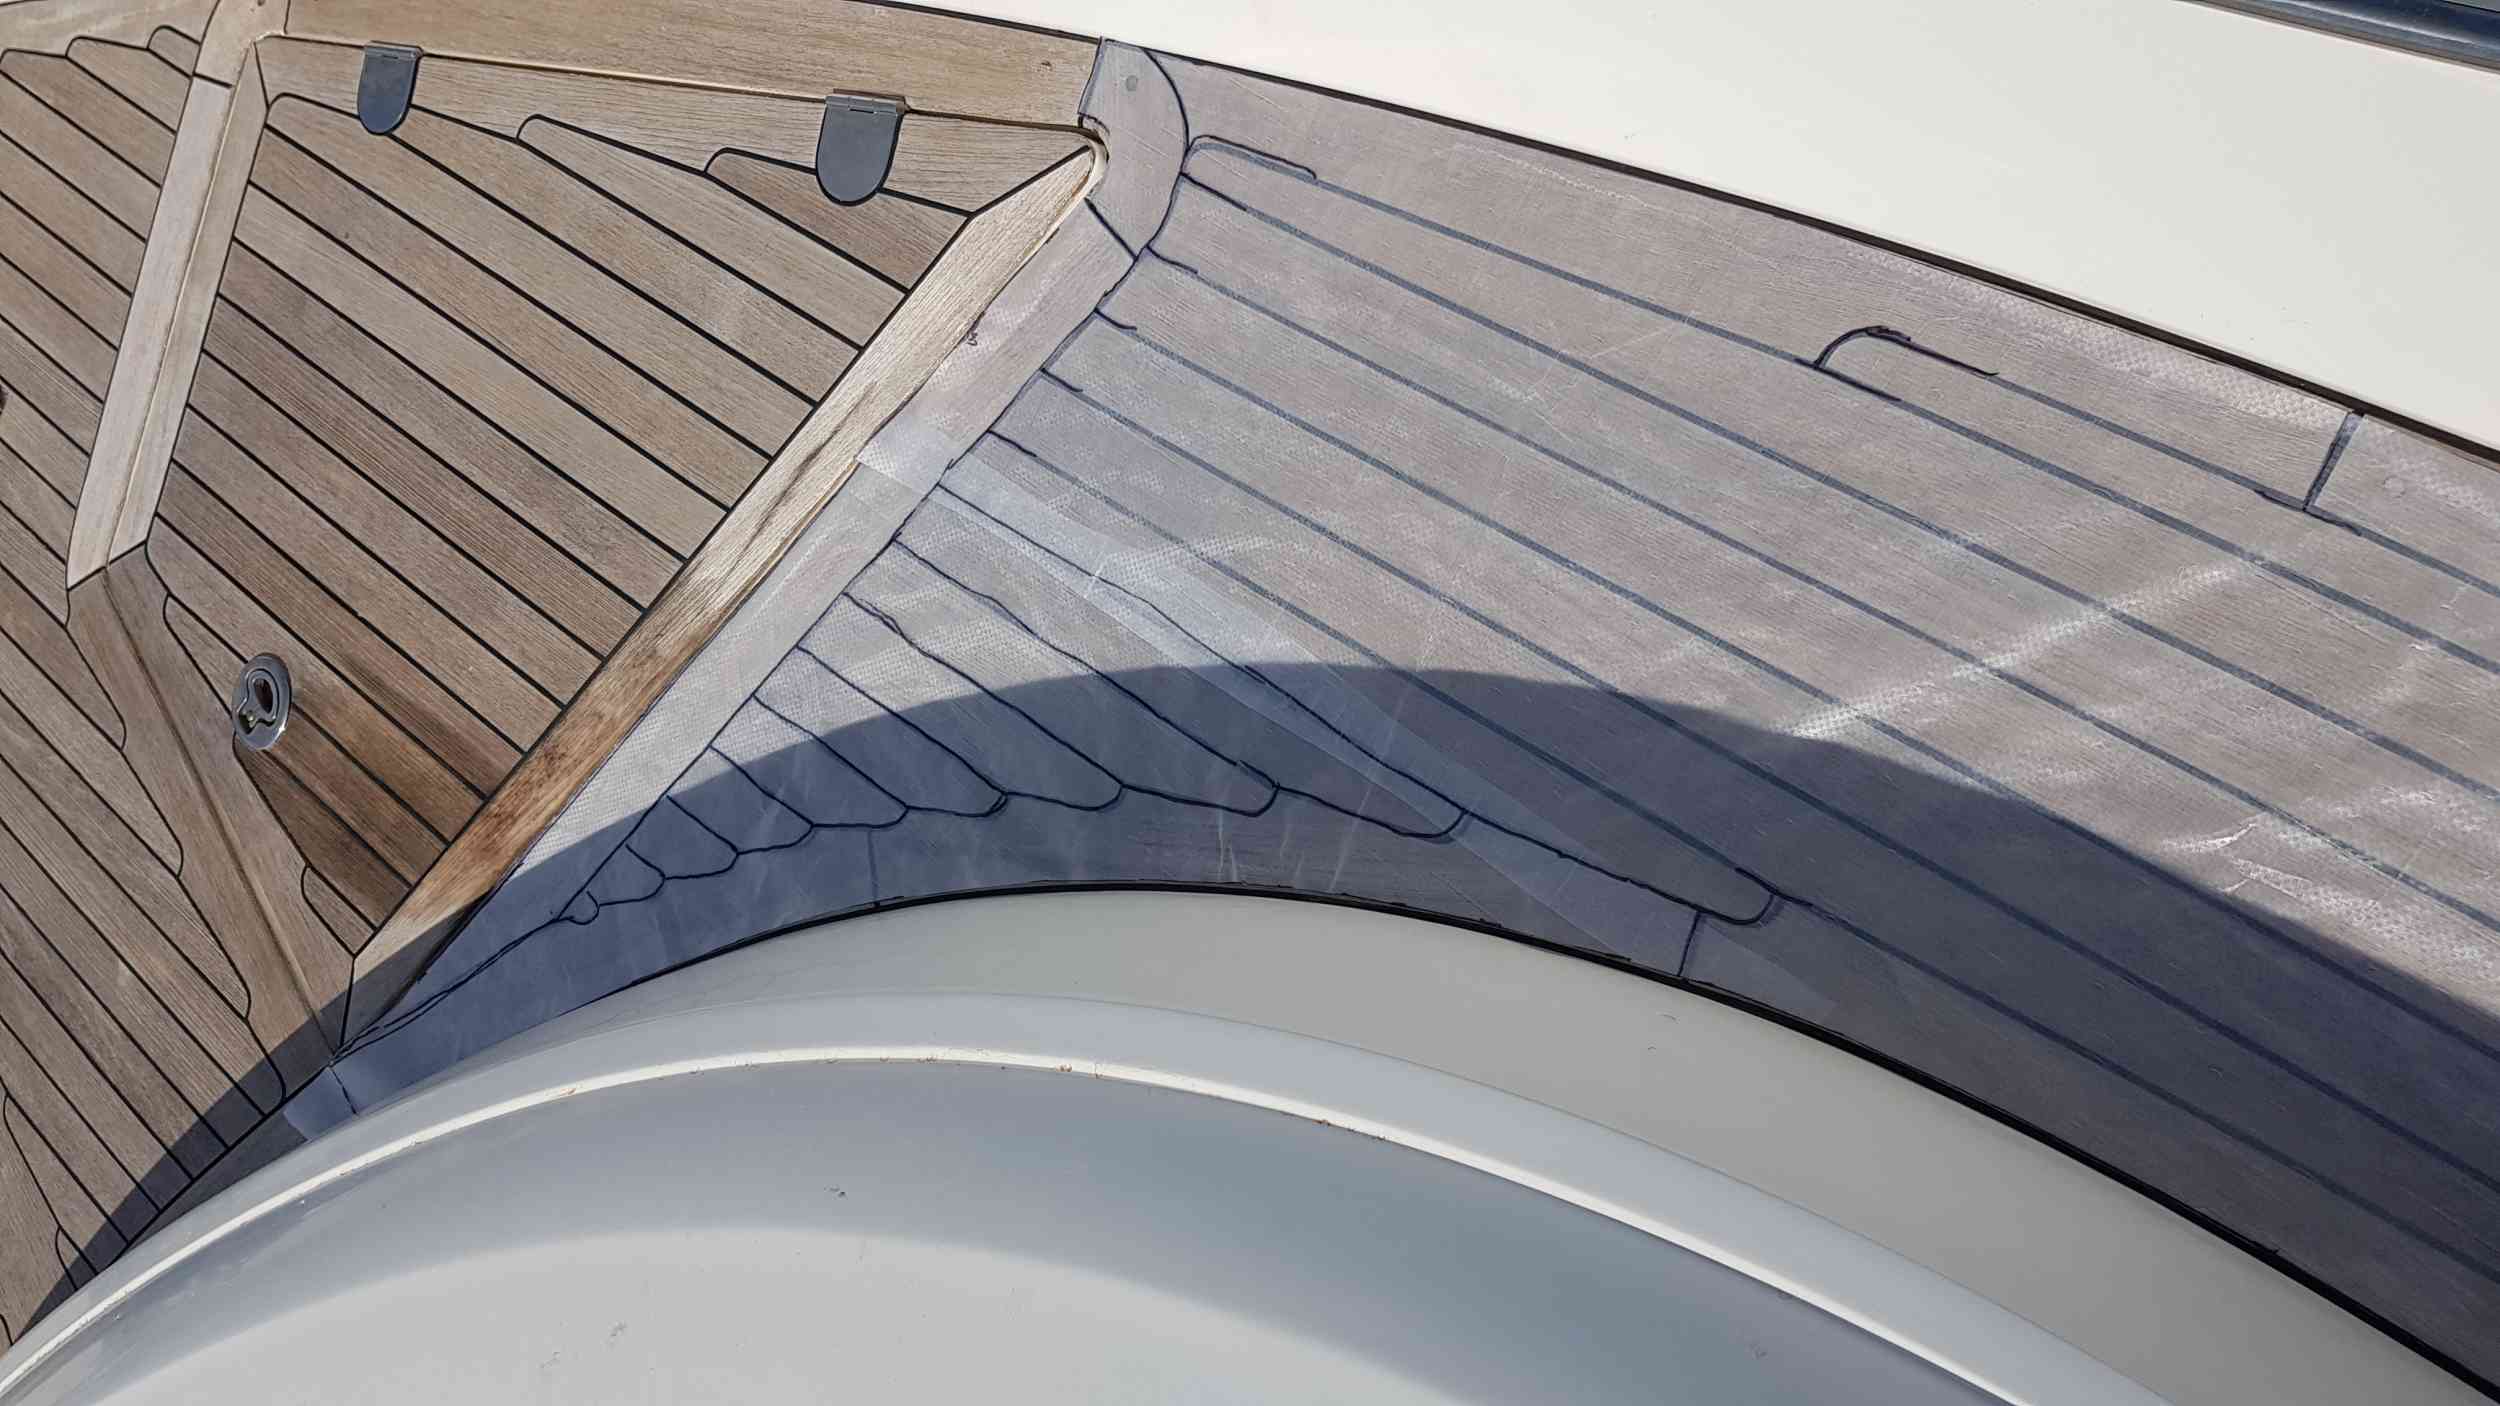
Please note that these notes are my views and experiences. Not everyone agrees with my views of real wood teak. But, for the last 15 years, I have owned two boats fitted with real wood teak. For me wood teak is just plain “dirty” and needs continual cleaning to make it look good. We spend quite a bit of time at anchor and we don’t have a water maker. So, every morning, SWMBO and I try to get up early enough to catch the early morning dew to “flunky” off the boat. It is then that you see just how dirty the real wood teak gets. Simply stepping of recently cleaned teak onto a GRP coach roof will leave dirty footprints. This dirt is then transferred around the rest of the boat. The only way to clean it is with the two part chemicals. Some yachties will tell you that all you need to do is throw a bucket of sea water over it but that is total rubbish. Wood teak is just plain dirty and slopping some sea water over it does absolutely nothing. Also, over a period of 10 to 12 years, wood teak requires replacing anyway. Princess yachts start with 6mm thick teak decks. After 12 years the teak ends up less than 3mm thick.
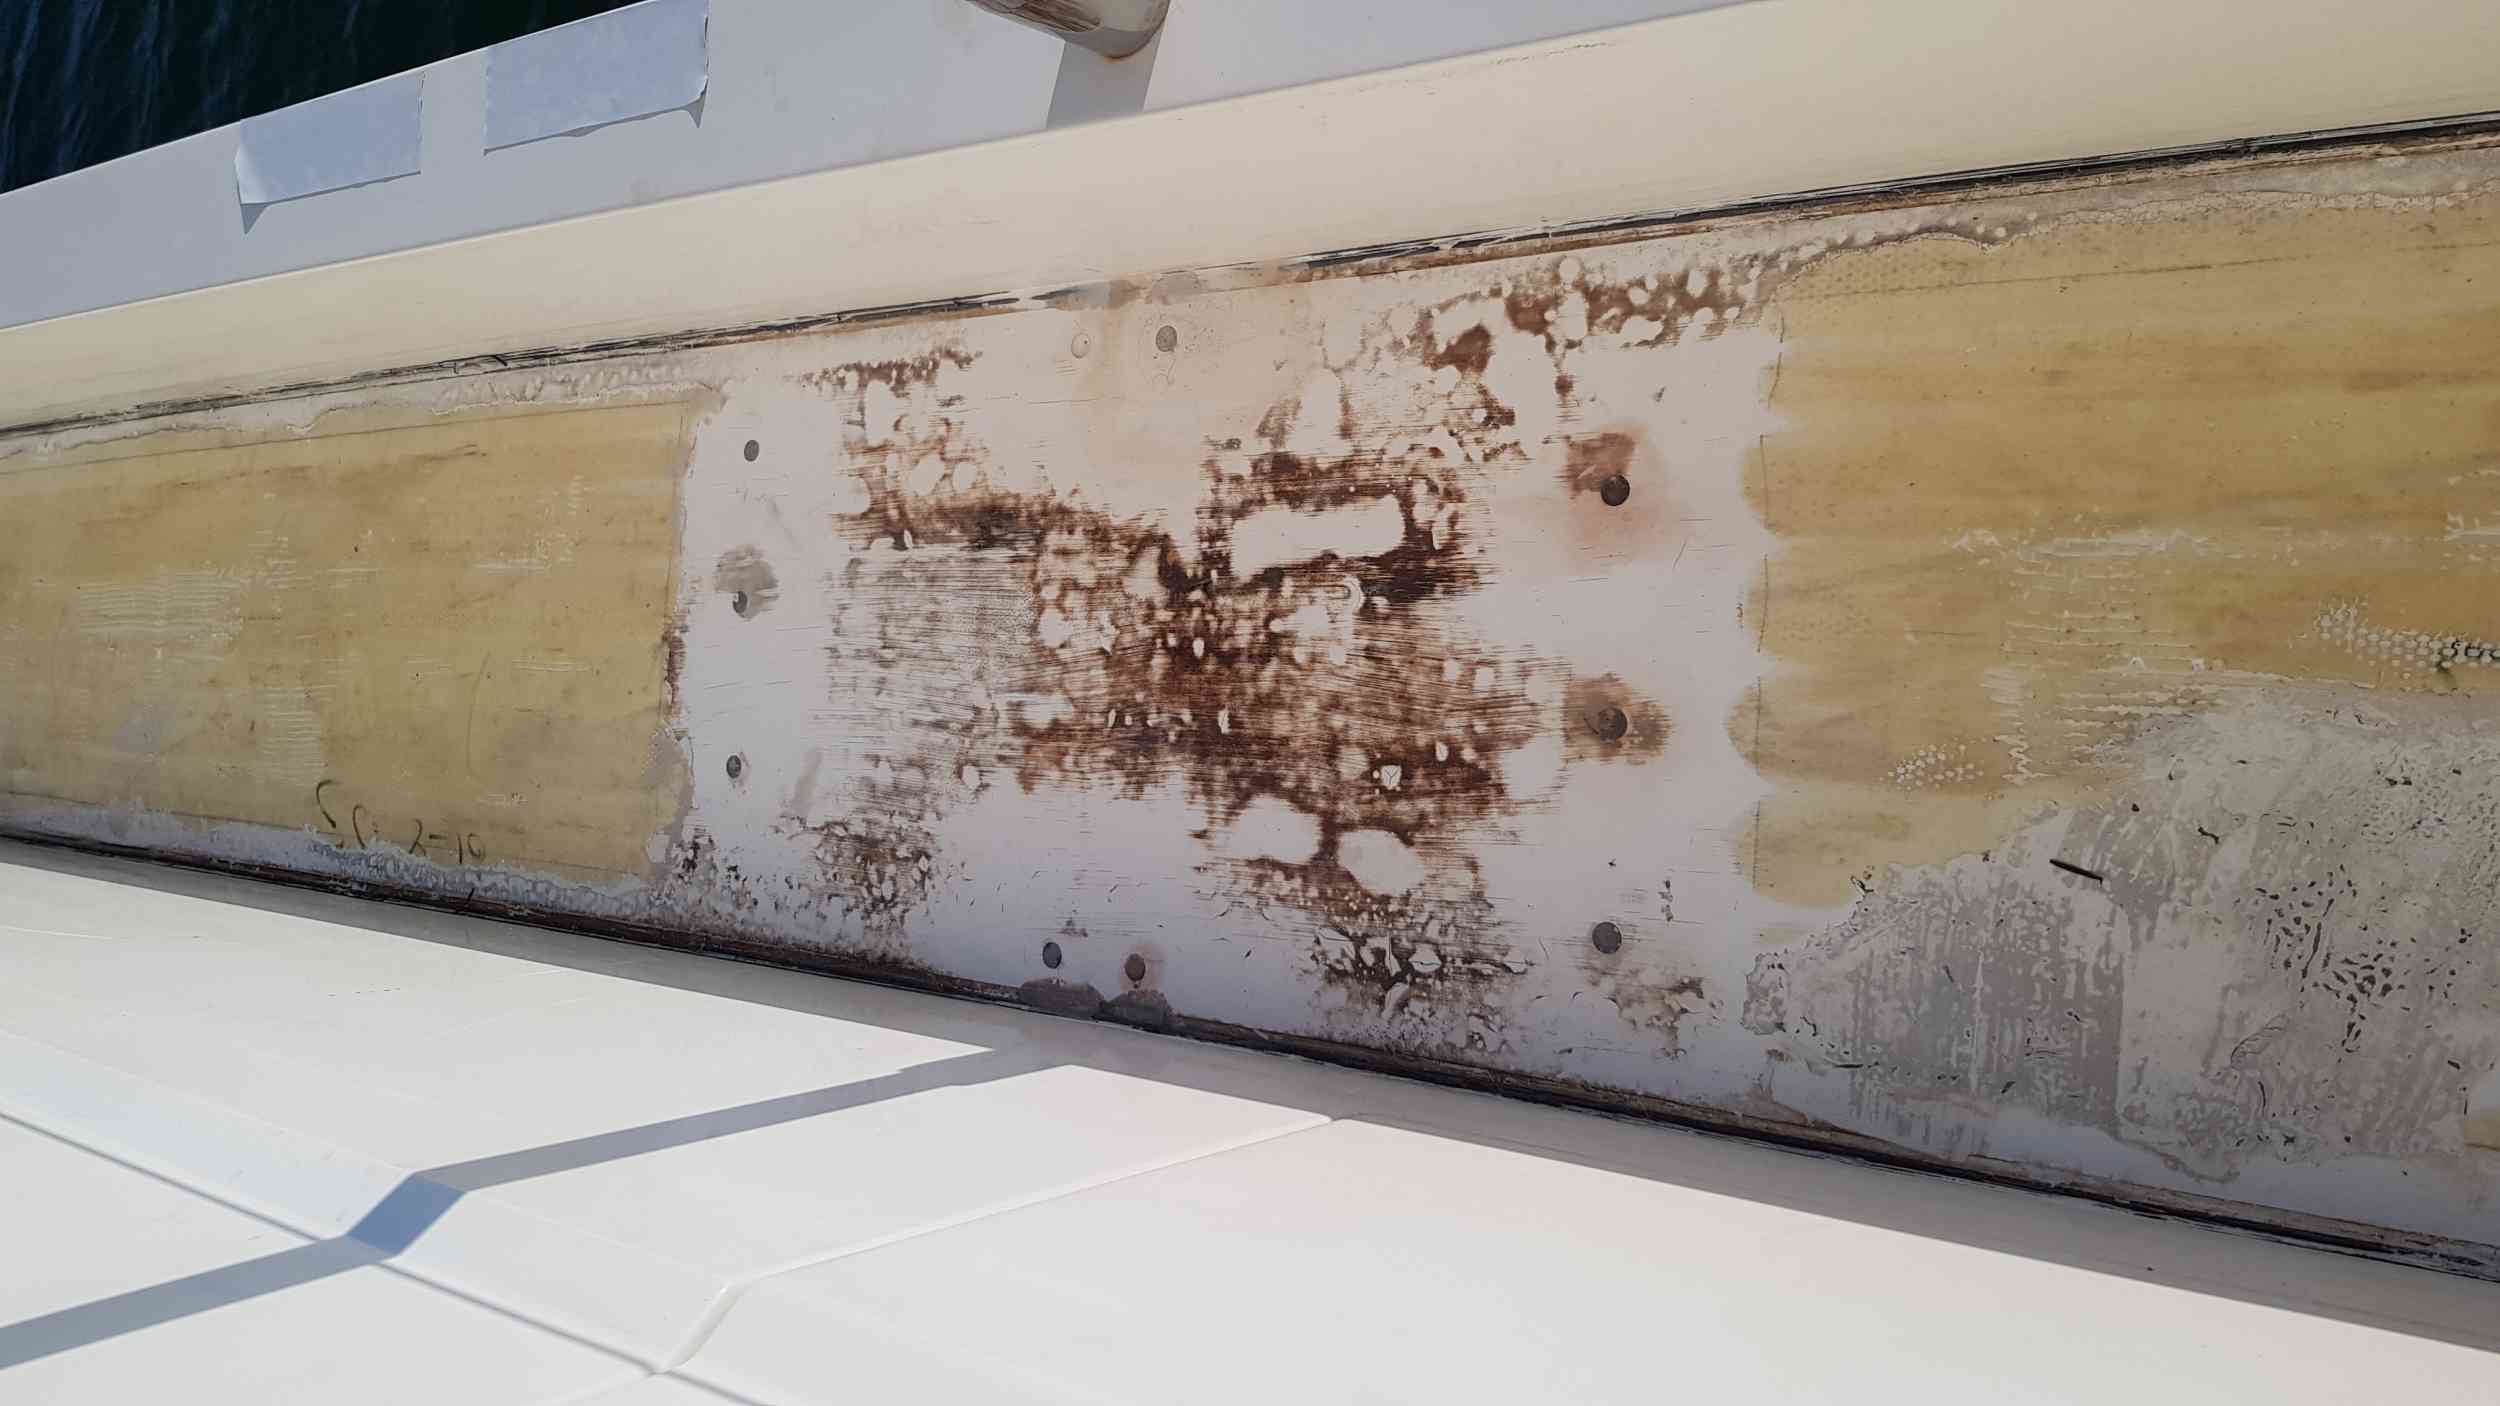
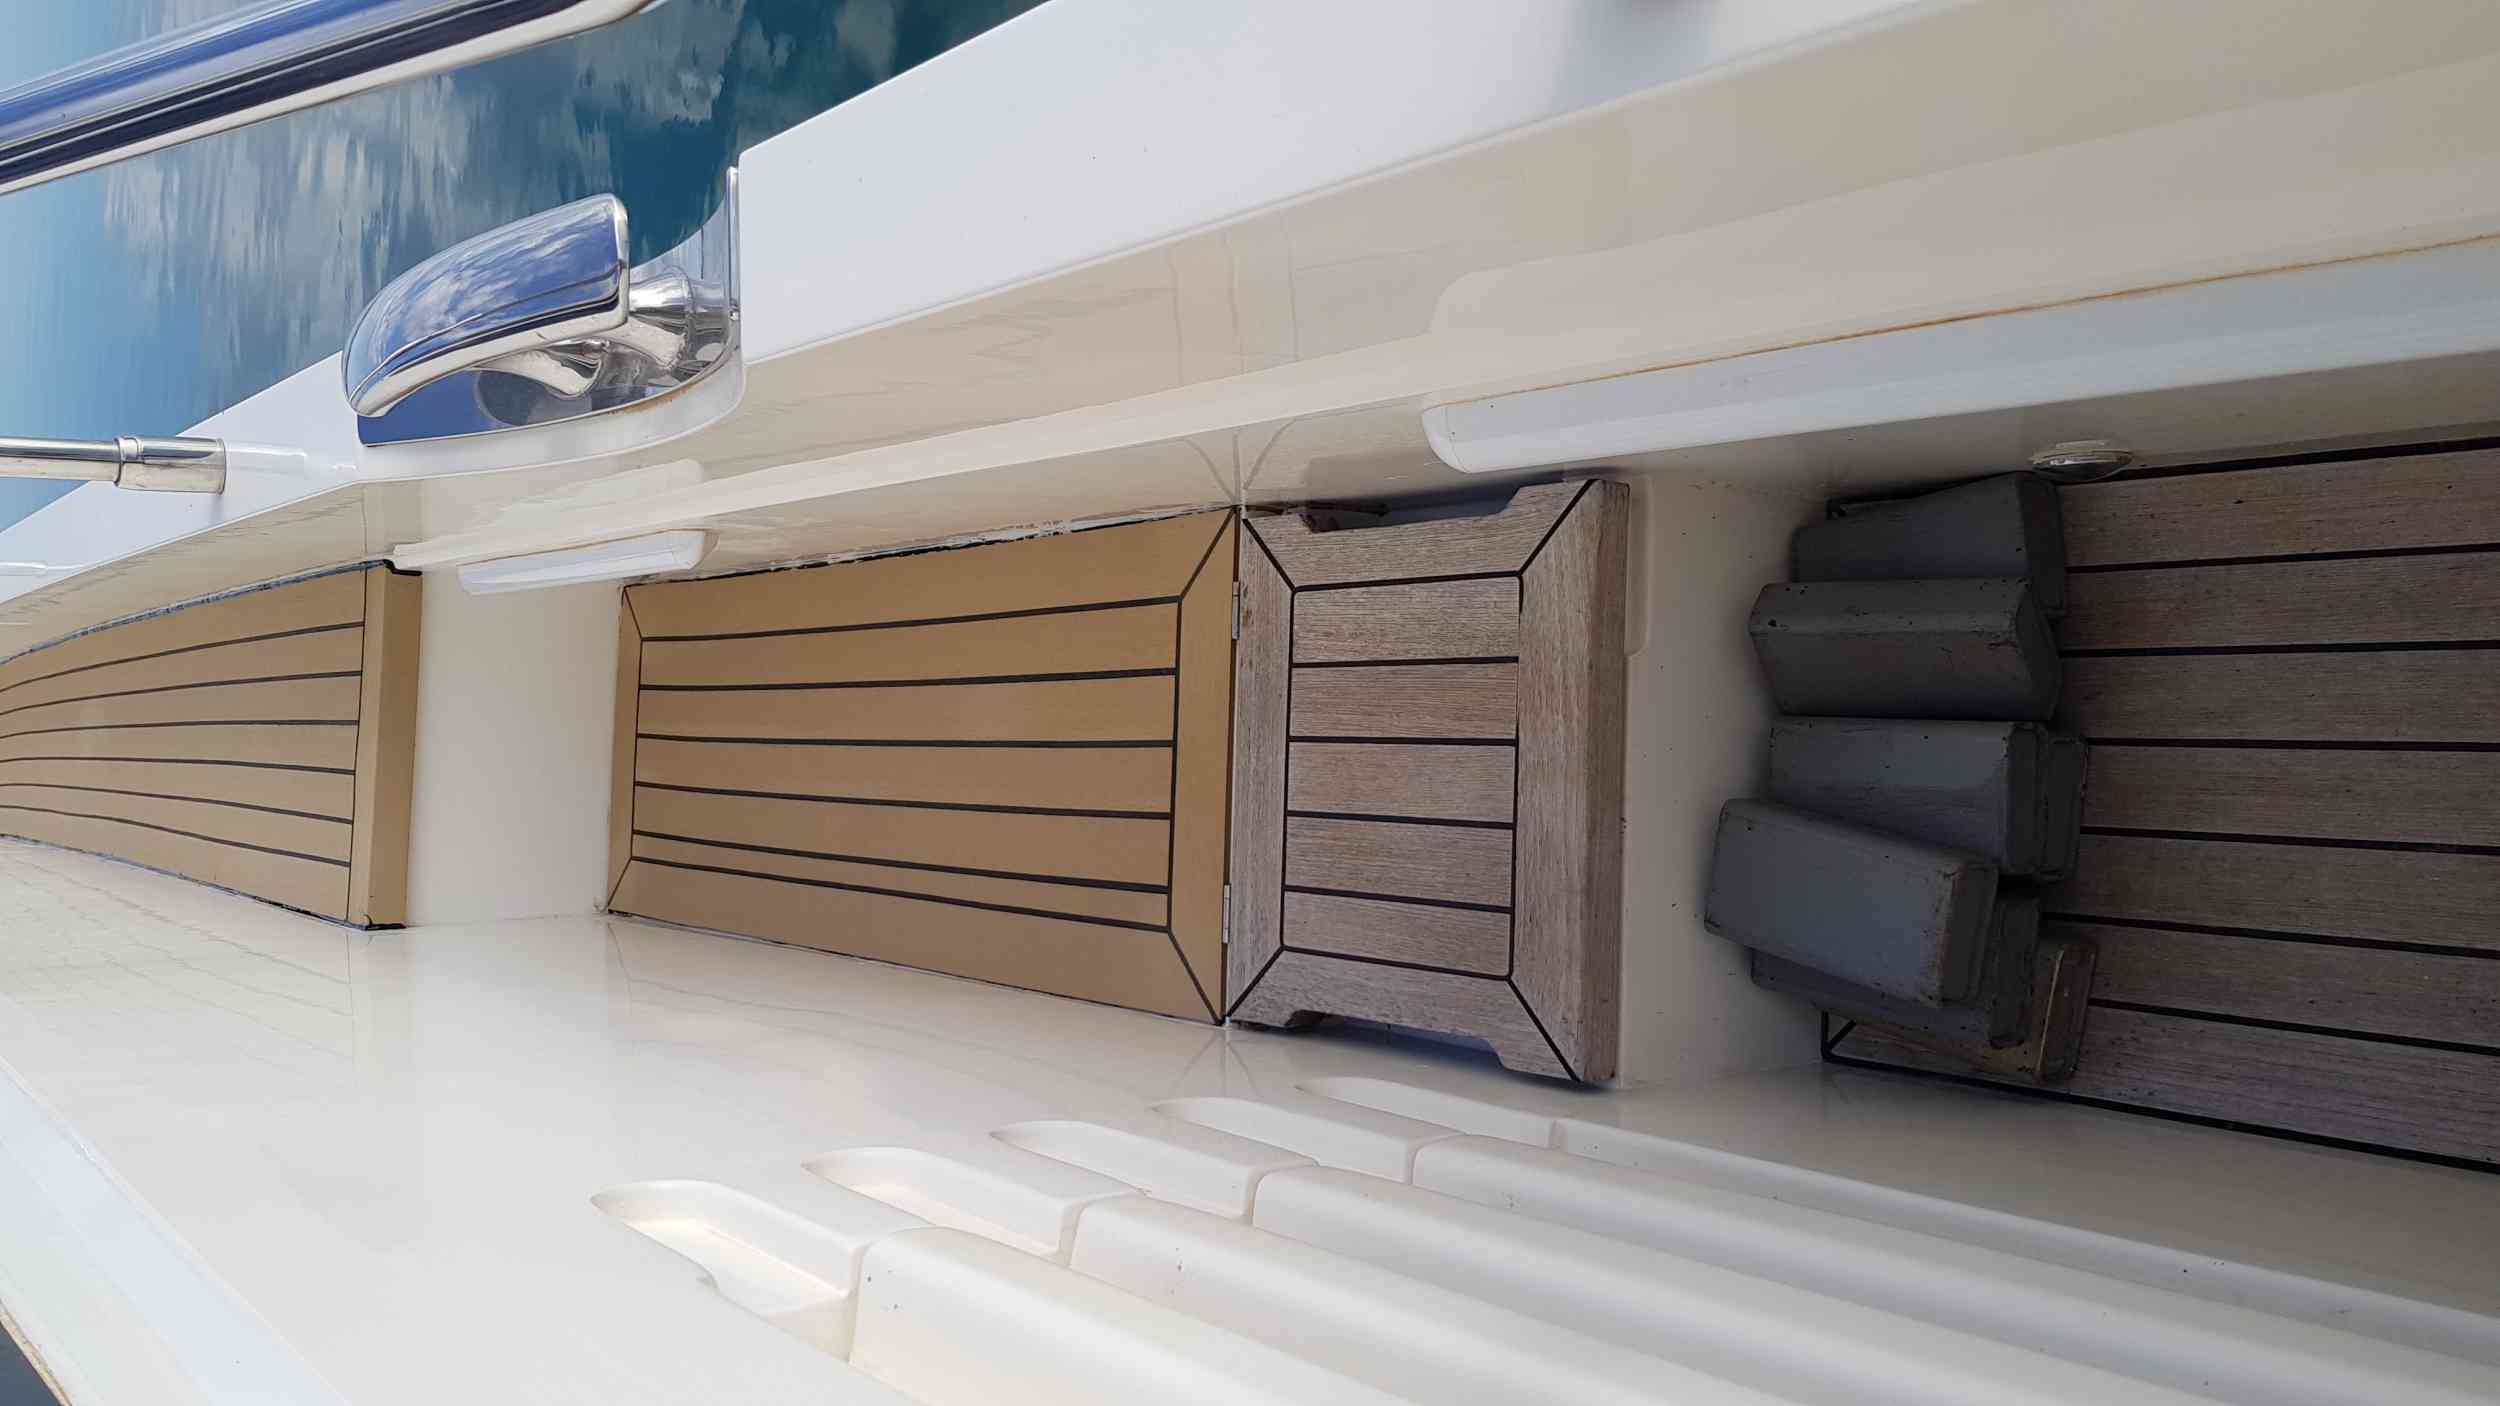
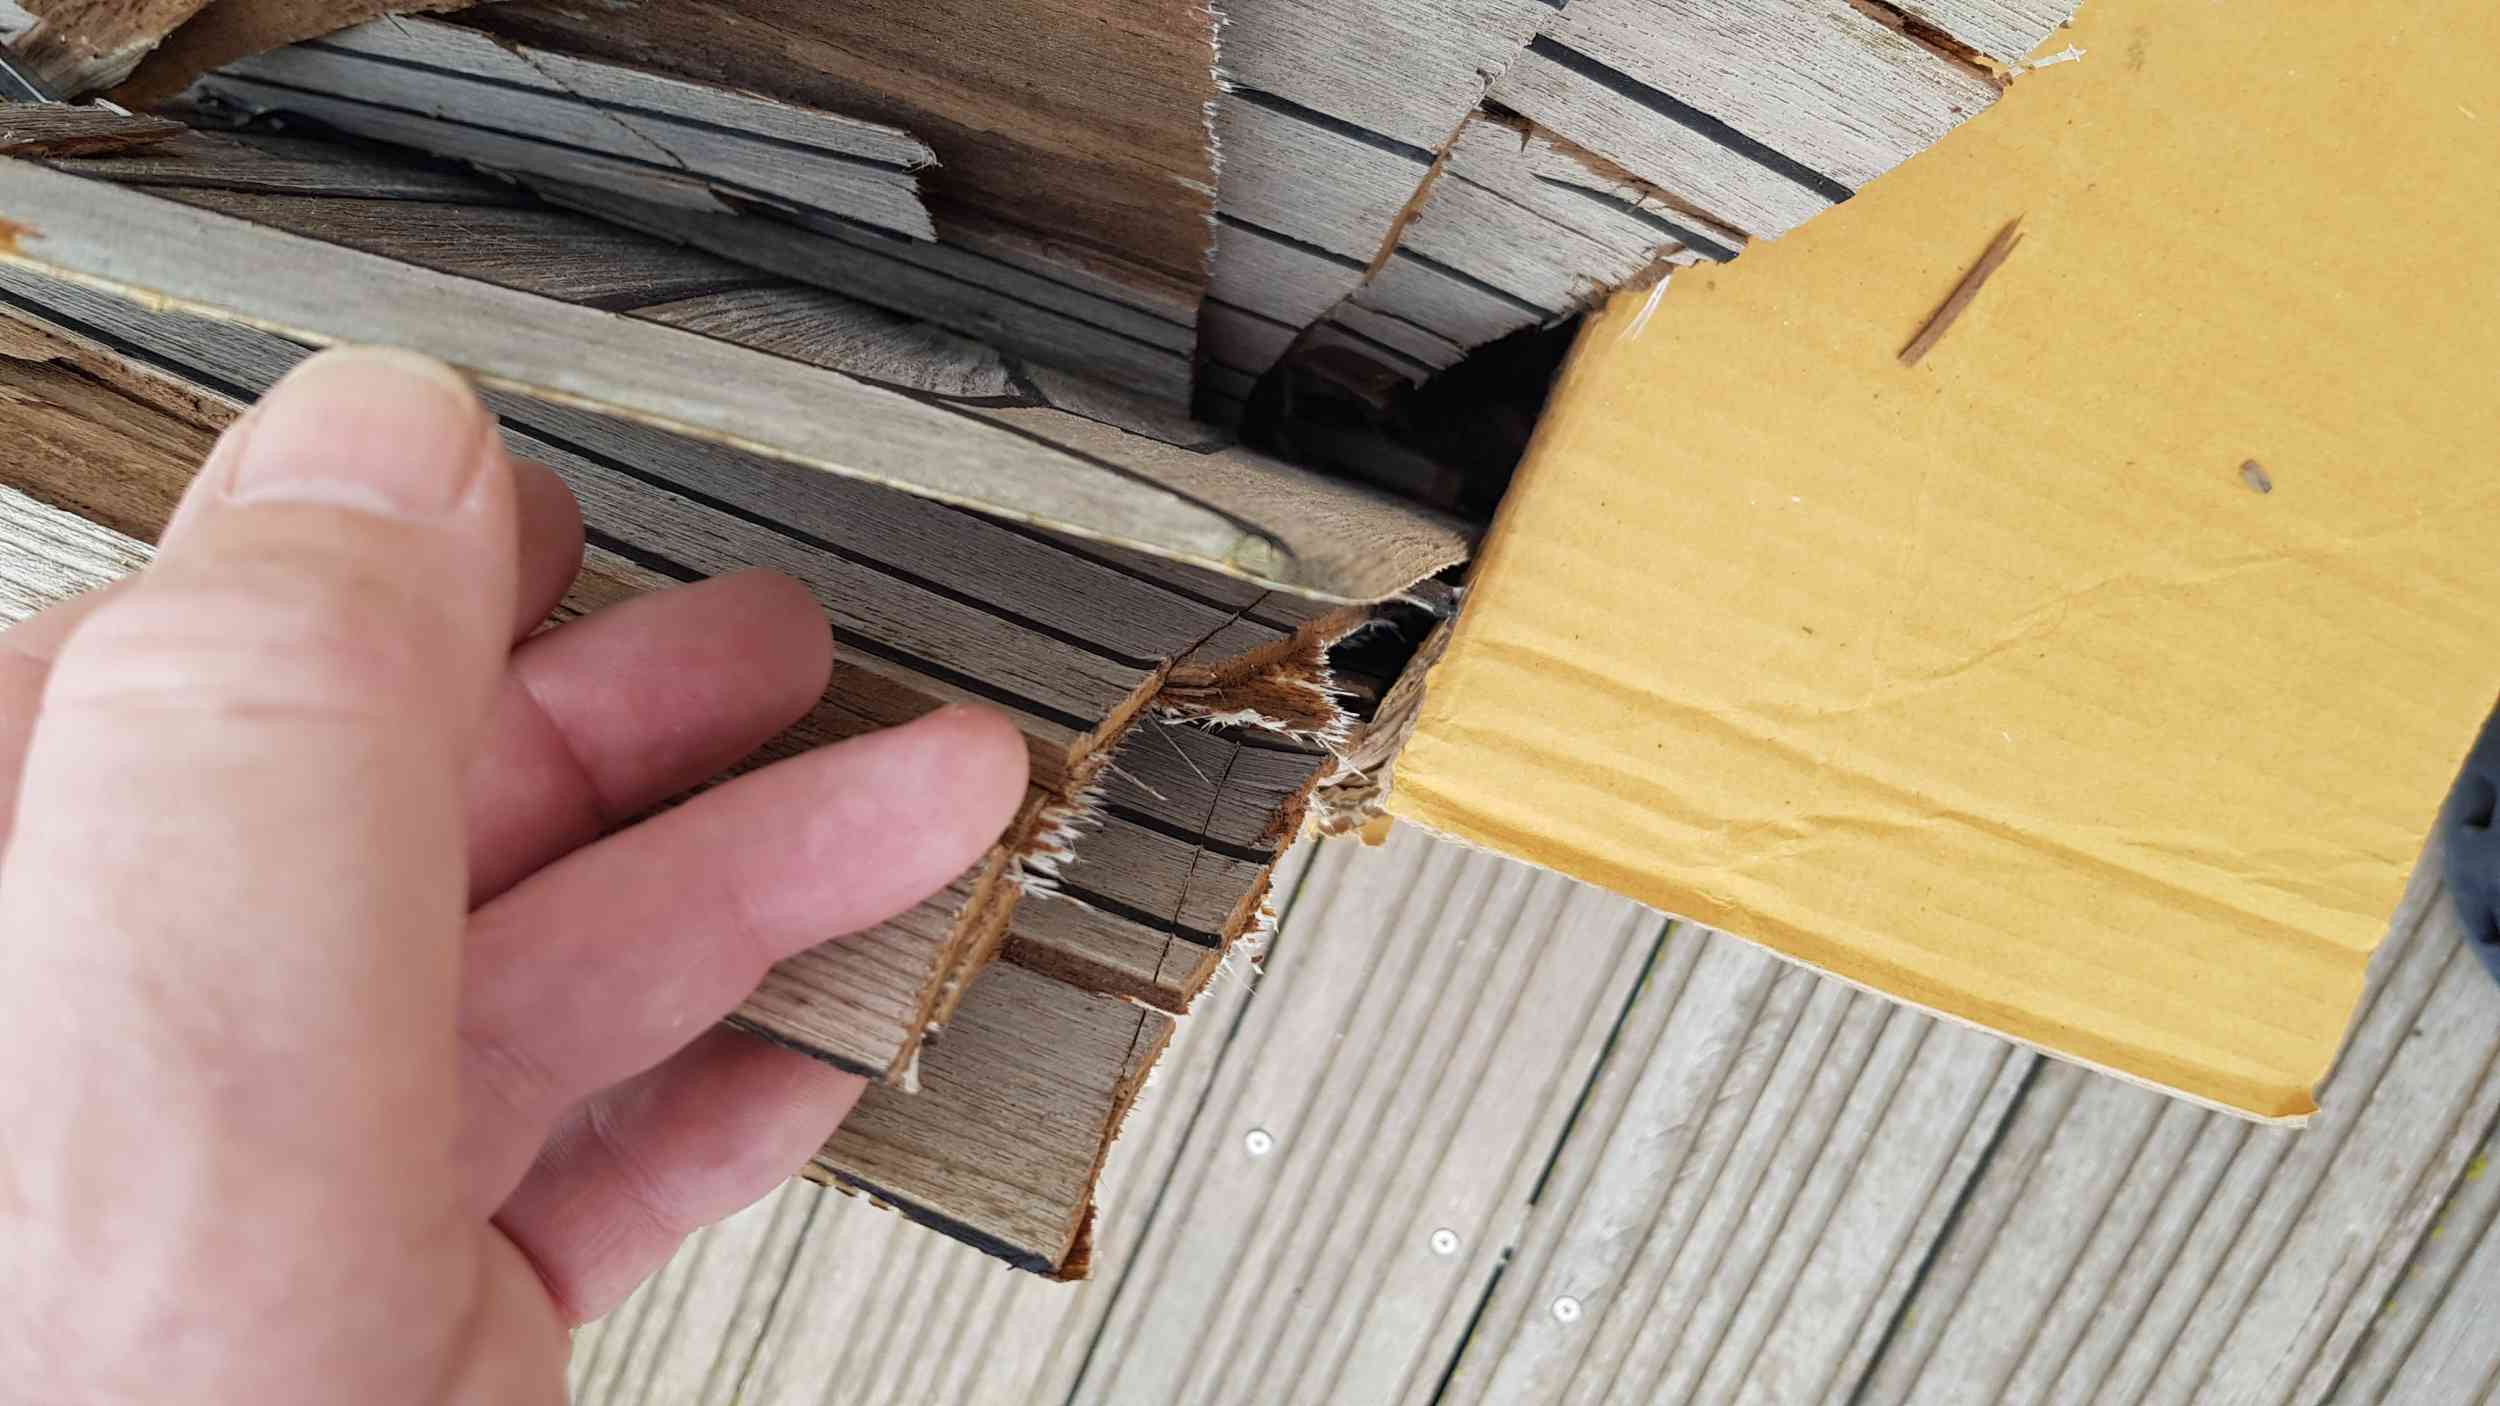
Here is a pic showing the thickness of our old wood teak. You can see just how thin it is.
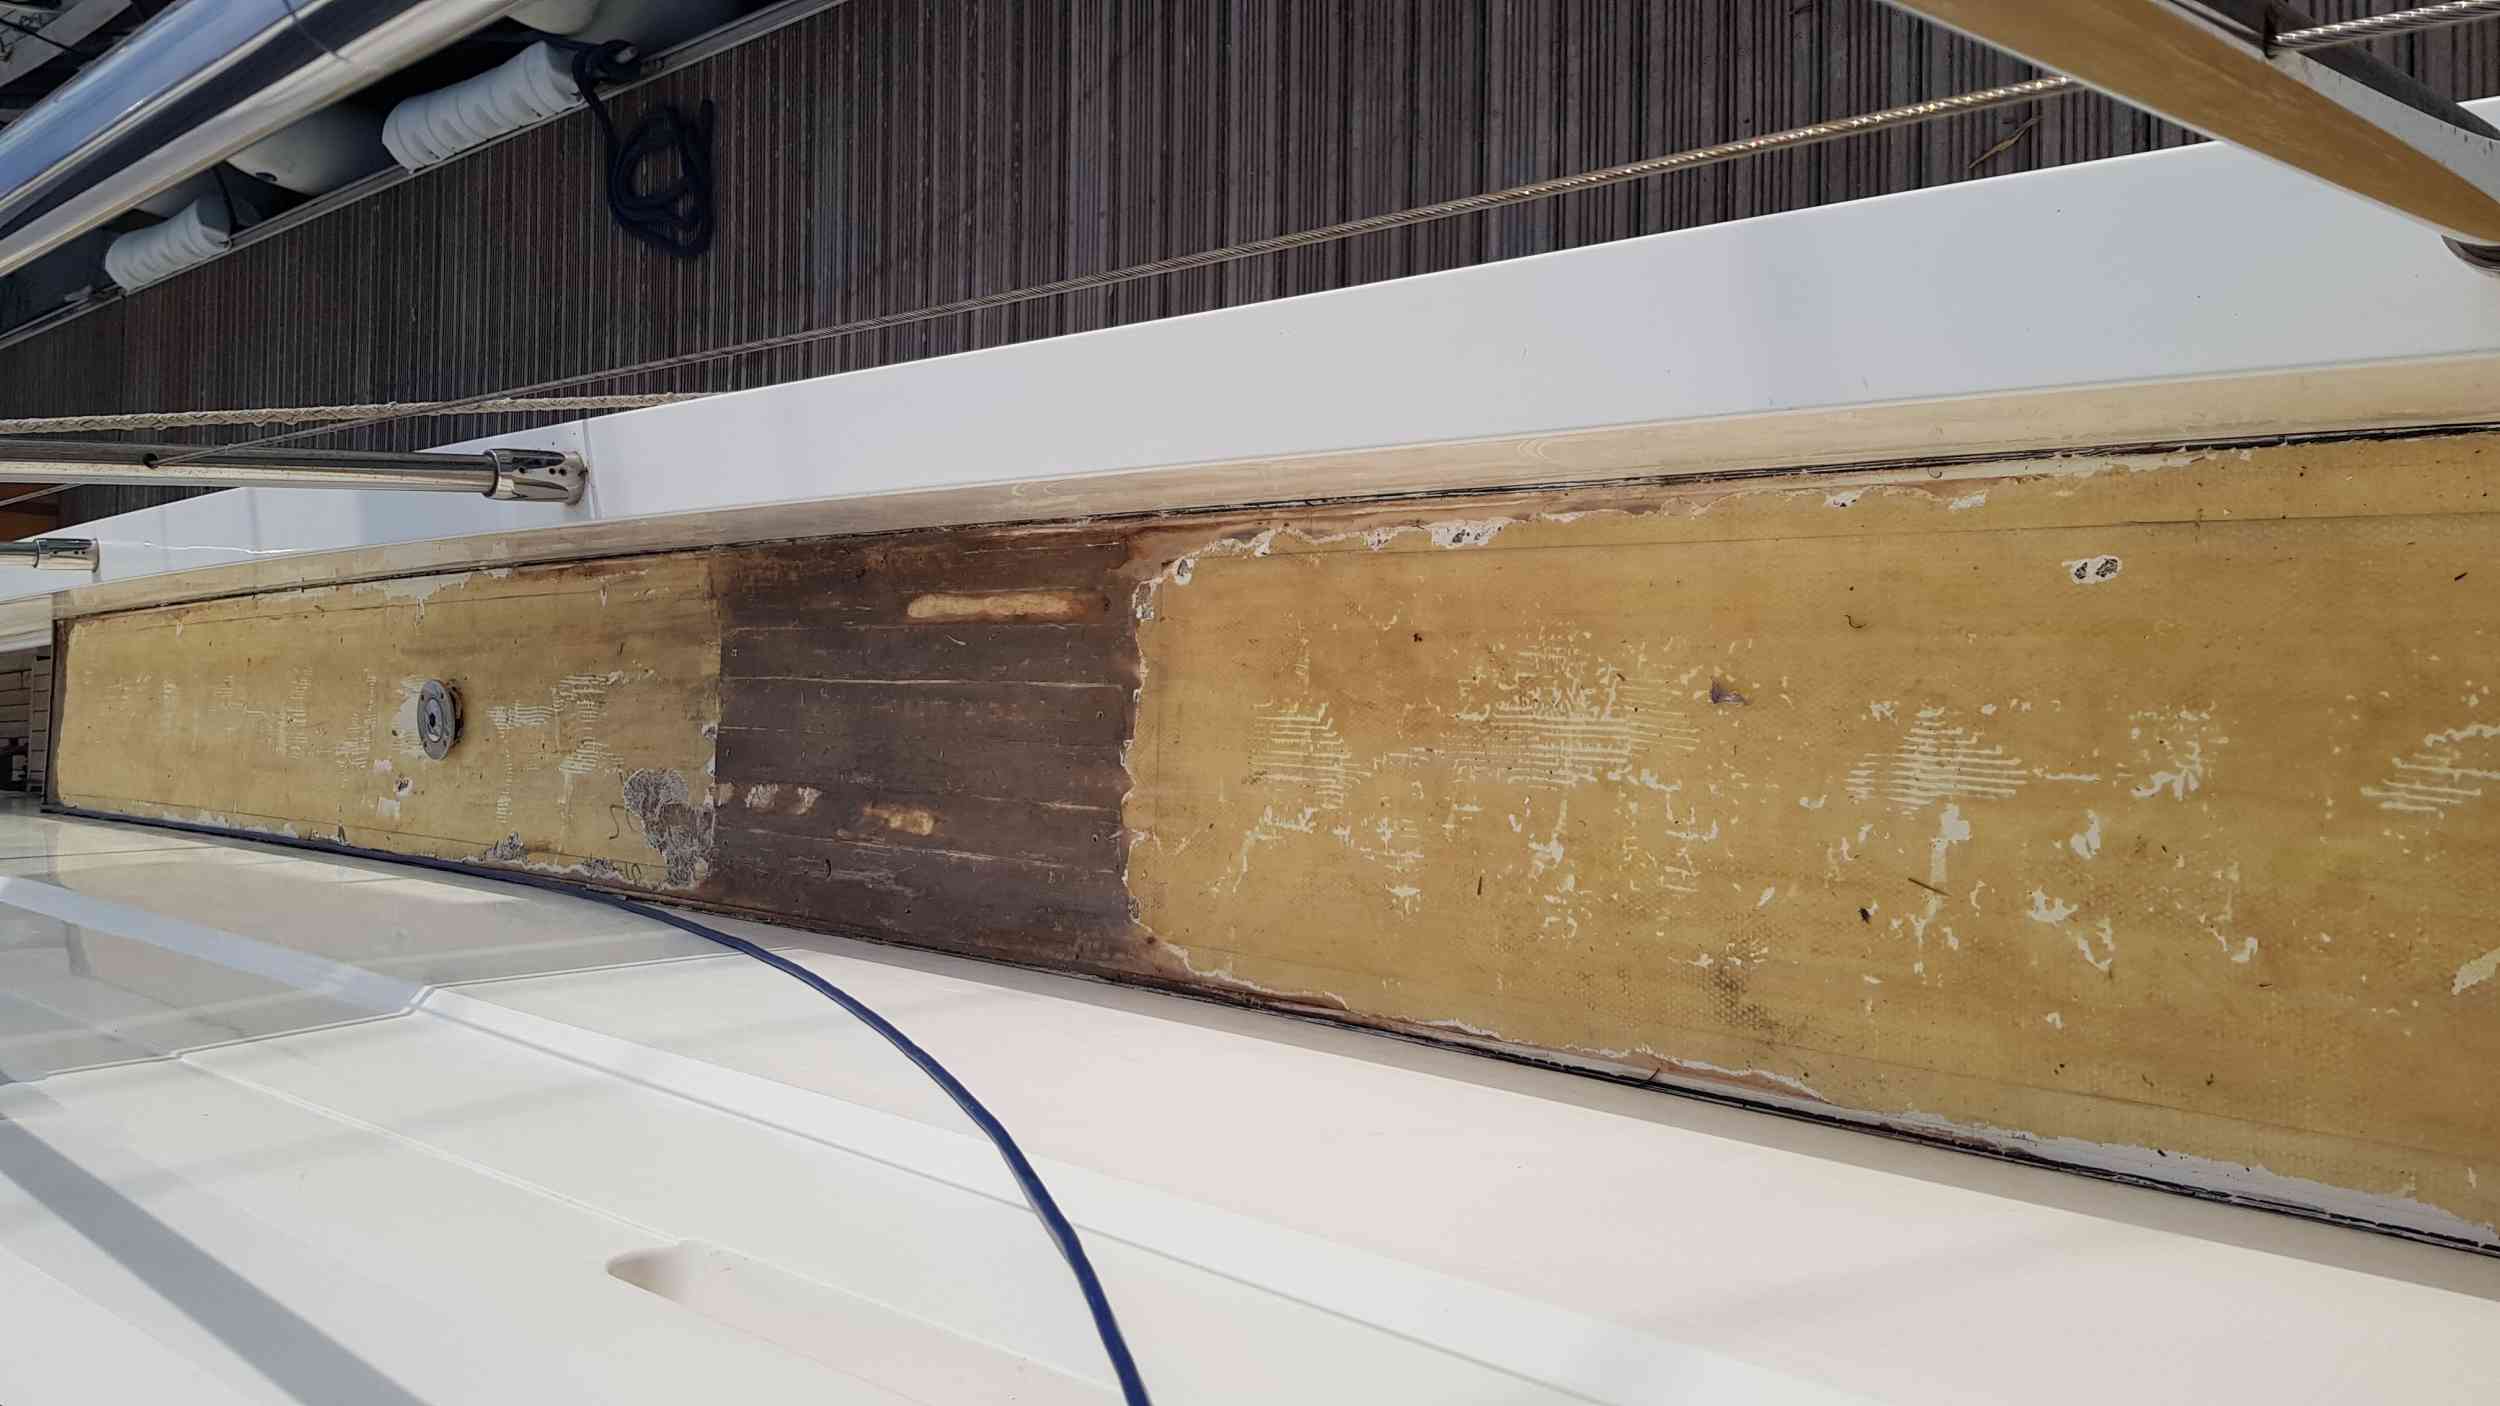
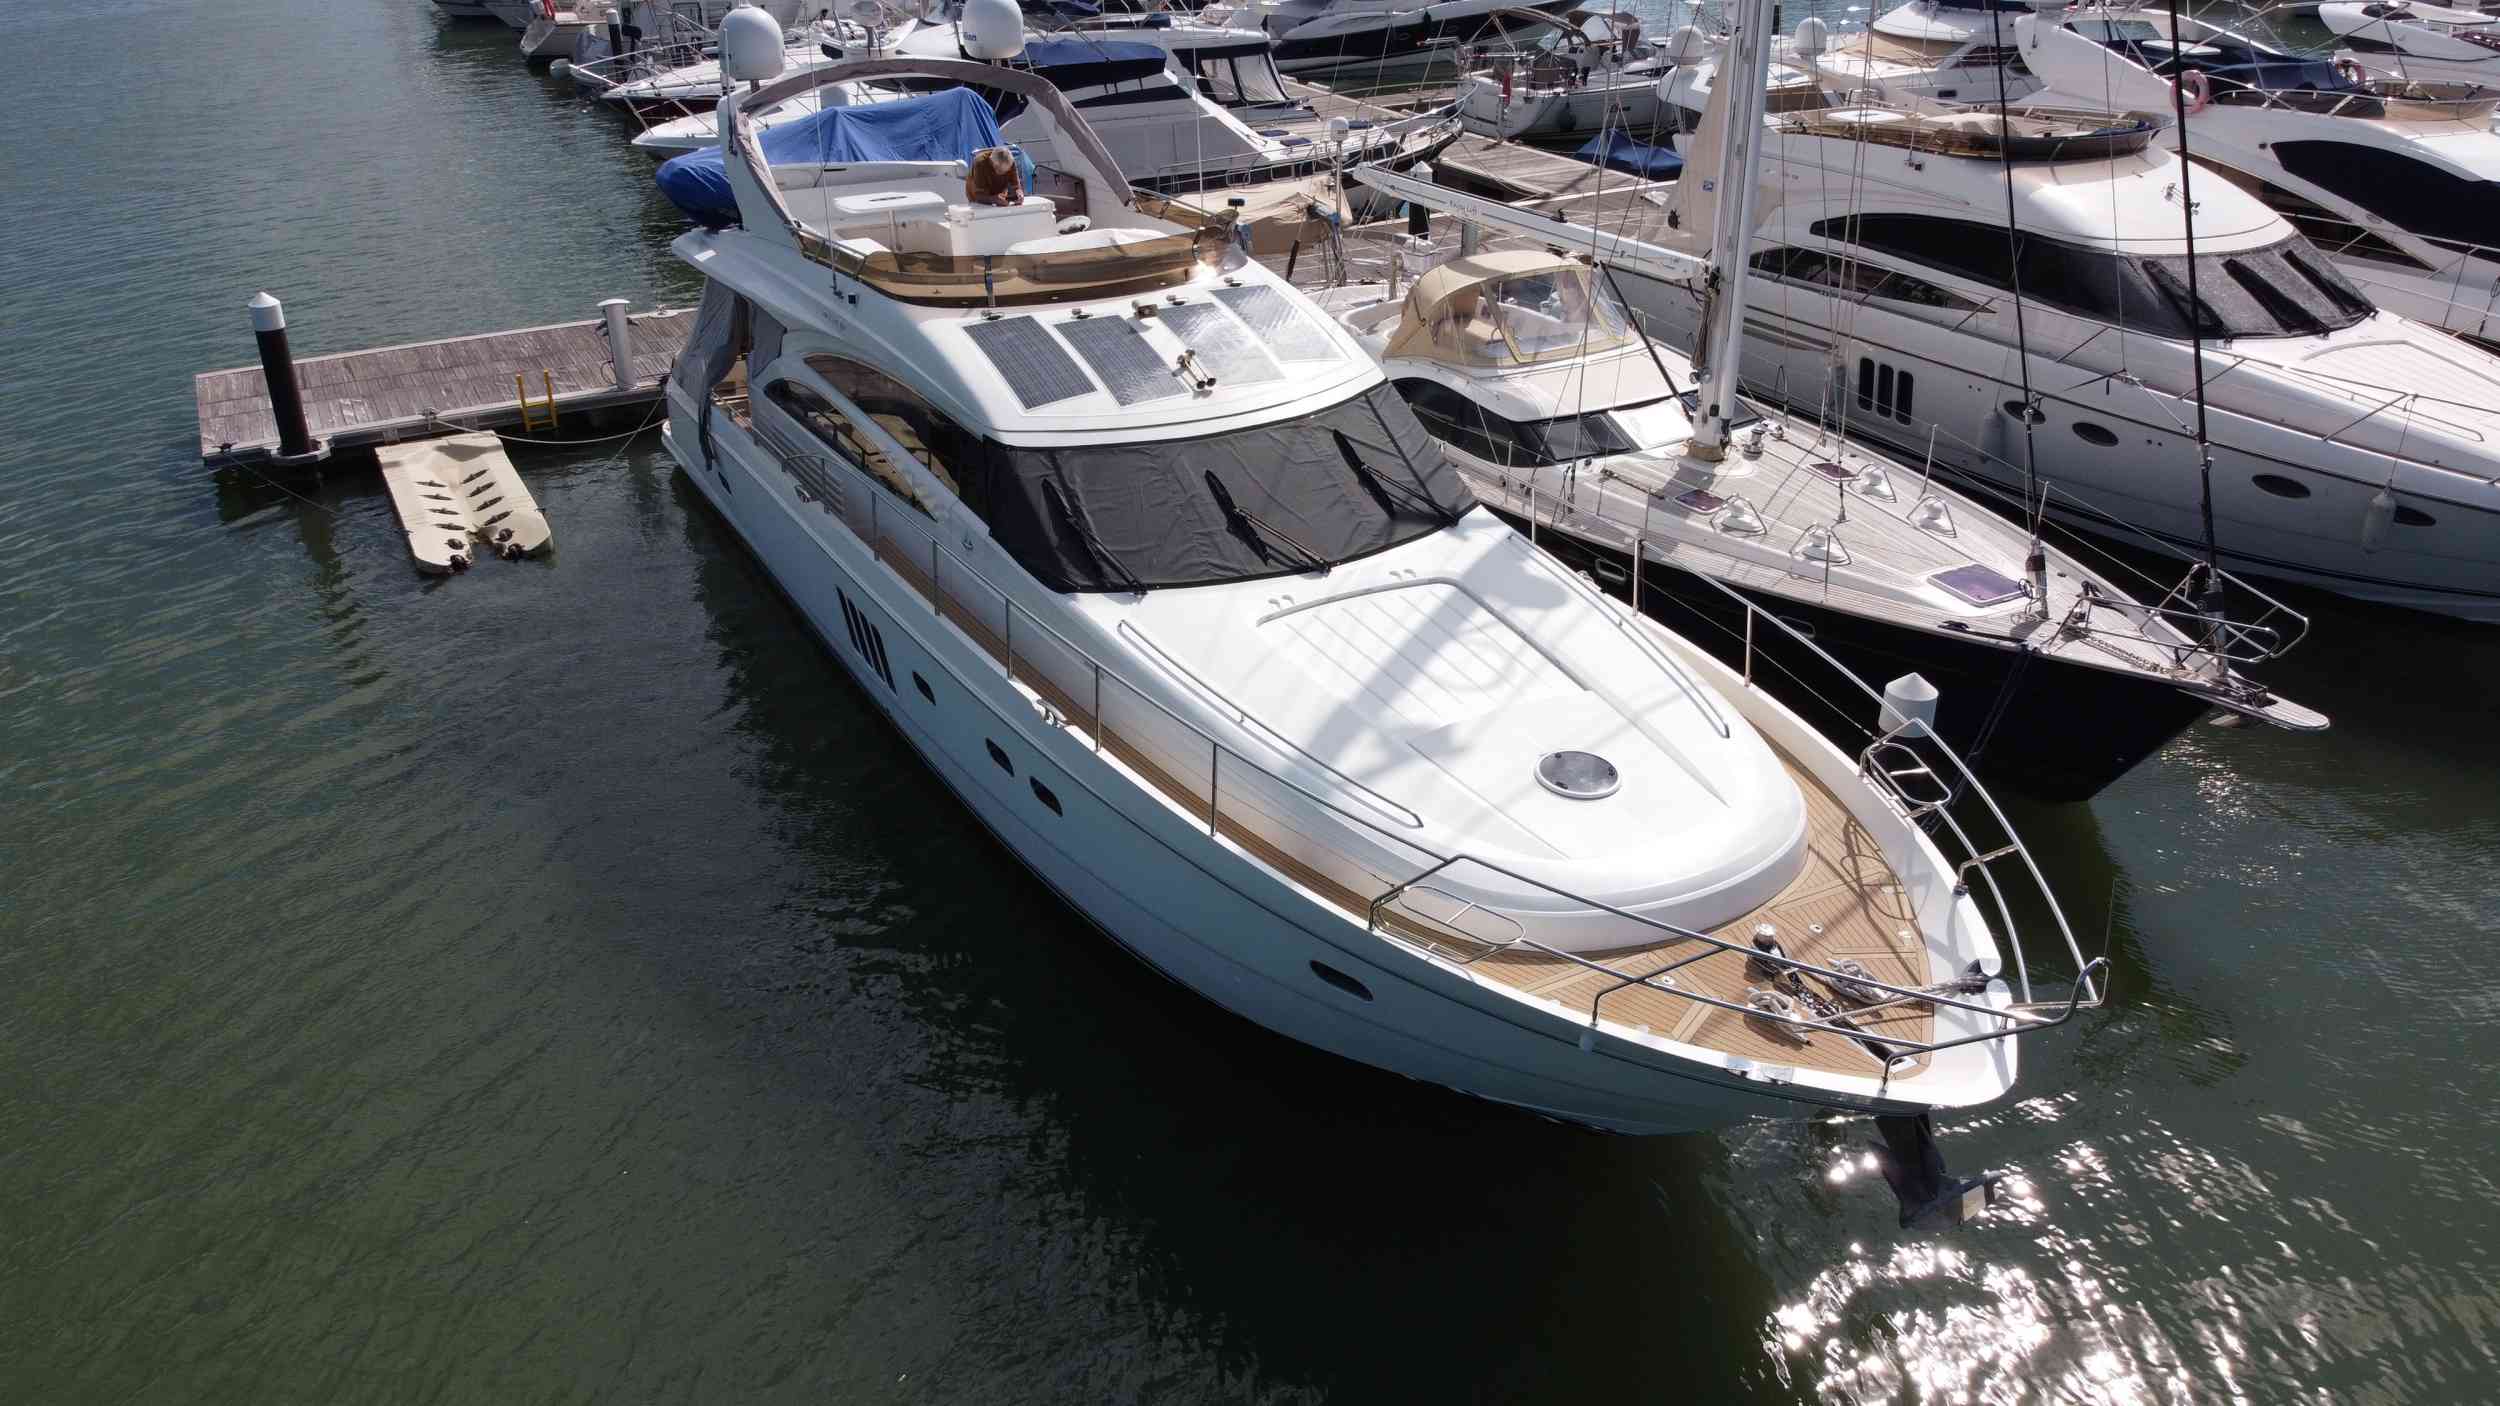
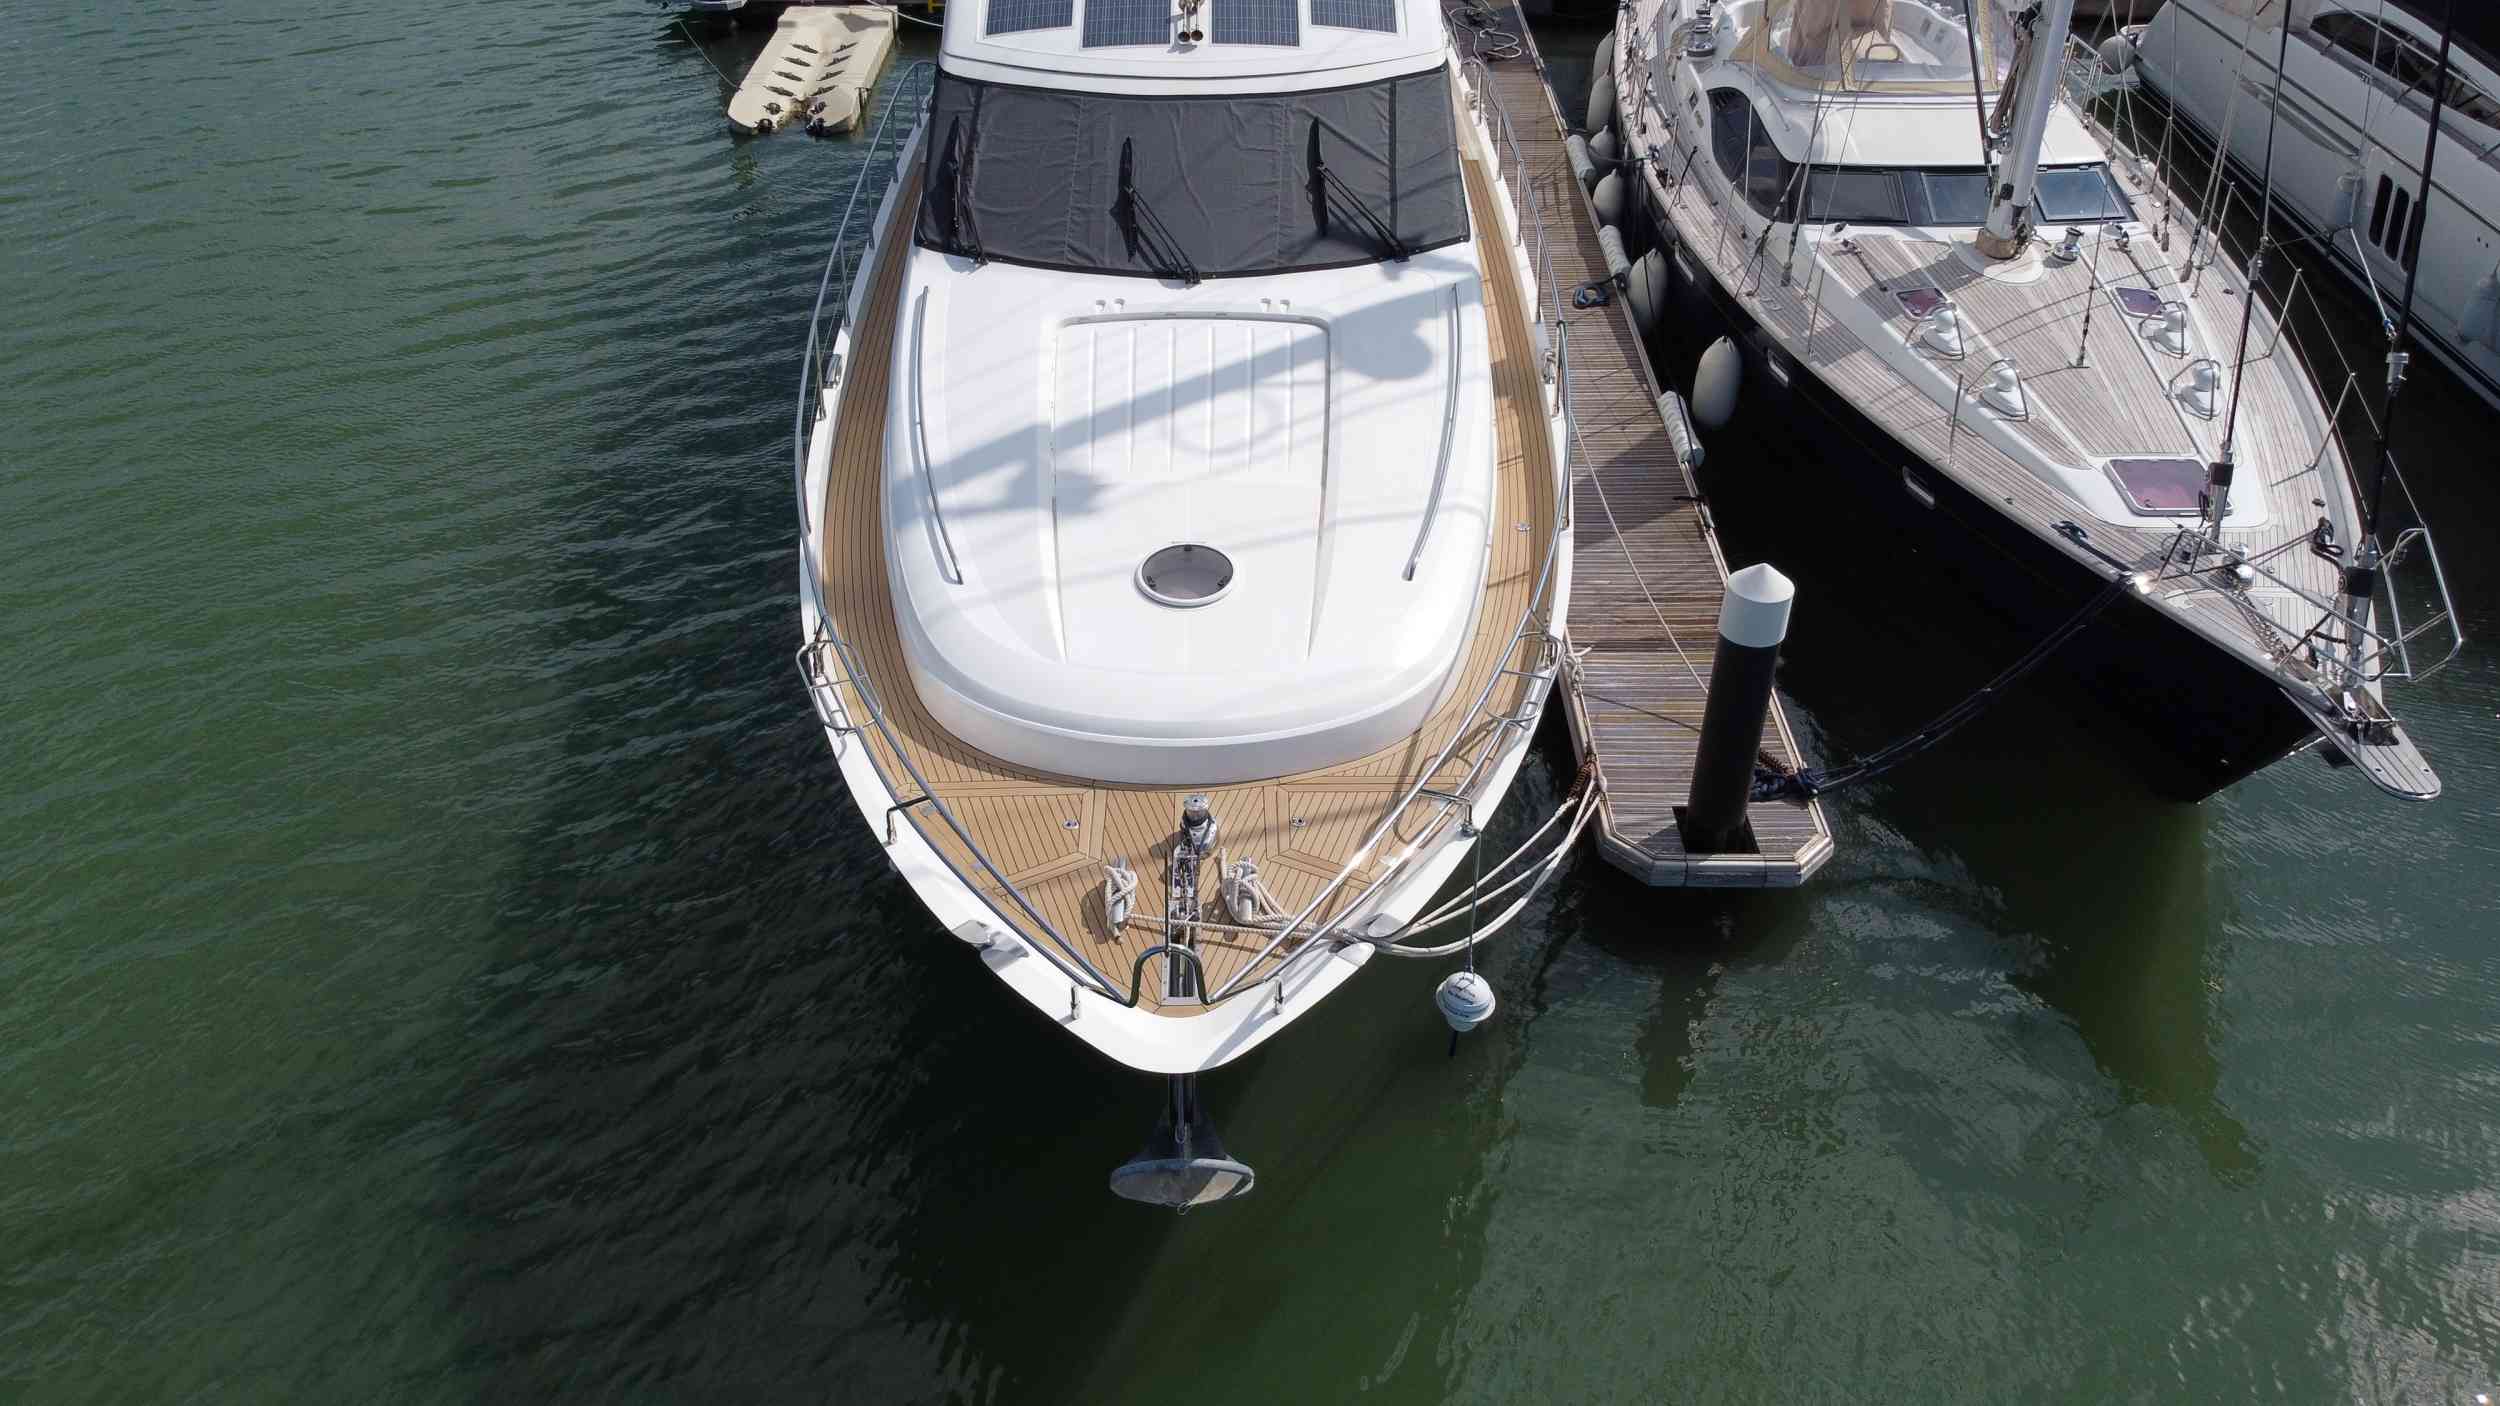
About three years ago, the bathing platform on our Princess 67 was showing signs of wear to the point where the black caulking was down to bare wood. This made the whole boat look shabby. So we decided to pay to have it replaced professionally. We chose to fit the second generation Flexiteek synthetic deck so now we have experience in both synthetic and real teak. Everything in boating is a compromise and teak decks are no exception. Real wood is hard to keep clean and wears away whereas synthetic teak gets very hot in strong sunshine but is dead easy to clean. So it is a matter of what suits you the best. In my opinion, the hot summer surface is a small price to pay for dirt free decks thus keeping the rest of the boat clean. Incidentally, away from the marinas, the synthetic teak stays much cooler. And as long as you select a recognised product, synthetic teak can look to the untrained eye just like real teak.
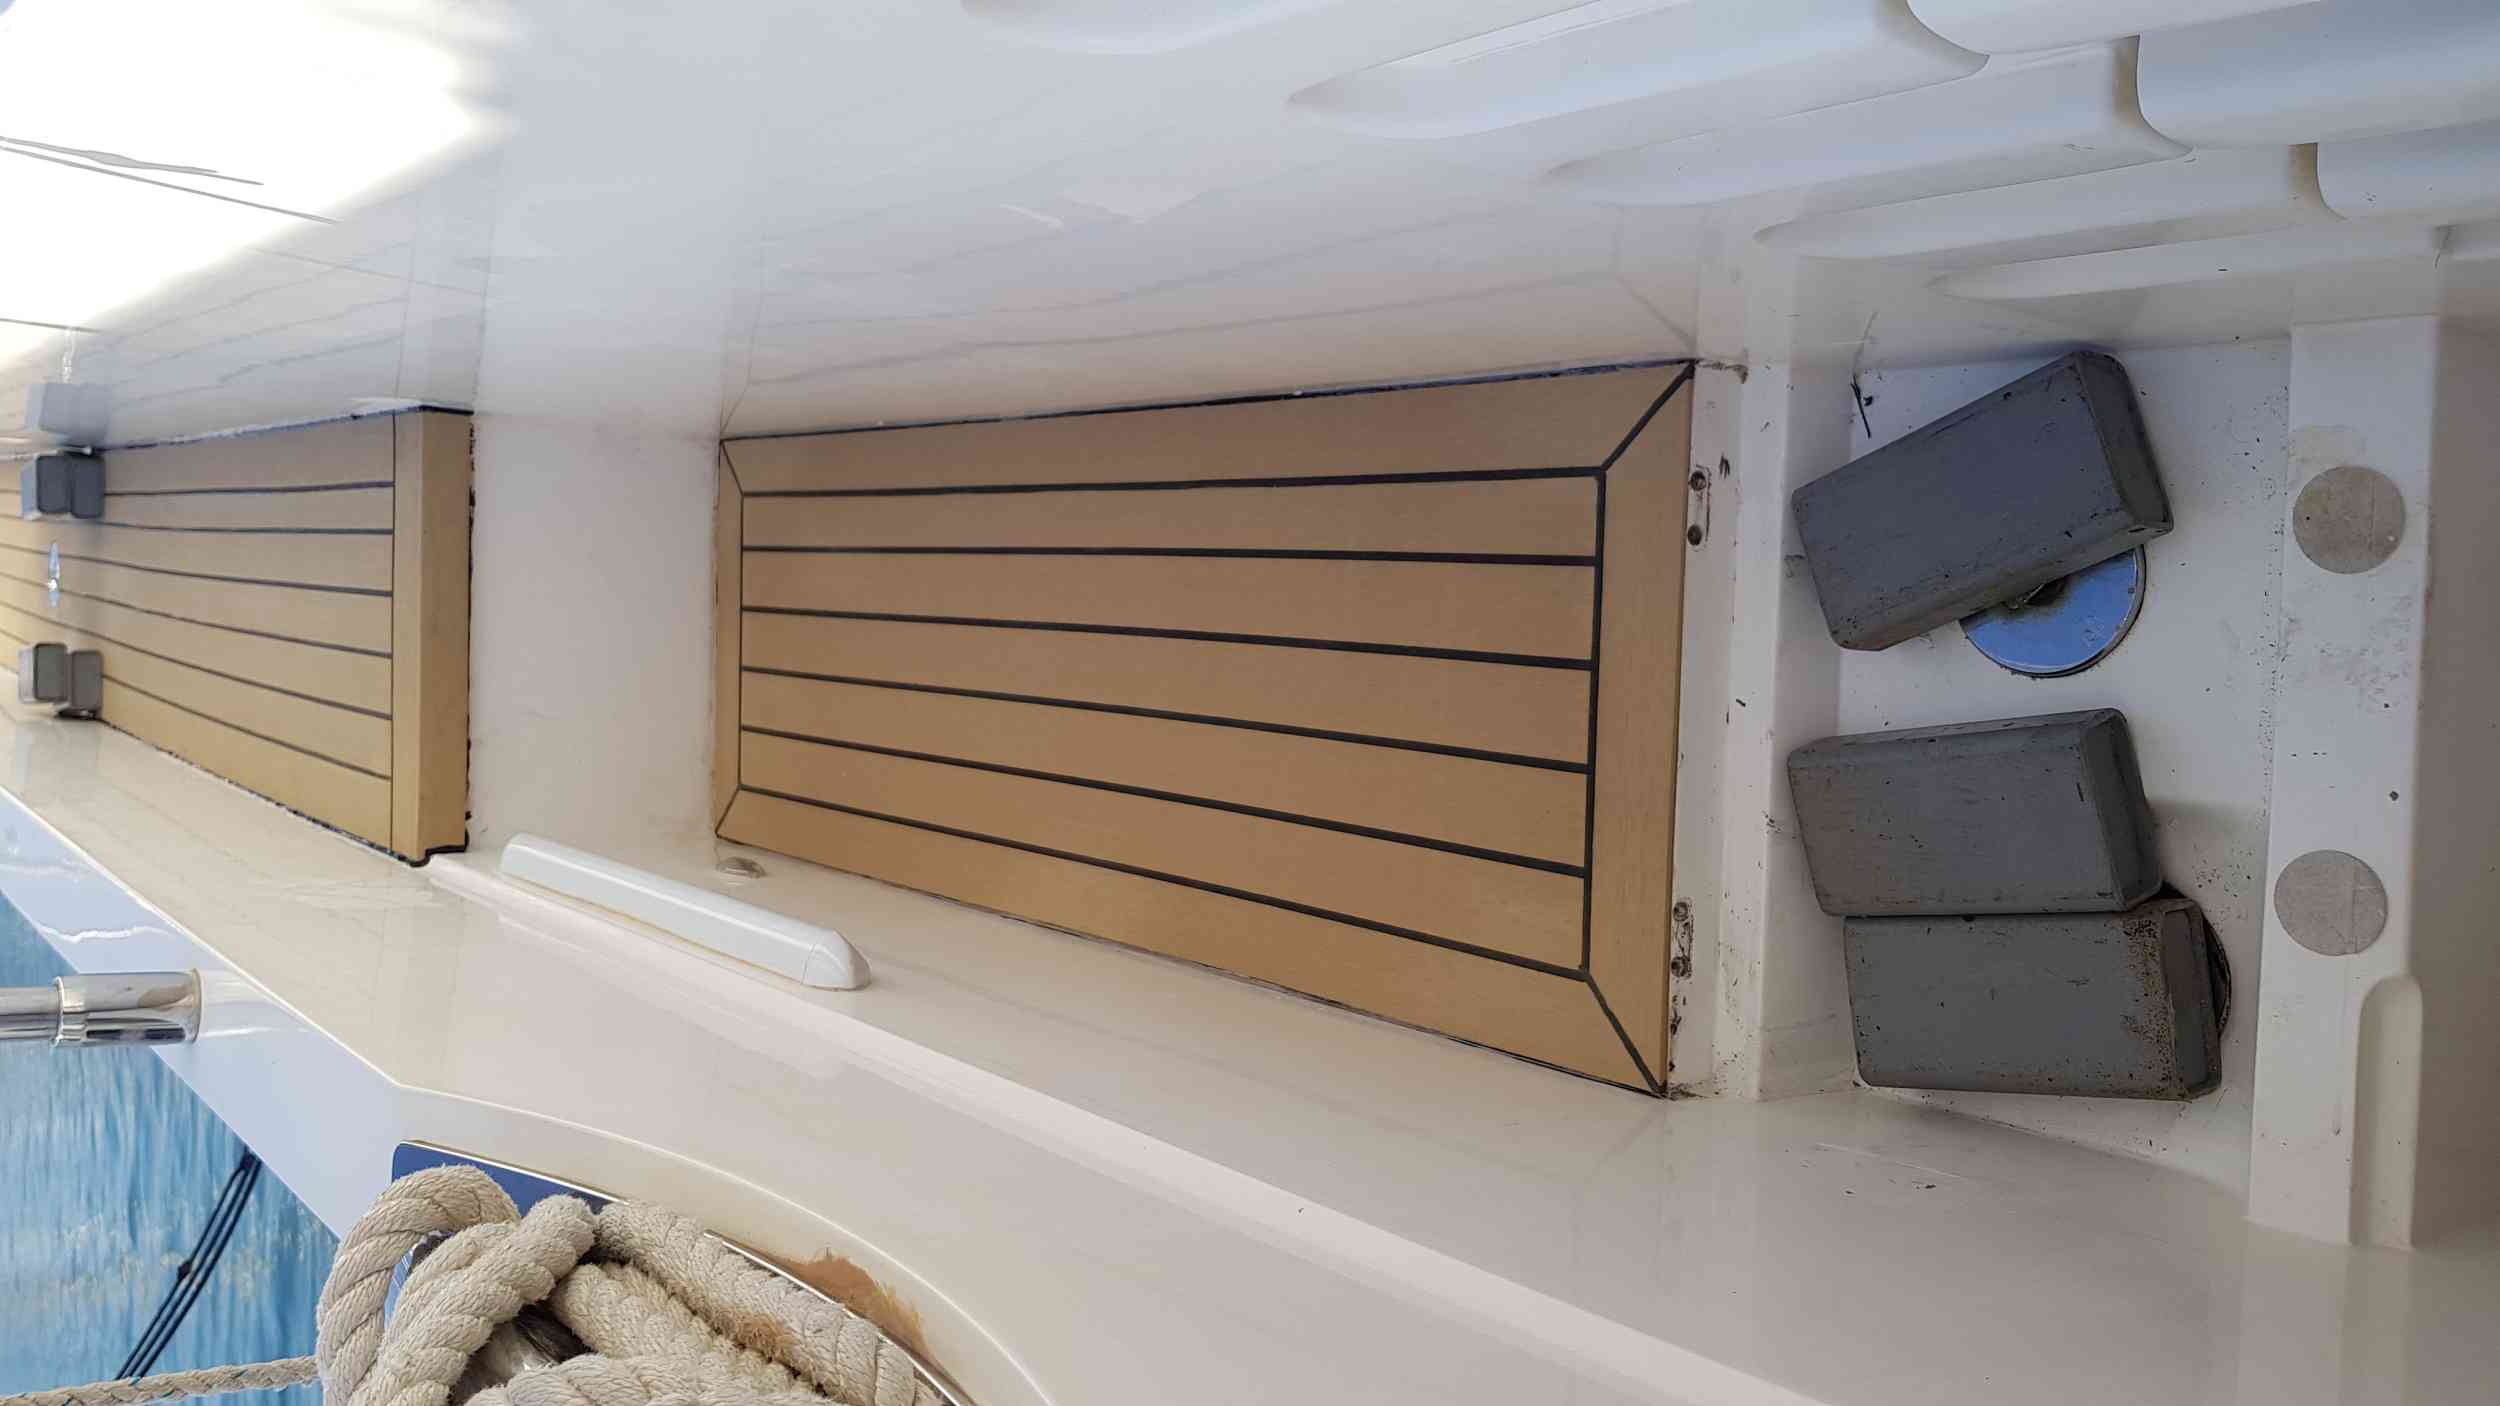
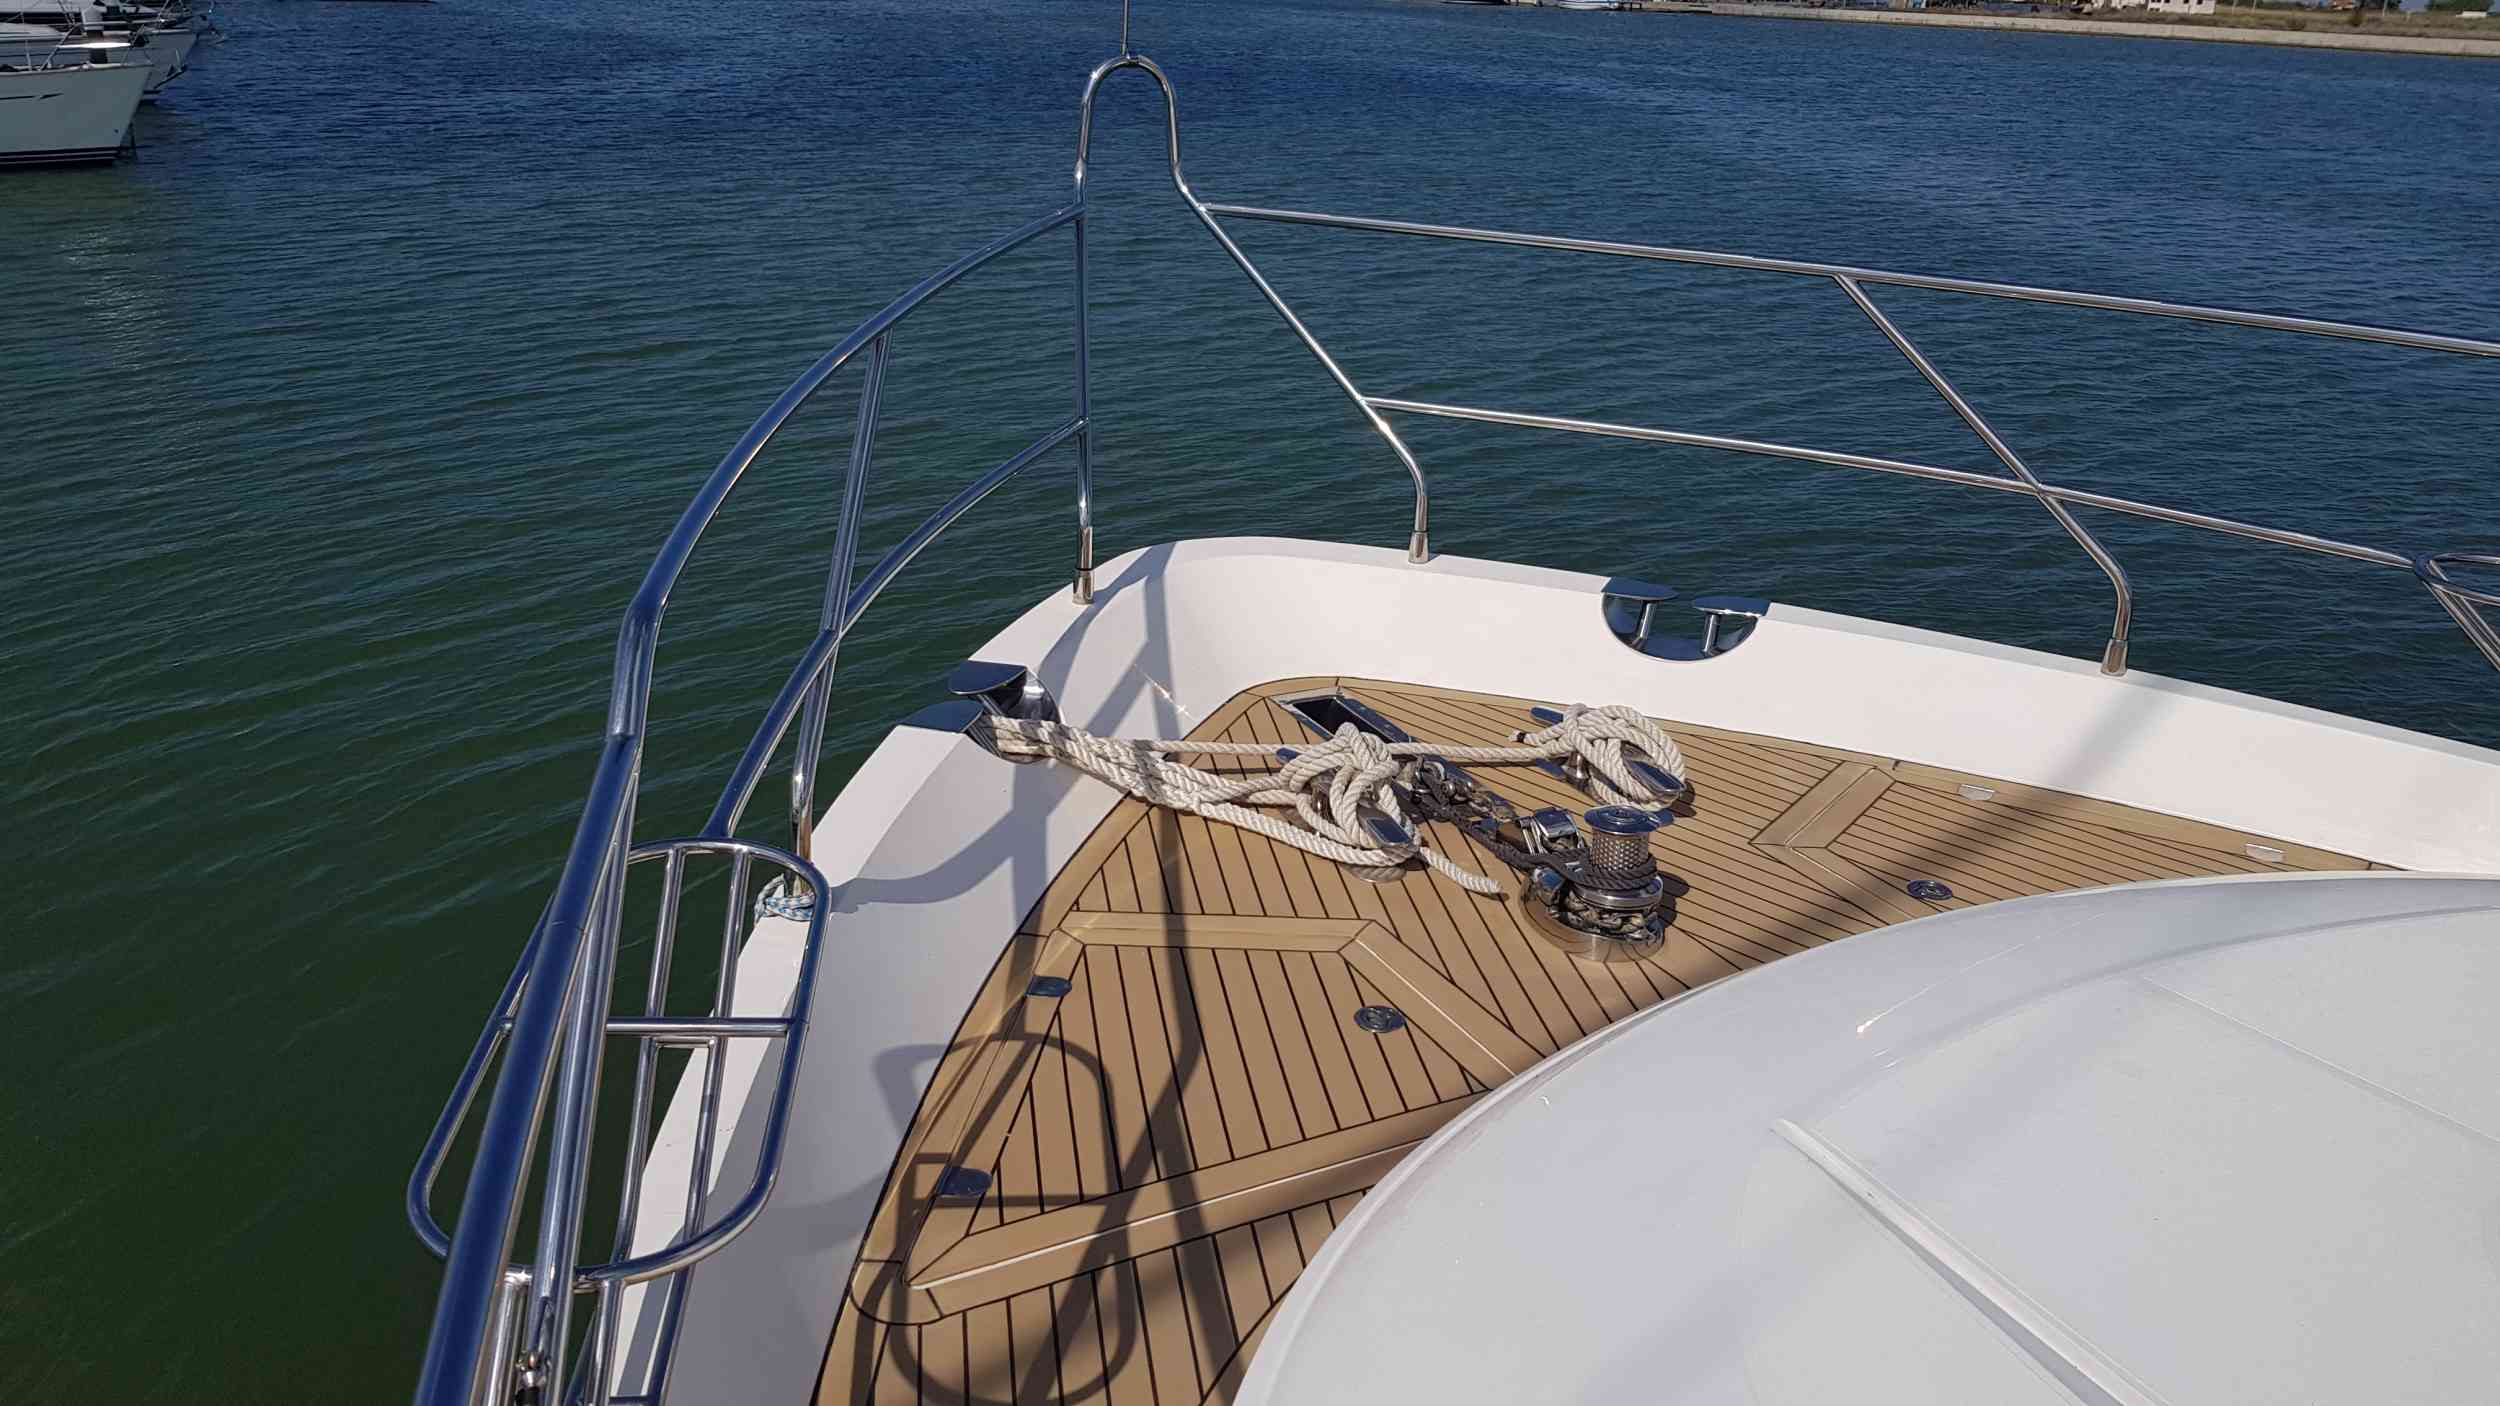
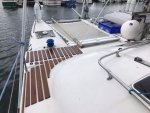
Here are some pics after our bathing platform had been fitted with Flexiteek. Sorry about the state of the old winter cockpit covers in the photo!!
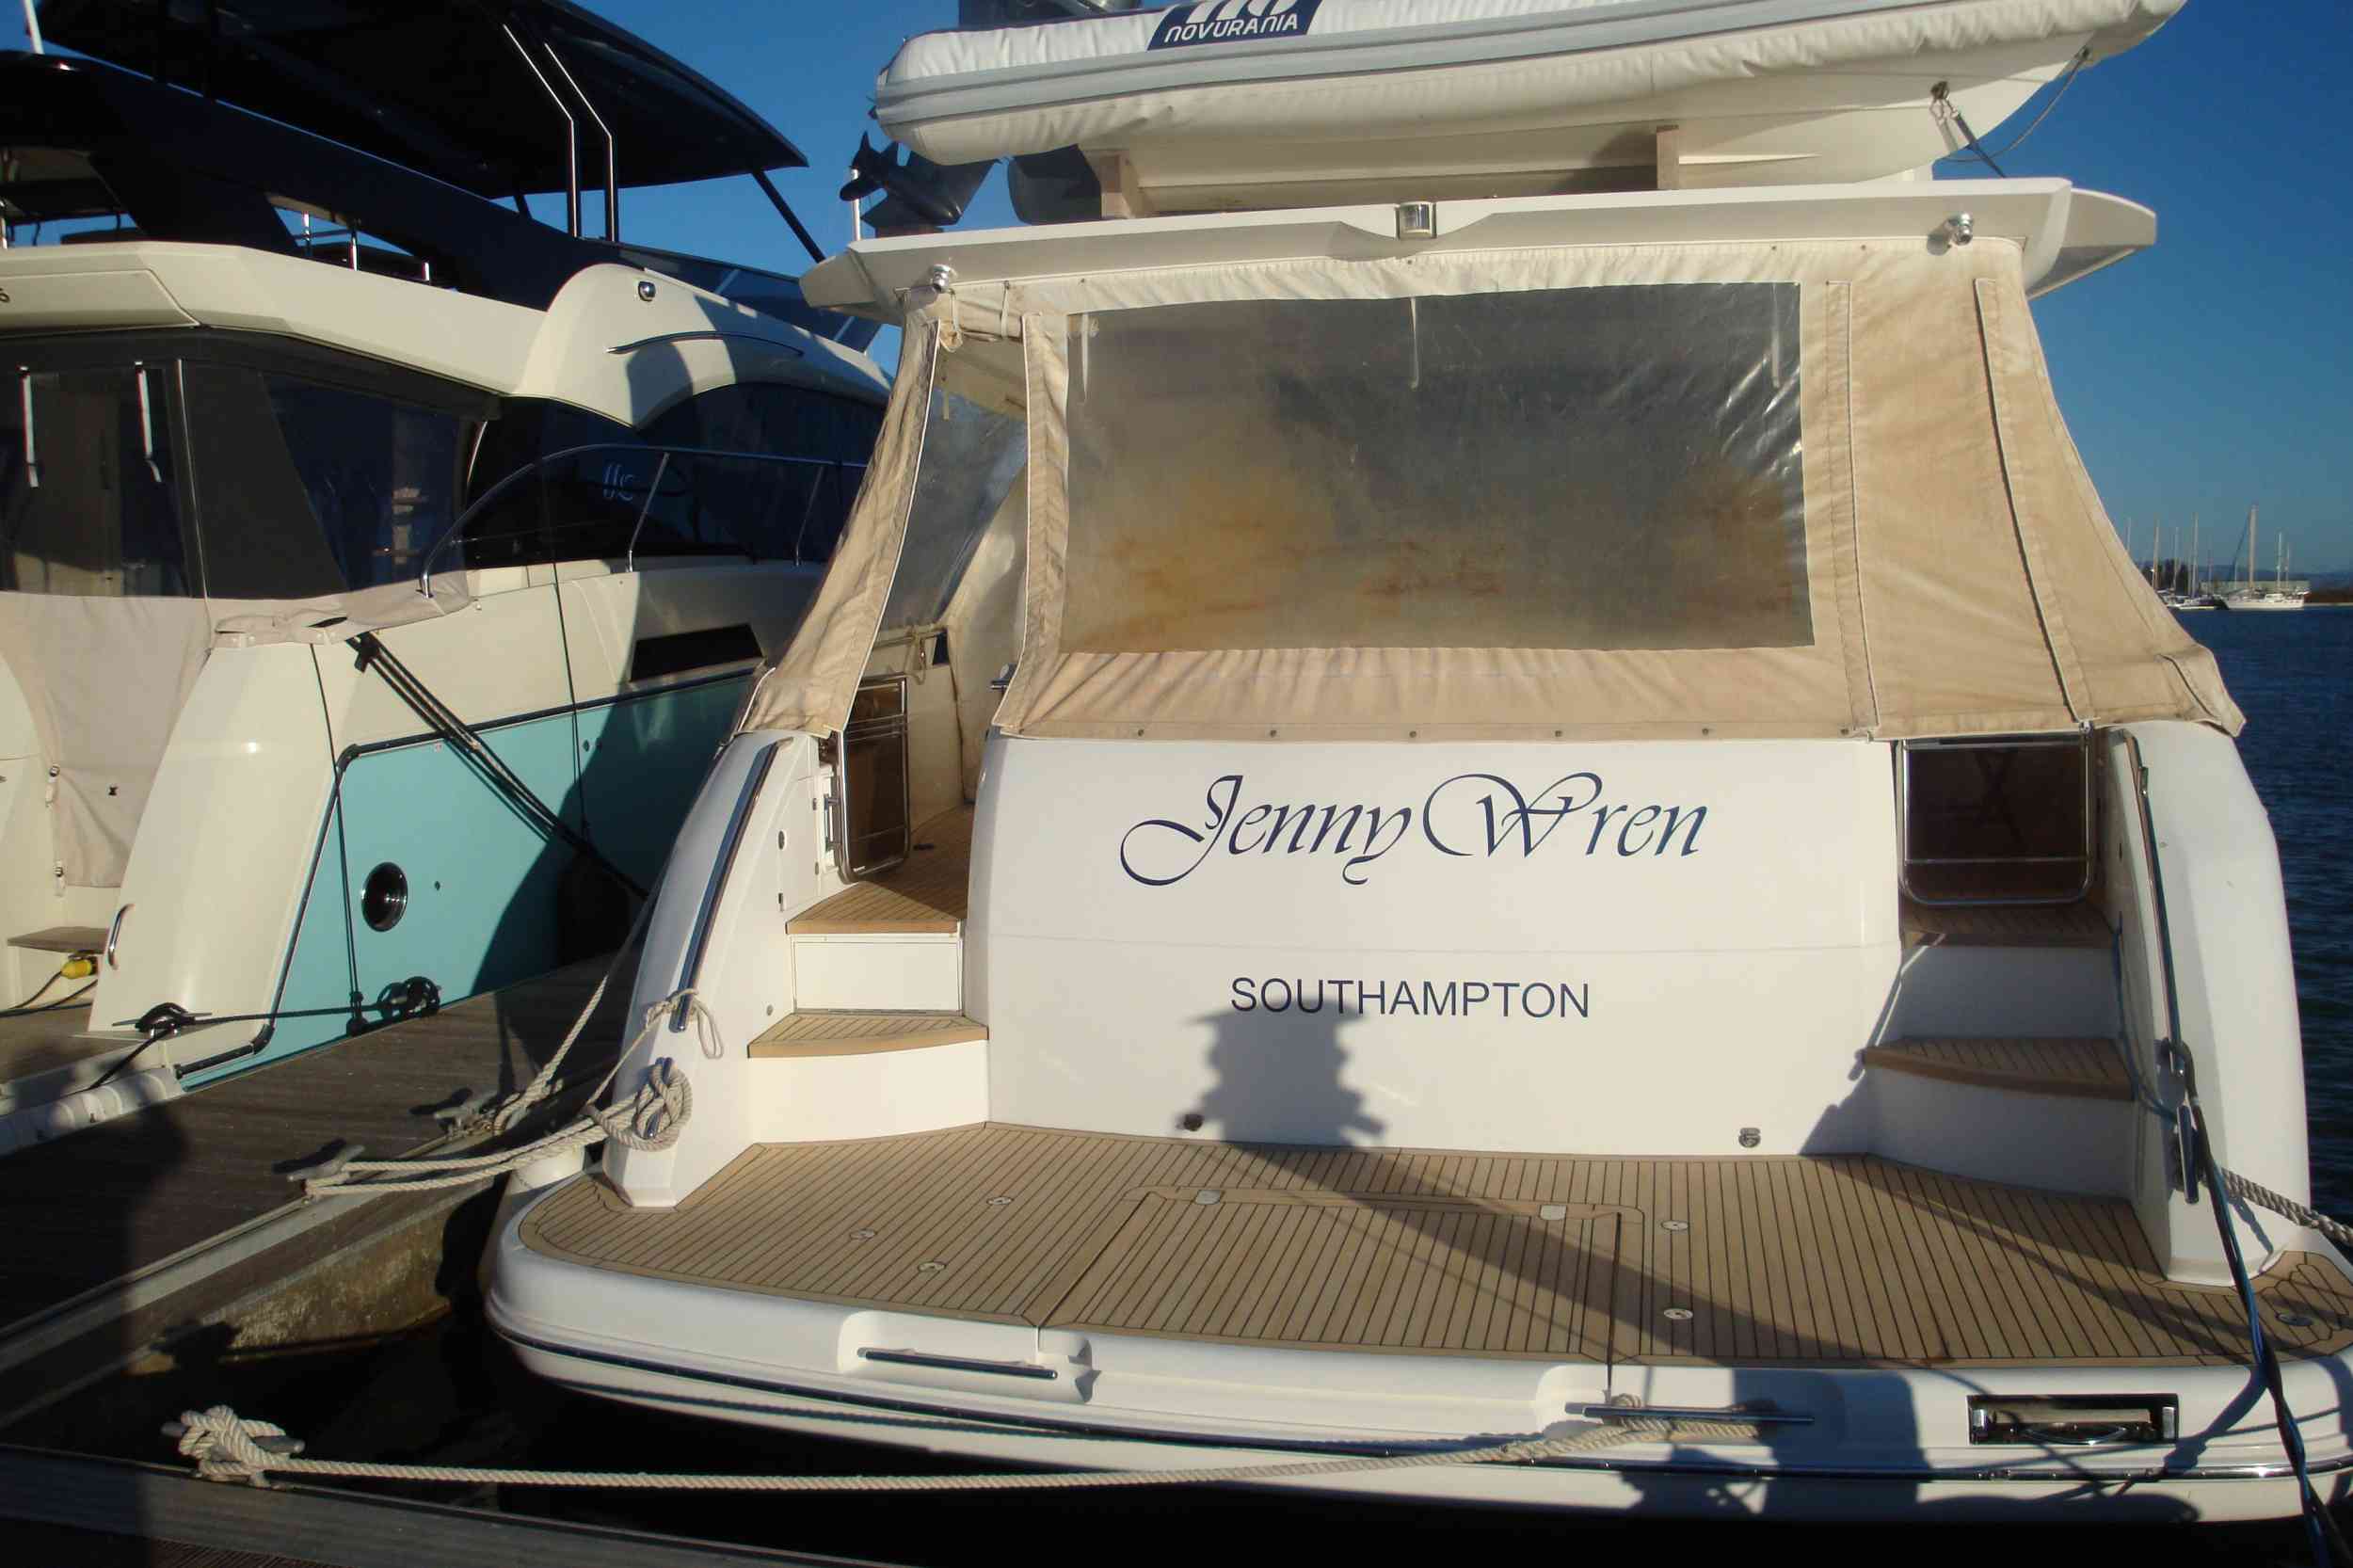
Can you tell the difference between the real teak and the synthetic teak?
And here you can see at anchor in the heat of the sun that the surface temperature isn’t that bad.

So, having had some success with the bathing platform, I now want to do the rest of the boat. Apart from being very expensive, it is important to do the job properly to make it look as close to original teak as possible. For example, planks have to line up as they cross over hatches otherwise the job will look awful. So, after getting some quotations for the work and discussing the techniques with professional suppliers, I decided to make and install synthetic teak myself. The first problem that I ran into was finding a supplier who would, not only supply me, but someone who I could call for advice. These days, the market seems to be cornered by Flexiteek and Permateek who push you to their contractors/dealers. This is not what I was looking for. Eventually, I found Trakmark who specialise in providing the components and materials to do exactly what I wanted.
I have decided to split the rest of my teak update into three phases. For right or for wrong, I decided to do the foredeck first. That has been successful so my next area is the replacement of the flybridge teak and finally the last phase will be in the cockpit. I expect to draw this out over several years. It is a real shame that we didn’t have synthetic teak installed on the boat when she was new.
Whilst researching, it was very apparent that there are lots of ways to design wooden style decks. Looking round the internet, I found some examples of Princess Yachts that had been updated with synthetic teak. In fact I was lucky enough to find photos of Princess 67 like ours. So using these images, I decided how NOT to do the update.
Here is the foredeck of a Princess V where, IMO, they have tried to follow the Wattsons wood teak design too closely. I don’t like the small thin planks in their design especially as it runs down the side decks.
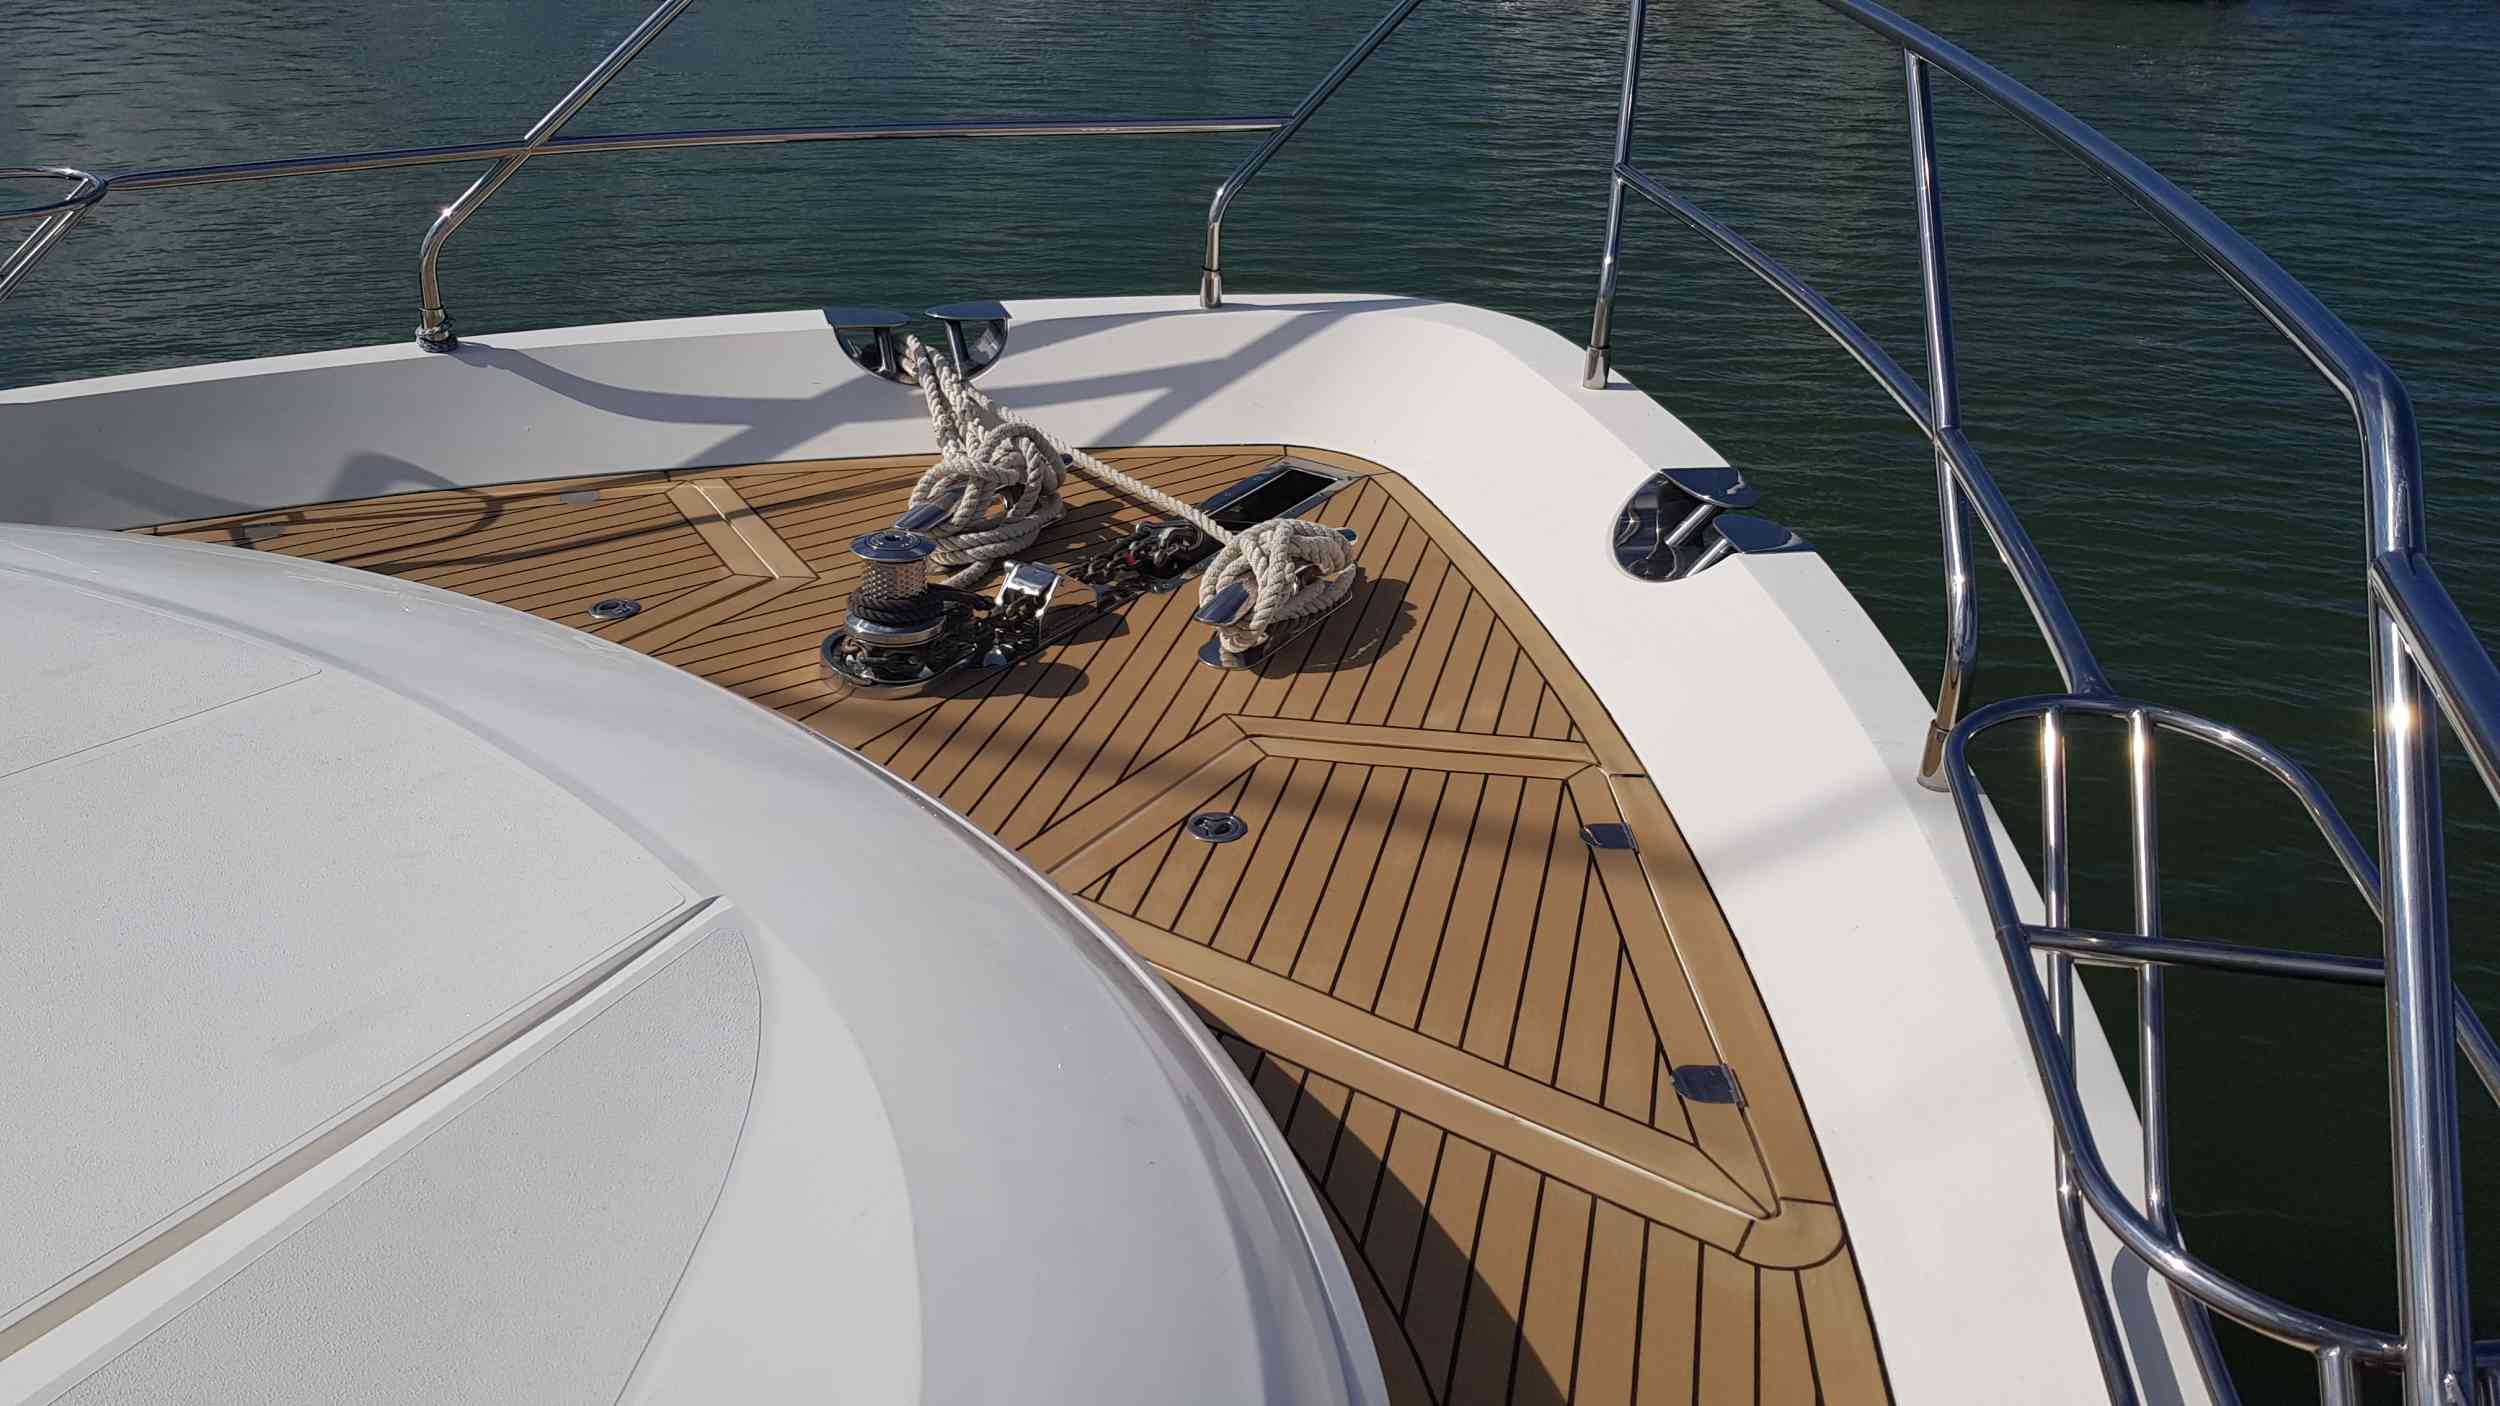
And here is the foredeck of a Princess 67 like ours. Here, they have broken away from the Wattsons design but, by keeping the planks straight, they have run into a problem where they have had to add a centre panel where the deck cleats and windlass are located. Again this isn’t what I wanted
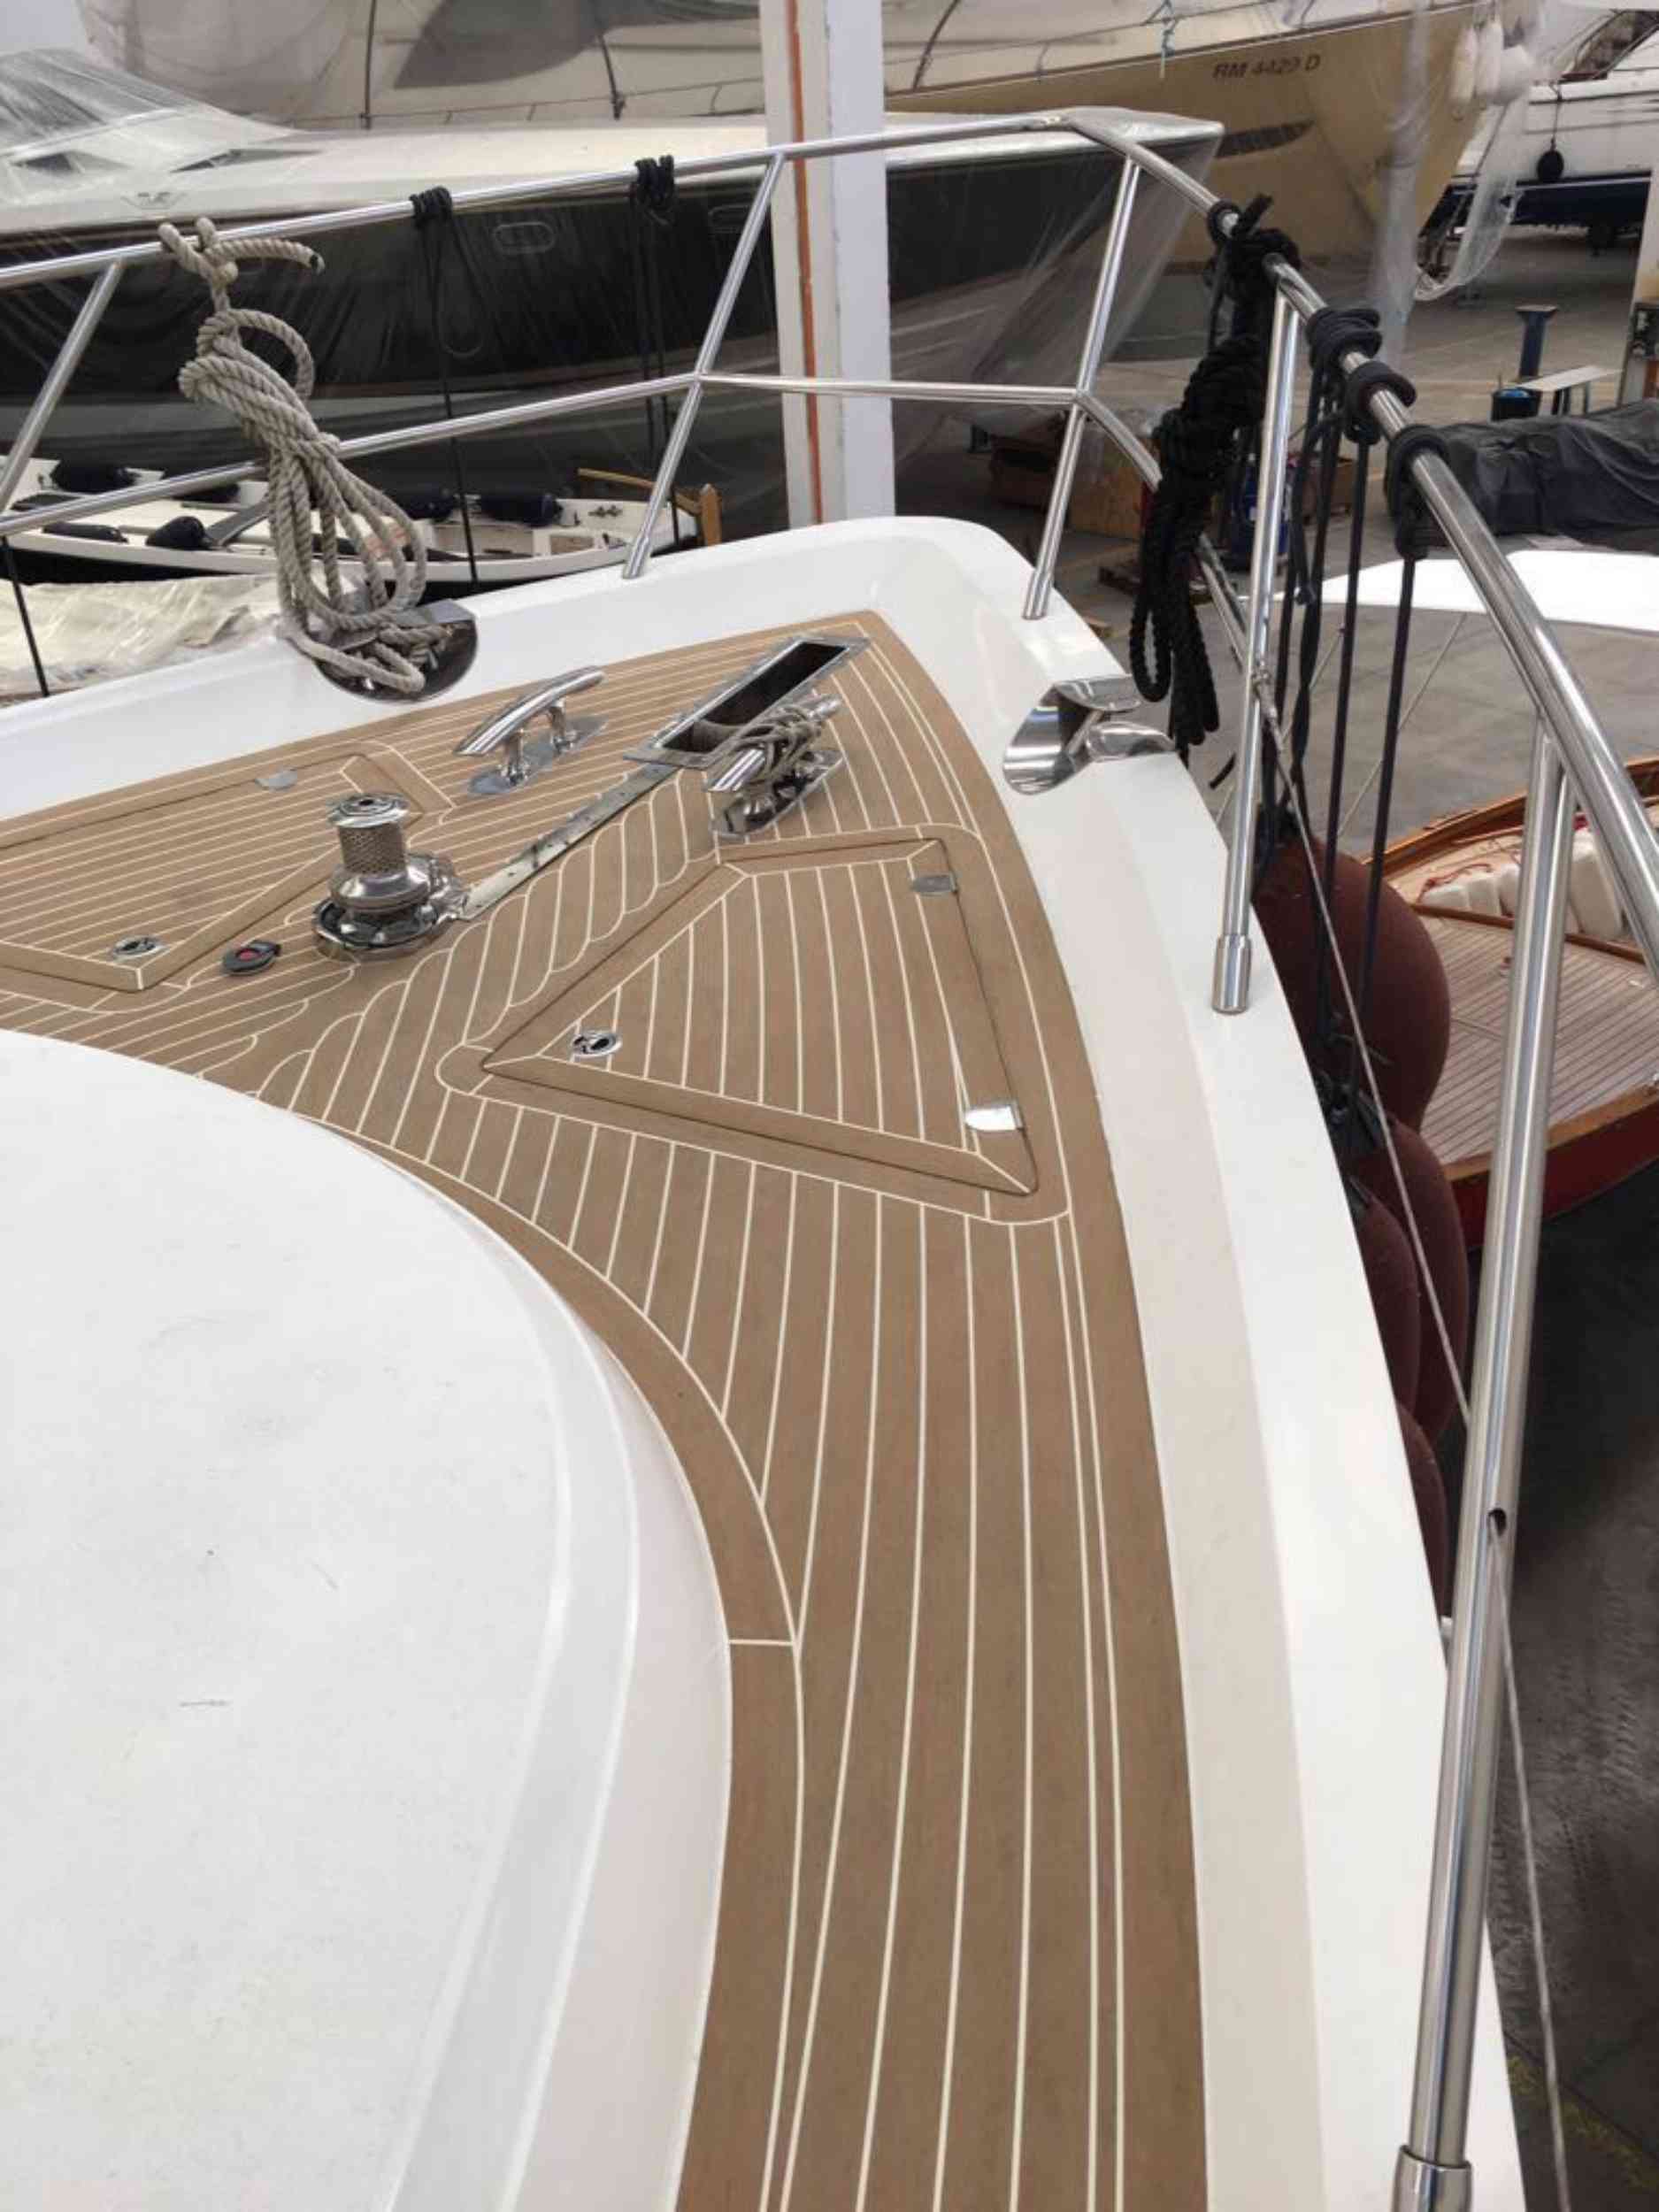
So, my idea was to follow the Wattsons wood design closer but to take care not to have thin planks in the design. This is how mine ended up.
As this thread progresses, I will discuss a DIY concept where I have tried to manufacture and install synthetic teak to the standard that you would expect from professionals. I discussed my intention to post this report with Trakmark who supplied the product that I am using. They are happy that I write this thread explaining the techniques that I have learned so far. Essentially, though, my technique is the same that Trakmark explained when I first started working with their product. There have been areas where I have found some difficulties and as a result I have developed my own techniques which I will explain as this thread develops.
More to follow on the actual making and installing of the upgrade.

Real teak is actually far easier to lay , talking proper planks from 5 mm up wards any width .The teak on my bathing platform is properly worn out, has gone through to the underlying fibreglass in places. So I need to get it sorted at some point soonish.
My dad has had the teak on bathing platform on his boat replaced with flexiteak, and it looks OK, but not as good as real teak, but the main issue is the temperature it reaches in the mallorca sun, its unbearable in bare feet, you have to spray it down with the shower before you walk on it, it's that hot.
How much does real teak cost per square meter fitted professionally? I haven't looked into it yet, but I'm tempted to just get it replaced with teak again, even though it'll wear out in 15 years.
I would probably go for some kind of synthetic teak if it didn't get so hot.
Do you know what you are talking about?Real teak is actually far easier to lay , talking proper planks from 5 mm up wards any width .
Prepare the surface in the usual way , they use silk flex caulk to stick them down ( measure and cut ) and those cross tile spaces to maintain even spacing like tilers do .Weights for 24 hrs .The sika squishes out between .They just use a horizontal knife to cut it back level to the wood and simultaneously make the caulk lines .Give the whole lot a light sand and your done .
Of course 5 mm is cheaper and easier to handle than 10 mm .But at least the caulk lines never wear out as the planks are not veneers .
Saw it done on a new princess 54 berthed next door ...it’s bathing platform .
Google the planks for costs .
CorrectMight i venture a guess , the top step is the original ?
Have a look at Trakmark's DIY prices - I think you will be impressed.I had been considering brightening up some rather bland big areas my self with the fake stuff , but was put off by the price , went for some free reclaimed 100 yr old Brazil mahogany instead ? , q happy tho accept it will have some maintenance issues
Will do Mate , TY ?Have a look at Trakmark's DIY prices - I think you will be impressed.
Yep - it does get hot - hotter than wood anyway.The teak on my bathing platform is properly worn out, has gone through to the underlying fibreglass in places. So I need to get it sorted at some point soonish.
My dad has had the teak on bathing platform on his boat replaced with flexiteak, and it looks OK, but not as good as real teak, but the main issue is the temperature it reaches in the mallorca sun, its unbearable in bare feet, you have to spray it down with the shower before you walk on it, it's that hot.
How much does real teak cost per square meter fitted professionally? I haven't looked into it yet, but I'm tempted to just get it replaced with teak again, even though it'll wear out in 15 years.
I would probably go for some kind of synthetic teak if it didn't get so hot.
Was reacting to Julian’s Windy 25 s bathing platform , a relatively tiny area to the whole of a P67 .Do you know what you are talking about?
Have you ever seen synthetic teak being laid?
Have you ever laid wood or synthetic teak yourself.
IMHO, synthetic is FAR easier than wood.
You cut it with a Stanley knife to begin with.
It bends round corners - something that you definitely can't do with wood.
I hope that by the time I have finished this thread, you will see that it is much easier than it first seems.
Wait until I've posted more chapters and you will see.
Sorry everyone - I've been busy at home today doing jobs for SWMBO.
I will try and get another chapter out in the next day or so.

")
Yes - I will comment on the nasties later.Looking great, and i'm even more likely to do our own decks
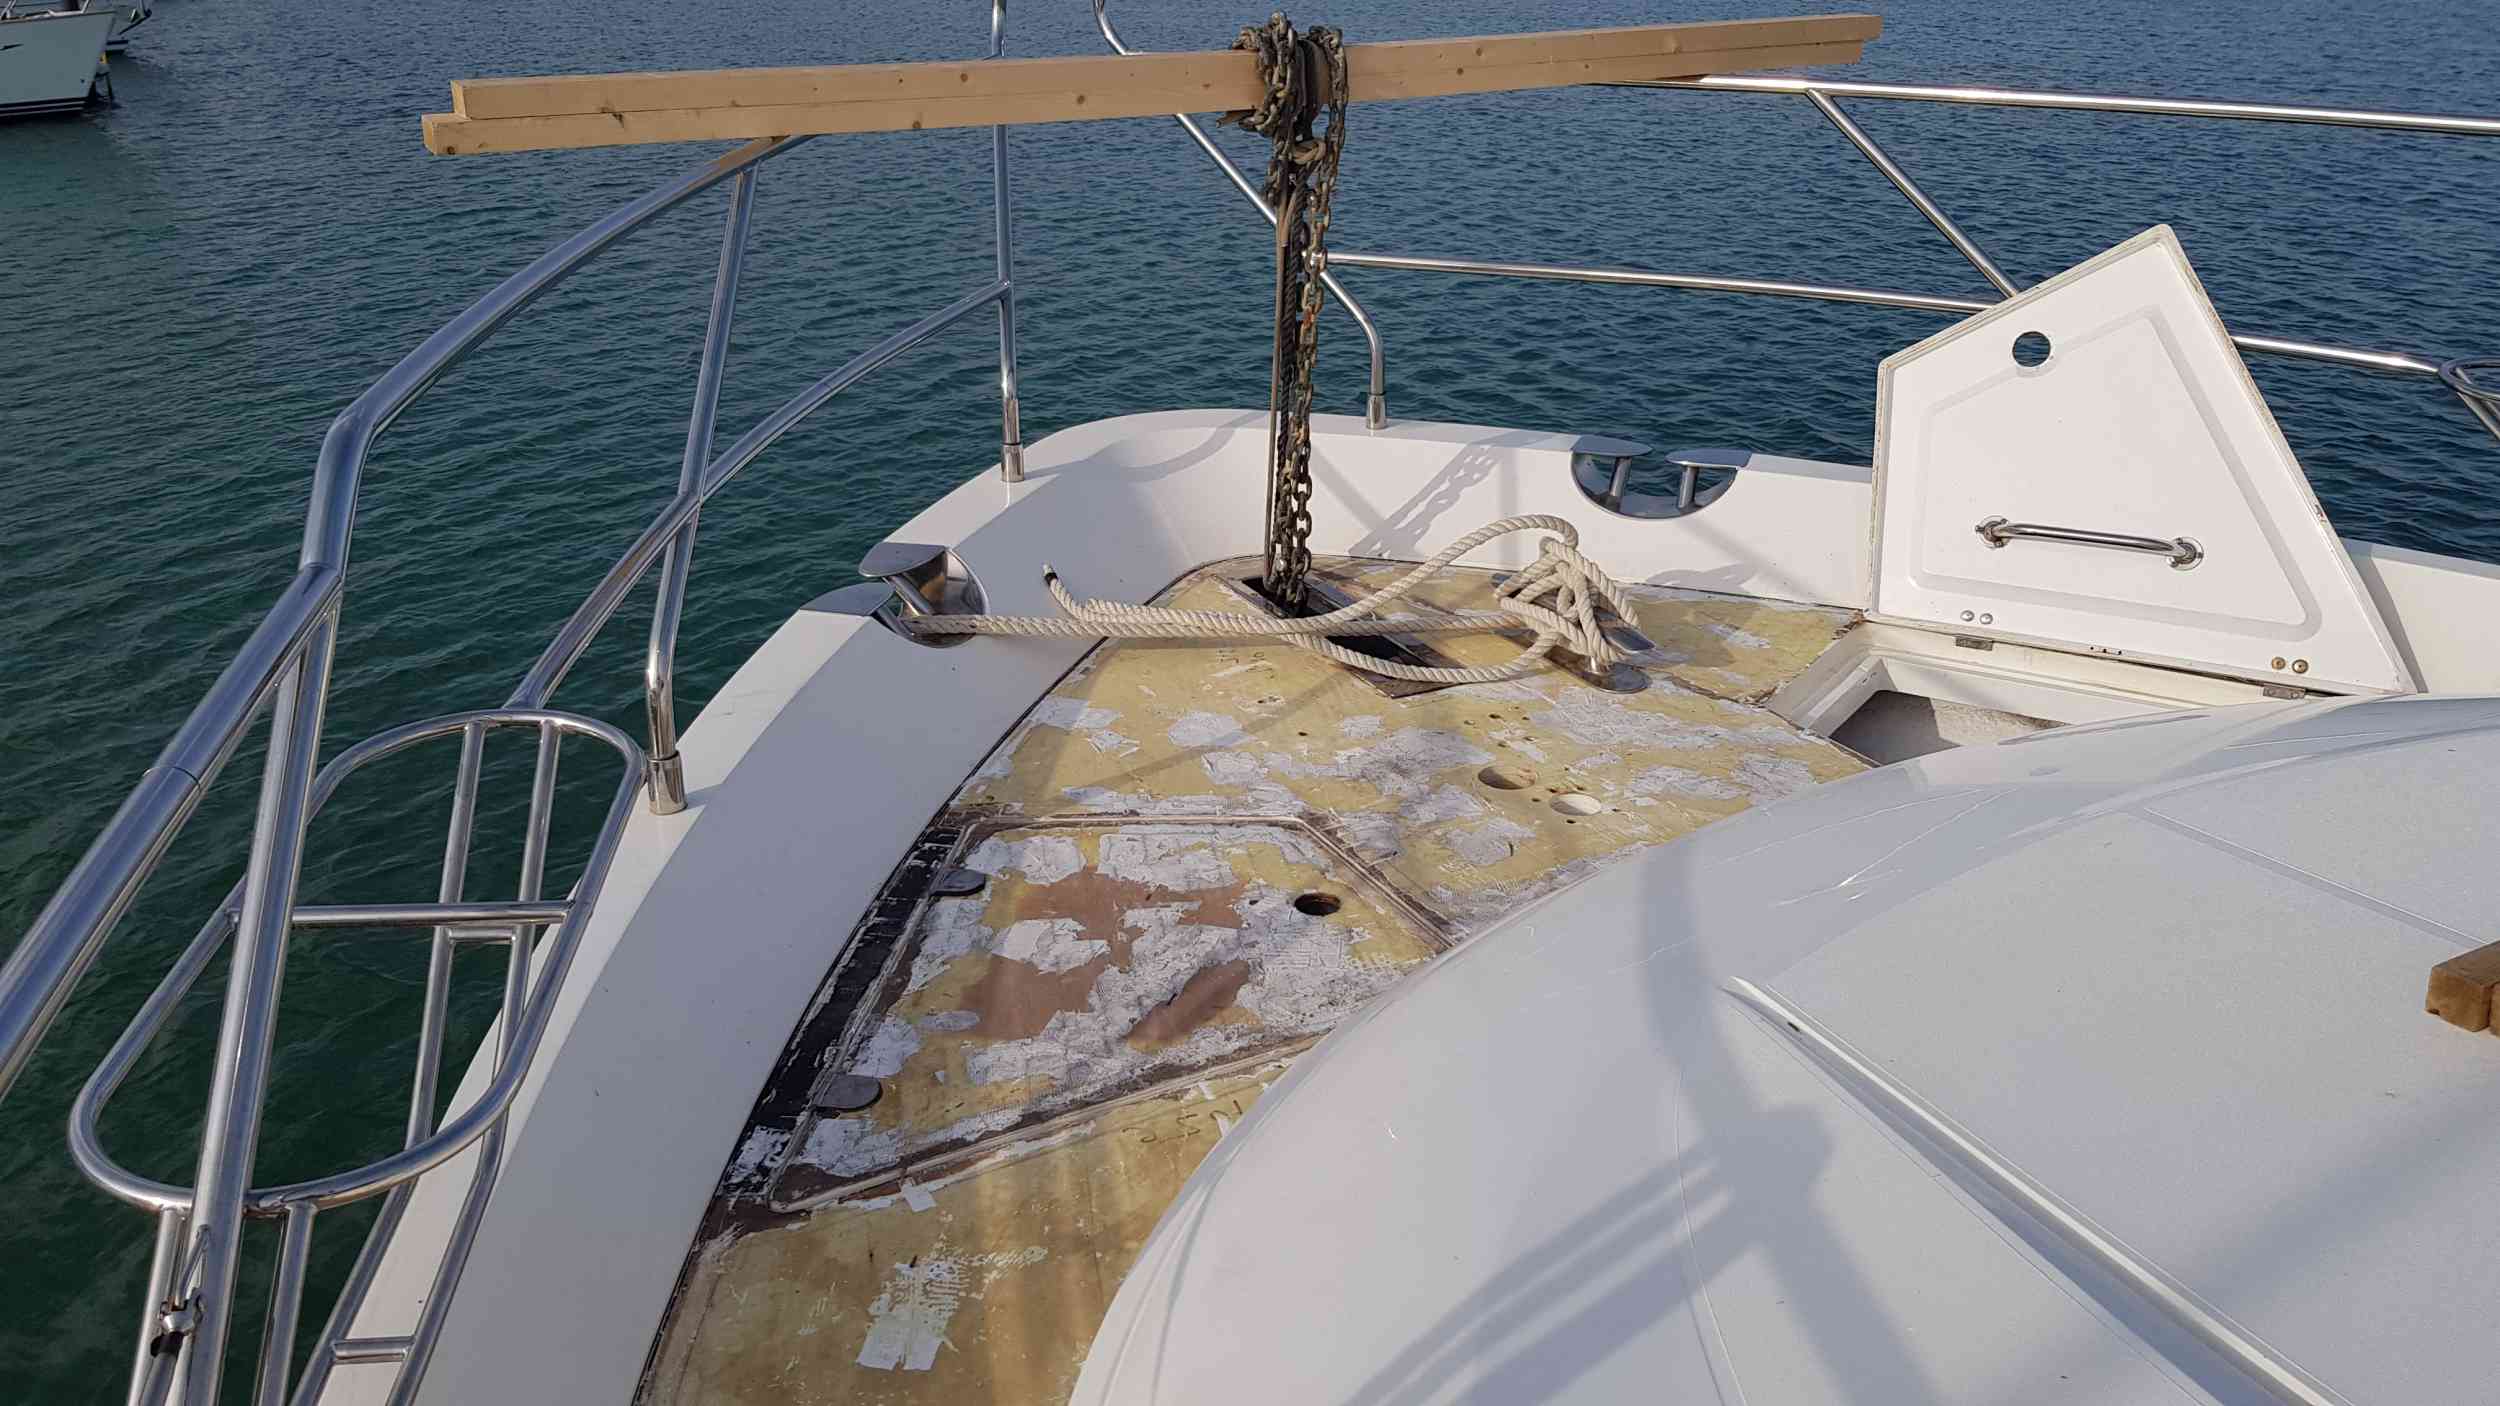
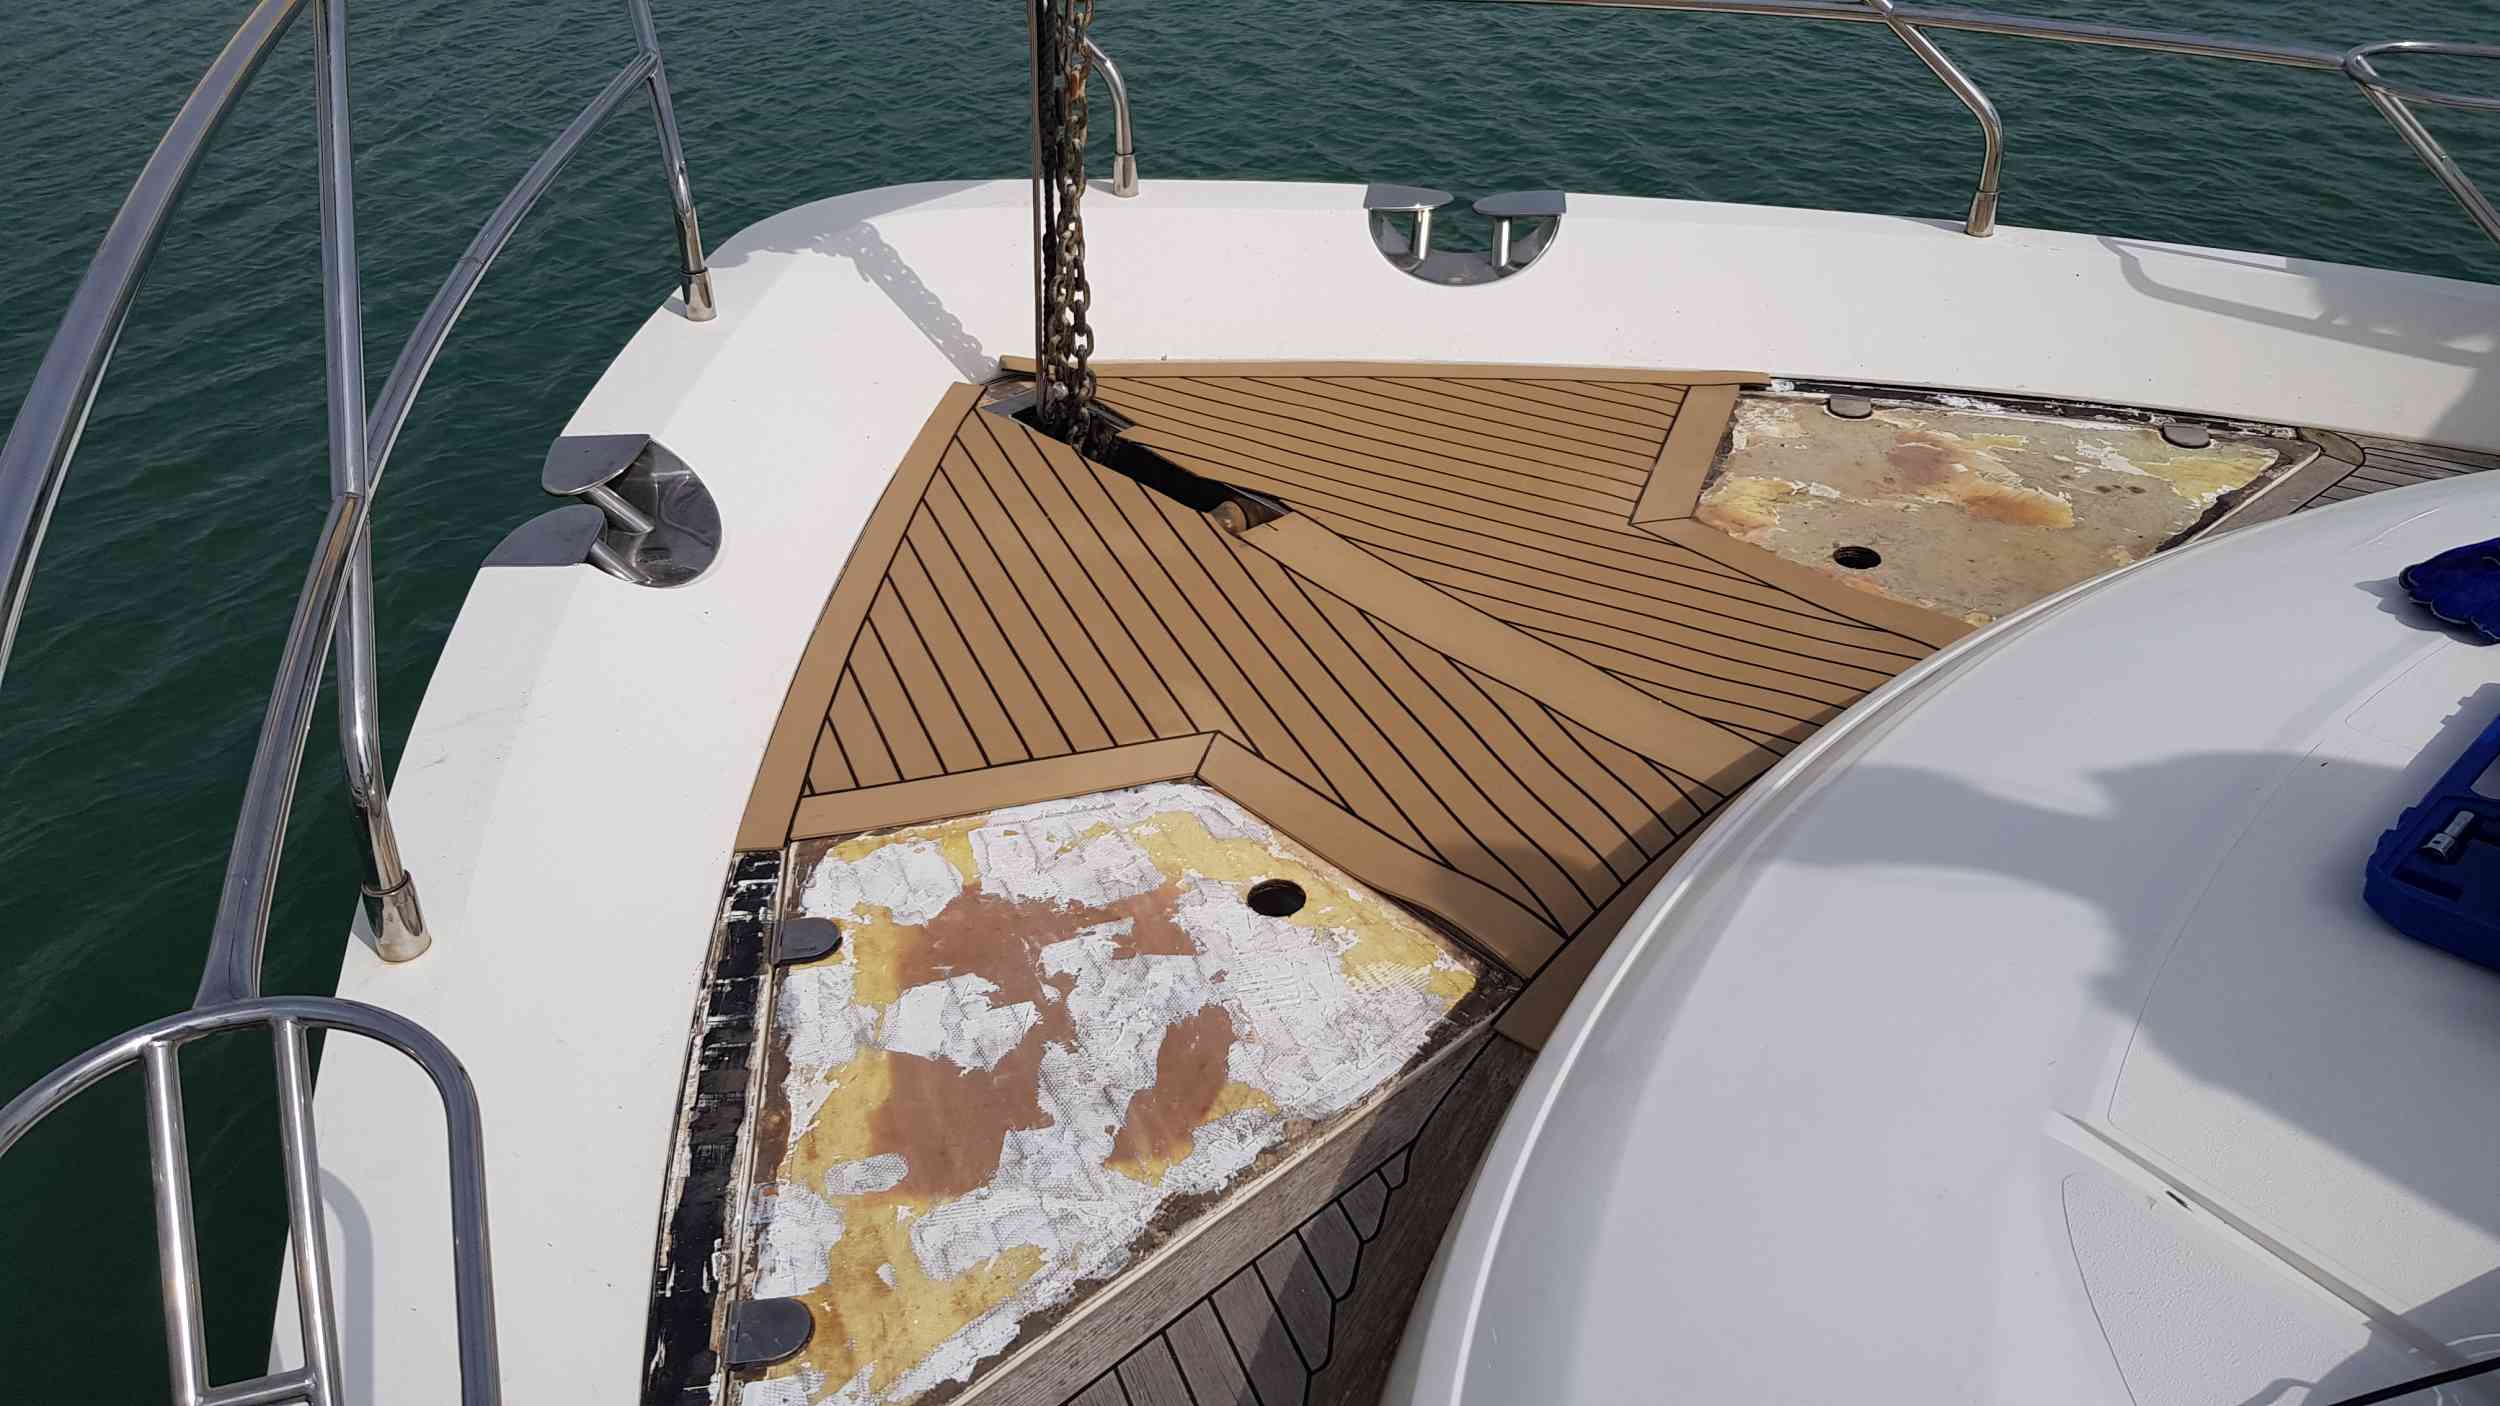
The thing that still worries me though is did you find any nasties when you removed your teak? or was the fiberglass beneath trouble free?
Colin
To be honest, I don't think there is a lot in it.One advantage is also the weight saving
Chapter 3
Templating
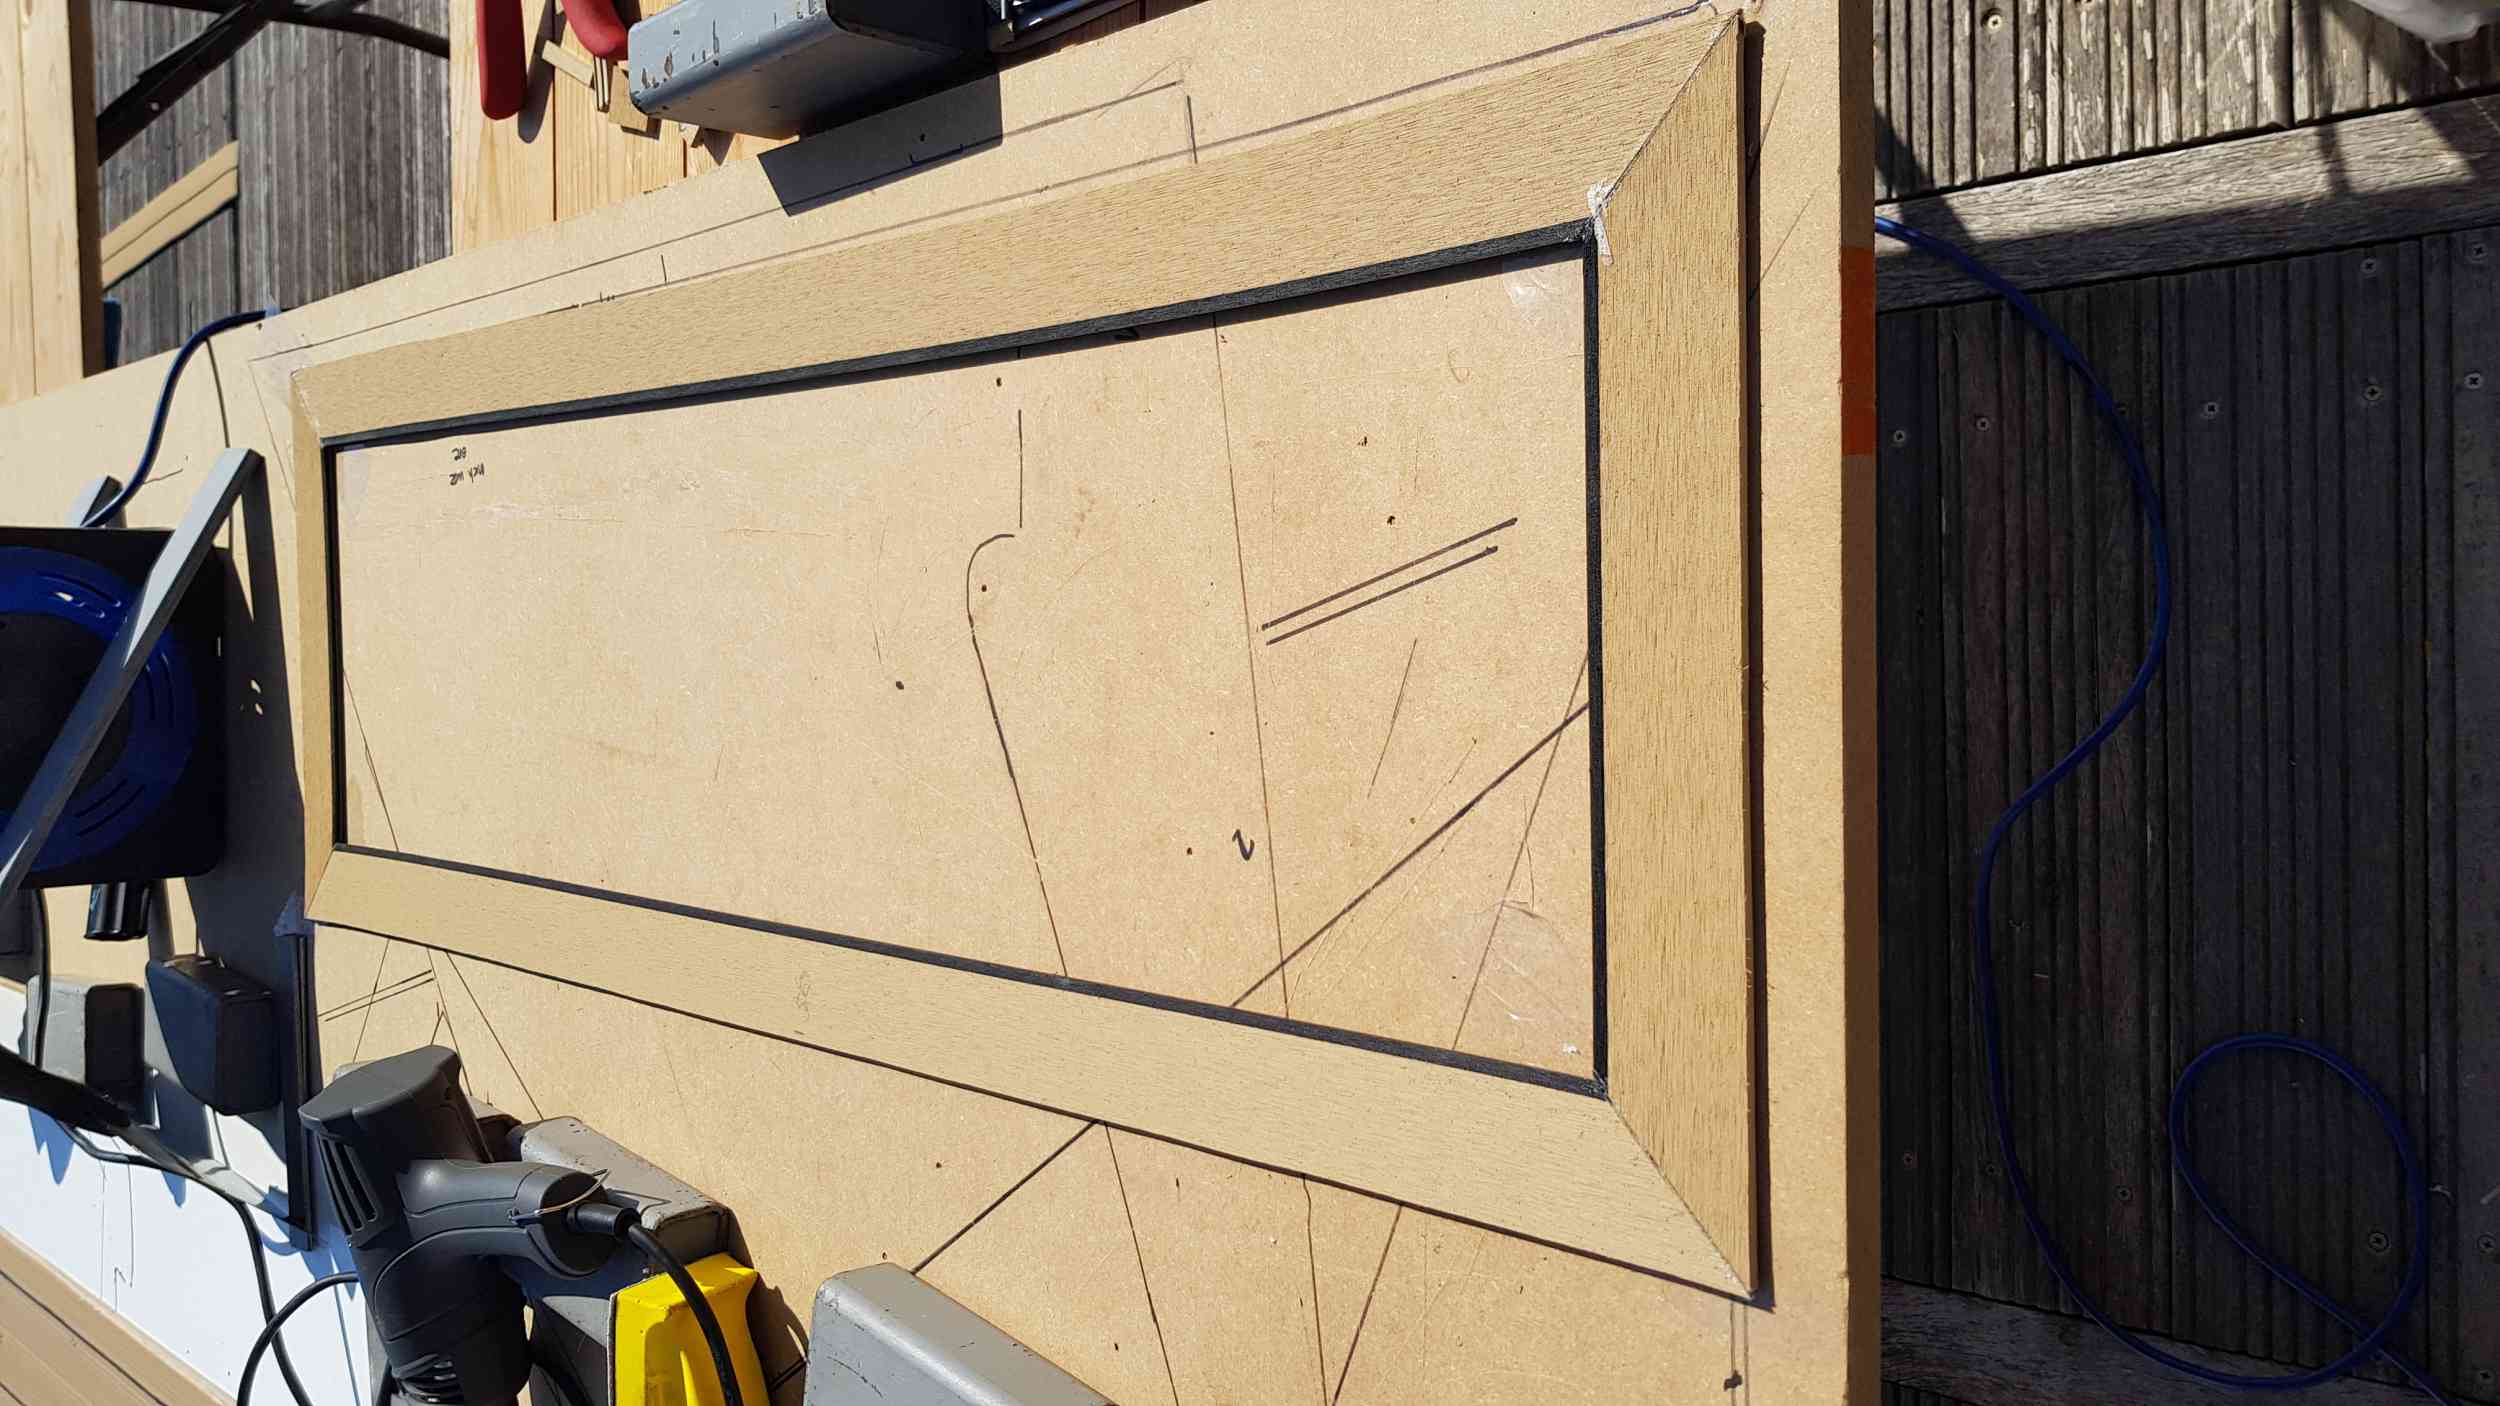
With no idea what I was doing, I took some of the plastic template material that I’d bought to make covers for my sewing project, and cut it and stuck it to the existing wood teak on JW’s foredeck. A retired yachtie friend who had been in the synthetic teak business confirmed that I was doing the correct thing. I used double sided sticky tape and cut the template to an accuracy of 1mm, taking care to make sure that the template material was taught in all directions. Using a Sharpie pen, I drew lines on the template and took lots of photos to remind me how the old teak had been designed.
Here’s a pic of the starboard side deck template.
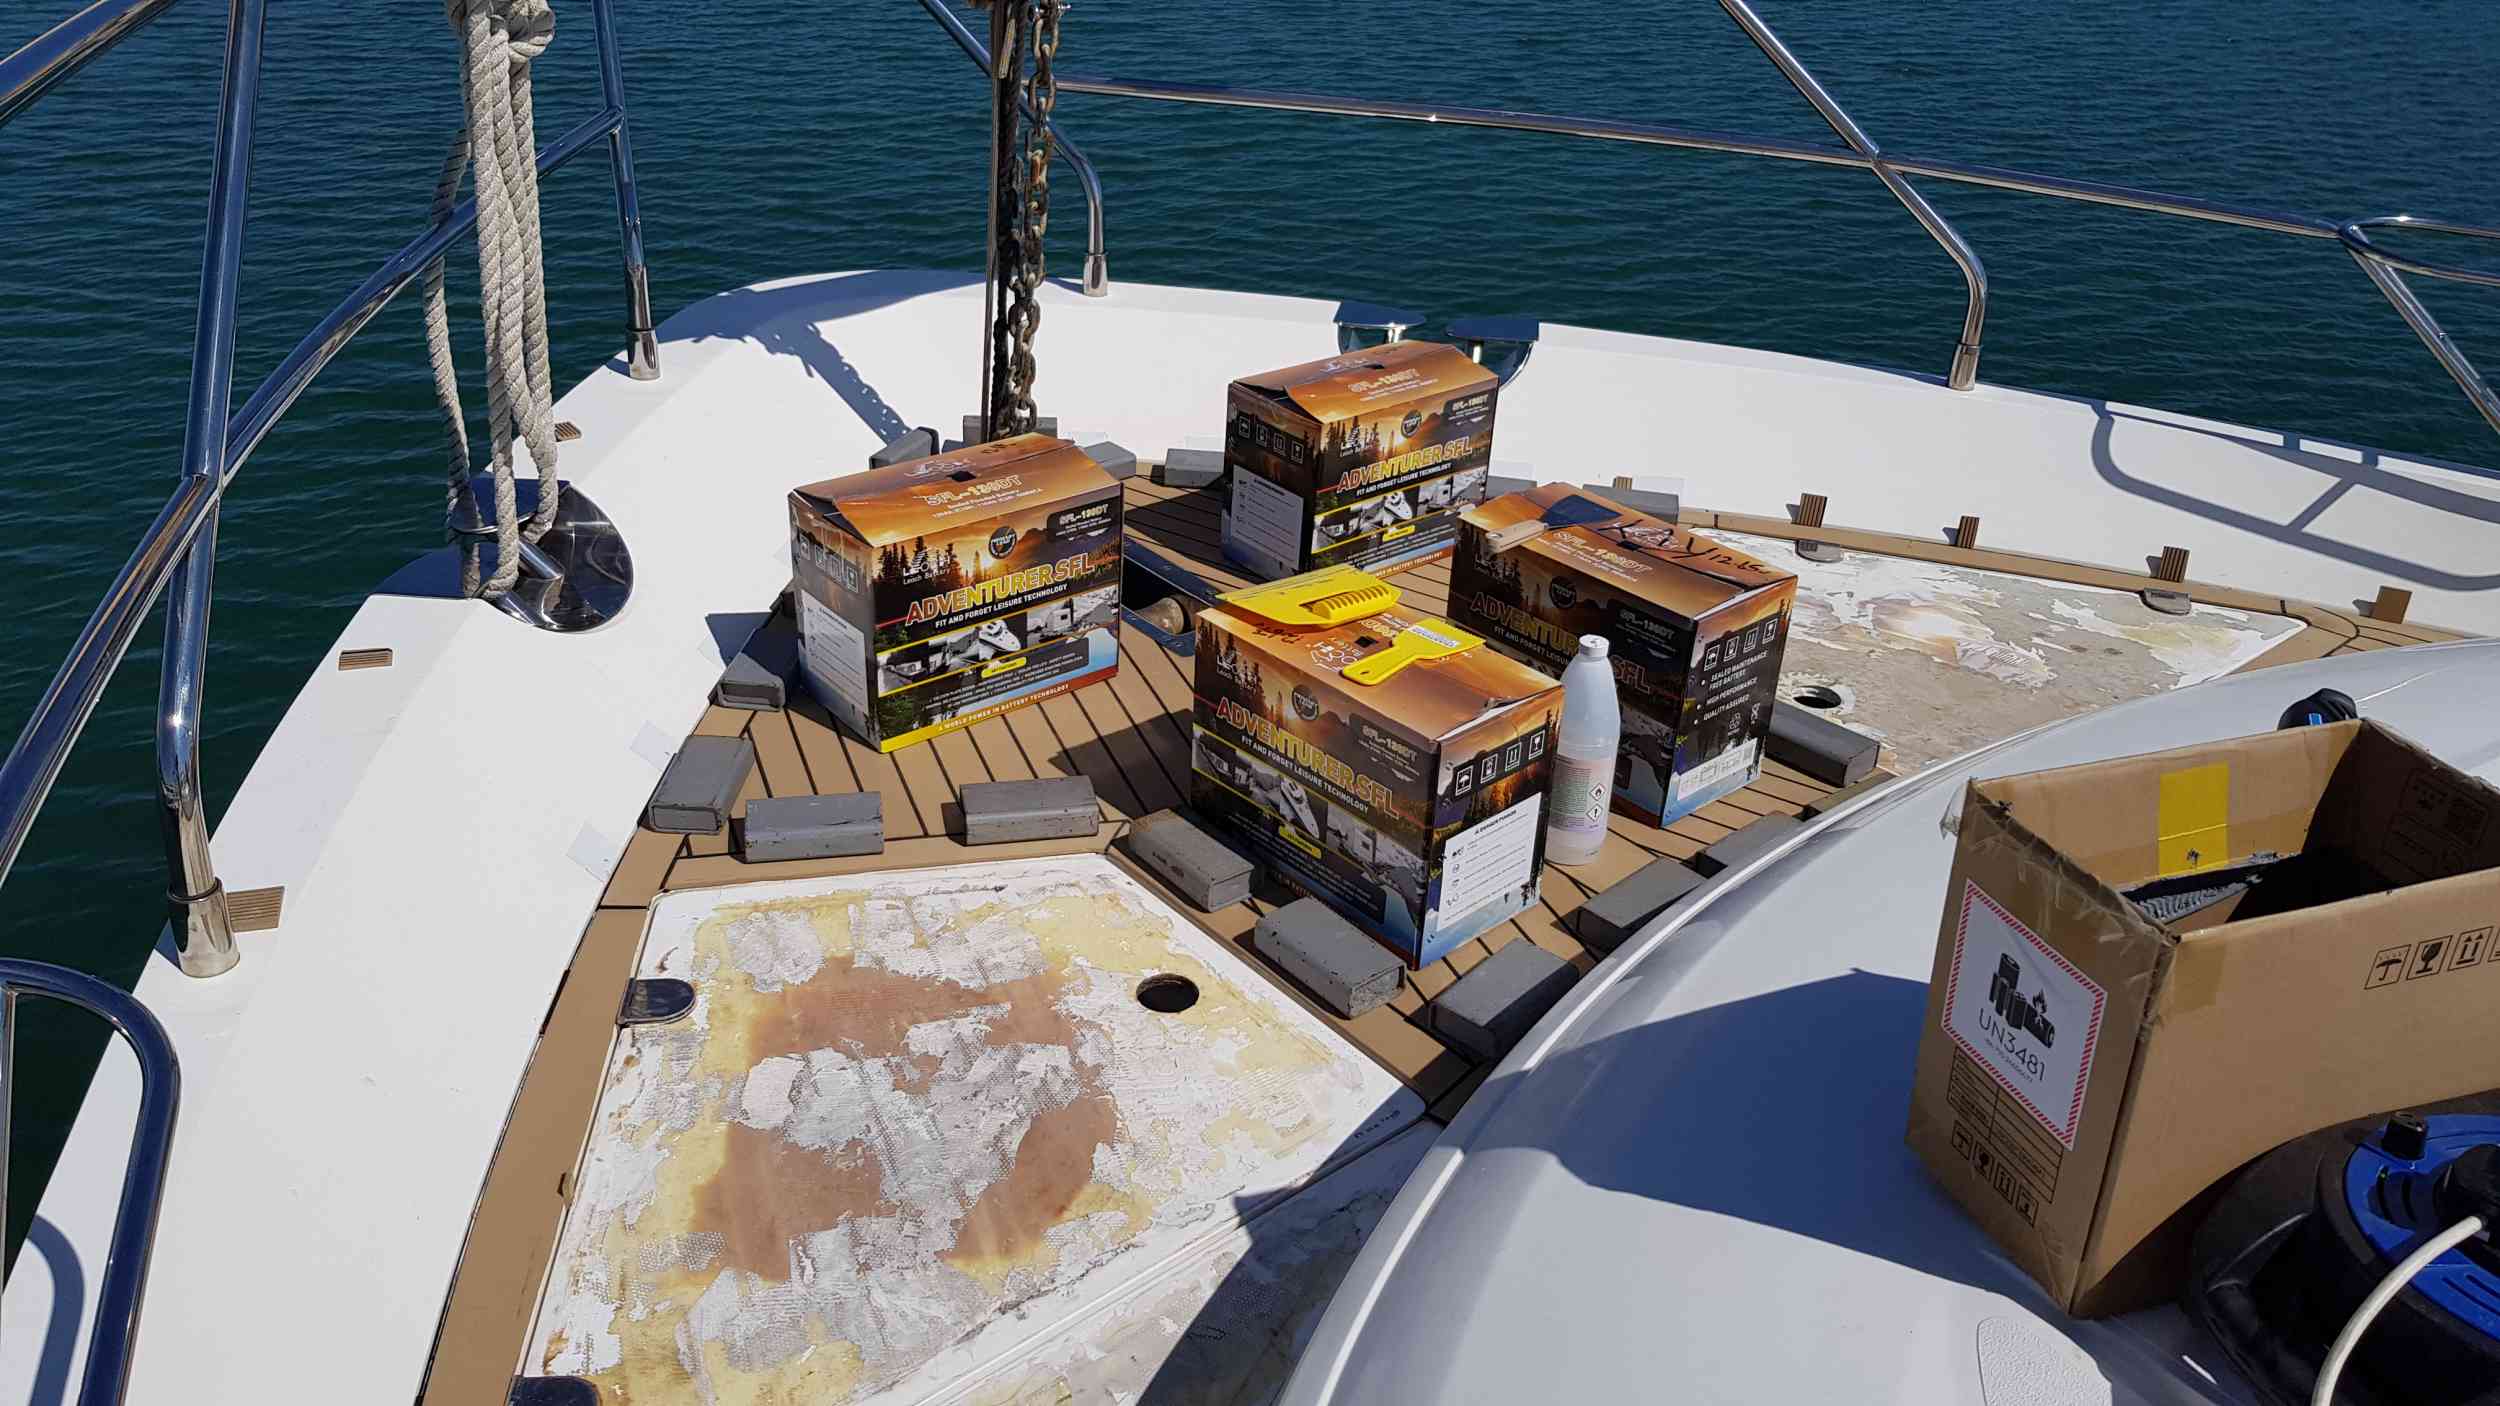
I then rolled the whole lot up and took it home. You have to remember that the boat is in Sant Carles in Spain and I live in the UK. The idea was to have the synthetic teak made over the winter period and fit it to the boat in the spring. When I got home, I ordered enough synthetic teak from Trakmark to make the whole of the foredeck and both side decks.
Trakmark were extremely helpful. I arranged to collect the material and tools that I had also ordered. During my visit to Trakmark, they took me to their workshop and showed me the various techniques.
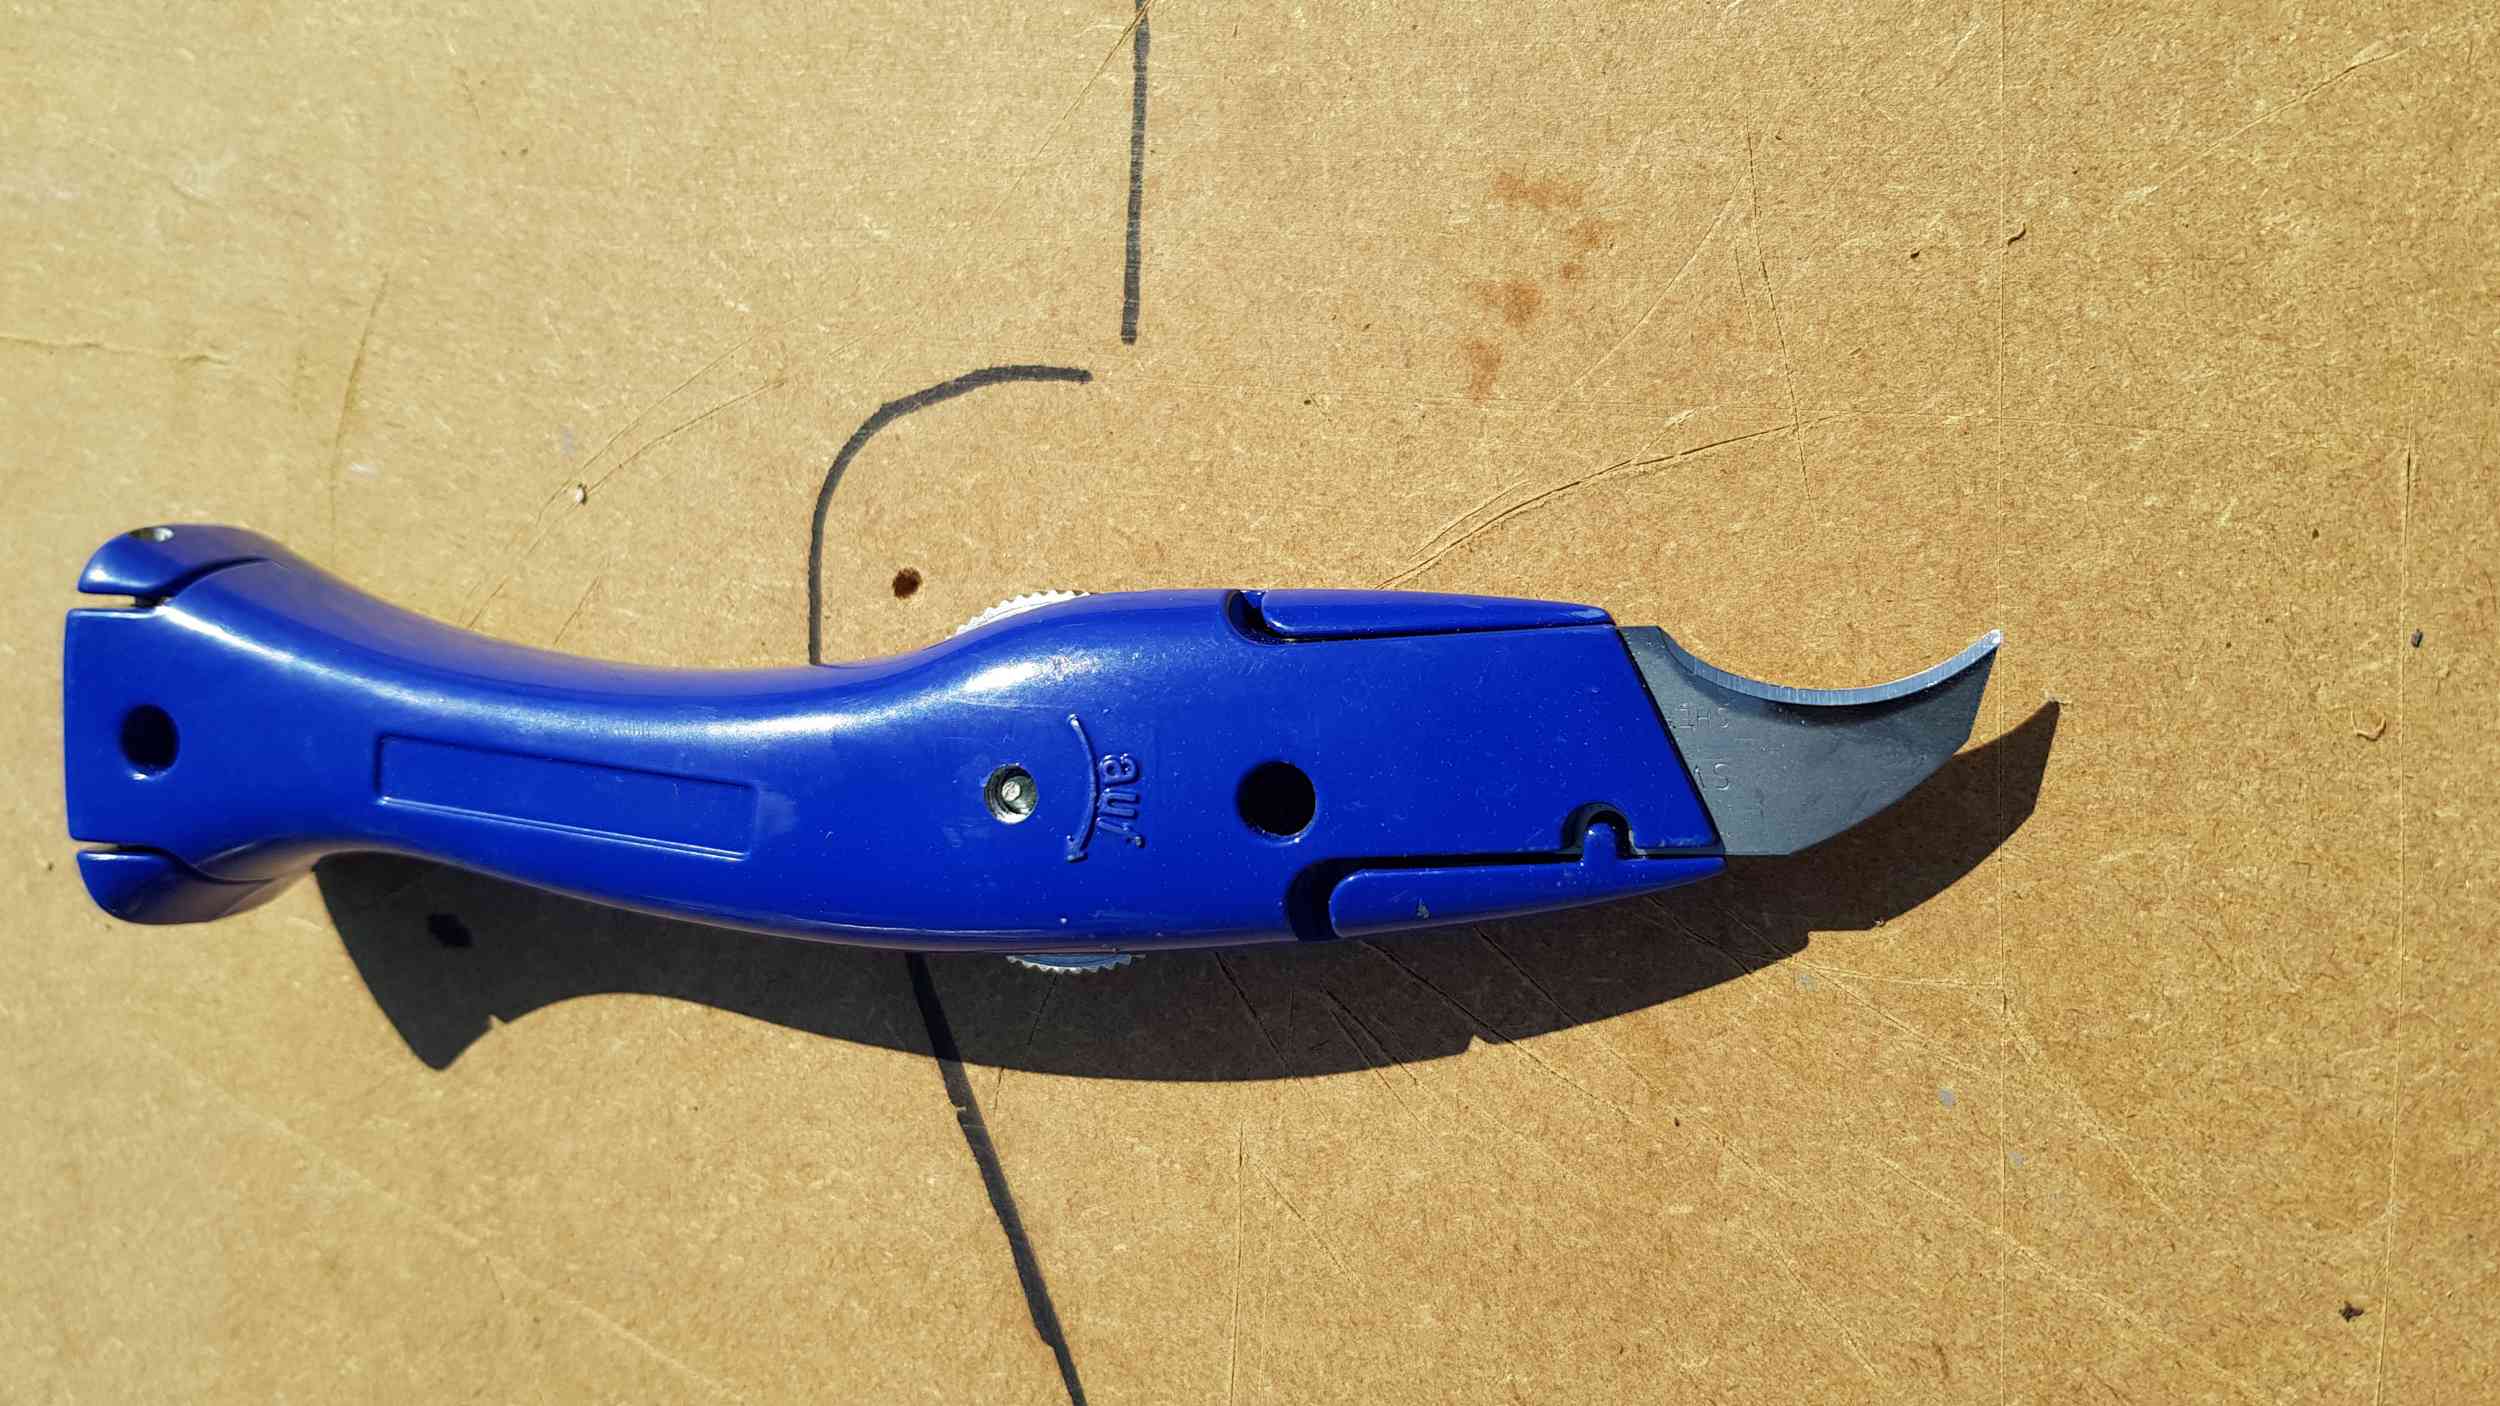
During Christmas, I experimented by making small pieces before undertaking the main job. Cutting the material is very easy once you have warmed it up. So, to cut a piece from the roll supplied, you waggle a hot air gun over the area to cut until the material goes floppy. Then it is a simple matter of cutting it with a special Stanley knife. One like this:-
Note this is not a normal “hook blade”. I bought the blades from Trakmark. Believe me, the correct blade makes a huge difference. With warmed up material and one of these blades, you can cut accurately down a pencil line. If it starts to get difficult to cut, simply warm it up again.
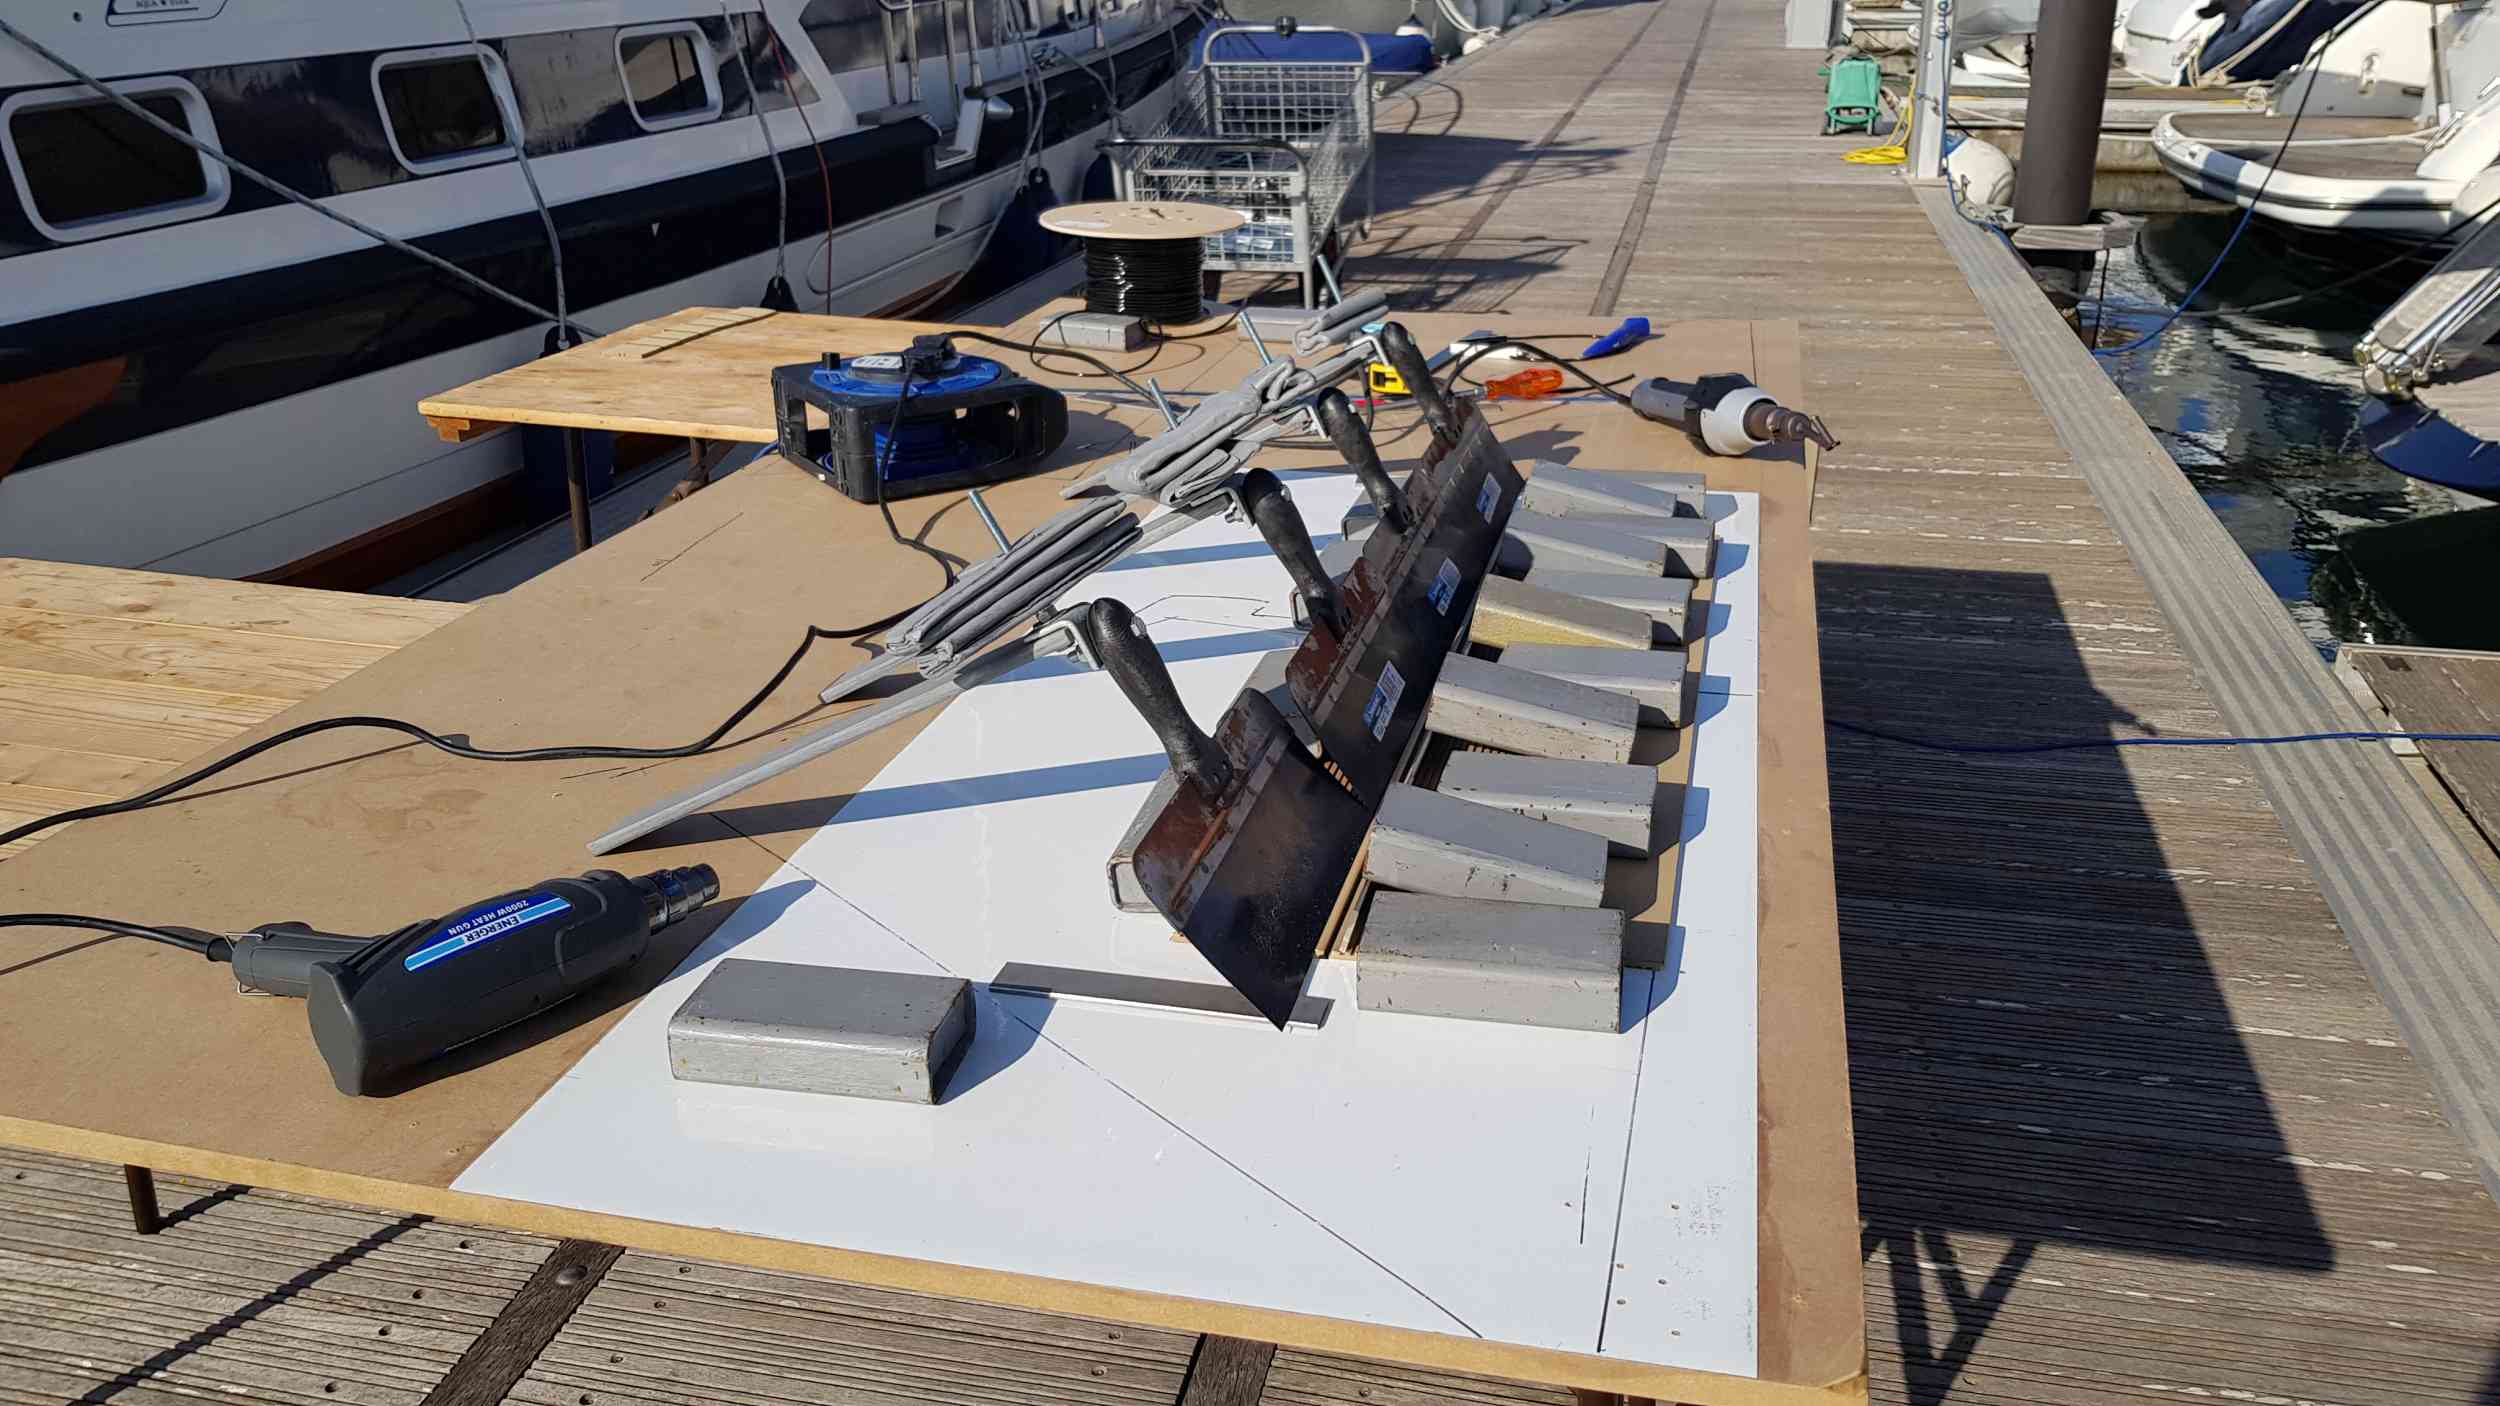
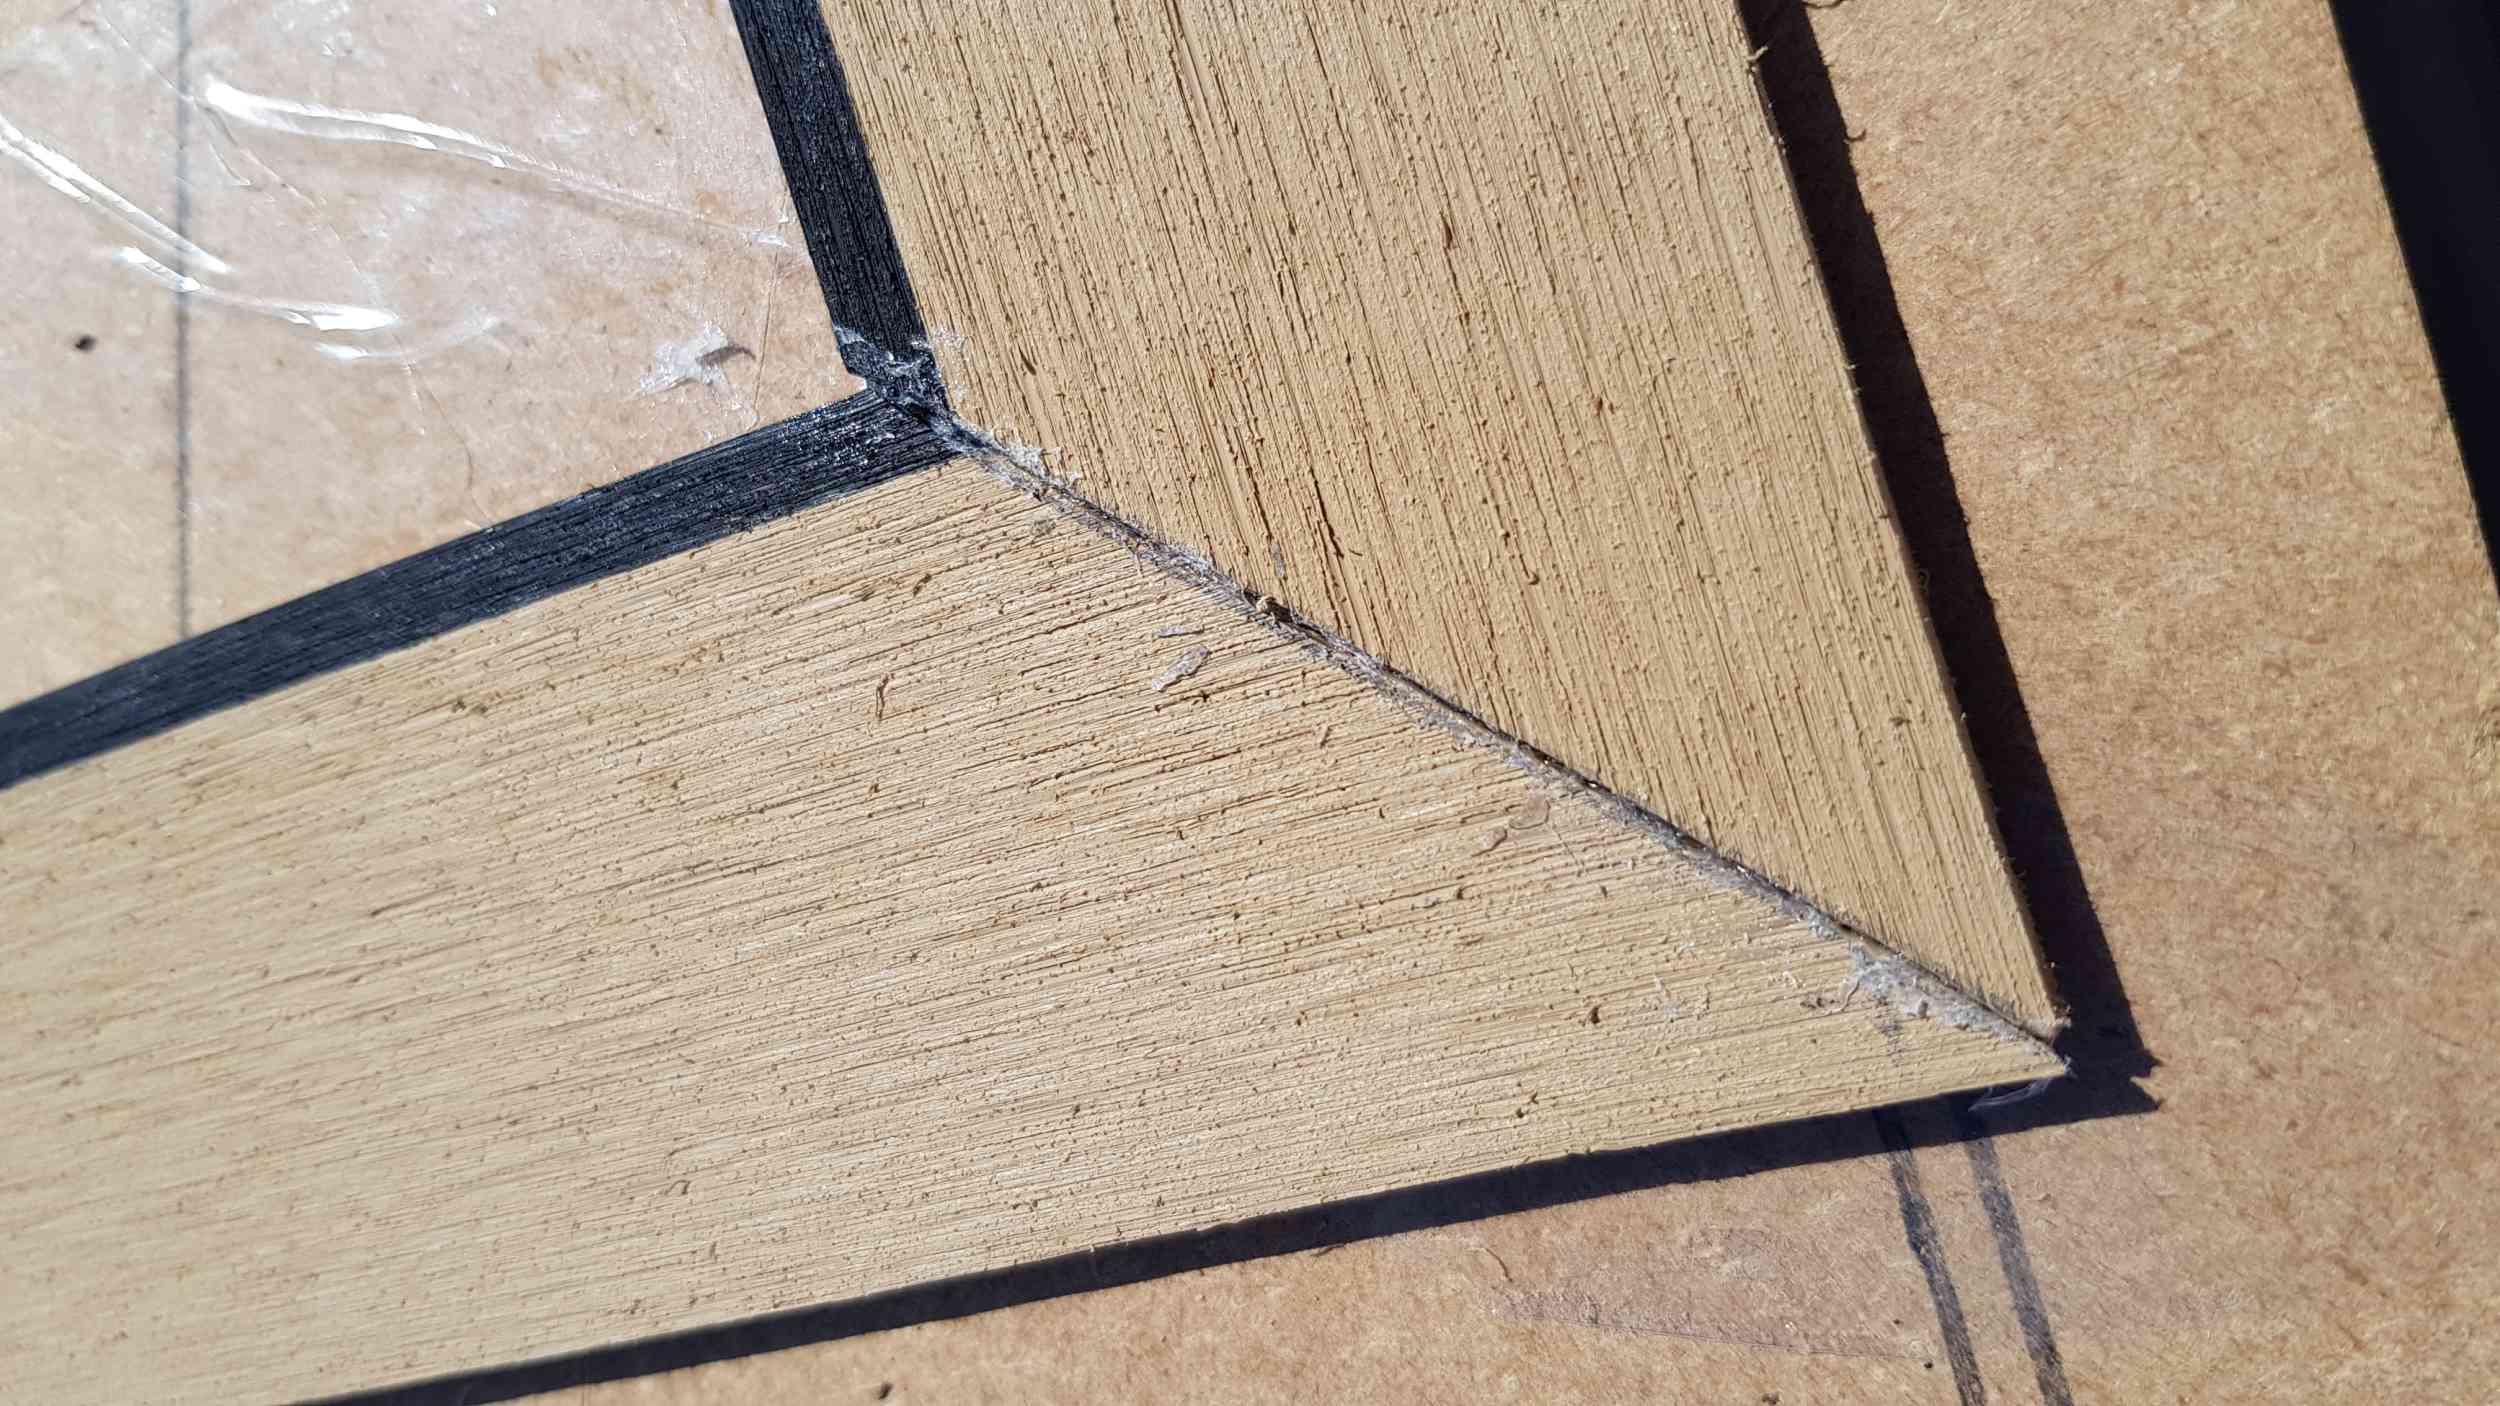
We haven’t discussed Top Welding yet. Not all joints can be made on the back of the material. Some joints, the corners for example, have to be made differently. The method that Trakmark explained to me goes like this. Cut the shape you want and stick it together using glue that they provide. The glue is called Stelmax and works in a similar way to the glue you buy to join plastic plumbing fittings. In other words, it chemically melts the surfaces to be joined just like those Airfix kits we built as kids. So, to make a corner, you cut the mitres using the trusty hooked Stanley blade (no need for any special tools when cutting – just common sense) and stick the joint together. I then use my lead filled weights to keep the joint tight until the glue has dried. Trakmark suggested that the glued joint should be left overnight but I have found that a couple of hours is enough. Here is a pic of a stuck corner joint:-
Now that the joint is firmly attached, we have just got to make it look like the other back welded joints. I use Trackmark’s method which uses a standard wood router and guide. Using a 4mm router bit, I cut a groove following the glue line on the top surface about 3mm deep. Then, using a different (softer) welding rod to the one used to weld the back, I fill the groove with plastic to look like caulking. This is where I had most of my problems. Trakmark use the same welding gun for the top welds as for the bottom welds but with different temperature/airflow settings on the welding gun. You finish of the joint by removing any excess “top weld rod” and sand the joint with sandpaper. I couldn’t get it to look right so I resorted to manually welding without using the speed nozzle. The idea is to blow hot air between the weld rod and the groove but too much and you can melt the material. Too little and the weld rod doesn’t stick. So I developed my own technique. For me, the weld gun is too big for this job and I need more control to get it looking right. So I bought one of these – a hot air soldering station – you can get them from Ebay for about 30 quid.
Using a small nozzle that fits into the groove, I have far more control and I can now get the joint looking good. I have also made a roller and I usually get SWMBO to follow me with the roller pushing the rod into the groove as I make the top weld. Sorry, I don’t have any photos of this part of the process but the corners in the lower step next to the fuel filler in this photo were done using that technique.
To Snape or Not to Snape – That is the Question.
Snapes are the rounded corners that you find on wooden teak decks. Wood doesn’t like being cut into a sharp point – it splinters. So, the manufacturers of wooden teaks deck form curves thus avoiding pointed joints. Plastic doesn’t have this problem so it is perfectly possible to make a deck in synthetic teak where the planks are allowed to come to a point. Now the 64 thousand dollar question is, do you want it looking like original teak, or do you want it with a cleaner finish without all the fiddly curves. Originally, I wanted it to look exactly like the original but I couldn’t make the Snape joints as good as the machine that extrudes the base material.
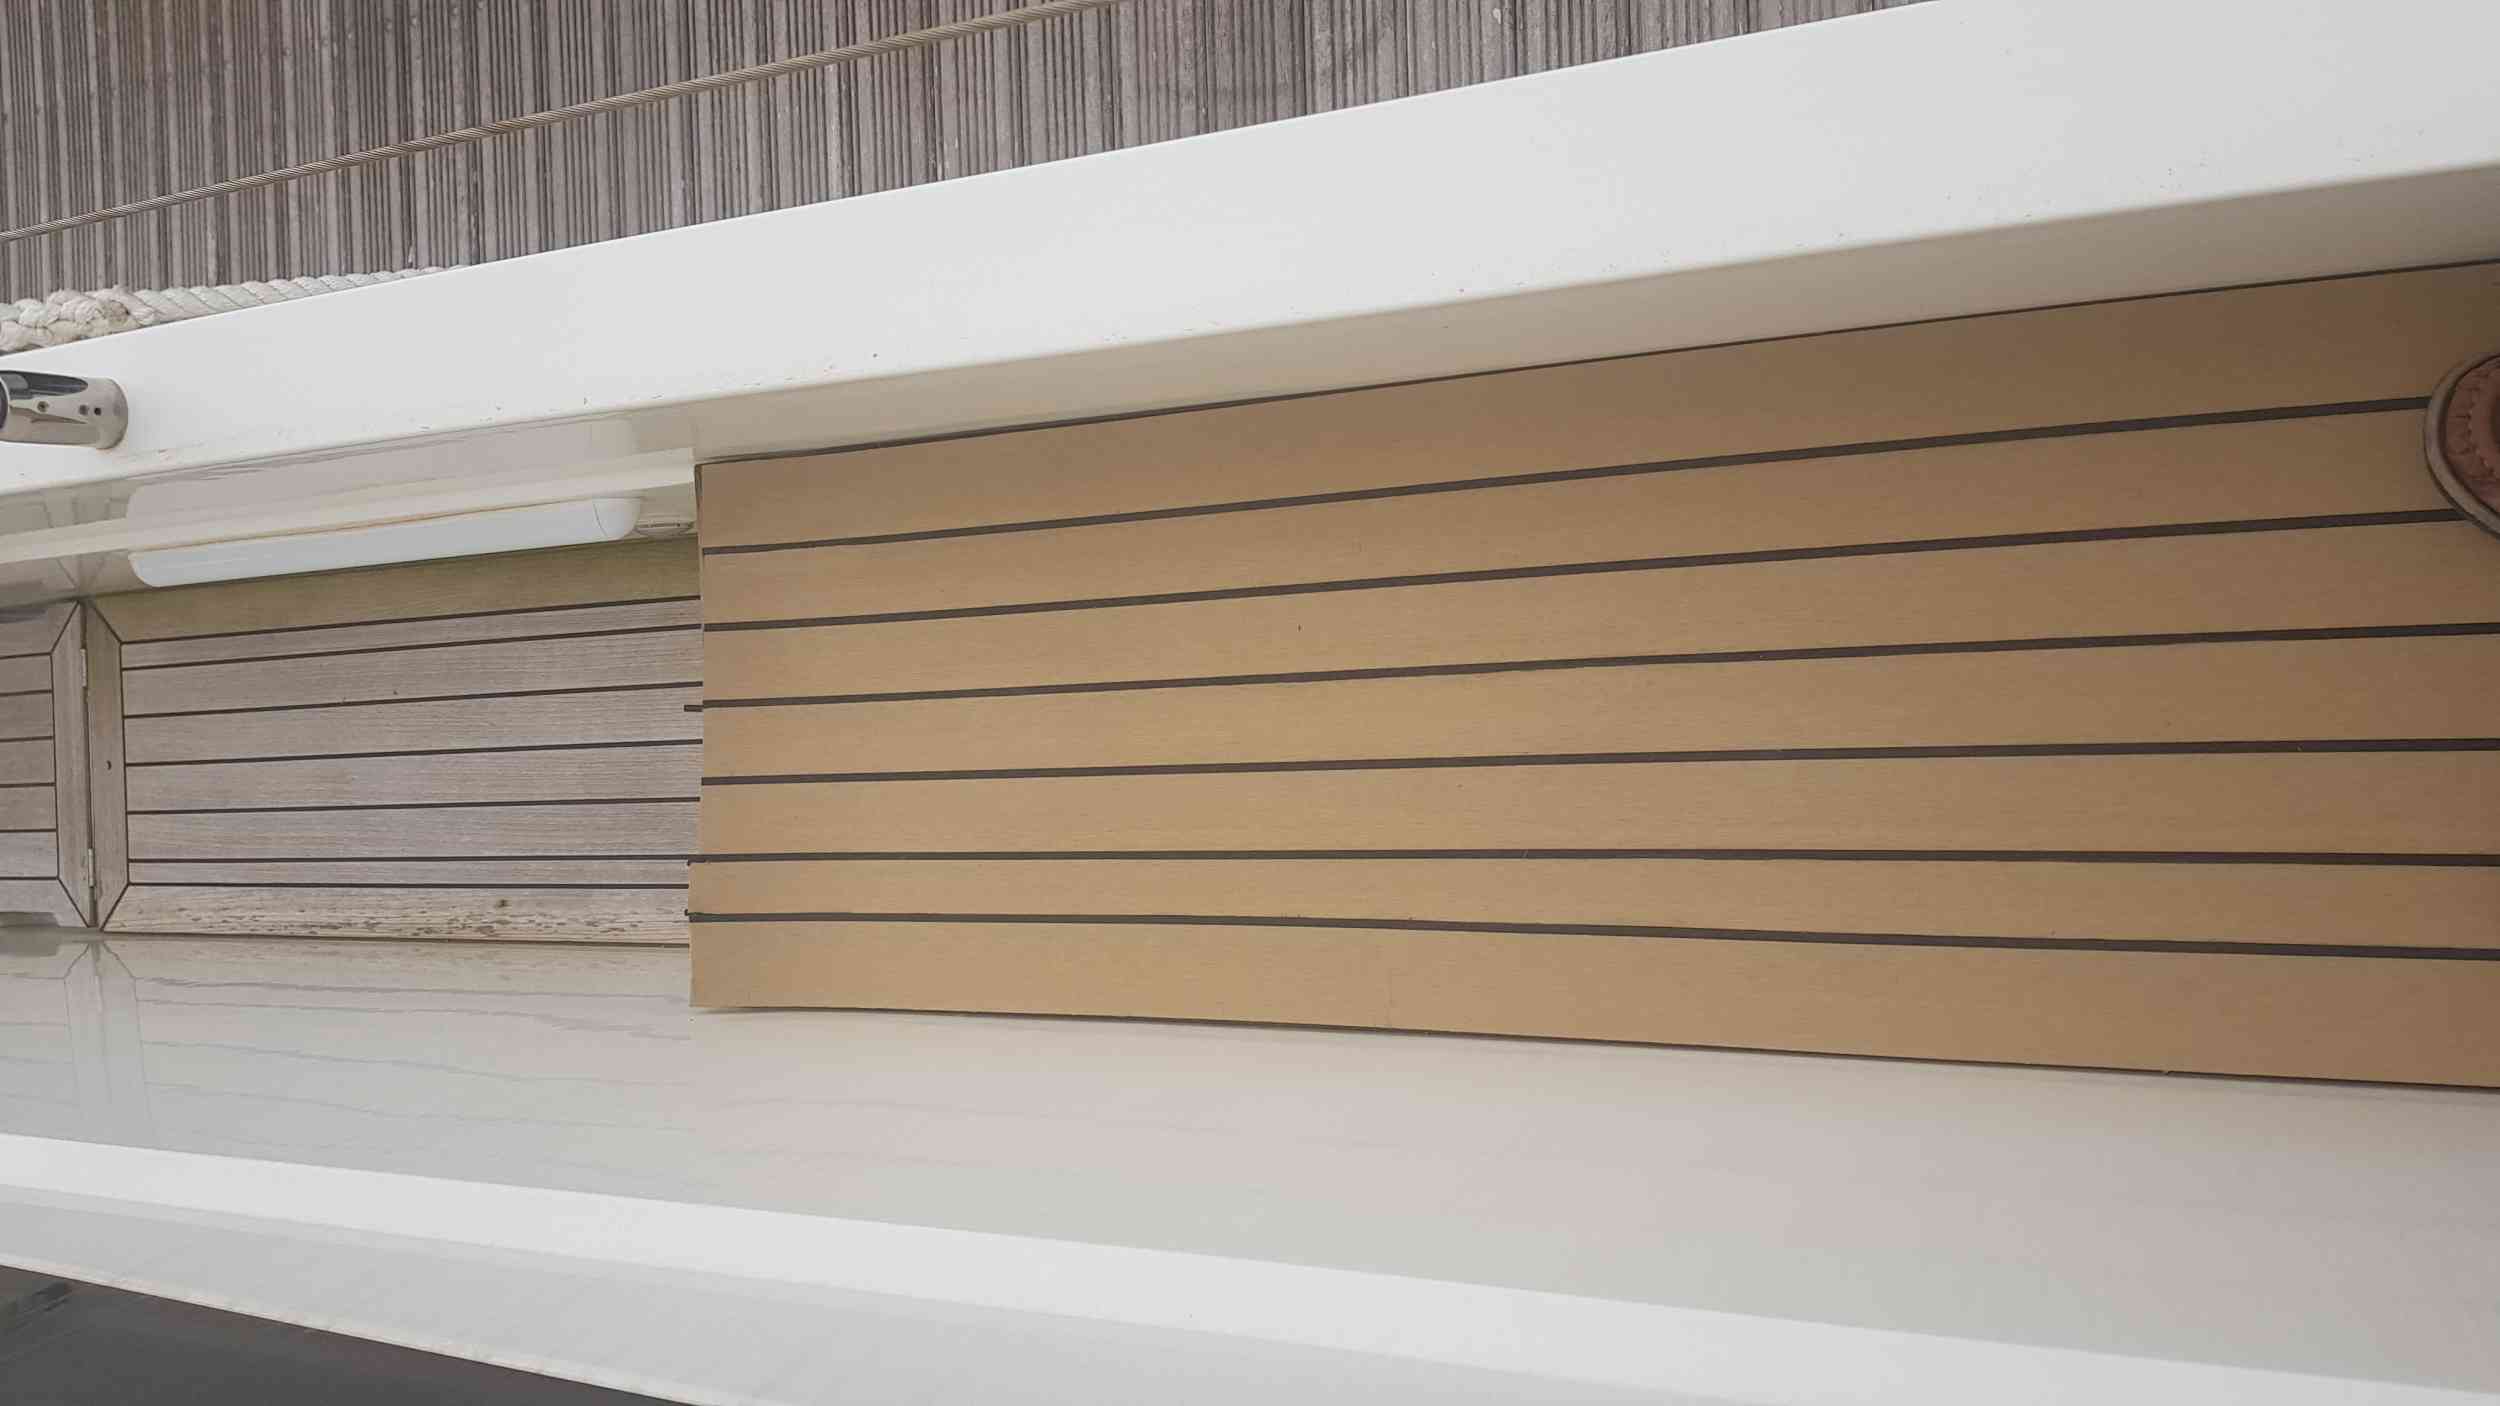
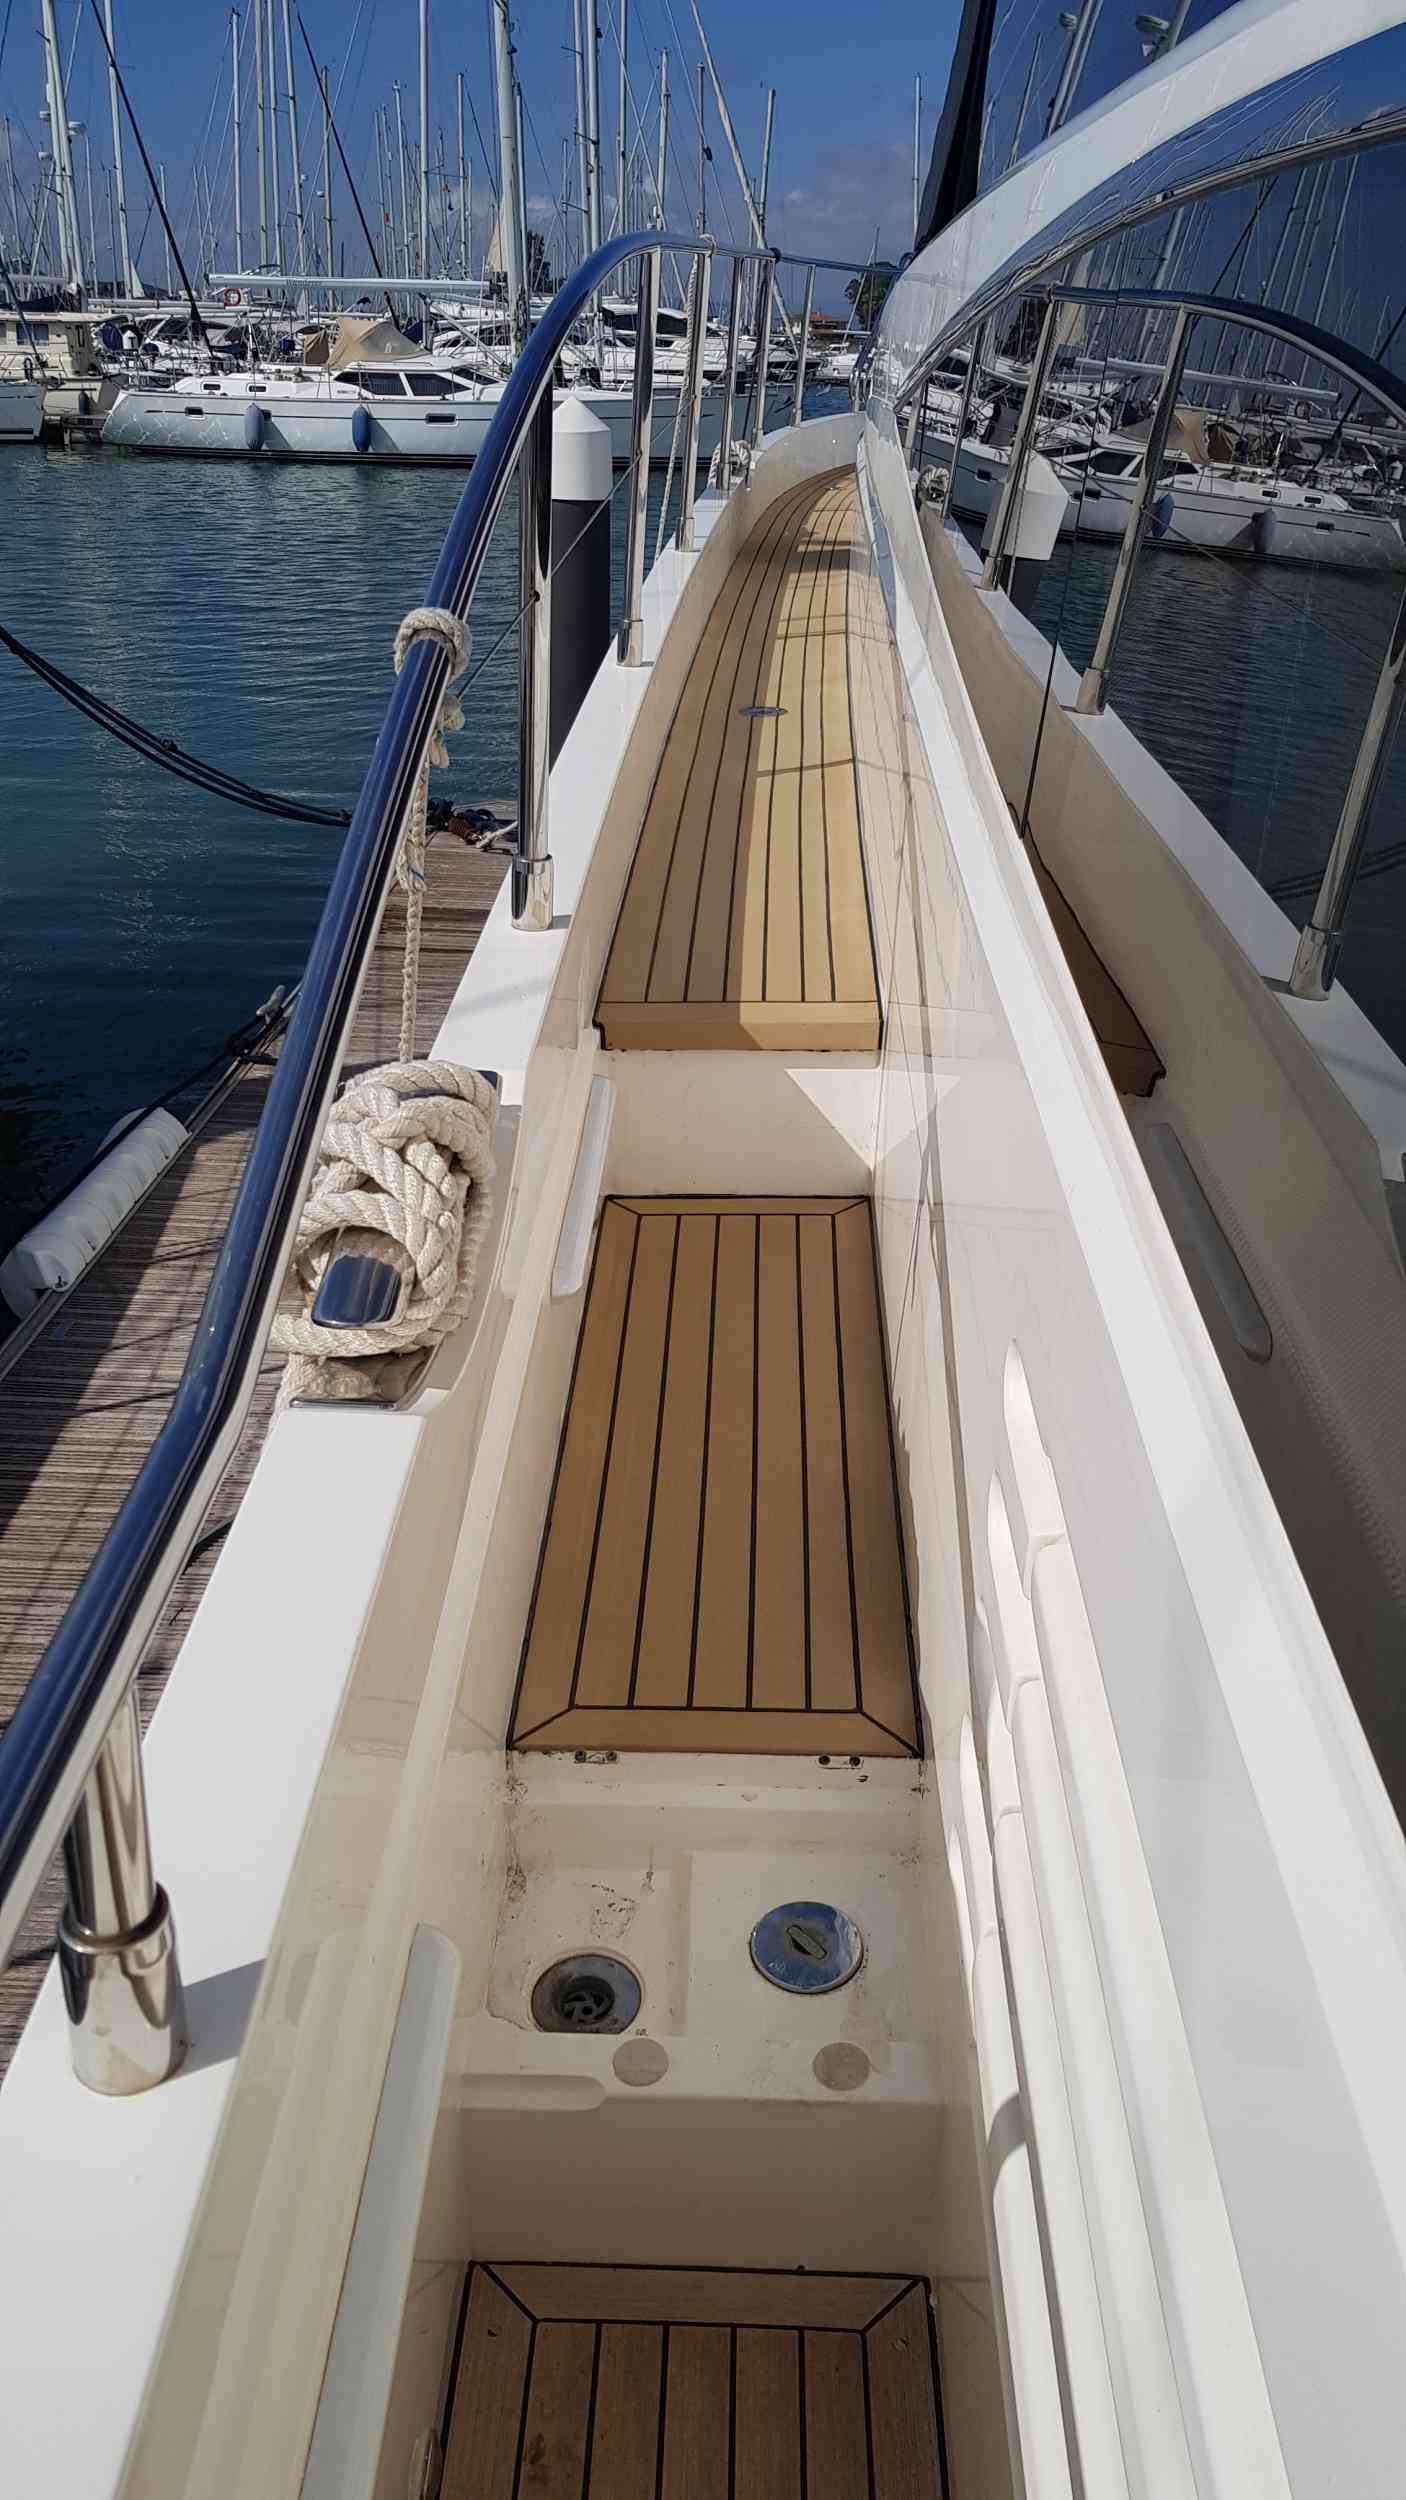
By mid January, I had made the port side deck completely and one of the bow hatches but I wasn’t sure about the Spapes. So, I rolled it all up. Put it in a bag and booked a flight out to Spain. The idea was to see how well it fitted and to do some “mock ups” with the Snapes. If it didn’t fit, I would scrap the whole project! But, to my amazement, it DID fit. The great thing with synthetic teak is that it comes in 10m lengths so I was able to do the whole of the side deck without any joints. Wattsons made the Princess 67 side decks in at least three pieces. In fact the teak has been lifting for many years where at those joints.
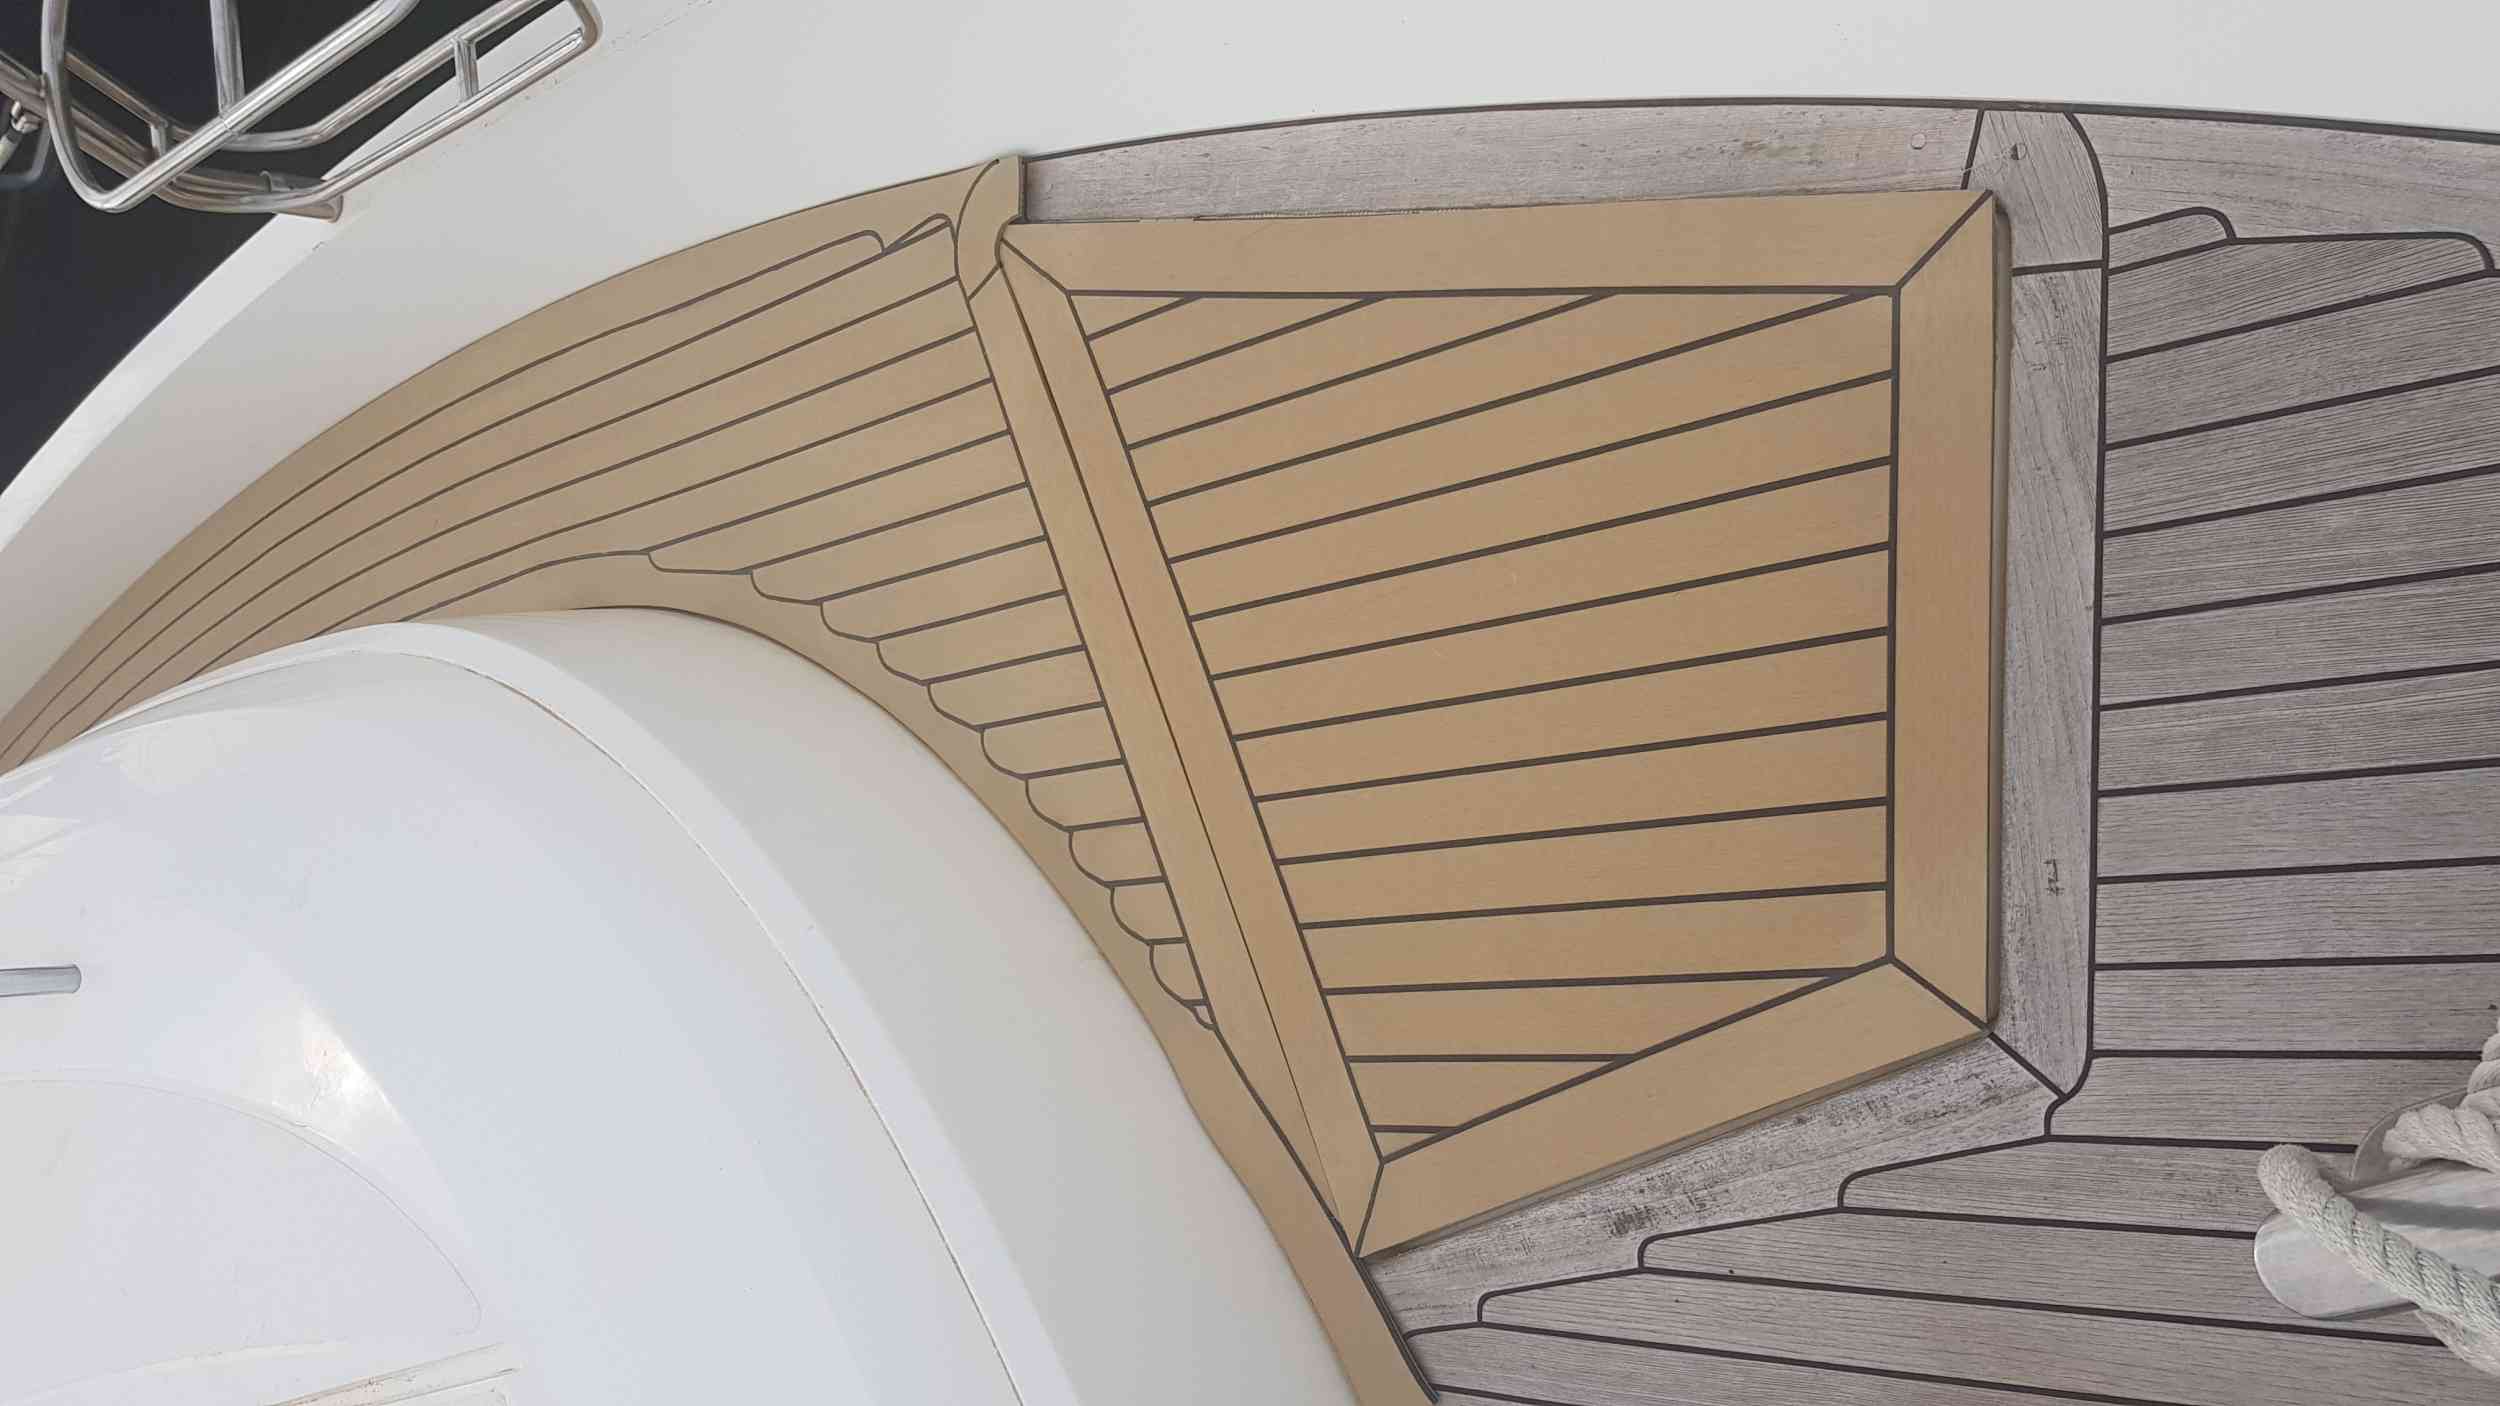
So, excited with my port side fitting, I continued with the Snape mock ups. Here are some pics that I took at the time.
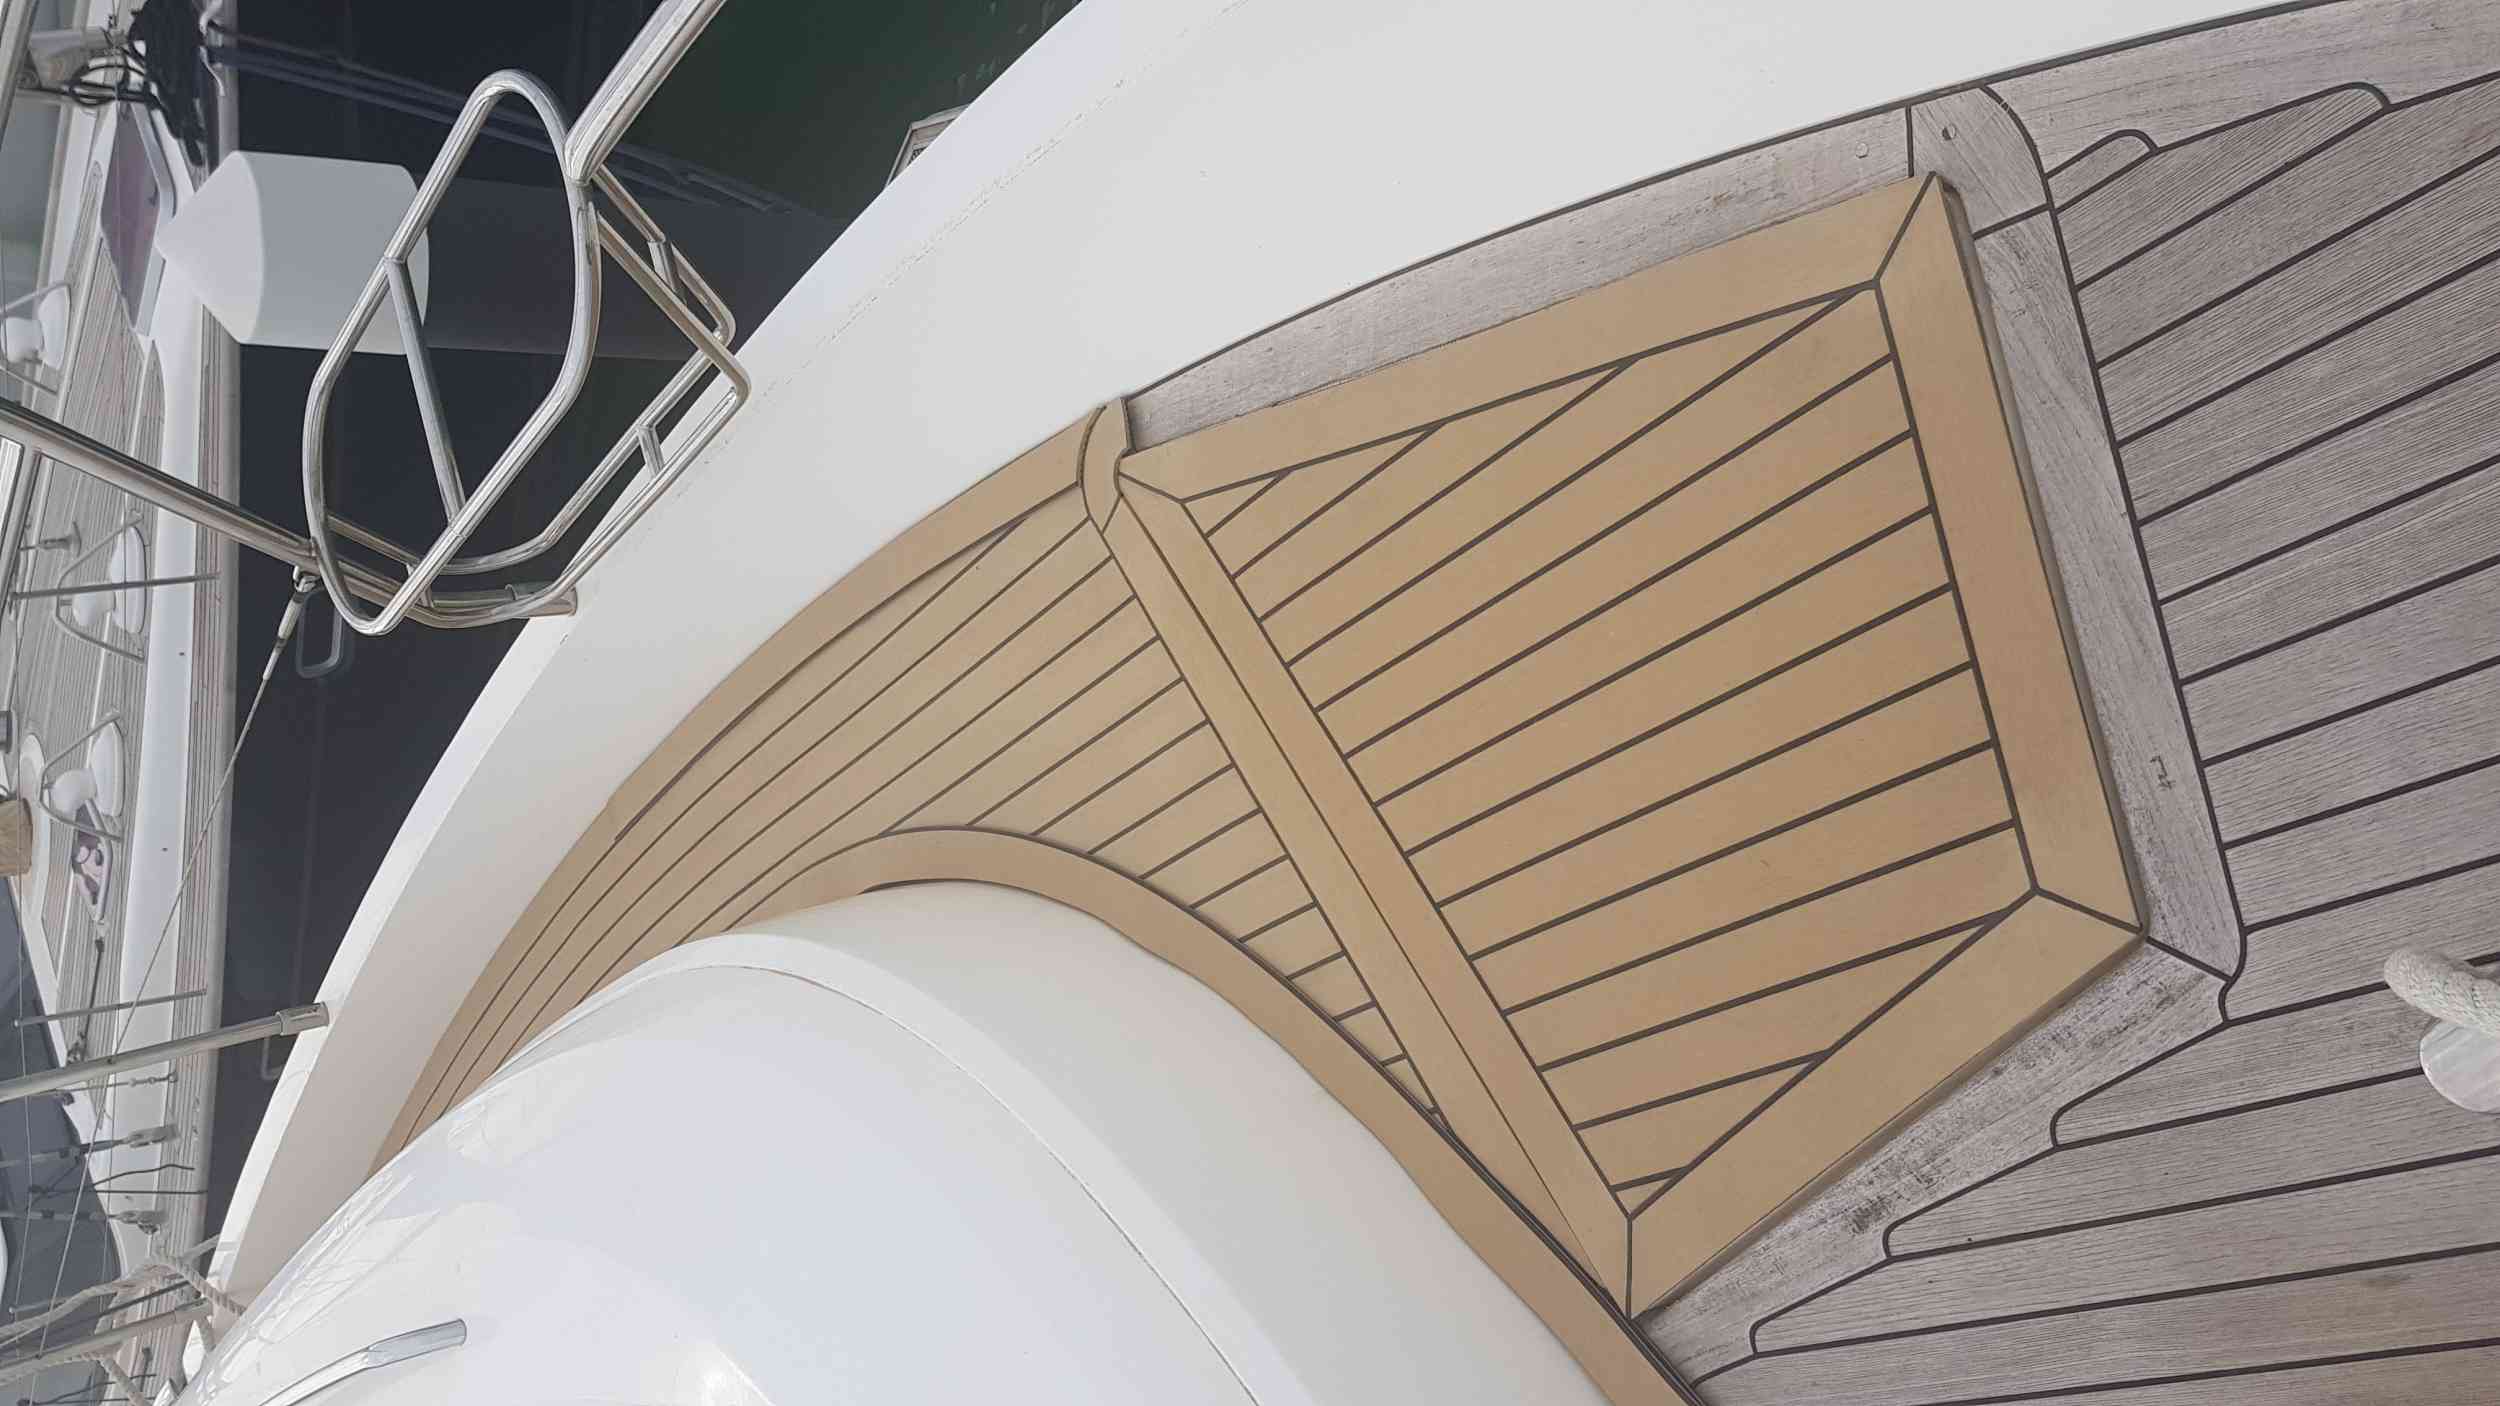
This is with Snapes
And this is it mocked up without Snapes. In other words, just using the factory machined edge to finish the job.
I took the pics back home to SWMBO and we both agreed that it looked a lot cleaner without Snapes. If you look closely, at my Snape joints you can see that the joint isn’t particularly good. At the time, I was giving myself about 9/10 for the Snape joint and 10/10 for the non Snape joint. Both would work but we decided that we didn’t need Snapes.
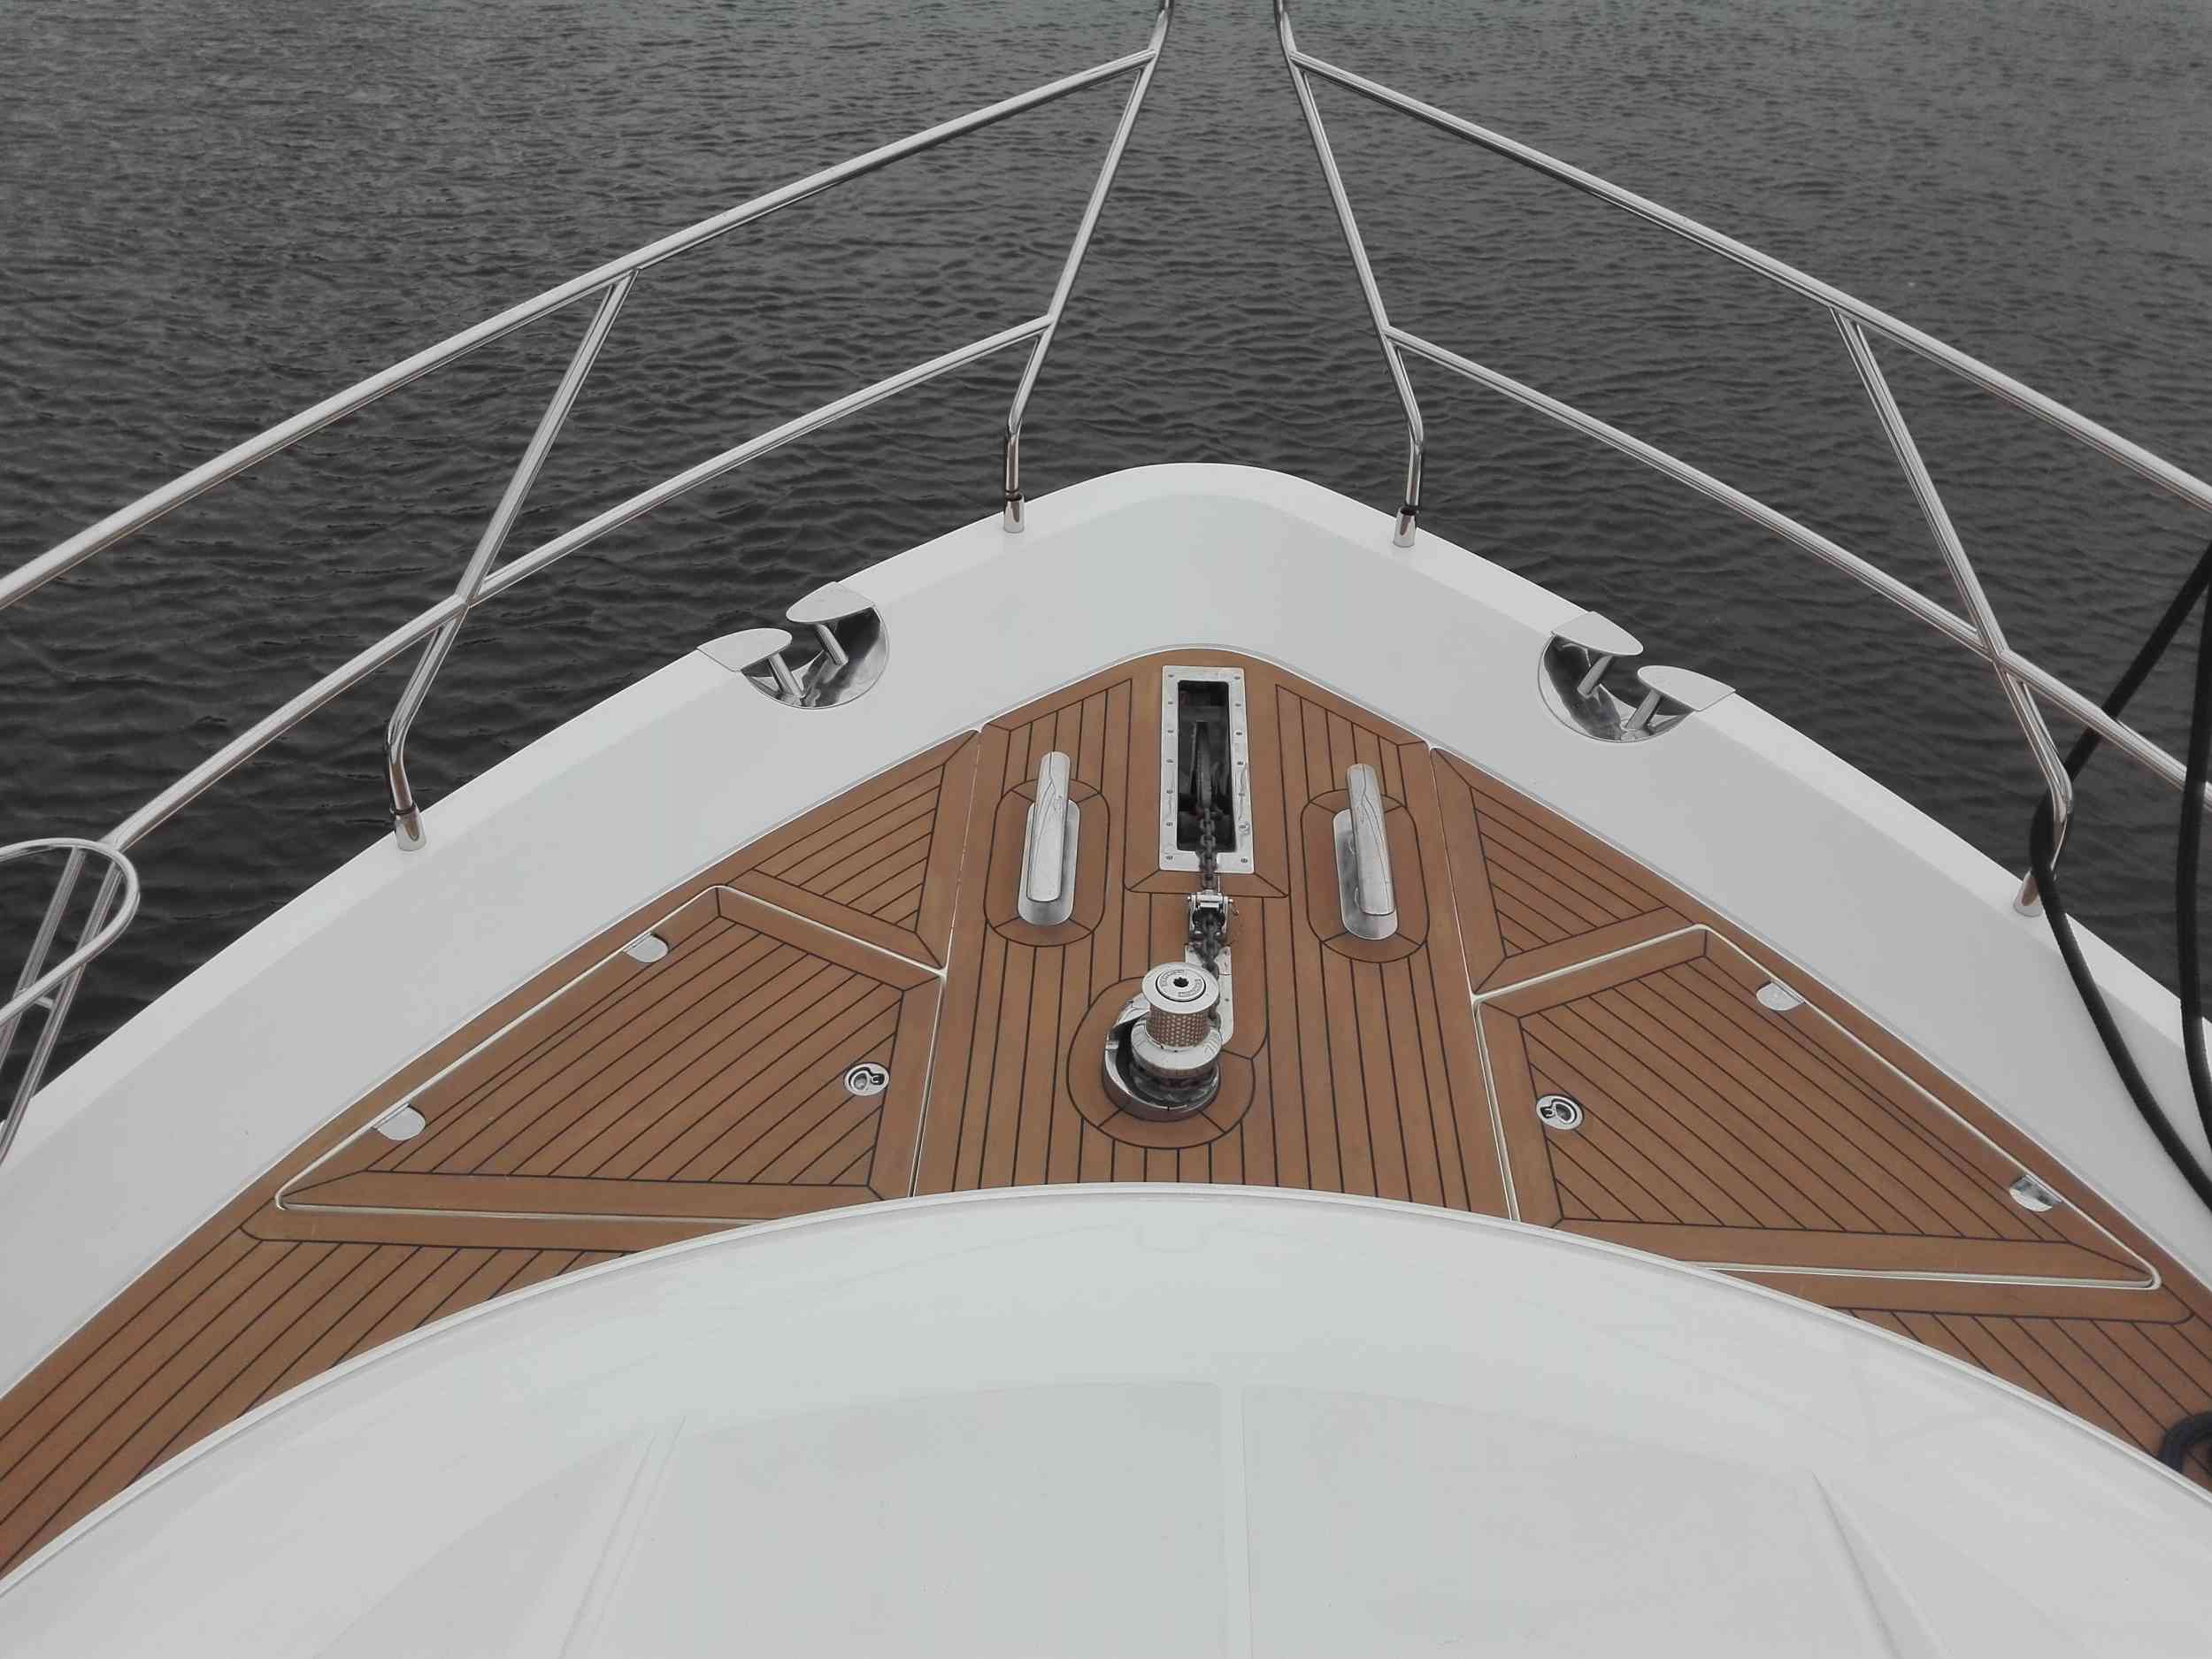
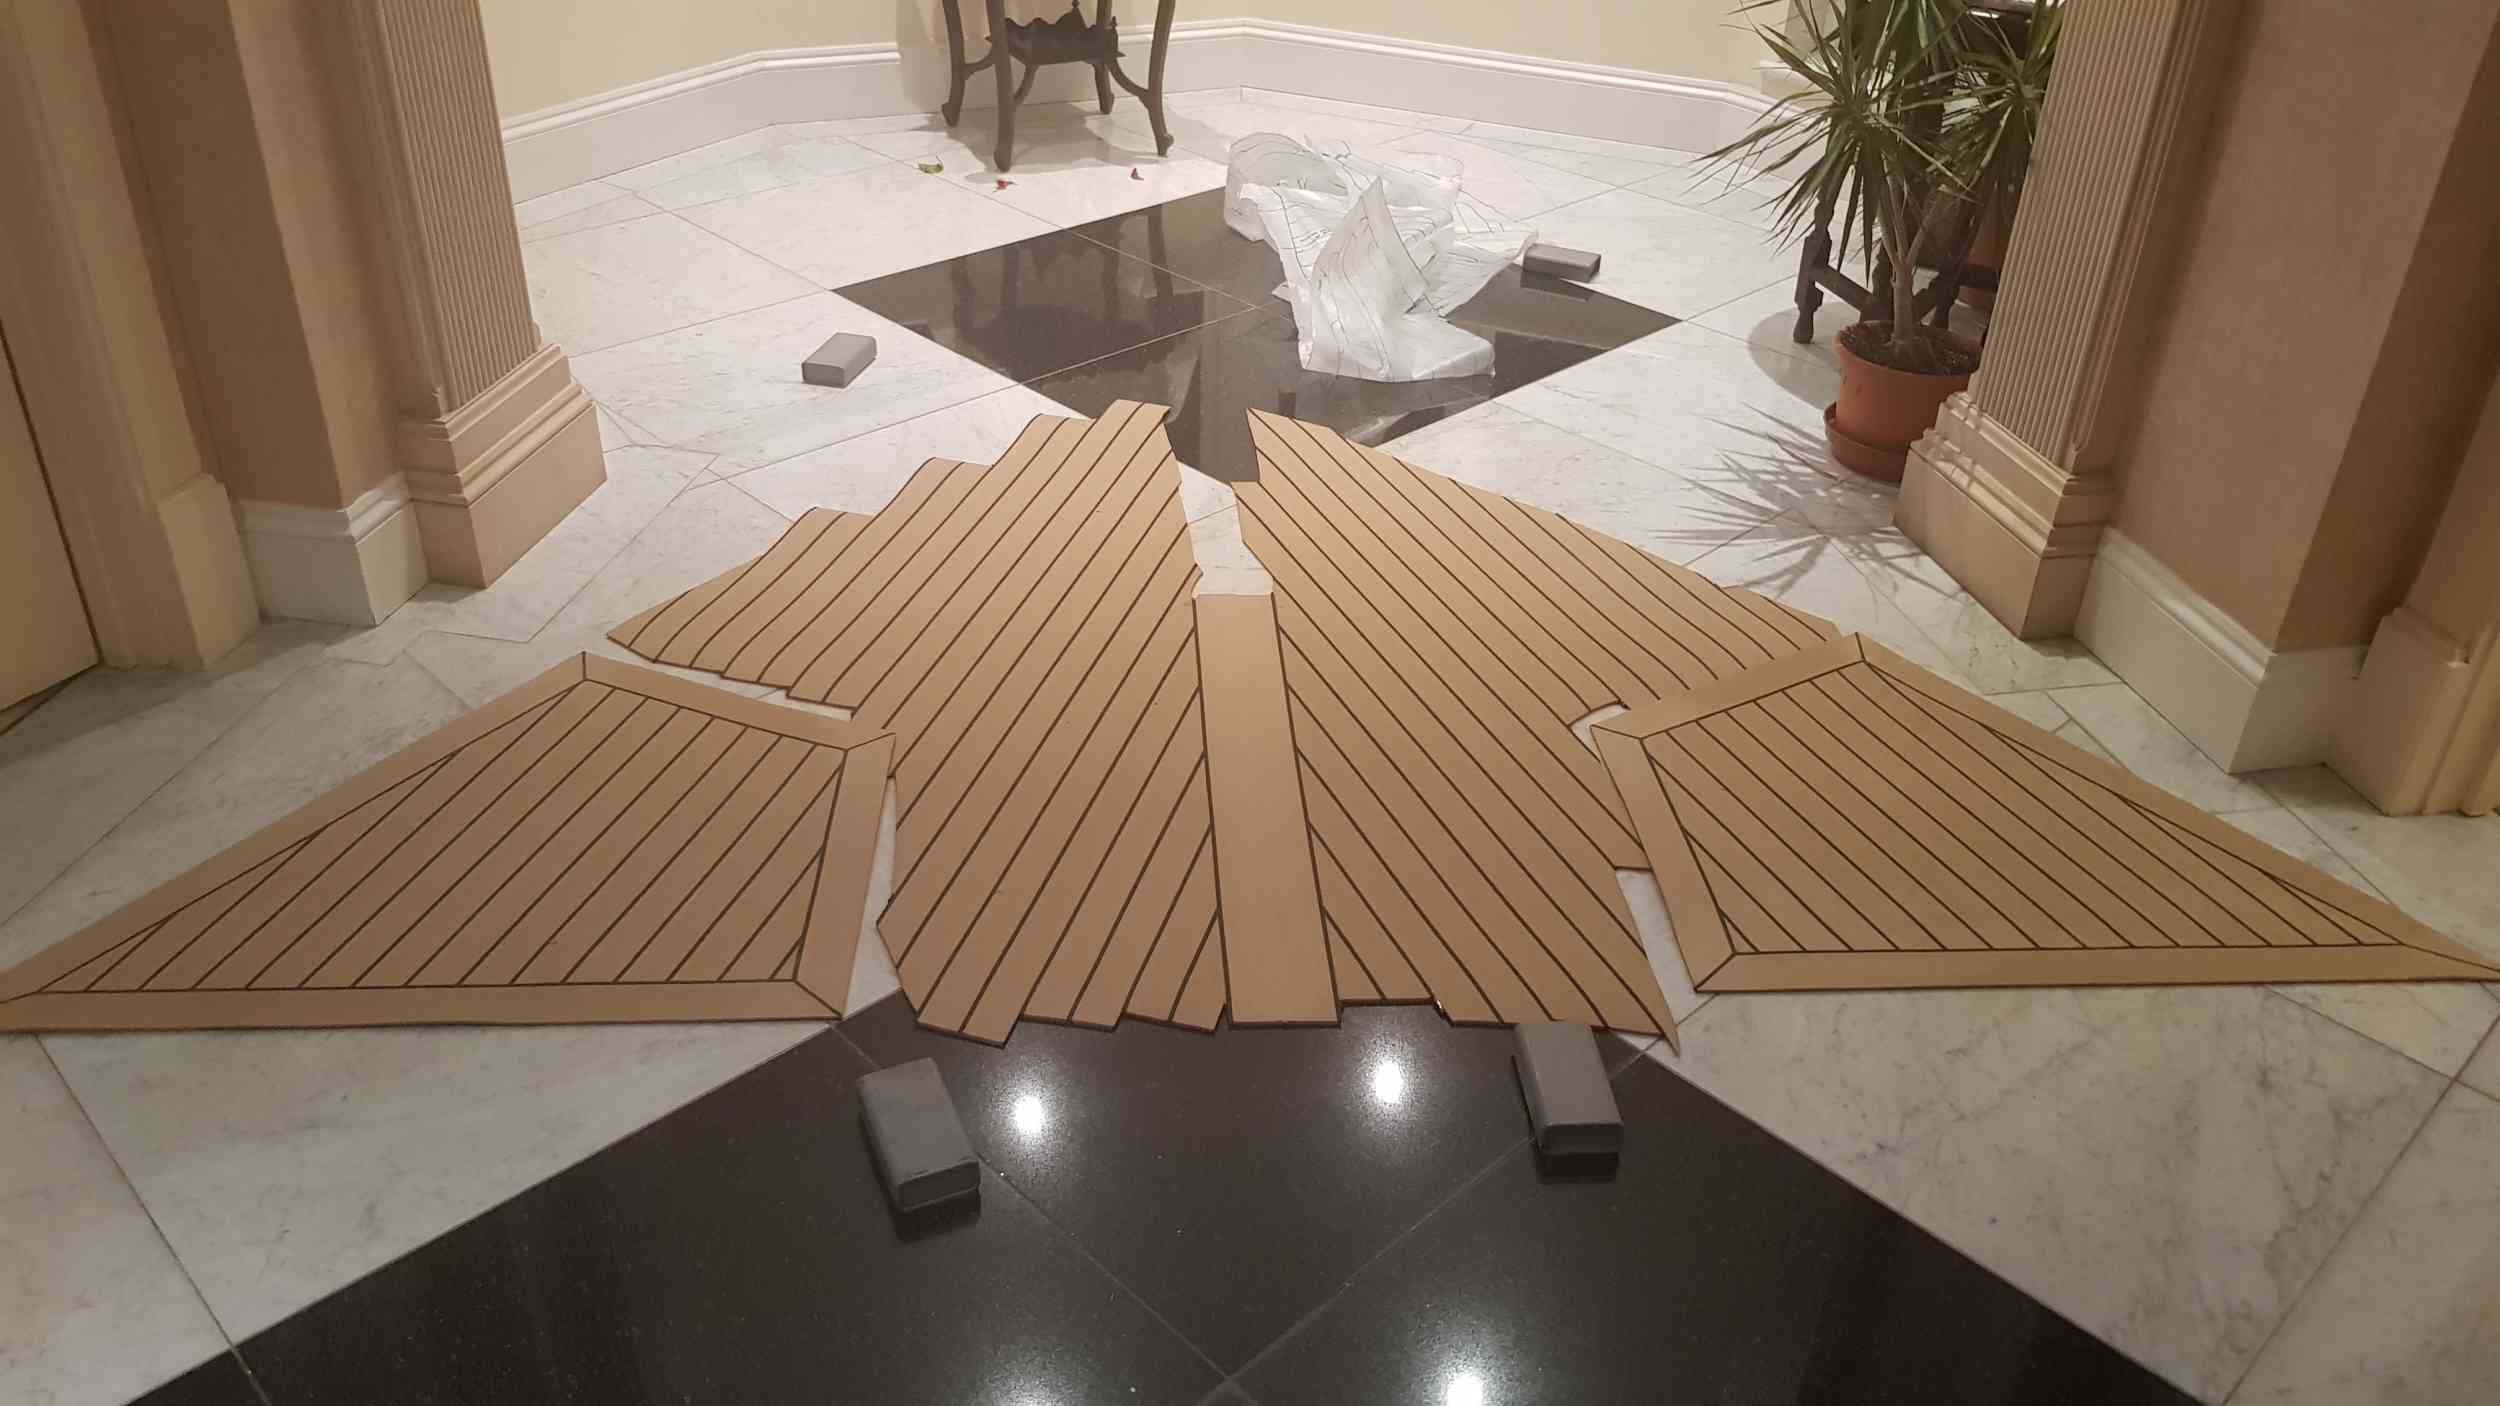
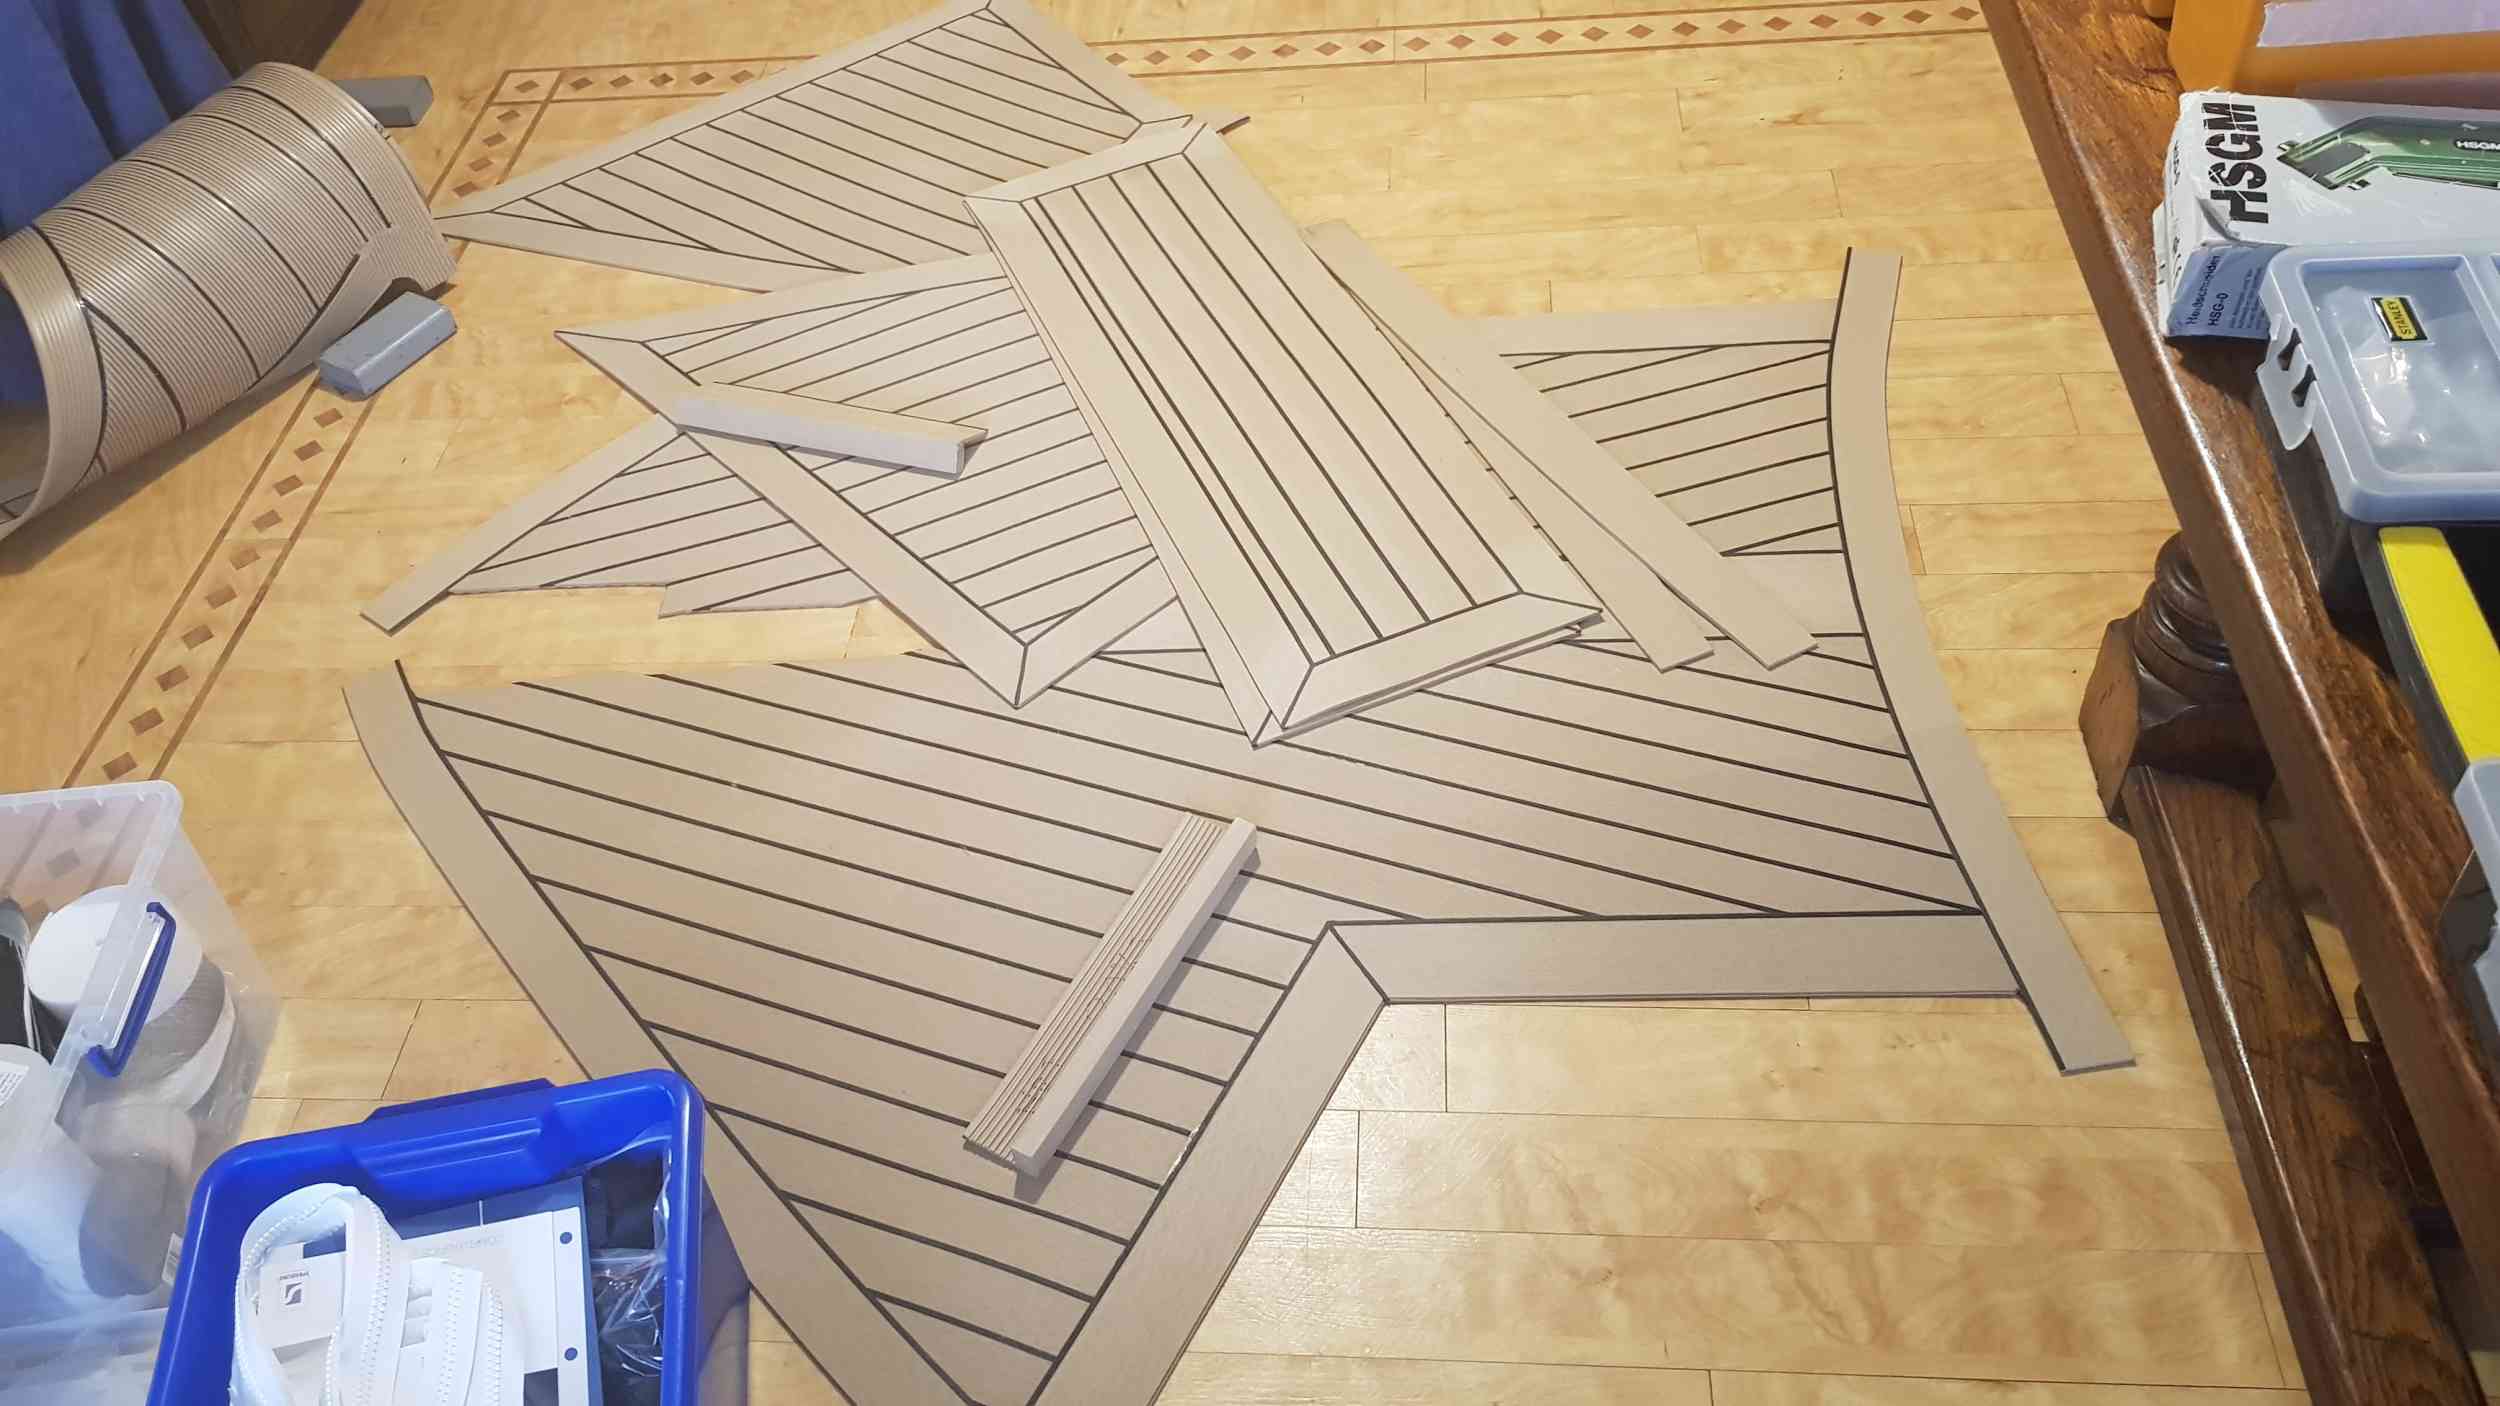
Back home I got back onto the project and finished the starboard side and starboard hatch cover. Then, following the “No Snapes” concept, I make the main foredeck from my templates.
Here are some pics of the fore deck and other pieces as they developed.
First without borders
And then finished – with borders
These pics show something interesting – the King Plank. That is the wide plank where the windlass will eventually go. Trakmark make a section that they actually call “King Plank”. I bought some but I was worried how it would join to the rest of the fore deck planks. After some careful thought, I joined two border planks together, back to back. Track mark also offer “Repair Rod” which is welding rod of the same colour as the base material. If you weld it into a routered groove, you can make an invisible joint. By doing this, the black machined edge was now on the outside of the home made King Plank. So it was dead easy to make the joint to the King Plank using a back weld thus making the whole deck look good. This concept was only possible after the decision not to have Snapes.
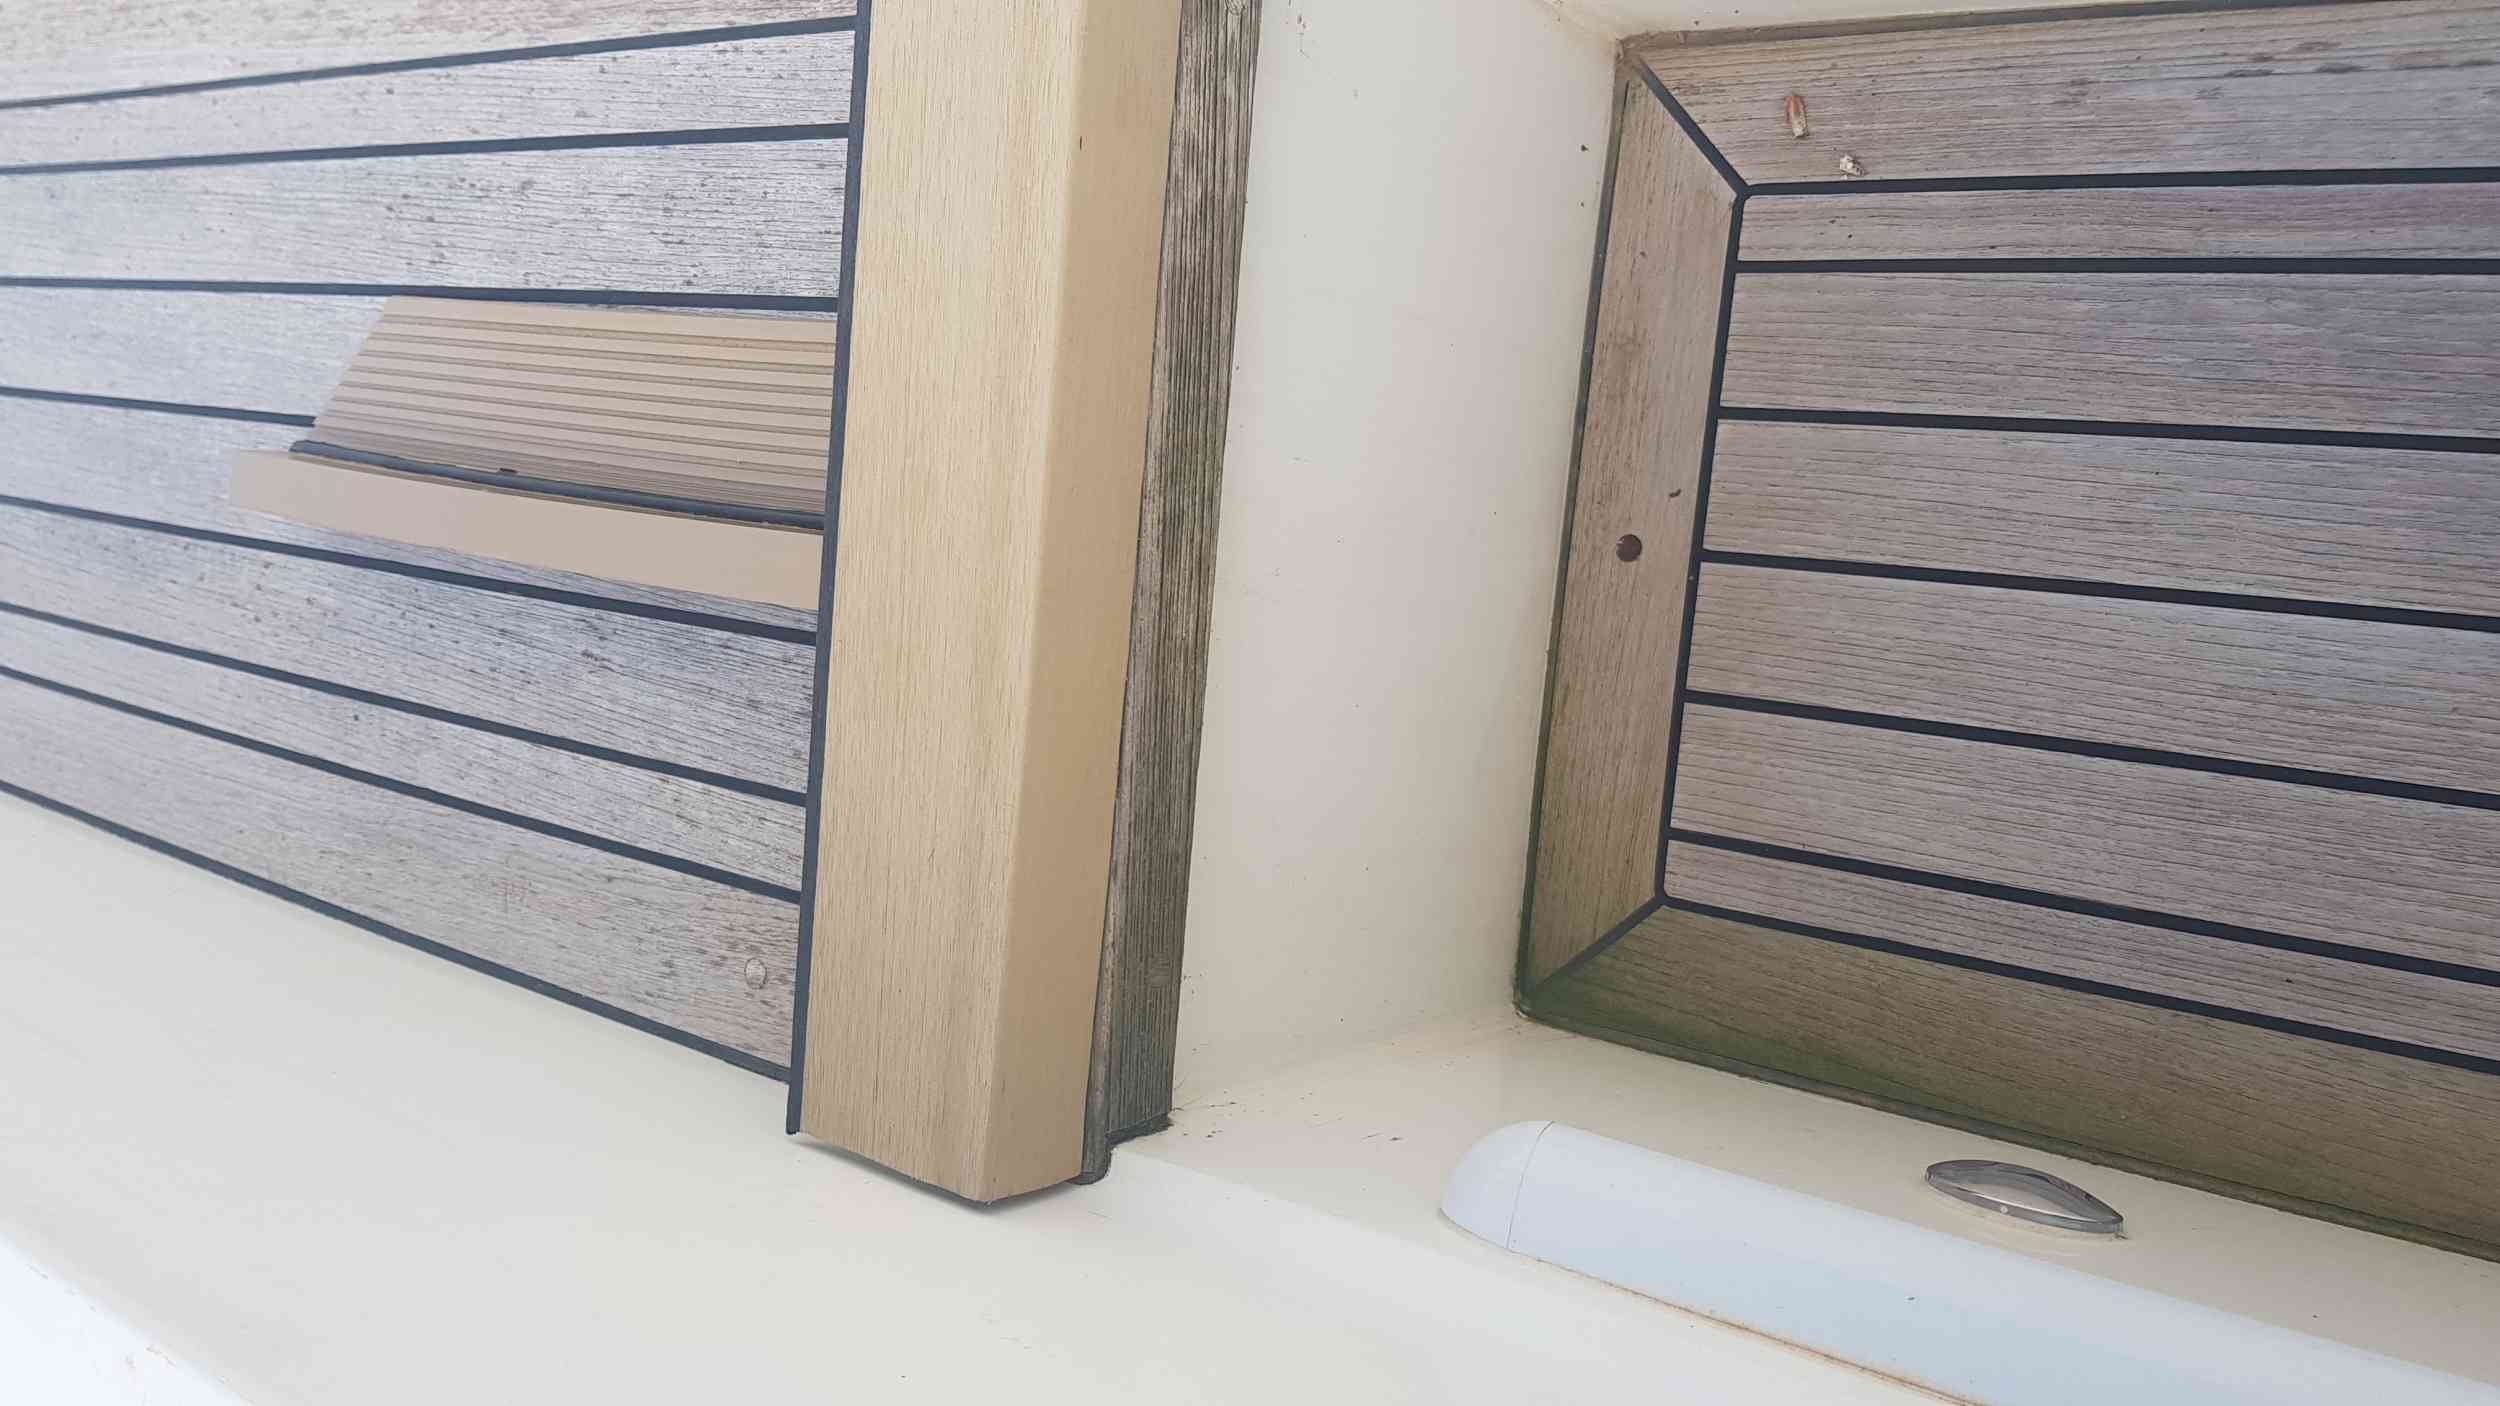
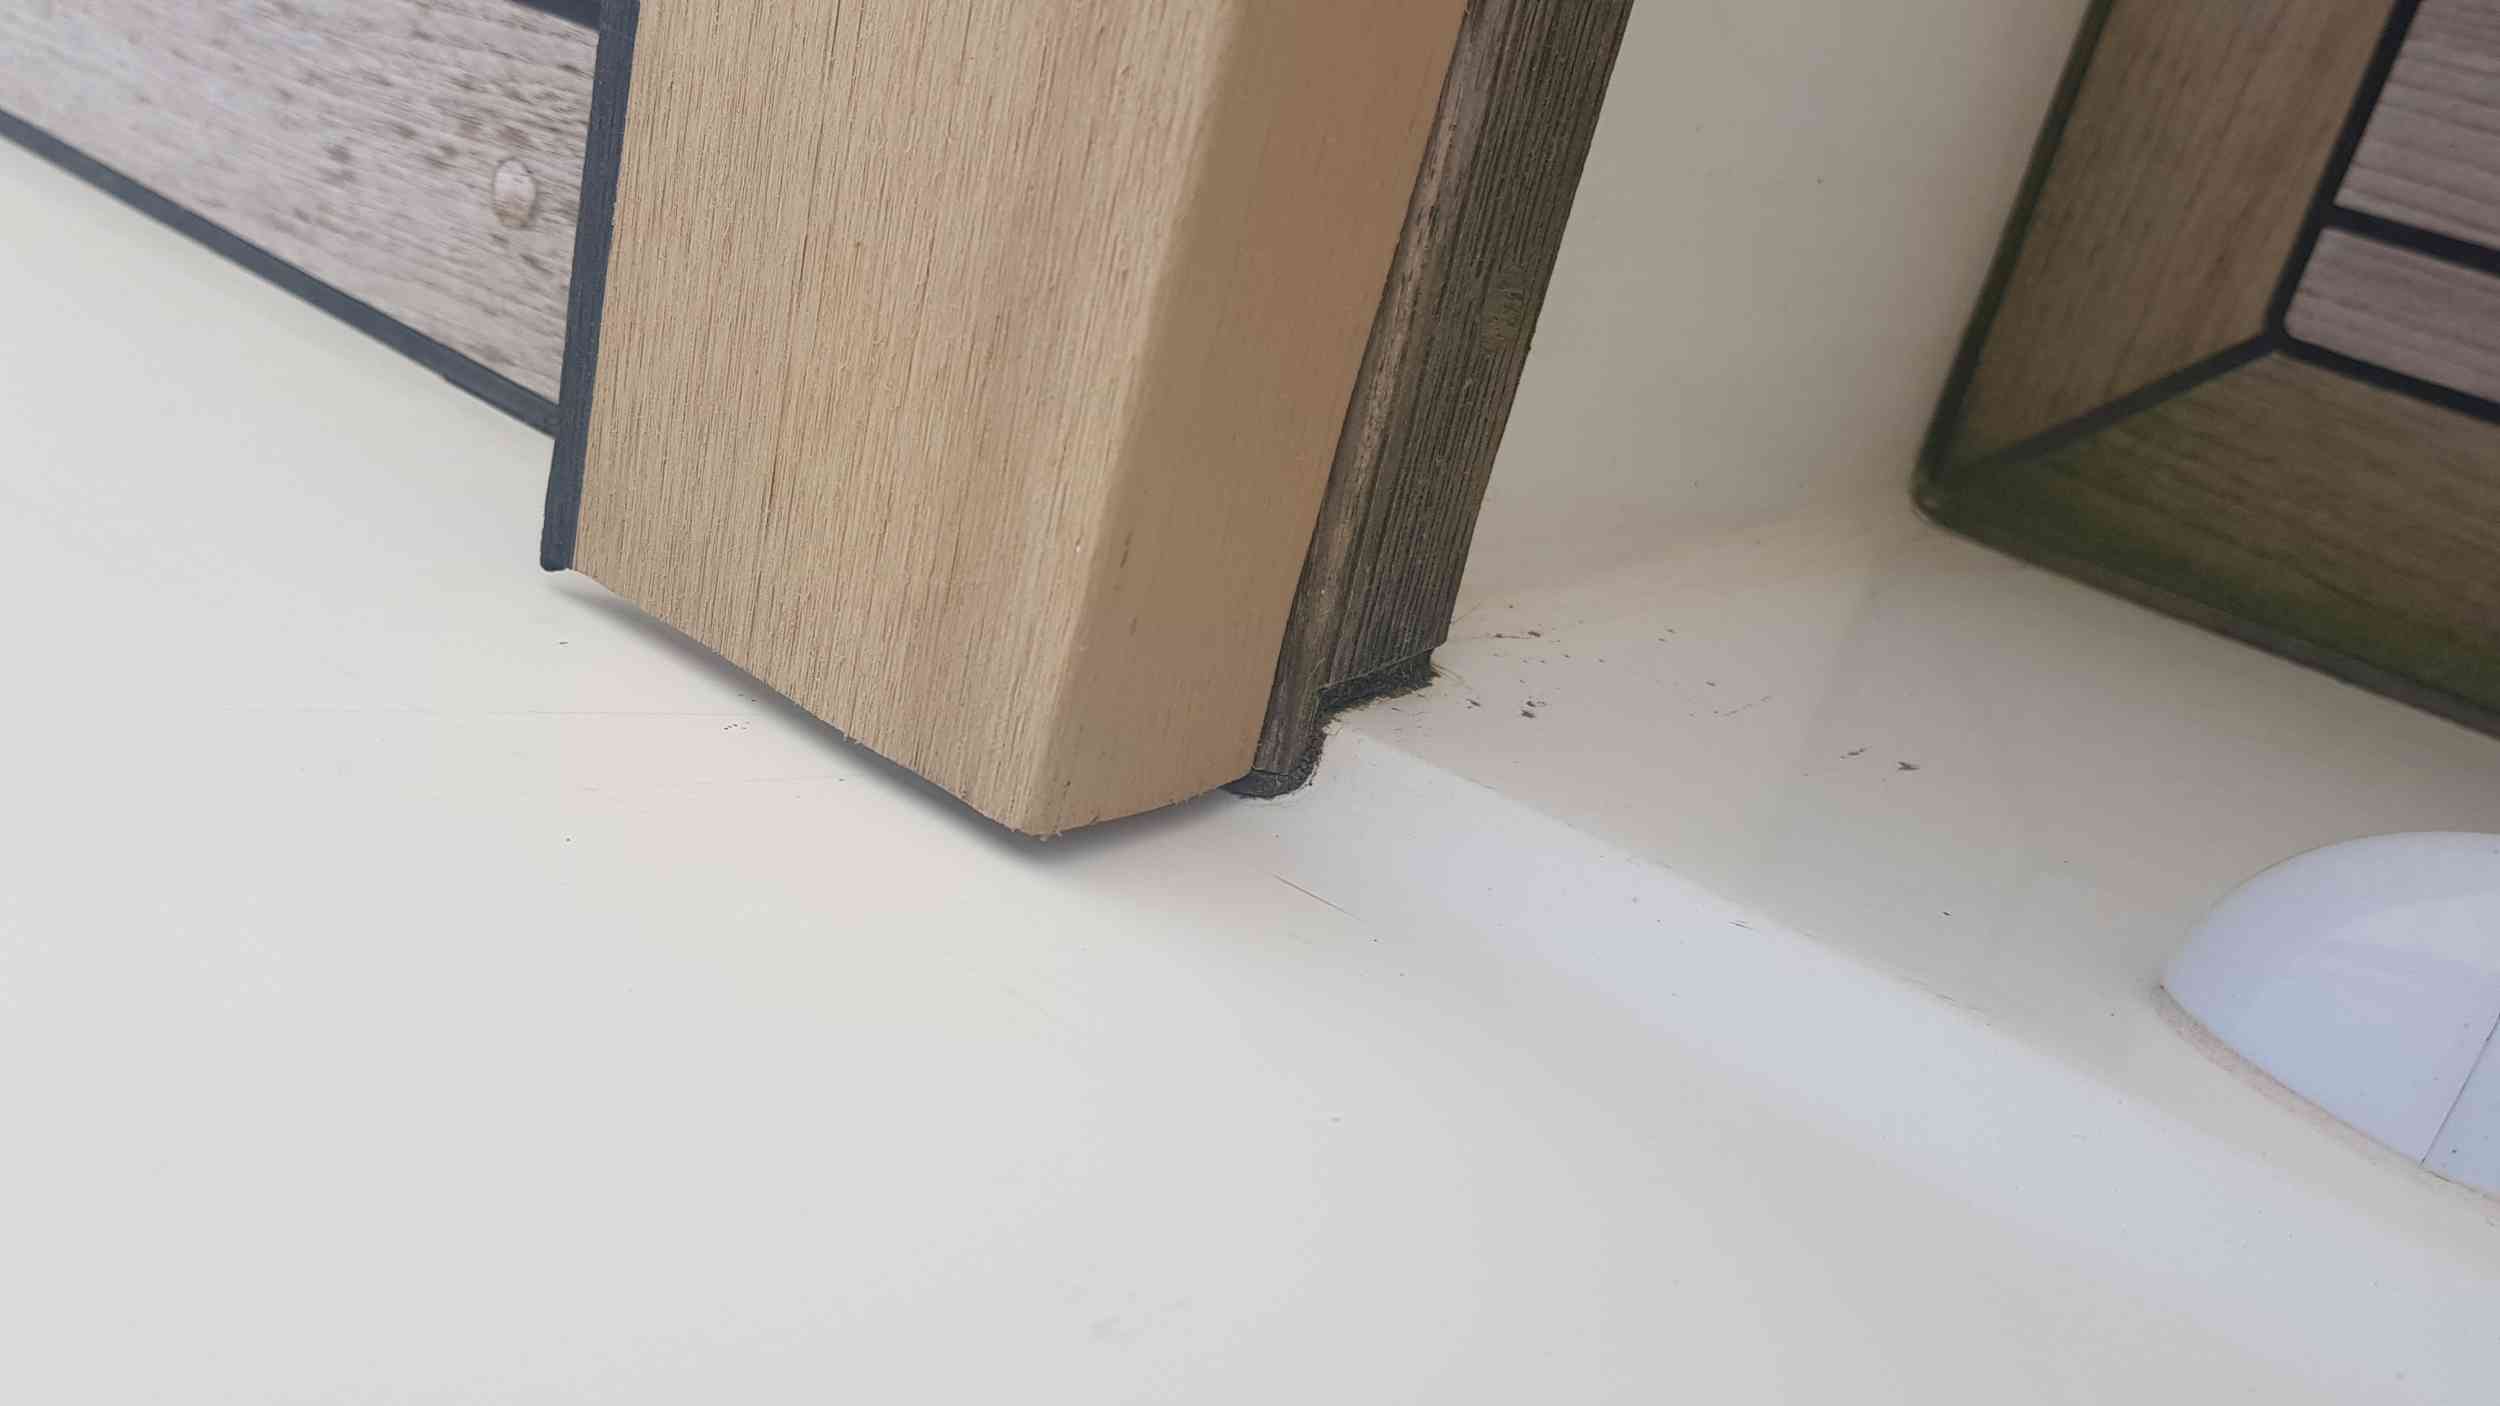
Before finishing this chapter, I will explain how I was going to make the step at the aft end of the side decks. Trakmark supply 20mm x 30mm solid box section. You can use this for all kinds of things but I chose to make the step using it. Again, I used the “Repair Rod” to make an invisible joint giving the illusion that the deck was a lot thicker than it is.
See these pics
Can you see the weld?
OK, thats it for this chapter.
More will follow but if you have any questions, please ask.