3D Printers

Hurricane

Well-known member
Joined
11 Nov 2005
Messages
9,513
Location
Sant Carles de la Ràpita
Visit site
The reason in my last post that I was printing nuts an bolts was to see how strong they could be.
To be fair, I was only testing an M8 nut on an M8 bolt and an M12 nut on an M12 Bolt - only using ABS.
And the answer is - not strong at all - doesn't even get close to strong enough.
It might be possible to incorporate hand tight wing nuts but for general fixings plastic doesn't seem strong enough.
I have some PLA-CF which is carbon reinforced - I may try that sometime.
But it is good to "push the boundaries" to see what is possible.
 

DavidJ

Well-known member
Joined
15 Jun 2001
Messages
5,867
Location
home in Brum. S37 sold, was in Med Spain.
Visit site
The reason in my last post that I was printing nuts an bolts was to see how strong they could be.
To be fair, I was only testing an M8 nut on an M8 bolt and an M12 nut on an M12 Bolt - only using ABS.
And the answer is - not strong at all - doesn't even get close to strong enough.
It might be possible to incorporate hand tight wing nuts but for general fixings plastic doesn't seem strong enough.
I have some PLA-CF which is carbon reinforced - I may try that sometime.
But it is good to "push the boundaries" to see what is possible.
Interesting because that was notionally my first job to make a a bolt and cylindrical nut for the garden solar lights which the grandkids keep wrecking with a football. I’m only after a medium strength.
 

Hurricane

Well-known member
Joined
11 Nov 2005
Messages
9,513
Location
Sant Carles de la Ràpita
Visit site
Interesting because that was notionally my first job to make a a bolt and cylindrical nut for the garden solar lights which the grandkids keep wrecking with a football. I’m only after a medium strength.
Hmmmmm - I think a stainless steel nut and bolt would be better!!!
You need to fine a better excuse to buy one.

Jobs do come up though.
I've just bought a load of very cheap hygrometers to go inside some cereal containers that I'm going to store my rolls of filament.
These
https://www.amazon.co.uk/dp/B0D14HWN7Z?psc=1&ref=ppx_yo2ov_dt_b_product_details
At one quid each my thoughts are that they will give me a good indication of how dry my filament stock is.
They arrived yesterday.
So I chucked one into the first cereal container with its roll of filament and some loose silica beads.
And, of course, the hygrometer has ended up at the bottom.
So, I'm now printing a little disc/flange so that they will sit in the core of the filament reel.

Just think of an idea and a few minutes later - you have your idea - even though it may be a carp idea.
 
Last edited:

Refueler

Well-known member
Joined
13 Sep 2008
Messages
19,252
Location
Far away from hooray henrys
Visit site
Well, I'm not changing much at all.
I've just switched from printing out some small containers using PLA to making some Nuts and Bolts using ABS.
The only thing I've had to change was which spool of filament to use and to tell Bambu Studio to make the bolts with 100% infill
So I haven't had to adjust anything.

It will come ....

If you were printing models like this :

NNq7SIYl.jpg


JLCeWpHl.jpg


pteVJCkl.jpg


KN0njKFl.jpg


QjGNRskl.jpg


4SjsSUgl.jpg


There is no way you can just use defaults ...

Each of those models has parts that require different feed rates, temps, layer heights, retraction just to name a few of the settings ...

Some individual parts have different settings / infill etc within their own as the print progresses ...

I have spreadsheets that detail the settings and weights of each printed part ...

TBH - given the complexity of some prints - I cannot imagine a machine capable of auto selecting the variations needed to complete.
 

Refueler

Well-known member
Joined
13 Sep 2008
Messages
19,252
Location
Far away from hooray henrys
Visit site
Hmmmmm - I think a stainless steel nut and bolt would be better!!!
You need to fine a better excuse to buy one.

Jobs do come up though.
I've just bought a load of very cheap hygrometers to go inside some cereal containers that I'm going to store my rolls of filament.
These
https://www.amazon.co.uk/dp/B0D14HWN7Z?psc=1&ref=ppx_yo2ov_dt_b_product_details
At one quid each my thoughts are that they will give me a good indication of how dry my filament stock is.
They arrived yesterday.
So I chucked one into the first cereal container with its roll of filament and some loose silica beads.
And, of course, the hygrometer has ended up at the bottom.
So, I'm now printing a little disc/flange so that they will sit in the core of the filament reel.

Just think of an idea and a few minutes later - you have your idea - even though it may be a carp idea.

Most Filaments come in packages with Silica Sachets .... what I do is have small bin liner bags and put a spool in a bag with the silica sachets ... then they are all put back in their respective shipping box labelled with the colour etc in a plastic clear sealable storage box.
 

Hurricane

Well-known member
Joined
11 Nov 2005
Messages
9,513
Location
Sant Carles de la Ràpita
Visit site
Most Filaments come in packages with Silica Sachets .... what I do is have small bin liner bags and put a spool in a bag with the silica sachets ... then they are all put back in their respective shipping box labelled with the colour etc in a plastic clear sealable storage box.
I am starting to build up a number of different filaments so storage is becoming a bit of a problem.
Everyone says that you have to keep the filament dry.
So, to deal with both issues (storage and keeping them dry) I am going to store the rolls in sealed plastic cereal boxes.
Each box will have a handful of silica beads loose in the bottom.
We have a large walk in airing cupboard so thats where I'm storing the filament at the moment.

The Bambu AMS unit holds up to 4 rolls of filament so I am doing something similar with that as well.
The AMS includes a couple of silica bags but there is more space available.
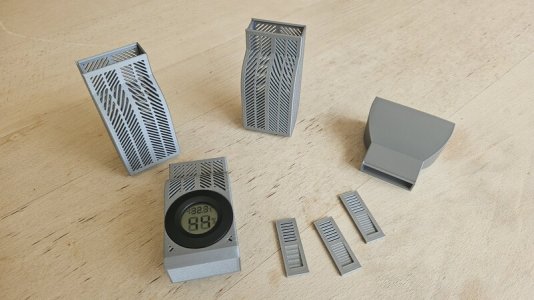
So, I printed these boxes

20240718_113122.resized.jpg

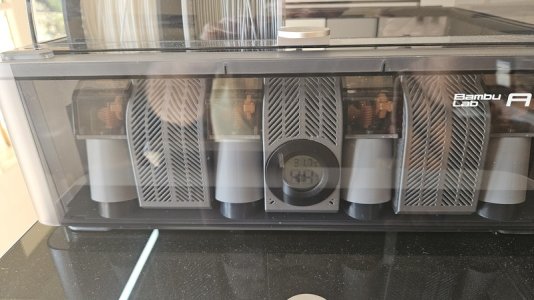
Two either side and one in the middle - the middle one includes a hygrometer.
Here they are fitted.
20240718_113437.resized.jpg

Since taking that pic, they are now with silica beads.

I just want a system that is easy to manage and these two simple steps seem to be keeping the filament dry.
 

Refueler

Well-known member
Joined
13 Sep 2008
Messages
19,252
Location
Far away from hooray henrys
Visit site
The box can hold 10 1kg reels in their brand boxes. Other spare filaments stay in their shipped boxes sealed under the bench.

ColorFab and other good brands I use ship their filaments in ziplock foil bags ... open the box .. lift out - cut off the sealing strip and then unzip the foil bag. Use and then put back .. zip bag .. put into box and large plastic sealing bin.

I have pal who even designed a de-humidifier container and the filament exits via gland to the printer ... he is in process of creating a storage box with dehumidifier ...

I have to say that in fact - even though I store filaments in a way to reduce chance of moisture degradation ... I often leave spools on my printers and I have yet to see any poor prints because of it. At time of year like now - being coastal - we have high humidity .. still no difference in prints.

I can only think after reading hundreds of posts on various forums about this matter - that some people are printing some extremely sensitive / intricate items that may be affected.
 

Hurricane

Well-known member
Joined
11 Nov 2005
Messages
9,513
Location
Sant Carles de la Ràpita
Visit site
The box can hold 10 1kg reels in their brand boxes. Other spare filaments stay in their shipped boxes sealed under the bench.

ColorFab and other good brands I use ship their filaments in ziplock foil bags ... open the box .. lift out - cut off the sealing strip and then unzip the foil bag. Use and then put back .. zip bag .. put into box and large plastic sealing bin.

I have pal who even designed a de-humidifier container and the filament exits via gland to the printer ... he is in process of creating a storage box with dehumidifier ...

I have to say that in fact - even though I store filaments in a way to reduce chance of moisture degradation ... I often leave spools on my printers and I have yet to see any poor prints because of it. At time of year like now - being coastal - we have high humidity .. still no difference in prints.

I can only think after reading hundreds of posts on various forums about this matter - that some people are printing some extremely sensitive / intricate items that may be affected.
Thanks for that
I'm taking a preventative approach rather than a reactive approach.
It is obvious to me that filament needs to be kept dry - every roll of filament that I have bought has come in a vacuum sealed bag with silica gel packs inside.
So I am just taking steps to keep it in good condition.
I don't want to have to buy a filament drier - that would just make things difficult.
As said above, my approach is a "plug and play" approach using default values.
I've been using this machine for the last 3 months and so far it does exactly that for me.
Keeping the filament in good shape seems to be a sensible thing to do.
And this idea of using cereal boxes means that I can instantly see the stock of any particular filament.
 

vas

Well-known member
Joined
21 Jun 2011
Messages
7,986
Location
Volos-Athens
Visit site
indeed they have to be dry!
following last year's flooding here in Volos, with the uni building receiving 20cm of water for a few days, a colleague had left something like 5 full reels unsealed in a cabinet. Didnt flood but with the subsequent high Sept temps they got thoroughly damp.
tried for fun to print on a couple of them before sending them for recyling, nada, even the simplest object wouldn't stick to the plate and would disintegrate...

re bolts, maybe try printing the nut side up (hole horizontal) so that at least some part of the thread will be in the same printline to the opposite side giving it a bit more integrity. Doubt it would do much, but for sure printing a nut laying down (hole vertical) has no chance of being of any use imho

V.
 

DavidJ

Well-known member
Joined
15 Jun 2001
Messages
5,867
Location
home in Brum. S37 sold, was in Med Spain.
Visit site
indeed they have to be dry!
following last year's flooding here in Volos, with the uni building receiving 20cm of water for a few days, a colleague had left something like 5 full reels unsealed in a cabinet. Didnt flood but with the subsequent high Sept temps they got thoroughly damp.
tried for fun to print on a couple of them before sending them for recyling, nada, even the simplest object wouldn't stick to the plate and would disintegrate...

re bolts, maybe try printing the nut side up (hole horizontal) so that at least some part of the thread will be in the same printline to the opposite side giving it a bit more integrity. Doubt it would do much, but for sure printing a nut laying down (hole vertical) has no chance of being of any use imho

V.
Good info regarding the damp potential problems. I will be careful because I intend to have the unit in my garage.
Interesting idea about the nut but (when I buy the printer) I will make a boss with an insert for a SS nut, that will solve the problem for my application.
 

vas

Well-known member
Joined
21 Jun 2011
Messages
7,986
Location
Volos-Athens
Visit site
Good info regarding the damp potential problems. I will be careful because I intend to have the unit in my garage.
Interesting idea about the nut but (when I buy the printer) I will make a boss with an insert for a SS nut, that will solve the problem for my application.
mind they have (ebay ali, etc) nice bronze (looking at least...) inserts bolts inside, multigrooved outside, built your piece with a slightly smaller hole, then place said insert on top of the hole and with a soldering gun increase the temp until you can push it straight in, level it nicely, job done. Did it for lids of boxes I've built for some electronics for the e/r.
will never fall off like an insert nut :)
 

Hurricane

Well-known member
Joined
11 Nov 2005
Messages
9,513
Location
Sant Carles de la Ràpita
Visit site
re bolts, maybe try printing the nut side up (hole horizontal) so that at least some part of the thread will be in the same printline to the opposite side giving it a bit more integrity. Doubt it would do much, but for sure printing a nut laying down (hole vertical) has no chance of being of any use imho

V.
All the experiments that I've done with nuts and bolts were printed that way. The problem isn't the thread. It is the material - just isn't strong enough - even using ASA and ABS. I haven't tried printing with a carbon filament yet though (Bambu call it PLA-CF)
 

Hurricane

Well-known member
Joined
11 Nov 2005
Messages
9,513
Location
Sant Carles de la Ràpita
Visit site
Good info regarding the damp potential problems. I will be careful because I intend to have the unit in my garage.
Interesting idea about the nut but (when I buy the printer) I will make a boss with an insert for a SS nut, that will solve the problem for my application.
mind they have (ebay ali, etc) nice bronze (looking at least...) inserts bolts inside, multigrooved outside, built your piece with a slightly smaller hole, then place said insert on top of the hole and with a soldering gun increase the temp until you can push it straight in, level it nicely, job done. Did it for lids of boxes I've built for some electronics for the e/r.
will never fall off like an insert nut :)

I haven't, yet, used those little heat inserts. But for simple box lids there is a very simple solution. Use M3 screws (bolts). I use standard M3 cross head screws.
You then make your design with clearance holes of 3.2mm (say a box lid) with a nice countersink.
And in the main body, create a hole that is 2.85mm dia.
The 2.85mm hole is perfect for an M3 to "cut" its own thread into PLA plastic.
I like to give it at leas 10mm depth for the cut thread.

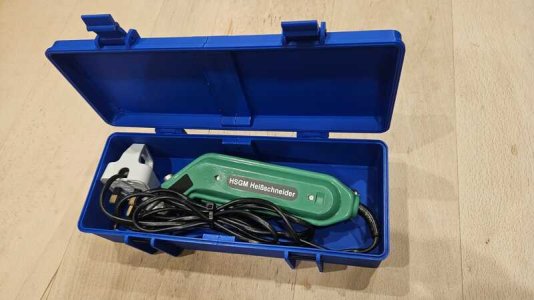
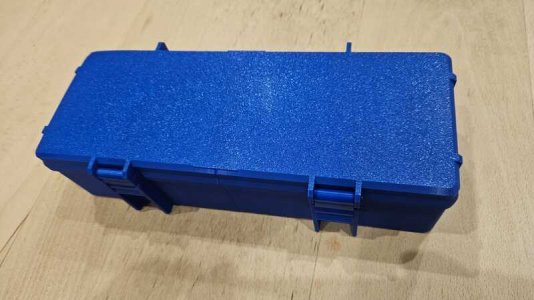
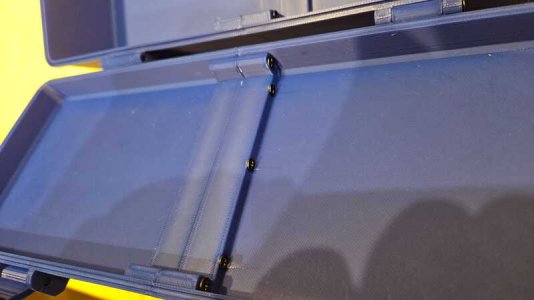
This is a box that I printed for my Hot Knife.
This box is too big to be printed on my machine in one print.
So I designed a fatter section in the middle and clearance holes on one half - screw holes on the other half.
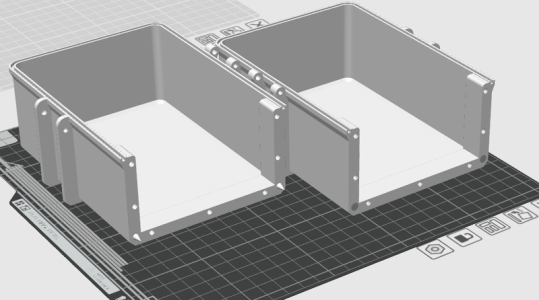
I then split the box in the Bambu Studio (also adding locating cones during the split process).
And screwed the pieces together after they had been printed.

1.resized.jpg

2.resized.jpg

This photo shows the screws

3.resized.jpg

And here it is in the Bambu Studio after cutting before slicing and printing. I changed the colour to white for this image.

Screenshot_2024-07-23_17-56-52.resized.png

That process is remarkably strong.
I tried gluing but this is much stronger.
 
Last edited:

Hurricane

Well-known member
Joined
11 Nov 2005
Messages
9,513
Location
Sant Carles de la Ràpita
Visit site
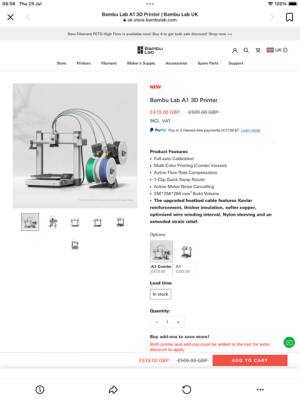
I’m still going for the £750 model but this ad popped up today
These things are becoming more affordable and portable…… maybe have one on the boat. :unsure:

View attachment 180486
The A series has been there during this thread.
If you click the A1 over the A1 Combo, it is even cheaper,
Yep - I wondered about having it for the boat but I'm not sure about the storage of filament on the boat.
I will keep 3D printing purely for home but there will be boat projects to do.
 

jakew009

Well-known member
Joined
29 May 2012
Messages
412
Visit site
The A series has been there during this thread.
If you click the A1 over the A1 Combo, it is even cheaper,
Yep - I wondered about having it for the boat but I'm not sure about the storage of filament on the boat.
I will keep 3D printing purely for home but there will be boat projects to do.
The filament storage is a non issue in reality. We buy the filament by the pallet load.

The best thing to do is just get a little food dehhydrator and chuck any rolls in it that have been sat around for a while.
We have a couple of these: https://amazon.co.uk/GCSJ-Dehydrator-Adjustable-Thermostat-Machine-Great/dp/B07DQFYH7Y

It doesn't matter how well sealed your storage is, PETG will need force drying once it has been sat around for more than a couple of weeks or you will get lots of stringing.
And lots of filament arrives just plain wet from the manufacturers.
 
Top