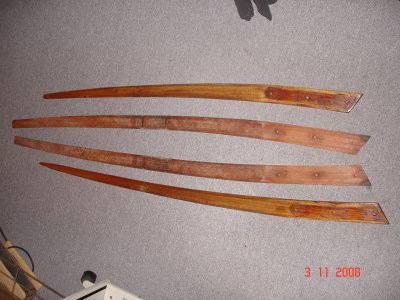
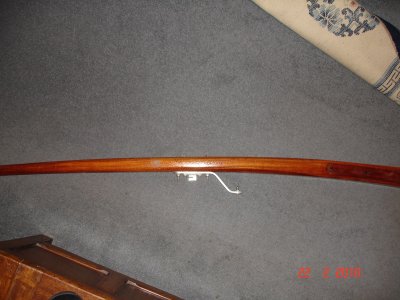
Renovating laminated wooden tiller

eddystone

Well-known member
Joined
18 Aug 2013
Messages
1,832
Location
North West Devon
Visit site
There don't seem to be many options for getting a new wooden tiller made and even less for something made exactly to the shape I want so for the time being i'm planning to do a deeper renovation of my existing tiller than I've done previously. It's a really nice tiller (in my humble opinion) but it tends to delaminate in a couple of places and the varnish has flaked off where additional coats have been applied very well. Last time I added so much varnish in the vicinity of the bracket that wrestling it back in made it worse than before I started. So I intend to try to sand it back to bare wood, scrape out where there is a gap in layers and glue and clamp. It does seem very solid so I'm not worried it's going to break and I have an old spare tiller anyway.

Any tips on:
- fixing localised delamination
- best varnish to use, particularly in UV resistance
 

vyv_cox

Well-known member
Joined
16 May 2001
Messages
25,427
Location
France, sailing Aegean Sea.
coxeng.co.uk
Many laminated tillers use ash as the light layer, which has particularly poor weathering capability. Mine delaminated but when I removed the wood from the stainless support at the stock I found almost no wood remaining. I had a solid replacement made, I was a day off launching in the Netherlands at the time, but it was straight which made copying easy.
 

doug748

Well-known member
Joined
1 Oct 2002
Messages
12,851
Location
UK. South West.
Visit site
The problem is getting the old glue out and cleaning the joint. If it is at the base, where they tend to snap, I would do my best with epoxy and through bolt it as well. Traditional varnish lasts very well if you make a cover for it.

These people may be able to help if you decide to replace it:

Tillers
 

Daydream believer

Well-known member
Joined
6 Oct 2012
Messages
19,424
Location
Southminster, essex
Visit site
Run a fine keyhole saw along the open lamination joints.One could drill a hole & insert a coping saw blade. Cut along the glue line & this will remove the old glue. Then use a conventional keyhole saw. A cheap one as used for cutting holes in plasterboard should do. Or one for a stanley knife handle. This will enlarge the cut.
Once you feel that you have removed the dead glue from the failed parts of the joints try to clean out any dust with air.
Then drill 10mm holes through the tiller through the glue line at about 50mm centres. These holes will enlarge the glue line. You need to get a decent drill so it does not form a "hairy" hole.
Block the holes one end with duct tape. Lay the tiller on its side & pour thin epoxy resin into the holes. Agitate such that the epoxy runs into the glue line. Keep topping up the epoxy until you are sure that the old glue lines have been fully filled & the holes you have drilled are full.Allow to harden. Fill any slight dips & sand to smooth surface. Then proceed as normal
 

AntarcticPilot

Well-known member
Joined
4 May 2007
Messages
10,079
Location
Cambridge, UK
www.cooperandyau.co.uk
I'm not writing this from experience, but many people have suggested that laminating a new tiller is of the same order of difficulty as renovating an old one. As @vyv_cox has suggested, the wood of the old tiller may well be on the way out and that's why the glue has failed.

I made a new, straight tiller from mahogany when my previous laminated tiller started to fail, but the original tiller was straight.
 

Tranona

Well-known member
Joined
10 Nov 2007
Messages
40,893
Visit site
Woodskin is fine. it weakness is abrasion resistance (or not very good!). I shall be using it on mine this winter. Best protection is a cover
 

Refueler

Well-known member
Joined
13 Sep 2008
Messages
17,721
Location
Far away from hooray henrys
Visit site
My tiller started to delaminate on my SR25 ..... so I cleaned off my Workmate ... grabbed dowels and two glues ... a) Epoxy, b) PU exterior

Drills and tools.

First I dug away at old glue to allow the laminations to be forced together in the workmate.

Then using PU Exterior glue - applied into the opened up lamination joints .... PU glue foams and expands into all the nooks and crannies ... is weather proof and strong. It can be sanded easily once set ..
Once glue is in ... clamped in workmate till next day ...

Next day with stanley knife paired away the excess PU glue ...

Next I cut short lengths of dowel that matched depth of tiller ... drilled neatly holes through tiller matching the dowels. The dowels were inserted with epoxy and with plastic wrap protecting workmate .... clamped so dowels were level to tiller surface.

Once Epoxy had set ..... with fine saw cut / leveled dowels and epoxy.

Once all that was done ... it was sand the whole to get ready for conventional varnish ....

It may sound overkill for the dowels ... but this was second time in 20 odd yrs of doing the job on same tiller.

8ImAOPzl.jpg
 

eddystone

Well-known member
Joined
18 Aug 2013
Messages
1,832
Location
North West Devon
Visit site
Run a fine keyhole saw along the open lamination joints.One could drill a hole & insert a coping saw blade. Cut along the glue line & this will remove the old glue. Then use a conventional keyhole saw. A cheap one as used for cutting holes in plasterboard should do. Or one for a stanley knife handle. This will enlarge the cut.
Once you feel that you have removed the dead glue from the failed parts of the joints try to clean out any dust with air.
Then drill 10mm holes through the tiller through the glue line at about 50mm centres. These holes will enlarge the glue line. You need to get a decent drill so it does not form a "hairy" hole.
Block the holes one end with duct tape. Lay the tiller on its side & pour thin epoxy resin into the holes. Agitate such that the epoxy runs into the glue line. Keep topping up the epoxy until you are sure that the old glue lines have been fully filled & the holes you have drilled are full.Allow to harden. Fill any slight dips & sand to smooth surface. Then proceed as normal
I take it you mean low viscosity epoxy resin (with hardener) - previously I’ve used 2 part epoxy glue but that’s too stiff to get into the gaps properly. Actually I had been thinking of exterior wood glue.
 

Refueler

Well-known member
Joined
13 Sep 2008
Messages
17,721
Location
Far away from hooray henrys
Visit site
I take it you mean low viscosity epoxy resin (with hardener) - previously I’ve used 2 part epoxy glue but that’s too stiff to get into the gaps properly. Actually I had been thinking of exterior wood glue.
PU Glue .....

To get Epoxy glue to really get deep in ... you can play a hairdryer over it ... it thins the epoxy - but take care as it speeds up the curing.
 

Daydream believer

Well-known member
Joined
6 Oct 2012
Messages
19,424
Location
Southminster, essex
Visit site
I take it you mean low viscosity epoxy resin (with hardener) - previously I’ve used 2 part epoxy glue but that’s too stiff to get into the gaps properly. Actually I had been thinking of exterior wood glue.
I used West resin on a mast that I had to repair using that method. It has to be thin otherwise it will not run into the slits & absorb into the timber.
 

Refueler

Well-known member
Joined
13 Sep 2008
Messages
17,721
Location
Far away from hooray henrys
Visit site
I take it you mean low viscosity epoxy resin (with hardener) - previously I’ve used 2 part epoxy glue but that’s too stiff to get into the gaps properly. Actually I had been thinking of exterior wood glue.

Even Araldite standard will thin with a Hairdryer played over it and sink in ...

But for deep penetration - you need 'laminating' epoxy resin ..... which can literally be consistency of water.
 

Snowgoose-1

Well-known member
Joined
2 Jun 2015
Messages
709
Visit site
I have sealed end grain with meths added to epoxy but it might not be strong enough for a laminated tiller. Agree that a cover is a good idea and the tiller also becomes a nice feature.
 

Tranona

Well-known member
Joined
10 Nov 2007
Messages
40,893
Visit site
It depends on which way the tiller is laminated. If it is vertical like Poignards it is fairly straightforward because the joints are not under stress. It it is horizontal where the laminations are used to form the curved shape it is much more difficult. The idea of drilling 10mm holes across the seam sounds good as it effectively forms a rivet with a good surface bonding area to lock the laminations in place. The only one I have done on a Centaur tiller I drilled down for 6mm fluted dowels and plugged the holes with matching plugs. AFAIK still there 20 years later.
 

Refueler

Well-known member
Joined
13 Sep 2008
Messages
17,721
Location
Far away from hooray henrys
Visit site
I have sealed end grain with meths added to epoxy but it might not be strong enough for a laminated tiller. Agree that a cover is a good idea and the tiller also becomes a nice feature.

Meths will 'dilute' epoxy - but it breaks the chemical chain of the resin - creating a less strong final set. Its better to use heat to thin and still retain its strength.
 

Stemar

Well-known member
Joined
12 Sep 2001
Messages
22,726
Location
Home - Southampton, Boat - Gosport
Visit site
I'm a fan of le Tonkinois for that soert of application. It's very UV resistant, and has the advantage that, if damaged, it doesn't peel off the wood like varnish - just rub the damage down, dry off the wood and apply a few coats. Looks good, too, with a high gloss, but non-slip finish.
 
Top