Moody 28 Resurrection - starting at the deep end Arrow & Aztec

Hoist

Active member
Joined
28 Nov 2019
Messages
225
Visit site
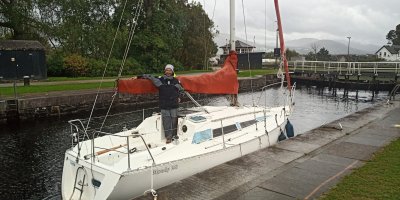
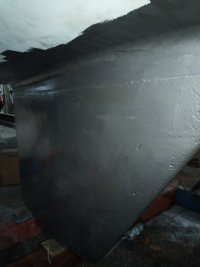
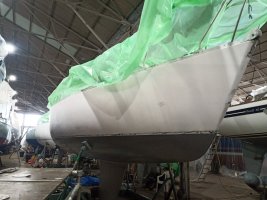
My friend and I have always talked about restoring Moody's as a hobby. He was in the market for a boat and after a few failed offers on a couple of Mk1 31's we spotted a Moody 28 for sale near Inverness. The advert had some pretty horrible pictures of a tired Moody 28 but not to be deterred we went and looked at it. The boat had been a charter boat all of it's life and spent the last 28 years on the caledonian canal.

To say it was rough was an understatement however it appeared to be only cosmetic. I called another friend who is a GRP specialist and sent him pictures. I said what's the best way to fix this and he replied "a match"

IMG-20210516-WA0016[21259].jpgIMG-20210516-WA0015[21258].jpg

The boat was fairly well appointed with twin batteries, Webasto heater, hot water and shore power. It had been reengined with a Nanni 14hp at some point and it ran perfectly so a deal was done. This is where things get complicated....

IMG-20210516-WA0020[21257].jpg( Caledonian Canal, Laggan Locks)

I had happened to ask the seller where it came from and it's story. He was the Chief Engineer of the charter company and told me that when the company no longer wanted them they were sold off and he had bought this particular one. Never one to shy away from a deal I happened to say "well if you know of another one and it's for sale let me know"

6 weeks later we had 2x Moody 28's ?

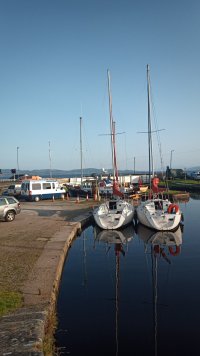
Aztec and Arrow have been together as far as we can tell all their life. They were built as charter boats and ended up in the med as Sunsail boat's from new. We think they did 5 years in the med and then returned to the UK where they ended up as charter boats on the Caledonian canal until 2018 when the charter company stopped offering sailing vessels for hire. They cruised up and down the canal and sailed around the lochs for 25+ years which must be some sort of record.

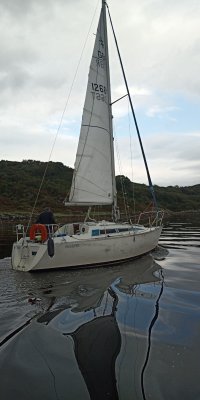
IMG-20210516-WA0013[21348].jpg(moving arrow along the canal)

We immediately fell in love with the terrible twins and their dirty charm. They have one number separating them on the production line but knowing Moody's they would have been very close in the yard since the mould. My friend Dave took Aztec under his wing and I would look after Arrow for the trip home.

Engines were serviced, hatches resealed, ropes replaced, jammers replaced and the boats were thoroughly thoroughly cleaned however there is only so much you can do with a boat at the side of the canal

IMG_20200903_182610.jpgIMG_20200903_183703.jpgIMG_20200903_133154.jpgIMG_20200903_175003.jpg

We decided we would aim for the Clyde for the winter giving us much more options on marina's, facilities and local knowledge. The boats were never fitted with any kind of instruments, no GPS and there were no nav lights so we would have to improvise in the weeks leading up to the big trip home.

August 2020

Dave was able to move Aztec into the sea and then onto the utterly stunning Ballachulish as a little test sail before the big adventure south. Raymarine Chartplotters were fitted with telephone/ipad navionics and paper charts as back ups. A stock of Lazilas LED battery operated nav lights were purchased (great product) We took flares, spares, liferafts, dinghys and every bolt shackle rope block and jubilee clip we could lay our hands on.

I left home a few days early with another friend to make the final preparations for moving Arrow into the sea. I was fully aware that time was marching on and my only time off available for the sail South was early September. Not ideal timing for such sailing on the west coast of Scotland but we did not want to wait any longer.

IMG_20200903_083817.jpg(Caledonian Canal Banavie)
 
Last edited:

Hoist

Active member
Joined
28 Nov 2019
Messages
225
Visit site
IMG_20200910_142120.jpgIMG_20200910_142012.jpg
(Neptunes staircase Caledonian Canal)

The time had come to make the move South. Coming down the neptunes staircase on a rainy day isn't so challenging especially in the nimble 28. Unlike the Crinan canal we are used to the Caledonian is fully manned and you don't touch the locks so even single handed is possible for a skilled skipper.

As we drew closer to the sea we could see the weather worsening from smirry rain to a lot of rain. The forecast was so so, typical Scottish rainy day weather so when we reached the end of the canal we moved out onto the little pontoon next to the sea lock for Arrow's first night in saltwater in 25+ years.

We devised a plan to maximise the miles per day. I would single hand Arrow to Onich which is just passed the southern end of loch linnhe. Dave would drive our friend Stevie to Ballachulish and he would take Aztec to Onich and then we would have the two boats together for the trip home. We had a few nightcaps and went to bed early so I could get the tide in the morning.

IMG_20200912_171033 - Copy (2).jpg Outside the canal at Corpach

Having taken residence in the aft cabin on Arrow, I woke up at 4am with the strange feeling that we were sailing. I looked up and saw the corner of the gimbled cooker sticking past the door and thought thats really weird. Its at that point I realized the weather was HOWLING and the boat was heeled over about 30 degrees. I jumped up, threw oilys on and looked outside to see the boat was still in place but heeling over so much that I had to step up to the pontoon. I doubled the mooring lines and sat ready with the boat until 8 or 9 am when the canal opened.

Screenshot_20210303-230545.png
Dave snapped this pic that morning just before we moved the boat. It had calmed down a lot but it was still too much for a first voyage. You can see it's an awful position without shelter. We moved the boat back into the canal for shelter. The staff were very gracious and understanding of the situation with the weather so we had to sit it out for 2 days until things calmed down

I've never been nervous on any boat. I've been sailing since I was 4 years old. I could berth my father's 336 anywhere when I was 10 but honestly coming out of the canal on Arrow my brain was in over drive. "This is quite narrow here, this boat hasn't been in sea water for 27 years, if the engine quits I will have to sail it back into the sea lock with an onshore breeze"

IMG_20200914_102419.jpg IMG_20200914_092619.jpg (heading south down loch linnhe)

Despite the weather looking truly awful. Arrow chugged down the loch past Fort William at a steady 4 knots at 2000 rev's meaning I got to Onich on time to link back up with Stevie on Aztec. From that point on the pair have been together to this very day.

IMG_20200914_104918.jpg (Waiting at Onich for Stevie on Aztec you can just see the bridge)

As we reached Port Appin the weather changed completely and we had lunch in glorius sunshine. That made a huge change from the 2 days previous stormbound but also it was the point I gained confidence in Arrow and Aztec that they were capable and without drama.

IMG_20200914_132308.jpg IMG_0294.JPG (Port Appin)

A lunchstop and a 20 min nap gave us the power to carry on to Oban and the weather was perfect all the way to the transit Marina. Social Distancing for boats (keep one pontoon free) was in full effect at this point but we felt it was important to keep the twins together :p

Screenshot_20210303-230421.png IMG_20200914_180524.jpg IMG_0299.JPG IMG_0297.JPG Oban Transit Marina
 

Hoist

Active member
Joined
28 Nov 2019
Messages
225
Visit site
We would leave the next morning at 6am for the tide. We knew the Crinan canal was limited availability and not open every day so we tried to get there as soon as possible. If there is ever a sport called Motor sailing match racing it was invented in 2020 by 2 guys sailing moody 28's around the island of Luing

IMG_20200915_090833.jpgIMG_20200915_091914.jpgIMG_0303.JPG

I can't remember the issue with the canal whether it was time or shut for covid but we ended up diverting to Ardfern that day and we had to take a day off as the canal was shut for some reason.

IMG_20200915_112739 - Copy.jpgIMG_20200915_123021.jpg
IMG_20200915_191511.jpg


(Ardfern)

I realized after arrival that everybody was looking at the twins. Most were confused as to how scratched they were but many people came and asked us about their story. It was at Ardfern on our day off that the renovation started. I began polishing Arrow :D

IMG_20200915_125010.jpgIMG_20200915_132636.jpg

The village shop it Ardfern is pretty well stocked and i can recommend the steak pie! The chandlers is even better stocked and worth a visit if your in the area.
 

Hoist

Active member
Joined
28 Nov 2019
Messages
225
Visit site
Into the crinan canal was nicely uneventful after a much needed rest day. Our reinforcements had arrived so we could blast through the canal in one sitting.

IMG_20200917_114808 - Copy.jpgIMG_20200917_174437.jpg Ardrishaig Basin

It was at Ardrishaig where Stevie and Dave swapped over as Stevie had to return home. We came out of the Sea lock at Ardrishaig into thick fog which is always great fun without radar and peering down to the GPS. Everything becomes much easier when your on home turf. If we had been somewhere unknown we would probably not left so quick in the foghowever this really is our back garden so we scooted down Loch Fyne pretty quickly

IMG_20200918_085841.jpg

IMG_20200918_080649.jpgScreenshot_20210303-230253.png

As we reached Portavadie the sun had burned the fog away and Dave had a brainwave. "lets go to the spa at the marina"

IMG_20200918_130201.jpg

IMG_20200918_131735.jpg Nobody believes me that this is Scotland! (Portavadie Marina)

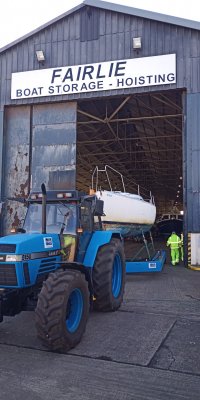
Lunch after the spa was the finest crisp sandwiches and then we raced to Kames to have dinner at the awesome Kames hotel. This was our last night sleeping on the boats. They were booked in for a 2pm lift out at Fairlie Quay the following day


IMG_20200918_162359.jpgIMG_20200918_194234.jpg Kames

I can genuinely say, hand on heart that the pair made it all the way from Inverness to Fairlie Quay without one single thing going wrong, breaking or failing. I would go anywhere on either of them after the delivery trip and they deserve what happens next.
 

Hoist

Active member
Joined
28 Nov 2019
Messages
225
Visit site
IMG_0325.JPGIMG_20200919_130614.jpg

As we arrived at Fairlie Quay the hoist slings were allready in the water waiting for us so Aztec was whipped out quicker than we could stop and take a photo. Arrow was soon plucked out of the water also and both boats were jet washed. Both boats still had a keel which was a nice bonus and apart from some large rust growth on the keels the hulls seemed very good. The freshwater life was very kind to the boats!


IMG_20200919_163706.jpgIMG_20200919_164555.jpgIMG_20200919_163759.jpg


The large lumps of rust were easily removed with a screwdriver or hammer but we saved the real cleaning for later. Within a few days the yard had removed both masts and were ready to move the boats inside to their winter home

IMG_20200919_163607.jpgIMG_20200924_114341 - Copy.jpg

This is where the fun begins. Lots of questions were asked and options considered. Vinyl wrap them? Leave them alone? Paint them?

We knew that vinyl would not stick to the topsides in the condtion they were in so sanding was always going to take place whatever option we choose. In the end we chose to sand, fill, fair and paint. Having taken advice from my GRP repairing friend, he recommended International Perfection Pro because it's good, its easy to apply and you can roll it on.

IMG_20201121_120158 - Copy.jpgIMG_20201025_163217 - Copy.jpgIMG_20201121_120144 - Copy.jpgIMG_20201025_112458 - Copy.jpg

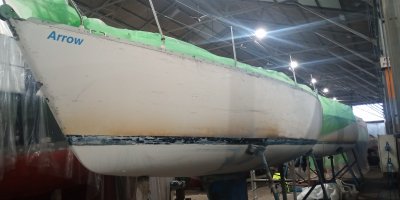
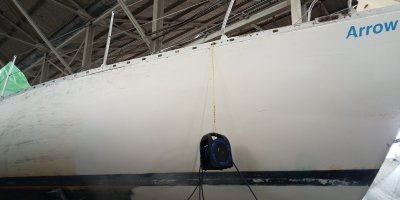
We started on Arrow first as it was closer to the door. Sanding the minimal amount of antifouling that was on her. You can see the extent of the scuffing from the years of amateur berthing in the canal. 80 grit made light work underneath and we quickly learned that a hoover attached to the sander is absolutely essential. Lidl do great workshop vacuums for about £30
 

Hoist

Active member
Joined
28 Nov 2019
Messages
225
Visit site
IMG_20201027_164757 - Copy.jpgIMG_20201121_120158 - Copy.jpg

With both 28's now sanded we decided it would be best to seek professional advice. We hired a surveyor with the plan that he could assess if our plan was sound, the hulls were sound and anything else he may want rectified along the way. The moisture readings in both boats were around 12-13 which is normal (so I'm told) and there were no blisters, signs of osmosis or any other nastys. Even the keel bolts were given a clean bill of health. I can only guess that the freshwater really preserved these boats rather than maintenance!

IMG_20201025_112458 - Copy.jpgIMG_20201025_115839 - Copy.jpgIMG_20201025_115829.jpg
Before During 1st pass with sander

So with the plan approved, we began sanding Arrow. Firstly with 120 then down to 80 grit on the orbital sanders. this was going to be a tedious job. If you dig the scars out you will have more to sand to make it flat so patience is required. Longboarding an entire hull was just not going to be sensible so baby steps and consideration were the name of the game

IMG_20210110_132706.jpg Aztec waiting for her turn

IMG_20201121_120158 - Copy.jpgIMG_20201121_143010 - Copy.jpg
Before After

I don't think there are many boats you can sand the gelcoat back with 80 grit and not just go through the gelcoat. Moody really laid everything on thick. We became well oiled sanding machines. Its really amazing how much better your technique becomes in what would seem such a mundane and simple task. As we progressed onto the port side we got through it in half the time with better results.
 

Hoist

Active member
Joined
28 Nov 2019
Messages
225
Visit site
With the topsides sanding well underway, I needed a break from that task so I turned my attention to the keel for a day.

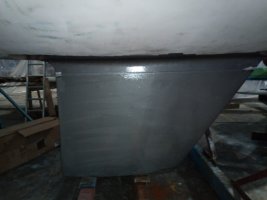
A good wire wheel was put on the grinder and I went to town with it. I got it pretty smooth, not race boat status but very acceptable for cruising. I cleaned the keel joint area on the stub with the sander and then sikaflexed the keel joint. Kurust was then applied to the keel itself and once dried I primoconned over the top of it to keep the keel safe from rust.

IMG_20210112_101311.jpgIMG_20210116_123345.jpgIMG_20210227_161412.jpg

I was able to find the original Moody waterline as I sanded through everything. As everybody knows these were a bit ambitious when you start putting real world stuff on the boat. we used it as a guide and moved it up 1"

IMG_20201120_101659 - Copy.jpg

The boats had been inside the shed for a couple of months at this point and had plenty of time bare bummed. No "drying" time was ever required but we felt it was best to do so anyway while we were inside the shed. We would retain the waterline by primoconning up to the tape, then we would have a good solid line to stop for the topsides work

IMG_20210227_144132.jpgIMG_20210116_132813.jpgIMG_20210116_132733.jpg
 

Hoist

Active member
Joined
28 Nov 2019
Messages
225
Visit site
IMG_20210227_144145.jpg

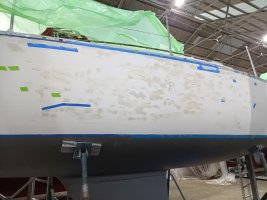
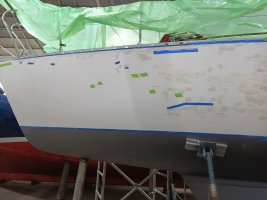
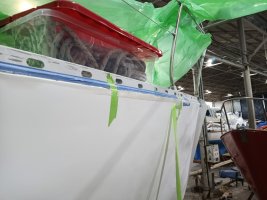
With below the waterline looking much smarter we returned our attention to the topsides and tested various fillers, methods and sanding techniques. there is really not one set way or product. If you use the "plastic padding" or teroson stuff on a very light scratch the sand paper just pulls it out with ease so you have to be creative.

We invested in a cordless dremel. Amazon has so many knock off attachments, minature wire wheels and sanding wheels for super cheap so we stocked up on them. We used the brush attachments to clean out the scratches and cleaned them with acetone prior to filling.

IMG_20210103_122941 - Copy.jpg This early attempt at filling had to be removed

IMG_20210408_125055_328.jpgIMG_20210408_125059_922.jpg

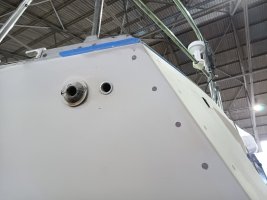
Everybody knows that preparation is the key when painting so we had to keep moving forward even if we did take a few steps back. One thing to do as your going along is to mark the blemishes, divots and things you see. on 28ft of plain dull white fibreglass you can spend hours squinting at it or trying to see things in the right light. If you see it, mark it and move on. Be confident thats where the filler needs to be and sand smooth

IMG_20210405_155231 - Copy.jpgIMG_20210405_155225 - Copy.jpg

Another useful thing is to buy the BEST masking tape and tape around where you are going to fill. The 3m stuff is expensive but it doesnt break as easily when you peel it off and its covered in filler. It really saves hours of picking and more hours of sanding.
 

Hoist

Active member
Joined
28 Nov 2019
Messages
225
Visit site
IMG_20210411_151756_731.jpgIMG_20210411_151744_512.jpgIMG_20210408_163846_200.jpgIMG_20210411_151410_800.jpg

As we got closer to completing the filling I spoke to our local chandlers about purchasing International Perfection Pro. One thing about that paint is they will not sell it to you if you are not a professional. I have no idea why, but given the amount of hours put in by now I would definately consider myself a skilled amateur. The chandlery were kind enough to coerce the international supplier into selling us the paint but they also gave us which roller to use, how much we will need and the painting methods.

Sand to 180-240
2 coats of interprotect - this is barrier coat to keep the perfection undercoat safe from the filler as they dont mix
Sand to 240
3 coats of international perfection undercoat
Sand to 400
2 coats of perfection pro
Sand to 400
1 coat of perfection pro

After this list. It was blatantly apparent that we didnt want to do all that again so it would have to be flawless. My friend Tom has really amazing attention to detail and he was really key to the perfect fairing on the boats. We decided to dig out the marker pens and fair the hull again. This time using LED torches to see everything from every angle, marking it up and then sanding back.

IMG-20210409-WA0007[21344].jpgIMG-20210410-WA0024[21343].jpg
 

Hoist

Active member
Joined
28 Nov 2019
Messages
225
Visit site
Here are some tools we found really useful

b8a669e9362f635f3d674e68f038845e.png

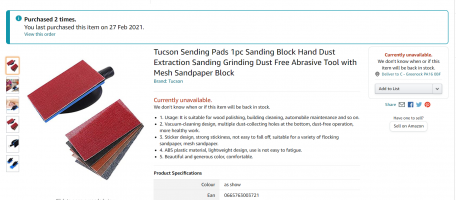
I saw the advert for the flexsander on facebook. I think everybody knows that facebook allows people to sell absolute rubbish but having researched it a little I found it for sale on Amazon. Amazon have better returns policys than most retailers but I certainly wont be returning it ever! it uses mesh sanding pads which are about £15 a box. perfect for small areas of fairing and beats longboarding.

0e1ab53a31c147228c32f9827a53f7f8.png2efaf3c72564f2d6b12f040245e47631.png

Little mesh sanding blocks. We didnt use these much with the vacuum but they are a nice size and weight to use on general fairing. So good I bought it twice as me and Tom would be waiting for the other to finish when doing small fairing. 3m Masking tape is so much better than any other tape. it beats gorilla, wurth, and any of thee other brands. It is my go to for any job now

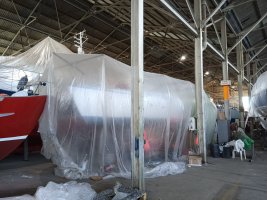
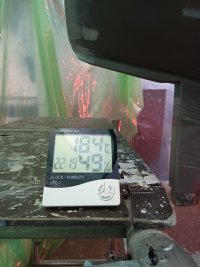
After literally months of sanding. It was time to build the tent. the temperature and moisture reading is very critical when using Perfection Pro and one of the professionals in the yard recommended we bought a digital thermometer which was a top tip!

e1eeb583e3a09d6e541fde49f10915ef.png

The first attempt at tent building failed, so did the second but the third time was the charm and we managed to get some good heaters in place. Everything was masked off and we set off painting the two coats of interprotect. That really is horrible stuff. It doesnt have good coverage properties, sticks to the roller too much and its impossible to make an even coat

IMG_20210415_133354_336.jpgIMG_20210420_214406_138.jpgIMG_20210414_215627_137.jpg


Perfection pro really is an amazing product and I would recommend it fully. even with just the undercoat it goes on so well

IMG_20210420_174751_914.jpg Perfection undercoat
 

Hoist

Active member
Joined
28 Nov 2019
Messages
225
Visit site
pictures speak 1000 words so Ill let the next few do the talking. This was when Tom and I applied the 1st of the perfection pro top coats

IMG_20210420_181219_877.jpgIMG_20210420_175114_062.jpgIMG_20210420_180102_487.jpgIMG_20210420_180945_121.jpg

the topcoat is looks like you are painting glass. Its amazing to see watch is dry and flatten itself. Its some very clever chemistry.

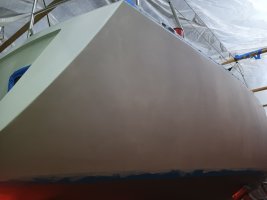
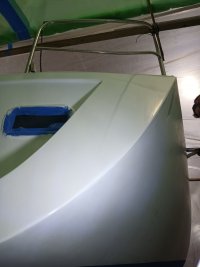
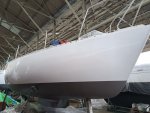
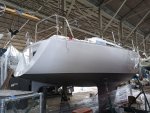
EIGHT coats of paint later, all that sanding and curing last week I managed to take the cover off arrow for the first time in a month.

Arrow.jpg
arrow 2.jpg
 

affinite

Well-known member
Joined
2 Feb 2005
Messages
1,239
Location
Eastern Med
Visit site
That is one of the best stories I have read for a long long time. It is told with passion and affection for two inanimate objects which are clearly coming alive under your joint stewardship. Many happy sea miles to all of you !

+1
I'm sure the Moody Owners Association would love to hear the story of the Moody Twins.
I have one of their big sisters - a Moody 44. I have to say that my girl isnt as pretty as yours.
 

ithet

Well-known member
Joined
27 Mar 2009
Messages
1,484
Location
UK, Hamble
Visit site
Great stuff. We had a moody 28 and loved it (on the Solent). Made quite a number of improvements. Mould number F2023.

If you are trying to get them back to original and need the striping tape for the topsides, I have a large roll of the original multi-tone tape, I am sure there is enough for two boats, PM if interested.
 

Concerto

Well-known member
Joined
16 Jul 2014
Messages
6,152
Location
Chatham Maritime Marina
Visit site
Well done. You are showing that old tatty boats can be revived with some effort. I know about all the hard work you have been doing as I have been renovating a 1980 Westerly Fulmar since January 2014. Be aware that what ever you budget for your work -DOUBLE IT. I budgeted mine at £12,000 and have now spent over £25,000 on materials only. My aim is to get to as new condition as possible with some updated equipment.

These 3 PowerPoint presentations might be of interest you both and assist with later work.
https://wiki.westerly-owners.co.uk/images/3/3f/Concerto.pdf
https://wiki.westerly-owners.co.uk/images/8/86/Gel_coat_renovation_19May2020.pdf
https://wiki.westerly-owners.co.uk/images/2/25/Interior_Woodwork_Concerto_PowerPoint.pdf

I would certainly recommend working with the Moody Owners Association as they may advise on particular materials used, especially on the woodwork.
 
Top