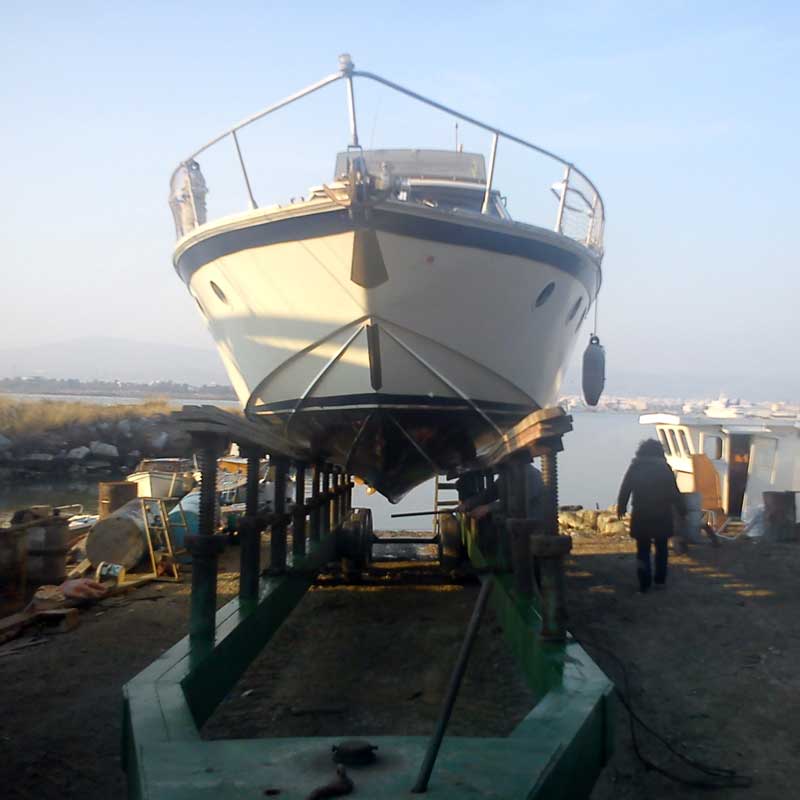
MiToS re-built/fit- versilcraft Mystery43

vas

Well-known member
Joined
21 Jun 2011
Messages
8,074
Location
Volos-Athens
Visit site
thanks jfm & Bart, bear with me as I just don't know how to do it yet.

I mean, I have the drain pipe at the bottom of it the chain drawer and a pipe leading to a through hull port on the bow just above waterline. It does need some fixing as its in shambles right now and water tends to come in rather than out...

Visiting port from my bedroom is acceptable in a fashion similar to Bart's setup maybe a bit more concealed and having to unbolt it to have serious access. Opening around 400X400mm and all of it part of a cupboard at the foot of the bed, so no problems there.

Foredeck hatch access would be in a size that would enable just visual inspection plus pulling untangling chain a bit, right?
In that case a 200X300mm maybe slightly triangulated shape should be sufficient. That would need to be just offcenter by the windlass, maybe a bit aft. The hatch could also incorporate an underhatch holder for the windlass clutch lever and be done with.
That hatch would be a plywood frame, covered with teak and using concealed hinges and watertight sealing to its frame?
DYI jobbie, or buy a proper hatch for watertightness (which is probably irrelevant as there's wet chain in there and there's a drain to outside?)

Leaves me only with one/two short lines to store...

any timber/plywood covered job would help me identify issues and organise construction.

Space is slightly tight and currently looks like that:
angelosonwindlass.jpg

Chain box ends at the rear end of this big timber piece (that btw need to replace as it's broken at the bow and looks fugly let alone that the pulley and anchor don't rest properly now where they should)

V.
 
Last edited:

jfm

Well-known member
Joined
16 May 2001
Messages
23,811
Location
Jersey/Antibes
Visit site
Foredeck hatch access would be in a size that would enable just visual inspection plus pulling untangling chain a bit, right?
In that case a 200X300mm maybe slightly triangulated shape should be sufficient. That would need to be just offcenter by the windlass, maybe a bit aft. The hatch could also incorporate an underhatch holder for the windlass clutch lever and be done with.
That hatch would be a plywood frame, covered with teak and using concealed hinges and watertight sealing to its frame?
DYI jobbie, or buy a proper hatch for watertightness (which is probably irrelevant as there's wet chain in there and there's a drain to outside?)
Yup, deck hatch need not be watertight because it opens to a draining locker anyway. It only needs to stop waves coming in. Bigger hatch is good, triangular shape if poss. Allows you to throw a few fenders in there and maybe store the winch handle, anchor ball and even a kedge. Space is tight though

There is one of these boats in Antibes. I must snap a few photos for you sometime soon...
 

vas

Well-known member
Joined
21 Jun 2011
Messages
8,074
Location
Volos-Athens
Visit site
Yup, deck hatch need not be watertight because it opens to a draining locker anyway. It only needs to stop waves coming in. Bigger hatch is good, triangular shape if poss. Allows you to throw a few fenders in there and maybe store the winch handle, anchor ball and even a kedge. Space is tight though

good,

I'm still a bit confused on space utilisation: you do imply that this store space does have a bottom on top of the chain compartment?
My 75m of chain take relatively little space (albeit stacks up a bit) so I could "floor" so to speak this hatch at around 300mm from the deck and have some really useful space.
Which then pauses the problems of:
  • accessing the chain if one wants to
  • negotiating the 50X200 beam that runs from bow backwards...

Else, if anything is to be dropped with the chain, I guess one has to remember to remove everything out before dropping or retreiving the anchor.

Am I right or am I missing something obvious?

There is one of these boats in Antibes. I must snap a few photos for you sometime soon...
thanks, I have viewed another one before deciding on MiToS, there the bow was very plain:
bow_winch-crewcabin_hatch.jpg


I wonder if I should dump the thick piece of timber on mine and find/fabricate/modify the anchor chain pulley for a clean fit just on top of the new teak deck as in the above photo...
Is there any advantage on either approach???

cheers

V.
 

vas

Well-known member
Joined
21 Jun 2011
Messages
8,074
Location
Volos-Athens
Visit site
am afraid no progress this week due to snow ice and me slipping and hitting VERY HARD the edge of the sundeck, or snowdeck as it were on Wed.
Result is a possibly fractured rib, still hurts a lot, but now I can breathe, sleep, move and walk (almost without hurting...)
And all that in order two take these two photos and they aren't that good either :(
snowclad1.jpg


snowclad2.jpg


First day we saw the sun today, getting warmer (reached 6C!) and prospects are good, so hope to makeup next week.

So did some work on the helm dash design as can be seen on this other thread


cheers

V.
 

vas

Well-known member
Joined
21 Jun 2011
Messages
8,074
Location
Volos-Athens
Visit site
but don't forget that mates on here will bless you to eternity :)

Bart enjoy the Italian snow and let me suffer down here... :( :p

looks like I must have damaged something in there, as it's 4 days now and it still hurts a lot, cannot take a full breath, cannot stay up for more than a couple of hours, hurts and hurts and hurts. Good thing is that kids didn't go to school throughout the week due to the snow (school is at 600m above sea level and under 1m of snow...). However, starting tomorrow I got to go to the uni, kids start school again so I'll resume my typical taxi driving duties (and get in the car hurts as well...)

Well, at least I'm slowly progressing on the helm design although I could do that much later :rolleyes:

more to come ;)

V.
 

vas

Well-known member
Joined
21 Jun 2011
Messages
8,074
Location
Volos-Athens
Visit site
Not many photographs taken I am afraid .... spent more time in engine room getting dirty ....

Anyway, steps from Helm/galley area forwards;

DSC_0096.jpg


and a glance of the mess it Stb cabin.....

DSC_0095.jpg

thanks Alf, much appreciated!

wondering though, is there a bunk under the helm area, at the far back to the right of the lower pic???
I'm planning to fit one down there but I'm slightly worried on the headroom available, it's going to be like a tomb down there...
If it is, what's the distance from matress to ceiling? should be less than 50cm!

cheers

V.
 

Divemaster1

Well-known member
Joined
15 Jan 2002
Messages
4,450
Location
Aberdeenshire, Scotland
Visit site
thanks Alf, much appreciated!

wondering though, is there a bunk under the helm area, at the far back to the right of the lower pic???
I'm planning to fit one down there but I'm slightly worried on the headroom available, it's going to be like a tomb down there...
If it is, what's the distance from matress to ceiling? should be less than 50cm!

cheers

V.

Yup, that is a bunk bed... hinged up and when lowered down she is aligned with the recess going in under the top part of the stairs (first piece of the picture in front of the stairs..).

Headroom is not too bad as that is up to the side deck what you see, so when you sit up, your head is naturally brught forwards underneath the large expanse between the dashboard and front windows.

Not much room between the lower bunk and top in the area where the feet are though .... but have slept in both bunks myself (178 Cm), but not experienced any problems with normal bedding in place.

However, I will take some measurements for you.... just let me know which ones you're interested in ...
 

vas

Well-known member
Joined
21 Jun 2011
Messages
8,074
Location
Volos-Athens
Visit site
Yup, that is a bunk bed... hinged up and when lowered down she is aligned with the recess going in under the top part of the stairs (first piece of the picture in front of the stairs..).

Headroom is not too bad as that is up to the side deck what you see, so when you sit up, your head is naturally brught forwards underneath the large expanse between the dashboard and front windows.

Not much room between the lower bunk and top in the area where the feet are though .... but have slept in both bunks myself (178 Cm), but not experienced any problems with normal bedding in place.

However, I will take some measurements for you.... just let me know which ones you're interested in ...

Hm, slightly confused, need to remove the steps again and measure what's going on behind.
I'm afraid that in order to do something like your design, I'll have to move the door to this stbrd cabin to the bow in order to have enough space for the staircase... And that's a hell of a job that I'll have to consider very carefully :(

I was planning to have this bunk under the helm foot area so all height will be very much limited. In your case half of it is in standing height. I'll do some more measuring and come back to you with exact measurement needs.

cheers

V.
 

vas

Well-known member
Joined
21 Jun 2011
Messages
8,074
Location
Volos-Athens
Visit site
slowly recoving from the fractured rib, so a bit of progress (temps up to 3C, nice and warm!)

Regarding this third cabin and the placement of the cross axis bed, there doesn't seem to be any other solution than MOVING the door 30cm to the bow, extending the helm level top step by also 30cm and hence shift the staircase to the bow. This way I get to keep the aircon/compressor and piping intact and not having to worry about finding alternative place to fit them :)

Considering the badly damaged leatherette lining of the wall, the width of these material (140cm) I worked it out that after all shifting the door is not more than a couple of days work...
Problem is finding an easy way of cutting through half the thickness of the plywood in order to make a matching blanking plate that will take some forces and cut the new hole.

TBH, I'm struggling in finding a way of removing the door frame off the plywood hole. It's oval alright, but it's one piece alloy and a v.tight fit meaning there's not enough slack to manage to push one end out of ply :(
will try again when rib's not hurting :rolleyes:

Other thing I did was clear out as far as I could in 3hrs the cable mess in the right hand side of the helm just on top of the fusebox...
What I found there is really difficult to describe, fcking mess is an understatement. Anyone wanted to connect a device, just lifted any panel, found a live cable (ANY live cable to be exact!) and went his merry way producing an amazing colourfull spagetti...
I think that with another 6-7hours I'll be down to the factory installation (all working perfectly btw!) plus the extras that need to be properly wired through the fusebox underneath...
cabling_mess_helm1.jpg


Nice thing is that managed to find a steering fluid leak I was experiencing unfortunately in a very difficult to access spot just behind the fusebox.
This connector box has the two copper pipes from the f/b steering wheel on top and a T under it getting the inner helm wheel and sending them down back to the rudders. Anyone care to explain how this work and what does this box do???

cabling_mess_helm2.jpg


cheers

V.
 

Divemaster1

Well-known member
Joined
15 Jan 2002
Messages
4,450
Location
Aberdeenshire, Scotland
Visit site
...........

TBH, I'm struggling in finding a way of removing the door frame off the plywood hole. It's oval alright, but it's one piece alloy and a v.tight fit meaning there's not enough slack to manage to push one end out of ply :(
will try again when rib's not hurting :rolleyes:

Mine's got a split and joning at the bottom (I believe) and fixed with a bolt... will check tomorrow...

Other thing I did was clear out as far as I could in 3hrs the cable mess in the right hand side of the helm just on top of the fusebox...

Nice thing is that managed to find a steering fluid leak I was experiencing unfortunately in a very difficult to access spot just behind the fusebox.
This connector box has the two copper pipes from the f/b steering wheel on top and a T under it getting the inner helm wheel and sending them down back to the rudders. Anyone care to explain how this work and what does this box do???

Loos like a non-return valve mechanism to ensure there are no flow of fluid from used helm to not used.... will see if I can find my setupand take picture tomorrow...
 

vas

Well-known member
Joined
21 Jun 2011
Messages
8,074
Location
Volos-Athens
Visit site
Mine's got a split and joning at the bottom (I believe) and fixed with a bolt... will check tomorrow...
yep, that's how mine are as well Alf. Problem is having removed all screws, I can just about lever the one edge of this frame a bit before it jams against the other edge :(
I'm sure I'll get it eventually, but not got the hang of it yet.


Loos like a non-return valve mechanism to ensure there are no flow of fluid from used helm to not used.... will see if I can find my setupand take picture tomorrow...

hm, looks like a non return from lower helm to f/b. There is a simple T underneath the box and that goes to lower helm. Maybe there's a priority issue? Lower helm takes priority over f/b???

Still thing is I have to get to this and manage to tighten (or more likely slacken, clean, refit) which is going to be a problem.
Still a good load of cables to remove from the area before I can have decent access to it.

cheers

V.
 

Divemaster1

Well-known member
Joined
15 Jan 2002
Messages
4,450
Location
Aberdeenshire, Scotland
Visit site
yep, that's how mine are as well Alf. Problem is having removed all screws, I can just about lever the one edge of this frame a bit before it jams against the other edge :(
I'm sure I'll get it eventually, but not got the hang of it yet.

1) remove door (obviously)
2) remove the fixings (screws)
3) push both pieces apart and leaver one side up with a screwdriver ..... ( not the drink!!), whilst pushing the frame part you are leavering slightly outwards... it is important to keep the pressure outwards for both pieces whilst doing this, otherwise you won't manage to split the frame...
 

BartW

Well-known member
Joined
9 Oct 2007
Messages
5,236
Location
Belgium
www.amptec.be
hm, looks like a non return from lower helm to f/b. There is a simple T underneath the box and that goes to lower helm. Maybe there's a priority issue? Lower helm takes priority over f/b???

Still thing is I have to get to this and manage to tighten (or more likely slacken, clean, refit) which is going to be a problem.
Still a good load of cables to remove from the area before I can have decent access to it.

are you sure there is a leak ? (difficult to see from the pic)
if not, I would leave it as it is,
and avoid to even touch this
 

vas

Well-known member
Joined
21 Jun 2011
Messages
8,074
Location
Volos-Athens
Visit site
are you sure there is a leak ? (difficult to see from the pic)
if not, I would leave it as it is,
and avoid to even touch this

Bart, yes for sure there's a leak. The top racor of the right hand side T is leaking (I've topped up around 300ml over the couple of month she was in the water). It's all now on the floor under this junction box :(
You can just about see a glossy spot between all the cabling...

Alf,
I went through the three stages you describe and stuck on the third with a large screwdriver levering between the two ends of the frame. Maybe need a couple more large screwdrivers to help push things about. Will try again when rib's not hurting, feeling rather bad the last couple of days tbh...

cheers

V.
 

Divemaster1

Well-known member
Joined
15 Jan 2002
Messages
4,450
Location
Aberdeenshire, Scotland
Visit site
...
Alf,
I went through the three stages you describe and stuck on the third with a large screwdriver levering between the two ends of the frame. Maybe need a couple more large screwdrivers to help push things about. Will try again when rib's not hurting, feeling rather bad the last couple of days tbh...

cheers

V.

Forgot to mention, that I found removing hinges a must and that pushing opposites worked as well ... ie top left and bottom right...may help having an extra body doing that whilst you attending to the joint....

Anyway, another picture of the companion way ... this time from the master cabin in bow, which shows the location of Stb cabin at bottom of the stairs...

DSC_0109.jpg
 

AndieMac

Well-known member
Joined
24 Mar 2009
Messages
4,516
Location
Tasmania, Australia
Visit site
Just read this thread for the first time V, this is a huge reno for sure. Well done so far.

I've gathered MiToS is a similar design to Alf's Navigator, which I have been aboard previously, so I will be interested in watching progress.

Good luck.
 
Top