Steel boat build - Almarine 1200fa

JOHNPEET

Well-known member
Joined
24 Sep 2002
Messages
428
Location
Anglesey
Visit site
Fly bridge decking!
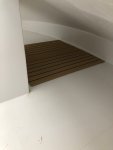
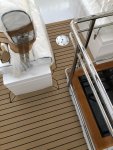
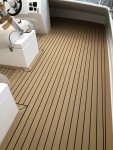
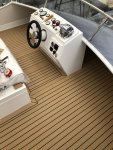
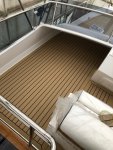
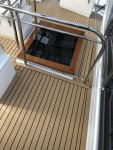
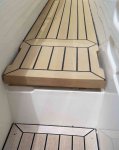
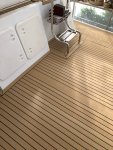
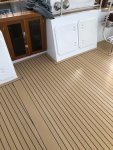
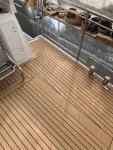
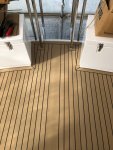
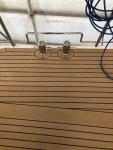
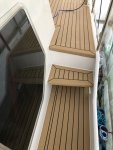
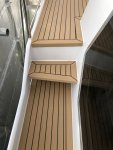
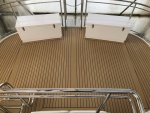
The only way that I felt that I could tackle the fly bridge area was to again, split the area into separate decking mats that I could fabricate and install. The fly bridge isn’t an enormous area by any means, but it has a number of fixed obstacles that I had to work around and I think you’d have to be much better than I am to make it in such a way as to make it appear as if it’s a single sheet/mat.
621E8DD4-ADD7-4D5C-B2DD-C0E39068F675.jpeg542732CB-5BEE-4EA4-B297-3377138EF67F.jpegCAC5EDFE-6783-4F71-91DA-360CA8C33D83.jpeg197ACCB2-358D-42CC-859D-2808DB6AA37E.jpegD13A8FE5-B662-49A6-98AB-BEE06E5EA061.jpeg82D2404A-C62B-4BBE-92D3-99474919865C.jpeg0D886ADD-5406-409F-8290-69783B7E6880.jpeg52F9257F-C215-4A26-9791-D6D10A04BDD0.jpeg3582B53C-356C-428C-911A-CA3ECCC47F71.jpeg71D08EC7-01FA-4C00-BC39-6AAF929CDF09.jpeg8973CAFA-C75C-40EA-9D61-D886E30FDF47.jpeg2CD07E2A-F8E1-438D-82D2-407E6FEBE7DD.jpeg
 

Hurricane

Well-known member
Joined
11 Nov 2005
Messages
9,415
Location
Sant Carles de la Ràpita
Visit site
Was the kingplank under the helm for aesthetics or is there a hidden reason?
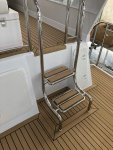
Did you make the steps on the stainless steel steps from real wood.
Trakmark supply a solid 20mm x 30mm section that I use for that kind of thing.
I think I would have used that on the overhang where the top deck meets the steps/ladder but your solution looks better.

There's a LOT of work in just the synthetic teak - let alone the rest of the boat.
I'm gobsmacked!
 

JOHNPEET

Well-known member
Joined
24 Sep 2002
Messages
428
Location
Anglesey
Visit site
Was the kingplank under the helm for aesthetics or is there a hidden reason?
Did you make the steps on the stainless steel steps from real wood.
Trakmark supply a solid 20mm x 30mm section that I use for that kind of thing.
I think I would have used that on the overhang where the top deck meets the steps/ladder but your solution looks better.

There's a LOT of work in just the synthetic teak - let alone the rest of the boat.
I'm gobsmacked!

The steps were made with two pieces of the 20 x 30 solid section with a piece of king plank all welded together to get the required section then sanded to finish. I think the decking in total took me about two and a half months!
 

Hurricane

Well-known member
Joined
11 Nov 2005
Messages
9,415
Location
Sant Carles de la Ràpita
Visit site
Yes, whilst cleaning our old wood teak, I slipped on the top step of the flybridge stairs and fell (bounced) down into th cockpit.
It hurt!
Trakmark, the way that you and I fit it, has a nice grippy feel to it.
The professional guys who fitted mf Flexiteek to our bathing platform, sanded it smooth which makes it more slippery than the Trakmark.

Synthetic teak is really nice under a bare foot.
Wood teak, more than 7 years old, becomes quite rough under foot.
Less slippery but not comfortable.
The big disadvantage can be in the hot sun where synthetic teak can get too hot to stand on.
In the Med that only happens in the heat of the day and for some reason it stays cool when away from the marina.
IMO that is a small price to pay for all the other benefits.
 

Hurricane

Well-known member
Joined
11 Nov 2005
Messages
9,415
Location
Sant Carles de la Ràpita
Visit site
The steps were made with two pieces of the 20 x 30 solid section with a piece of king plank all welded together to get the required section then sanded to finish.
Just shows how good this staff is - I thought that was real wood!
I did a similar thing on my diesel fuel flaps.
Can take a long time but it is possible to make it indistinguishable to real wood.

Fuel Flaps().jpg

20200424_162712().jpg
 

JOHNPEET

Well-known member
Joined
24 Sep 2002
Messages
428
Location
Anglesey
Visit site
Just shows how good this staff is - I thought that was real wood!
I did a similar thing on my diesel fuel flaps.
Can take a long time but it is possible to make it indistinguishable to real wood.

View attachment 135209

View attachment 135210

Yes, these look really good! The king plank on my fly bridge by the helm is just for aesthetic reasons. Just to carry it through the full length of the boat.
 

JOHNPEET

Well-known member
Joined
24 Sep 2002
Messages
428
Location
Anglesey
Visit site
Aft deck decking!

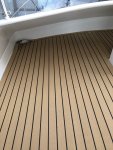
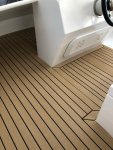
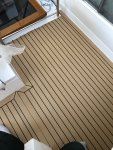
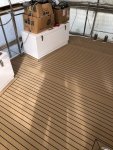
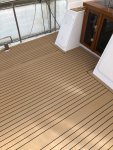
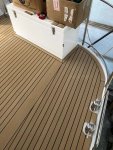
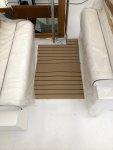
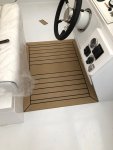
So this is the last set of photos relating to the laying of the synthetic teak decks. This was laid as one large main decking mat and one very small mat that sits under the steps leading to the fly bridge. Once these mats were completed, the last step was to bond all of the mats down to the deck with the proprietary adhesive supplied by Trakmark. This was carried out by carefully positioning each mat in its place, weighting down half of the mat with the lead ingot/weights, folding back the unweighted section and applying the adhesive to the deck. The adhesive is spread out with a serrated spreader and the decking mat folded back onto the adhesive and firmed down using a flooring roller to work out any air bubbles etc. The weights are then removed and the process repeated for the second half of that mat. Etc etc.

23142EB9-2D09-4C71-A238-B9944EF4975C.jpeg12F6E9B4-6A13-49D2-B4C6-B9CF45DB4707.jpeg29706A61-074F-4279-9D6E-320B2705D4E4.jpeg9043587A-AD24-42C5-AE4E-14413DA227CF.jpegB1201C49-655E-4B7F-B91A-D700A56A0EE9.jpeg31337324-7C3E-42E5-856D-C7C45D006916.jpeg833A200B-8066-47E9-8937-7FE4733D6E27.jpeg1B6BFAAE-6792-4051-AAB5-E6208D4B7CC9.jpeg490E81D4-F2BF-4413-9B78-2200126A8129.jpegB101622B-C411-4594-84F6-265D5D8BD346.jpegED25F0BA-61CE-4C14-849C-53612D952D96.jpeg
 

Hurricane

Well-known member
Joined
11 Nov 2005
Messages
9,415
Location
Sant Carles de la Ràpita
Visit site
How did you do the curves around the side cleats/posts?
I'm interested because getting a router to cut a curved groove (ready for top welding) is a real trick.
I've tried lots of ideas.
My current solution is a cheap Ebay palm router with a perspex disc as a guide.
It is a complicated process though, so I am looking for alternative ideas before I make the steps to our flybridge.
 

limecc

Active member
Joined
10 May 2017
Messages
325
Visit site
How did you do the curves around the side cleats/posts?

My current solution is a cheap Ebay palm router with a perspex disc as a guide.
I did (and do) the same but free-hand to a carefully marked line. Reason is I have curves with a gradually increasing radius anything else would take too much time.

These routers are incredible value for money.
 
Last edited:

Hurricane

Well-known member
Joined
11 Nov 2005
Messages
9,415
Location
Sant Carles de la Ràpita
Visit site
This might take a bit of space on this thread but this is my idea/way of making curves that aren't regular.
I cut two identical perspex discs.
The disc radius is exactly the same dimension as the Trakmark border strip.
Like this
20211124_150817().jpg

And fit one to the bottom of one of those cheap palm routers.
Like this

20211124_150839().jpg

Then mark the curve against a plywood template.
Like this

20211124_152255().jpg

Cut and glue the edge curve in

20211124_152210().jpg

Then route out the groove for the to weld, using the plywood template.
Sorry, I didn't take s pic at this stage but this pic of the final curve shows the concept.

20211124_150909().jpg

Sorry if this is s bit of thread drift.
 

JOHNPEET

Well-known member
Joined
24 Sep 2002
Messages
428
Location
Anglesey
Visit site
How did you do the curves around the side cleats/posts?
I'm interested because getting a router to cut a curved groove (ready for top welding) is a real trick.
I've tried lots of ideas.
My current solution is a cheap Ebay palm router with a perspex disc as a guide.
It is a complicated process though, so I am looking for alternative ideas before I make the steps to our flybridge.

I have to say that I faffed around with a few ideas before using the one that gave me the best results. I have a small cheap Katsu router for which I have a set of guide bushes and a plunge base attachment. I made a plywood template for the required shape allowing for the guide bush. I set some pins into the ply template so that I could press it on to a piece of king plank which allowed the template to grip the king plank and not slip. Route around the template to cut the required rebate into the king plank for a top weld. Cut the shape out on the outside edge of the rebate with a sharp knife. This provides the full width of the top weld rebate attached to the shape. Scribe around the shape on the decking and cut. So you now have the shape fitted into the decking but all of the bottom of the rebate is on the shape. Top weld and trim to finish. Not a perfect solution, but you do get a good router cut curve. Hope you understand my feeble explanation!
 
Top