Antares 760 thread

Plum

Well-known member
Joined
6 Jun 2001
Messages
4,339
Location
UK East Coast
Visit site
Is 5 liters of antifouling enough for two coats on A760? Will paint with Jotun Megayacht Imperial.
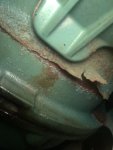
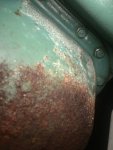
Yes, that is how much I buy. I use Micron 350 and 5L gives enough for a 3rd coat just around the waterline and then it lasts 2 years as I stay in the water all year and only lift out every other year. However, I dry out on a tide 2 or 3 times a year to clean the prop and change the prop anode.

Www.solocoastalsailing.co.uk
 
Last edited:

Plum

Well-known member
Joined
6 Jun 2001
Messages
4,339
Location
UK East Coast
Visit site
The standard prop on the 760 is made by Radice so in theory both your weblinks should be for the same anode but the Beneteau™ Replacement Anodes - Martyr Anodes one shows the shaft diameter of 40mm which is what I buy. When you fit it and after tightening the screw fill the counterbore with mastic (anything cheep will do) as this stops the anode wasting around and under the screw head which results in the screw no longer holding the anode securely.

Www.solocoastalsailing.co.uk
 

tomaz_slo

Member
Joined
26 Sep 2022
Messages
39
Visit site
Dimesions Radice vs Beneteau for shaft 40 mm shows that Beneteau anode is 2mm higher... (67 vs 65 mm). Does it matter? Can get Radice on Amazon, but can't get Beneteau.
 

tomaz_slo

Member
Joined
26 Sep 2022
Messages
39
Visit site
Any idea how to remove TAMD41p engine DIY to change rusted oil pan? I know I must disconect all included shaft. The problem is how to lift a little, move aft and lift enough to reach the pan....
 

Plum

Well-known member
Joined
6 Jun 2001
Messages
4,339
Location
UK East Coast
Visit site
Any idea how to remove TAMD41p engine DIY to change rusted oil pan? I know I must disconect all included shaft. The problem is how to lift a little, move aft and lift enough to reach the pan....
How bad is the rust? I know space under the sump is minimal but maybe worth abrading, cleaning and treating without lifting? If you made something like this https://www.amazon.co.uk/Exfoliatin...cphy=1006621&hvtargid=pla-1192473802252&psc=1 to which you fixed a length of adrasive paper then strips of fabrick with cleaning agents, then rust converter fluid?
 

tomaz_slo

Member
Joined
26 Sep 2022
Messages
39
Visit site
I managed to take some photos....
 

Attachments

  • oilpan1.jpg
    oilpan1.jpg
    61.2 KB · Views: 16
  • oilpan2.jpg
    oilpan2.jpg
    49.1 KB · Views: 16
  • oilpan3.jpg
    oilpan3.jpg
    69.5 KB · Views: 17

Plum

Well-known member
Joined
6 Jun 2001
Messages
4,339
Location
UK East Coast
Visit site
Any idea how to remove TAMD41p engine DIY to change rusted oil pan? I know I must disconect all included shaft. The problem is how to lift a little, move aft and lift enough to reach the pan....
In such a confined space I think you would have to lift the engine a long way up in order to work on the sump and be able to make a good seal when refitting. An idea, for minimal cost, is to construct a scaffolding frame something like the one below, four legs resting on wooden boards against the hull, each side of the engine bearers, to spread the load with the legs in the four corners of the engine space. The top of this frame should be right at the top of the wheelhouse roof. You then have two options: first one: use two hoists, one at the front of the engine and one right at the back so you can hoist right out of the compartment and even lift the front of the engine much higher than the rear for better access. Option 2: use four hoists with two long lifting straps that go right under the engine side to side. One strap near the front the other near the rear. Lift the engine a little then hoise using the two hoists on one side while lowering the two on the other side. This will rotate the engine until it is up side down giving excellent access. This picture is just to illustrate the construction of the frame.
s-l1600.jpg
 

Plum

Well-known member
Joined
6 Jun 2001
Messages
4,339
Location
UK East Coast
Visit site
Thanks plum for idea, but very complicated with 4 legs and lifting points. What do you think about that?
View attachment 148909
Yes, a good idea but given that the dry engine weighs half a tonne, plus the weight of the lifting frame, and you should plan for at least a safety factor of 3 if you are going to have your arms under the engine, you need to ensure the wheelhouse floor will support over 1.5 tonne. Which is why I proposed having the lifting frame legs,with load spreading wooden boards, standing on the hull.
 

tomaz_slo

Member
Joined
26 Sep 2022
Messages
39
Visit site
I believe that the engine is so large (widthxdepth) that I can't install anything that would make the actual frame clearance smaller as is. Also the hull isn,t horizontal and that is the problem for installing support structure. To reduce weight and make some more space I might firstly dismount reverse gear.
Am I really the first one with this problem? Can't find anything on net....
Also I can't find which engine mounts I have - they are rounded, M18 and the distance between bolts 10cm. I can't find these in the VP parts catalog...
 

Plum

Well-known member
Joined
6 Jun 2001
Messages
4,339
Location
UK East Coast
Visit site
I believe that the engine is so large (widthxdepth) that I can't install anything that would make the actual frame clearance smaller as is. Also the hull isn,t horizontal and that is the problem for installing support structure. To reduce weight and make some more space I might firstly dismount reverse gear.
Am I really the first one with this problem? Can't find anything on net....
Also I can't find which engine mounts I have - they are rounded, M18 and the distance between bolts 10cm. I can't find these in the VP parts catalog...
Looks like you are the first! Or at least the first to admit it :)
Appears that the engine mounts have been superseded by rectangular ones, I did not know that
Screenshot (8).png
 

Pleinmont

Active member
Joined
16 Aug 2019
Messages
315
Visit site
Interested to know how the oil pan replacement goes - good luck and stay safe with the lifting.
Out of all the things that can go wrong on my boat replacing a rusty pan is the one that I hope I never have to do.
Which reminds me, I must crawl down into the bilges and see how much I can wipe down the underside with duck oil on a rag...
 

tomaz_slo

Member
Joined
26 Sep 2022
Messages
39
Visit site
Interested to know how the oil pan replacement goes - good luck and stay safe with the lifting.
Out of all the things that can go wrong on my boat replacing a rusty pan is the one that I hope I never have to do.
Which reminds me, I must crawl down into the bilges and see how much I can wipe down the underside with duck oil on a rag...
There were some bad maintenance practice from previous owner... I believe there was water ingress at stainless steel bathing stripe, there was no auto bilge installed, god knows how long the oil pan was immersed...
Yes it will be a big project. I already oredered used pan for AQAD motor which is stainless steel one...

Btw, today the new Rocna Vulcan, 9 kg arrived and I hope it will set fine on original bow roller.

About rain ingress I found out that it's almost on all sealings... The majority where there are slots for table above lazarette and thru the covers of engine air intakes from both sides of the hull.

If someone can post some photos of autobilge installation using pressure switch from washing machine, it would be very helpfull for me.
 
Last edited:

Pleinmont

Active member
Joined
16 Aug 2019
Messages
315
Visit site
Yes that wouldn't have been good for the pan to be soaked in sea water...
Just wish Volvo had made all their sump pans from stainless steel given how hard they are to maintain and replace!
 

Plum

Well-known member
Joined
6 Jun 2001
Messages
4,339
Location
UK East Coast
Visit site
if someone can post some photos of autobilge installation using pressure switch from washing machine, it would be very helpfull for me.
Can't find a pic of mine but I used a switch just like the one in the link below from an old washing machine. Stepped up the hose that attaches to the small bore spigot to a 13mm piece of garden hose. The switch is mounted in the engine compartment at the top of the bulkhead between the water strainer and the primary fuel filter with the 13mm hose going straight down into the skeg cavity below it. If the water raises more than 100mm the switch closes.
CANDY Genuine Washing Machine Water Level Pressure Switch 41035075 | eBay
Mine just activates a sound and light at the helm but you would need a simple 12v relay to operate a pump. Very simple, reliable, always well away from any water. Mine cost me nothing.

Www.solocoastalsailing.co.uk
 
Last edited:

Pleinmont

Active member
Joined
16 Aug 2019
Messages
315
Visit site
Can't find a pic of mine but I used a switch just like the one in the link below from an old washing machine. Stepped up the hose that attaches to the small bore spigot to a 13mm piece of garden hose. The switch it mounted in the engine compartment at the top of the bulkhead between the water strainer and the primary fuel filter with the 13mm hose going straight down into the skeg cavity below it. If the water raises more than 100mm the switch closes.
CANDY Genuine Washing Machine Water Level Pressure Switch 41035075 | eBay
Mine just activates a sound and light at the helm but you would need a simple 12v relay to operate a pump. Very simple, reliable, always well away from any water. Mine cost me nothing.

Www.solocoastalsailing.co.uk

I had a little electronic water sensor fitted in the bilge to come on if the skeg cavity started filling up (most likely from the stern gland if that ever started leaking)
Was a Water Witch i think - wasn't much money to have it done.
Force 4 Water Witch Electronic Bilge Switch 24V | Force 4 Chandlery

It has no moving parts and doesn't react to oil or fuel. Hard wired to the battery so if the water level rises and set's it off it activates the bilge pump and an alarm even if no-one aboard.
Thankfully never comes on other than when tested as the bilge is dry but nice to know it's always on standby.
 

Plum

Well-known member
Joined
6 Jun 2001
Messages
4,339
Location
UK East Coast
Visit site
I am to change rubbing strake insert. Any idea about type and where to purchase? Of course the blue one would be the best.
Hi, have you received the new blue rubbing strip insert from the Beneteau dealer that you ordered? Did it fit ok?
 
Last edited:
Top