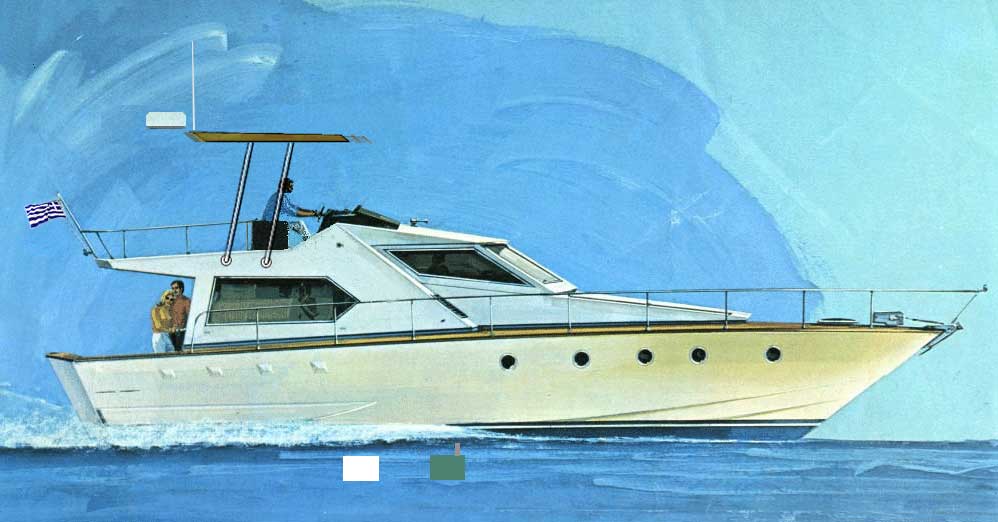
MiToS re-built/fit- versilcraft Mystery43

NormanB

Well-known member
Joined
20 Oct 2014
Messages
1,909
Visit site
Thanks for the thanks......:)

Other thoughts - or even a bit of plastic pipe that they use for gas mains ( they sometimes leave it at the side of the road when they are laying it) - would only take 15 mins with a good hacksaw to whip a bit off the end.

And seeing as you have access to a lathe - if you get hold of a big fat cardboard tube ( used in carpet stores) and protect the lathe bed with polythene - you could lay up fibreglass and resin around it until you had a good few layers.
 

vas

Well-known member
Joined
21 Jun 2011
Messages
8,016
Location
Volos-Athens
Visit site
hello again,

since summer is in the corner (ok, got almost a week of sunshine and temps over 10C for a change!) I thought I better post a video I took in early Jan otherwise it will look v.much out of place later :rolleyes:


yes, it does snow down here, that video was smack in the middle of a snowstorm on the beach :D , floating pontoon had 10-15cm snow and up to 40cm of snow gathered by the wind on some corners of the aft deck on MiToS. For the record it was the worst weather I can remember in the 15yrs I'm up here with 6 full days of temps staying below zero. Water temp in the port dropped to 12C, now up to 17-18C already.

Nikos the ss fabricator is coming this week to measure up and start working on the hardtop. I've spent enough days designing it, time for some action. Got the solar panels, the regulator, the radar and vhf antenna waiting for assembly! Only missing the anchor light, will sort out something.

Last week had a go with son to mock the side supports for the second time (will probably be 40something mm ss tubing) out of 40mm plastic waste pipe. First I lost a couple of pieces which surprisingly don't float doh! Anyway had enough to do the job. Took us an hour with a nice cold N wind blowing.
Two days later it really blew and as a result all the bleeding pipes ended up in the bottom of the sea :(

Pissed off had another go today with more duct tape to keep them together and a definitely warmer weather :D
Looks ugly but gives an idea and it's much better to discuss detailing, measure angles, lengths etc on the spot rather than out of a 14inch laptop and AutoCAD.
The horizontal piece is part of a teak (?) railing that I ripped off and had it lying around. Hope it makes it to the end of the week...

Hopefully next week I'll have something installed. I'll keep track of the process as supporting is an issue that I have to take great care of.

ht_mock_1.jpg


ht_mock_2.jpg


ht_mock_3.jpg


ht_mock_4.jpg


cheers

V.

PS. no custard here, if you want proof, you got to dhl your favourite canned powder and I can do my bit :p
 

vas

Well-known member
Joined
21 Jun 2011
Messages
8,016
Location
Volos-Athens
Visit site
Who are you planning to hang Vas? Looks like gallows ��

nice one P, :D

wasn't my plan tbh, it would only accommodate dwarfs or small children as bottom of the horizontal piece to f/b deck is only 1.85m (but I'll think about it...)

Need some serious reinforcing on the inside (er, back in track now not for the extracurricular suggested use!), as I wouldn't like to see the ht with the f/b deck parting with the rest of the superstructure on a serious blow. So right form of ss brackets and solid timber beams will need to be built, trimmed and fitted before final completion of the clamping down. So a fair amount of work to do over the next couple of weeks whereas I can barely spare half an hour a day... interesting

cheers

V.
 

KevB

Active member
Joined
4 Jul 2001
Messages
11,268
Location
Kent/Chichester
Visit site
I know you've said you've got the design and you're working on the build now but... I can't help thinking that without keeping to the lines of the boat it's always going to look like a "home made" bolt on. jfm's earlier design looked very neat.

What about only having supports at the front and a single radar stack at the rear of the flybridge, with your flags, steaming lights etc on it going up through the centre of the new roof as support.

Sorry for the basterdisation of your boat but something like this...

launch_5%20copy3_zpsggwguz8c.jpg
 
Last edited:

rafiki_

Well-known member
Joined
19 Jan 2009
Messages
11,978
Location
Stratford on Avon
Visit site
Slight Fred Rift, but you had 16 cm more snow than we did here in the far north. I had no idea life was so cold for you in the winter. Loved the bit about losing the drain pipes too ��
 

waynes world

Well-known member
Joined
7 May 2011
Messages
1,567
Location
Manchester
Visit site
By eck V, that is some snow. Not seen that over here in years.

Water at 12 deg, like bath water still to us lol. You do get spoiled


Now on your canopy, dont go to giddy, i am getting worried about mine now, i need to stop watching these disasters.

Not if this will work as i just copied and pasted it here.

http://redirect.viglink.com/?format...book.com/boatlifestyl/videos/767929420028308/


coming on nice, keep at it ;)
 

vas

Well-known member
Joined
21 Jun 2011
Messages
8,016
Location
Volos-Athens
Visit site
evening all,

another belated update!

gallows on hold, sorry P and LJS :p
Nikos is too busy doing real (highly paid) ss fabrication work as winter was too harsh and got a massive backlog. Not willing to pay over the top to push the HT up his job list, I'm patiently waiting. He promised he'll start this coming week (but it's the 3rd or 4th time I hear that from him :rolleyes: )

Admin work eased a bit, weather is really nice and hot (15+ at night, circa 22 midday) so I started working again inside.

One of the tasks is to finish upholstery on the three cabins. Remember that only port cabin is kept as designed originally, means that's the one that I had models for most of the bits and was more or less sorted in terms of where panels go and how the mate/interlink/etc one another.
Port cabin was missing the lower side deck ceiling as well as the lower ceiling part over the heads of the beds (that's where the galley floor is above). Did the side deck ceiling part cut the over the bed pieces and will do during the week:

portcabin_refit_14.jpg


portcabin_refit_15.jpg


portcabin_refit_16.jpg


Ah, btw, since I'd added a few extra cables on the grounds I wasn't sure how I'm going to operate the windlass, I realised there were 3cables (thin signal) going from the port cabin BMS controller to the bow where the windlass relay lives. So, decided to wire it up so that the domotic system can operate the windlass. I thought that maybe there will be the odd case where the wind would pick up a bit, I was out and I'd like to drop another 5m of chain or so... So now I can SMS the boat from my mobile to drop a bit more chain. Couldn't find a reason to retrieve anchor the same way, so didn't do that, but it's probably half an hour job to add that if someone thinks it's going to be useful (in something other than writing off MiToS...)


stbrd cabin was ex 2X heads, so all's new there. A lot of head scratching and after receiving the OK from daughter, I started designing a hanging cabinet on the head of the bed. Purpose twofold, accommodate all the crap daughter brings along (almost as bad as wife!) and give me easy access to the instruments of the lower helm above ;)
Mock of the main panel that George is going to lacquer the same white as the rest of the cabinets in the cabins is already cut and will be test fitted tomorrow before it goes back for trimming and painting.
Main ceiling panels are in place, but side deck ceiling panels cannot be built before getting the cabinet in place.

3rdcabin_ceiling_7.jpg


On the bow cabin, almost everything is new as it now gets deep into the bows into the ex-captain "cage" (with access hatch on the bow) that is now part of the bed with the hatch bringing fresh air to the cabin at anchor. So had the main ceiling panels done and fitted as well as the two side trapezoid ones. However what wasn't visible on the pics I was posting was that when laying in bed the side deck and bow ceiling panels were simply missing. Cabin was cool, I expect that with the 50mm thick rockwool I'm fitting behind each upholstered panel I install conditions will be even better in August heat.
So started with the two side deck ceiling panels, trying to find a method to fit them without having lots of screws visible. For the record I'm using 6mm marine ply for the panels, with 3mm foam stapled on followed by the leatherette again stretched and stapled on. No double sided tape used anywhere in MiToS. Original panels were completely destroyed by water dripping in from the stanchion bases, so don't have them for fitting ideas. Anyway, came up with the idea of having a series of lips hanging out of the panel to the outside that will "catch" on the side panel (alloy sandwitch over 6mm marine ply) idea being I push it way up and squeeze it in on the inside and wedge it down (hence the spacer seen on the underside). Maybe add a screw or two hidden under the overlap of the trapezoid upholstered panel. Many hours later, system worked just fine, both sides done (two screws on stbrd, zero on port). Colouring theme is fairly clean, white for the high space strips and the two sides, the lower part that surrounds it goes to the grey that matches the side panels, this way the white "comes out" and is stressed. Actually looks rather good!

Test fitting:
bow_refit_32.jpg


checking level and intersection with the other white upholstered panels:
bow_refit_33.jpg


bow_refit_34.jpg


you can see the hanging system on the following pic:
bow_refit_35.jpg


rockwool everywhere, I notice that the cabling around there looks awful, it's not that bad in real life :rolleyes: and anyway everything works so I'm happy!

bow_refit_36.jpg


end result on stbrd side over the workplace. Note that I added two led lights as well on the axes of the two portlights so that at night lighting angles are more or less simulating the natural lighting (so you don't have to move the laptop left and right ... I admit that was slightly OTT!)
bow_refit_37.jpg


Port side was much smaller but funny shaped and it was quite difficult to even model the shape to cut the ply. Resorted to bolting various 80mm wide strips of thin hardboard together to get the shape right. Works a treat!

bow_refit_38.jpg


lined and upholstered:
bow_refit_39.jpg


bow_refit_40.jpg


test fitting the custom dimmable led light on a F&S fixture
bow_refit_41.jpg


bow_refit_42.jpg


final result, looks v.good:
bow_refit_43.jpg


Having done these two, I moved forward towards the bow. I opted for a wider strip one on stbrd one on port side which will be complimented with two v.oddly shaped ones that will reach the cabinet frame. Trying to keep up the same theme of sliding and not using any screws was great fun. 12h hard work later, I have both panels test fitted (one zillion times) and fitting perfectly on the spot and the port side upholstered as well. Stbrd will be done tomorrow and then I'll try to model the two remaining pieces with the 520mm hole for the round hatch. It's a really low priority job from now on, so dunno how far I'll get...
Running out of pic quota, will continue reporting with a post next week (hopefully)

cheers

V.
 

longjohnsilver

Well-known member
Joined
30 May 2001
Messages
18,841
Visit site
Oh Vas, that looks dreadful and should be ripped out immediately!

Being slightly more serious, great work as usual, what make of dimmable led have you used? And what's all this about letting anchor chain out using your phone when not on board?! Please tell me you're joking. And maybe a forum inspection party should be arranged:encouragement: before it gets too hot............
 
Last edited:

MapisM

Well-known member
Joined
11 Mar 2002
Messages
20,431
Visit site
I notice that the cabling around there looks awful, it's not that bad in real life :rolleyes: and anyway everything works so I'm happy!
Blimey V, is that green cable one of those used for KNX bus signal, or am I mistaken?
If so, I didn't remember that you went as far as installing a full flagged domotic system...
MyToS must be the only wooden boat on the planet with such feature! :cool:

I'm also interested to hear more about dimmable LEDs.
Among other things, I am right now in the process of replacing dozens of GU 5.3 halogen bulbs.
Eventually I went for these ones (3000k version), because after comparing several different types I was happy with the light quality and its angle (95°). Besides, they are very nice to look at when turned off, unlike some ugly LED bulbs with internal leds visible and/or popping out from the surface.
But dimmable they aren't. Actually, I wasn't concerned about that, because I've lost count of how many lighting combinations there are on the DP, as opposed to my much simpler old tub, so when I'll want more/less light it'll be just a matter of turning on/off some light sections.

Apropos, if you forgive me the slight o/t, in the new to me DP I found that all the lamps are connected in pairs and in series, in order to use 12V bulbs - of which there's a much wider choice compared to 24V.
Clever idea, I thought - in fact, those in my previous link are only available in 12V, for instance.
Then again, it popped to my mind that maybe LED bulbs could be unhappy to work in series for some reason... Does anyone know if that is the case?
Those which I replaced so far seem to work very nicely, also with the battery charger turned on (hence with up to 28+V), but should I expect any future troubles?
 
Last edited:

vas

Well-known member
Joined
21 Jun 2011
Messages
8,016
Location
Volos-Athens
Visit site
Oh Vas, that looks dreadful and should be ripped out immediately!

Being slightly more serious, great work as usual, what make of dimmable led have you used? And what's all this about letting anchor chain out using your phone when not on board?! Please tell me you're joking. And maybe a forum inspection party should be arranged:encouragement: before it gets too hot............

why not (re chain dropping!)
:p
leds and domotics reply at the end of the post.

forum party, give me a couple of months to setup the HT and finish off various upholster bits and I should be ready!
Mind the only forum member that has seen MiToS in the flesh is RIN (I think he was slightly scared at the condition of the project at the time...)

Needless to say (again!) that forumites are always welcomed!


Yep, upholstery and fittings looking very good Vas.
thanks P., if everything fails, I should have a decent carrier as an uphosterer (or carpenter, or plumber, or electrician, or....)


Blimey V, is that green cable one of those used for KNX bus signal, or am I mistaken?
If so, I didn't remember that you went as far as installing a full flagged domotic system...
MyToS must be the only wooden boat on the planet with such feature! :cool:

I'm also interested to hear more about dimmable LEDs.
Among other things, I am right now in the process of replacing dozens of GU 5.3 halogen bulbs.
Eventually I went for these ones (3000k version), because after comparing several different types I was happy with the light quality and its angle (95°). Besides, they are very nice to look at when turned off, unlike some ugly LED bulbs with internal leds visible and/or popping out from the surface.
But dimmable they aren't. Actually, I wasn't concerned about that, because I've lost count of how many lighting combinations there are on the DP, as opposed to my much simpler old tub, so when I'll want more/less light it'll be just a matter of turning on/off some light sections.

Apropos, if you forgive me the slight o/t, in the new to me DP I found that all the lamps are connected in pairs and in series, in order to use 12V bulbs - of which there's a much wider choice compared to 24V.
Clever idea, I thought - in fact, those in my previous link are only available in 12V, for instance.
Then again, it popped to my mind that maybe LED bulbs could be unhappy to work in series for some reason... Does anyone know if that is the case?
Those which I replaced so far seem to work very nicely, also with the battery charger turned on (hence with up to 28+V), but should I expect any future troubles?

starting from the end, nah, should be okay having two of them in series. After all it's just on/off no dimming (not that the ones shown are dimmable!)

TBH I'm using these dimmable powerleds as they are 0-10V triggered (for the dimming) and designed and fabricated by the guy who's designed, built and is marketing the domotic system I'm using throughout MiToS. So not something you can use just like that, you need a controller and a third cable to move signal around, plus you need some sort of dimmable el. switches. Best if you keep altering the level of lighting but turning on and off series of lights.

Now, on the domotics, I've researched the topic A FCKING LOT back in 2000 when I was building my house in Volos and ended up with FYES (www.fyes.gr). I followed their developments, even helped with a couple of ideas and became beta tester for new kit as it was coming out.
Result is a system more versatile and much more cheap than KNX and all the Siemens consortia products. So yes, the green cable is the "bus" cable. I thought I'd analysed the system and it's abilities (or rather the ones I'm implementing!) before, probably not. A quick run down:

glass touch screens with their own intelligence and uploaded program, CAN-BUS (through the green cable) to communicate info various in/out as well as 4relays on each glass screen. Rack mounted devices with extra relays (again 20A each) to programm on and off of various things. Each device (glass screen or rack) also has 4-10 dimmable (0-10V) outputs.
Sensors (presence, temp, photometre, humidity, gass, smoke, Ammeter, et al) buttons/switches (soft/hard) and all types of fancy stuff either supported or can be added. Being now a friend (after almost 15yrs of pestering him with Qs ideas etc) I now have the programming tools, write my own routines and upload them to the system.
System has a GSM module so I can receive updates as well as sent commands.


During the rebuilt I thought a lot how I'm going to implement the system and ended up with a hybrid system:

Navlights, horn, can be operated normally via the old 70ies push pull switches and buttons on both helms. Signal cables go to the nearest FYES controller and then send the command to the rack mounted relay set that operates them.
Anchor can be used with normal toggle from both helms, footswitches AS WELL AS the FYES system via SMS.

The idea is that you setup scenarios and run them at will. So I can setup the boat to RUN mode (simply by sending a RUN SMS) and the anchor light will automatically switch on when it's dark - there's photometers on each presence sensor (each cabin and salon) and there's going to be an ext one at the top of the HT (once installed!). Getting an input from the engines means that it will also turn on the nav lights if engine is running (ok, it can get a bit silly, you might as well push or pull the switch). I can also turn the boat to PORT mode will such features disabled.

One of the features I really liked was the ability to monitor carefully the battery levels and act upon (that was before coming up with the 600W solar panels on the HT idea...) So, basic loads are linked on the FYES so I can turn on and off fridges based on service bank voltage, lights/dimmers/galley fan, fresh water pump, 1KW inverter, USB sockets throughout the boat, even shore power or battery charger, you name it.
However the real point was being able to monitor nasties like intruders, whole system works as a proper alarm, getting the boat into panic mode at night certain lights flashing, both 70ies helm alarm bells (as in proper bells!) ringing, as well as flooding/water intake warning mode. For this I'm now in the process of fitting 3 extra float switches (isolated from the three auto bilge pumps) which will sent an SMS to me, wife and whoever else I choose.
Similarly and in order to avoid having to spend quality time inverting duckbill valves which have messed themshelves due to running the blackwater pump with the seacock closed, I'm installing a magnetic contact on the trudesign seacock so that the pump wont run unless the seacock is open...

On the lighting front, I've spent a few days formulating automation routines so that when it's dark in the cabin if someone enters one of the lights dimms up enough for you to move about (not that my cabins are that big...) and automatically turns off a few mins after you leave the cabin.
Such a routine is handy and I used it all the time when working on the boat, but obviously not useful if someone wants to sleep in the cabin and moves about :D
First trip last year I had to stick masking tape on the sensors so that lights remained off throughout the night and everyone had a proper rest :D
Then I simply altered the routine and it now gives you three cabin operation modes (FULLY MANUAL, AUTO OFF and AUTO) Idea being that one of the 2 or 3 lights turns up on auto, all on manual. You can also set it to night mode for some extra details. I'm waiting for some updates in firmware so that I can do a proper feedback loop and keep the level of lighting to a preset value which would make sense in a boat at anchor with sun/reflections et al moving all the time. Helpful in the bow cabin where I expect my wife to work (she's more of a workaholic than me actually...)
At home with a raspberry pi, I have full control of the house from the web (which rooms are occupied, temp on each, light levels, humidity, energy consumption, etc). Dunno if I go that route on the boat as well as internet is just stolen from a couple of cafes, and the nearest uni building where I could connect is 200m away. Will have to try a decent antenna and see if I can pick a steady signal.

I was also planning to get diesel, black and fresh water tank info into that but finally opted on an integrated NMEA2000 nav support system so that's out.

So to sum it all up, it's a nice system and together with my home are two testbeds for interaction and home automation ideas. Whole thing feeds back to some of my classes at the uni as well.


sorry a bit carried away and rather long and probably confusing.

cheers

V.
 

waynes world

Well-known member
Joined
7 May 2011
Messages
1,567
Location
Manchester
Visit site
You can sat that again V :ambivalence: intense or what lol.

You are cracking on and make a good read, and it is good to read about another project as not many about fro some reason. It feels like mine is taking ages now. Do they ever finish though...nah.
 

RIN

Well-known member
Joined
2 Mar 2003
Messages
3,236
Location
West Midlands
Visit site
Mind the only forum member that has seen MiToS in the flesh is RIN (I think he was slightly scared at the condition of the project at the time...)
Scared? I thought you were mad! But I have been so impressed with what you have achieved. There are no problems that you can't solve. No complicated three dimensional items you can't fabricate. This has to be the most educational thread in the history of the forum.
R
 

Bigplumbs

Well-known member
Joined
7 Nov 2015
Messages
7,478
Location
UK
Visit site
Vas

I just read most of your thread here and I know many have said this but I am blown away by the work you have done and the dedication you obviously have. She is a lovely boat and and it is so nice to see her brought back to life. Me and my wife go on holiday to Skiathos for 2 weeks most years and are going in early june this year. I will keep an eye out for MiToS as I am sure you must pop over to Skiathos from Volos on occasion.

Might even get the ferry to Volos this year for a day for a little sight seeing tour

Very Well done

Dennis
 

vas

Well-known member
Joined
21 Jun 2011
Messages
8,016
Location
Volos-Athens
Visit site
You can sat that again V :ambivalence: intense or what lol.

You are cracking on and make a good read, and it is good to read about another project as not many about fro some reason. It feels like mine is taking ages now. Do they ever finish though...nah.

it's the road/route, not the destination W :p
BTW, there was another v.interesting project but no progress reported for over a year. I'm talking about the Fifty Feet of Grey (steel) http://www.ybw.com/forums/showthread.php?374141-Fifty-Feet-of-Grey-(steel) by Rob.


Scared? I thought you were mad! But I have been so impressed with what you have achieved. There are no problems that you can't solve. No complicated three dimensional items you can't fabricate. This has to be the most educational thread in the history of the forum.
R

R, thanks for just calling me mad without any extra adjectives :D
It's actually interesting to follow the design and built process of something as complex as a boat, should make ppl more aware of the factors involved and appreciate the excellent work done by the often called cottage industry. Much more difficult compared to designing and constructing a building. So much that I'm planning to introduce that in design classes when I go back to teaching in 2018...

Vas

I just read most of your thread here and I know many have said this but I am blown away by the work you have done and the dedication you obviously have. She is a lovely boat and and it is so nice to see her brought back to life. Me and my wife go on holiday to Skiathos for 2 weeks most years and are going in early june this year. I will keep an eye out for MiToS as I am sure you must pop over to Skiathos from Volos on occasion.

Might even get the ferry to Volos this year for a day for a little sight seeing tour

Very Well done

Dennis

thanks for the kind words Dennis, early June I'm going to be horribly busy with Uni work and it looks like MiToS will be on the hard for a couple of weeks so definitely wont be in Skiathos.
However, if you decide to come over to Volos, I'd gladly show you around MiToS (either in the water or the hard), have a couple (or three) tsipoura in the old city and give you some pointers for spending a few hours around. A couple of v. interesting museums, two prehistoric settlements, villages up in the mount Pelion, etc.

and since I managed to finish the next two pieces of upholstery in the bow cabin (the most difficult in the whole boat!) a few pics documenting the process.
Note that the two strips were 1.65m long (iirc) and I'd run out of 6mm ply, so I patched two pieces together. Actually that was the best approach as there was little chance of getting such a complex section accurate on the first go (even with a decent model out of cardboard).

bow_refit_44.jpg


bow_refit_45.jpg


cannot see the joint once the foam and the leatherette are stretched on top:
bow_refit_46.jpg


rockwool and fitting the port side for good:
bow_refit_47.jpg


bow_refit_48.jpg


bow_refit_49.jpg


"hooking" the stbd side up was much tougher as to start with the cabinet door was further to stbrd and thus meeting the upholstery lower in elevation. This meant a bit of "lifting" to make sure that there was enough space for the cabinet door to operate without fouling on the upholstery. Ended up bolting two small galv. steel L-shaped sections so that I could push up and bolt the upholstery as far up as it would go.
bow_refit_50.jpg


bow_refit_51.jpg


and the final result:
bow_refit_52.jpg


The final two pieces are modelled and rough cut in ply, need to do the trimming in order for them to fit properly, devise the hooking up method AND built the port cylindrical upholstered piece that will slide up and fit at the end once everything is in place. Need to think that part a bit more tbh.

Seen these pics again, I definitely need to find a way to clean the mattress in the bow cabin as I've done all my upholstering on it and most importantly 2yrs ago there were two serious downpours that let lots of water on the bed (due to me forgetting to seal the port down to the hull...)

cheers

V.
 

vas

Well-known member
Joined
21 Jun 2011
Messages
8,016
Location
Volos-Athens
Visit site
another post as I'm still struggling with the HT construction (and even design!)

The fabricator decided that he cannot do what I want when I want so gave me a rather high price I'm not happy to pay.
So back to the drawing board, developing the whole concept further, simplifying the connections and mainly the way the whole thing is going to be constructed off site and come and bolt on in sections.

So looks like I'm moving from the difficult to even put in 3D X sides to two parallel pillars on each side with an L shaped section on top holding them together.
One on each side, bolts on sizes checked, slopes sorted after the first pillar is bolted on the side of the superstructure. Once both pillars are bolted, construction should be fairly stable.

THEN only the frame where the two solar panels fit is constructed, welded, polished and checked.

Then it comes in situ (with a small crane) and drops in place (holes already drilled matching the pillar top)

Final instalment is the diagonal frame from the feet of the helm back to the radar. Well, need to model it in 3D as it's rather difficult to sketch, but the idea is that this doesn't meet the HT at the sides, but only in the central backbone box section just under the radar. So in effect it's only taking the back forth pendulum loads you may get and not much else. An odd L shape on each side, starting narrow at the helm footwell, widening as it goes up, out over the railing, and once high enough to avoid fouling with bodies moving up on the f/b, turns 90s to go and meet the central box section of the HT. Difficult to explain, will post a 3D model soon. It's also and nice and quick route for the radar ethernet and power cables :)

Various sketches follow. Couple of questions also.

A. is it OK to have the main VHF antenna 50-100mm in front of the radar? I know the radar wont be affected, any reason that the VHF reception will suffer? Very much doubt it but just wondering!

B. why I don't like anchor lights hang around radars? Anyone seen a decent solution? Need radar, VHF antenna and anchor light in the same central axis! At the front end of the HT there's going to be a wind thing, but it's not related to the other mess at the rear.


just the process of the last couple of days work,

side_elevation2_HT10.jpg


side_elevation2_HT11b.jpg


side_elevation2_HT11c.jpg


the next is the main candidate especially if I manage to solve fabrication issues relating to the slanted pillar:
side_elevation2_HT12a.jpg


the next one is the previous plus a roll out shade thing. I've seen it once in an old(ish) Ferretti coming out of a tiny f/b radar arch and quite liked it. Not sure I'll bother tbh as I may as well have a spot for whoever wants to burn him/herself as the only other option is the bow). The problem is that I've not found a small enough cantilever mechanism todate, but as I said, not in a hurry.
side_elevation2_HT12b.jpg


Got to order bits this week, and start fitting them end of next week, else it's never going to be done!

cheers

V.
 

vas

Well-known member
Joined
21 Jun 2011
Messages
8,016
Location
Volos-Athens
Visit site
Home almost alone (daughter in Athens, wife in Berlin), nursing son with tonsillitis, so plenty of time for an update...

First, finished the bow cabin upholstery. Two oddly shaped pieces to clear the round portlight:

bow_refit_53.jpg


bow_refit_54.jpg


bow_refit_55.jpg


bow_refit_56.jpg


and an awful lot of work to fabricate the piece that's going to cover up and close the port hole sides (probably an EN term for it, not familiar with it though sorry). Actually most of the work involved trying to fit the piece in place, had to chisel, sand and generally mess about for much longer than anticipated. Ready for upholstering, but due to the shape, it needs to go to the guy that did the salon cushions for some stitching which I cannot do:

bow_refit_57.jpg


Daughter's cabin was next project, decided that there was an awful lot of space wasted above the bed head and the chest of drawers, so built a hanging cabinet. George painted it, and fitted in maybe three days together with finalising the upholstery pieces inside, out and around it. Domotic control installed, lights and sensors work, so all's finished there.

stbrd_cabinet_refit_1.jpg


stbrd_cabinet_refit_2.jpg


stbrd_cabinet_refit_3.jpg


stbrd_cabinet_refit_4.jpg


stbrd_cabinet_refit_5.jpg


stbrd_cabinet_refit_6.jpg


Next step was finalising the design for the Hard Top and persuading Nick that's easy to fabricate and to give me a better quote. Final shape is this the main issue being that it can be safely measured and built offsite with no back and forths for test fitting:

side_elevation2_HT14.jpg


Ended up giving him exact dimensions and angles and he built a superstructure mock on his workshop, fitted the round bases, fabricated (after a lot of discussing and measuring) the four pilars, built them with temp pipes in pairs and spot welded them on the construction:

ht_construction_1.jpg


ht_construction_2.jpg


ht_construction_3.jpg


ht_construction_4.jpg


next pic shows the stbrd side in place together with the randomly placed horizontal tubes keeping the 48mm dia columns in place:

ht_construction_5.jpg


On Monday I'm going to check and finalise the angle of the hardtop frame and built the L-shaped frames that will be welded on top of the pilars. The idea is that the whole hardtop is a three piece affair, two independent side frames with an L shaped ending each, plus the full framed+panel top that will be lowered and bolted onto the sides. All holes and measurements will be done and tested on the workshop so just through bolts and nuts on site.
Assembly on the spot will be in two stages.

A. two sides with a temp top frame comes onboard and with as small jig secured in place, holes drilled, backplates epoxied and whole thing bolted securely on.

B. next step a friend with a lorry with a built in crane comes aside (have to move MiToS to a place where the lorry can come nearby) and lowers the whole frame, gutters, solar panels bolted and sealed on, radar bolted on in place, M10 screws bolting the lot down, job done!

that's the theory, hope practice isn't too far away!

cheers

V.

PS. and since I've YET to manage and post any trip reports, just a pic from a "busy" anchorage two weeks ago when we tendered out to a taverna for dinner in Chorto 15nm from Volos port:

overnight_in_Chorto_July2017.jpg
 
Top