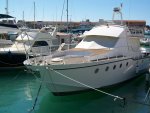
MiToS re-built/fit- versilcraft Mystery43

monticello1957

New member
Joined
24 Mar 2015
Messages
1
Visit site
Hi Vas, hope you still are reading replies to your thread. I am planning to build-in a bowthruster in a wooden boat 57 feet..In have several questions hope you can help me out. First if I look at the pictures after laminating the tube on the outside of the hull...did you just fill it with epoxy putty? And I can see the layer of the matting on the putty bud not on the hull nor into the tube. You did not laminate with the glassfibermatts the tube to the hull?
Further on the inside, the system how you cut-out the three layer is clear bud...did you laminate each layer separatly or as on piece?
How is the tunnel holding? Have there been any problems since you went into the water...leaking, cracking? would you change anything would you do the work allover?
Have you ever heard that the tunnel should be installed into one of the frames instead of between frames as you've did?
Thanks and kind regards,Patrick
 

vas

Well-known member
Joined
21 Jun 2011
Messages
8,016
Location
Volos-Athens
Visit site
Still impressed with the progress Vas !!

Sorry about the thread drift .... but just FYI as I came across this one ... As mentioned before, I am fairly certain our boats share same heritage.... in 1979 CentroMarine made a 44 footer (Open SS and Fly S) ... and the 44 Fly looks even more like the Versilcraft Mystere and JCL's Mystere/Mirage than what our 1983 45 footer does...

thanks Alf,

they all look fairly similar.
Would be interesting to see who designed them and what else he's designed!

Seems odd that the vetroresina ones (that's grp if my Italian is right, I'm sure some guy touring the south hemisphere will correct me if I'm wrong...) seem to have much smaller overhangs covering the aft deck than my flexi 12mm ply superstructure has. Very odd!

Back from Brussels and Luxemburg having collected enough cold for the whole of spring, I'm trying to get moving again.
Weather is not good enough and dry enough to sand the iroko capping and awtrol it, so plan is to finish off with the lower helm while George slowly progresses with cabinet work for that area.

So today I tried to sort out the lower helm dash layout. Wasn't particularly keen on what I'd designed up to now, and my return flight helped me work on some new ideas.
Figured out the right place for the gauges making them visible from either seated or standing position and the big headache was trying to blend the slanted plotter/autopilot/autoanchor panel with the part of the upholstery going towards the bow up to the windscreen. Having a short vertical piece doesn't really help, the only idea that seems to make sense is introduce a slanted panel going from the bottom of this dash area all the way up to the windscreen and be done with. This will work up to the front windscreen dash piece that George is currently working on (filling holes and replacing a cut piece making it all flat)

Now the problem is that in order to do all that, I have to effectively dismantle the whole dash, with the steering wheel and pump behind as well as the two engine controls that I never ever liked their placement.
If I'm lucky and I manage to take everything apart by lunchtime tomorrow (it's a holiday tomorrow down here) I'll be able to post some interesting pics of the new layout It should be slightly more ergonomic and with less planes (albeit more slanted planes which, as you've probably gathered by now, I really love...)

Managing to find a place to fit the old Sailor VHF turns out to be more difficult that once thought, but unless I rip things apart I wont be able to test fit it.

Existing condition is this:

lowerhelm_refit_39.jpg


lowerhelm_refit_40.jpg


next pic you can also see the Sailor, big heavy thing that is!
lowerhelm_refit_41.jpg


If someone argues that I should really leave that area alone and get on with finishing the rebuilt job, I'd agree but I just cannot help it! Maybe I should seek medical advice...

cheers

V.
 

MapisM

Well-known member
Joined
11 Mar 2002
Messages
20,431
Visit site
Seems odd that the vetroresina ones (that's grp if my Italian is right, I'm sure some guy touring the south hemisphere will correct me if I'm wrong...) seem to have much smaller overhangs covering the aft deck than my flexi 12mm ply superstructure has. Very odd!
LOL, this is your morning translation service (08:30 here!), confirming that your translation is correct. :)
Re. the shorter overhang with GRP, I would guess that back in the early GRP days most yards were actually less confident on its structural strength, compared to the already tried and tested wood...
 

jfm

Well-known member
Joined
16 May 2001
Messages
23,783
Location
Jersey/Antibes
Visit site
Vas this is tricky. Trying to fit modern colour screens into a dash designed only for engine dials is always a problem, so starting again is a good strategy. I know it is heresy and I will get flamed, but i'd dump the Sailor. It's too big and it doesn't "earn" the space it takes up. Folks still love them, so you can maybe sell it on eBay and get a new blackbox AIS VHF with the money!

I'd be interested to see your sketches for the new dash design/planes you have worked out

Completely separately, you have a black autoanchor (maybe you have 2?). Would you prefer grey, to match the garmin gear? I have grey x 2 and all my garmin gear is black! No pressure but do you want to swap?
 

Divemaster1

Well-known member
Joined
15 Jan 2002
Messages
4,450
Location
Aberdeenshire, Scotland
Visit site
Vas,

Will try to continue my search for history and I have initiated some discussion on the subject with people in Italy ... I have got confirmation via e-mail from Nevio Forcellini Mazzoni, on who built our boat under the name CentroMarine that he is still building boats under EnterpriseMarine http://www.enterprisemarine.it/it/index.php

In respect to the dash, you could KIS and just lift the panel with the dials straight up with a spacer and keeping it at the same slant (surely your throttle handles does not travel all 180 degrees ... which would make things clear both sitting and standing ... and I can assure you that you still will have a good view forwards... I have 10" radar screen and a 15" PC screen standing up ahead of instrument panel ...and I still have a clear un-interrupted view forwards when underway...

Oh ... and in respect tot he lovely Sailor (if you really feel you want to keep it).... mount it above your head ... at the back panel of the flybridge and handset fixed on the panel just behind the side window ... or sell it and buy one with smaller footprint with the money you get for it....
 
Last edited:

suandeimari

New member
Joined
27 Mar 2015
Messages
4
Location
Bologna Italy
Visit site
hello Vas, I live in Italy do not speak English and I rely on google translater, I hope the translation is correct, I have a Versilcraft Mirage S 1972 very similar to your boat.
I look with admiration the masterpiece of rebuilding you're doing,
I'm renovating my boat and I see that in some parts we have the same damage
It 'a pleasure to see how the work
 

petem

Well-known member
Joined
16 May 2001
Messages
18,745
Location
Cotswolds / Altea
www.fairlineownersclub.com
hello Vas, I live in Italy do not speak English and I rely on google translater, I hope the translation is correct, I have a Versilcraft Mirage S 1972 very similar to your boat.
I look with admiration the masterpiece of rebuilding you're doing,
I'm renovating my boat and I see that in some parts we have the same damage
It 'a pleasure to see how the work

Your translation is perfectly understandable. Welcome to the forum. Would be good to see some pictures of your boat too.
 

vas

Well-known member
Joined
21 Jun 2011
Messages
8,016
Location
Volos-Athens
Visit site
Hi Vas, hope you still are reading replies to your thread. I am planning to build-in a bowthruster in a wooden boat 57 feet..In have several questions hope you can help me out. First if I look at the pictures after laminating the tube on the outside of the hull...did you just fill it with epoxy putty? And I can see the layer of the matting on the putty bud not on the hull nor into the tube. You did not laminate with the glassfibermatts the tube to the hull?
Further on the inside, the system how you cut-out the three layer is clear bud...did you laminate each layer separatly or as on piece?
How is the tunnel holding? Have there been any problems since you went into the water...leaking, cracking? would you change anything would you do the work allover?
Have you ever heard that the tunnel should be installed into one of the frames instead of between frames as you've did?
Thanks and kind regards,Patrick
Hello Patrick and welcome!

sorry, almost missed your post as first posts are delayed awaiting approval from the moderators. Funny you should mention the bowthruster as a few days ago I was thinking about it, trying to remember how I did it and if I should do any more internal reinforcements before I get the under bed cabinets in place.
Got to go though the pics of the era (OK, got over 5K pics filed on a monthly basis) and figure out how I did it. Give me sometime and I'll try and do it (poke if I don't do anything after a fortnight)

Only a few points I can make without having to think very hard.
Not being in the water yet, so cannot answer how it's holding yet :) summer should tell.
Never heard of installing the tunnel into the frames, seems absurd, you're loosing structurally and I cannot see the continuity of force distribution from tunnel to iroko/ Maybe they meant something else?

LOL, this is your morning translation service (08:30 here!), confirming that your translation is correct. :)
Re. the shorter overhang with GRP, I would guess that back in the early GRP days most yards were actually less confident on its structural strength, compared to the already tried and tested wood...
hm, makes sense, but defies the argument that when a new material/method/system is introduced, at first it closely imitates the one it replaces, slowly progressing and getting on its own paces.

Vas this is tricky. Trying to fit modern colour screens into a dash designed only for engine dials is always a problem, so starting again is a good strategy. I know it is heresy and I will get flamed, but i'd dump the Sailor. It's too big and it doesn't "earn" the space it takes up. Folks still love them, so you can maybe sell it on eBay and get a new blackbox AIS VHF with the money!

I'd be interested to see your sketches for the new dash design/planes you have worked out

Completely separately, you have a black autoanchor (maybe you have 2?). Would you prefer grey, to match the garmin gear? I have grey x 2 and all my garmin gear is black! No pressure but do you want to swap?

John,

yes exactly my thoughts hence the approach with the slanted panel where 3 digital displays fit.
Regarding the Sailor, I'd really like to keep it, as an ornament and reminiscent of the old nav gear that a boat of that era should feature. However, only spot I can squeeze it is not particularly appealing, so still thinking about it. I do have a AIS (receive only) black box to install, so AIS is covered. Doubt I'll get a couple of hundred of euro for the Sailor though :(
Only have this one autoanchor and I did notice on your dash pics that you have all black and grey autoanchors. Since you're not in a hurry either, if I manage to get a GHC20 a/p control then I'll keep the black, if I opt for the cheaper GHC10 which is grey, then I'm happy to swap mine. Just give me a month or two to see what I come up with on e-bay ;)

Vas,

Will try to continue my search for history and I have initiated some discussion on the subject with people in Italy ... I have got confirmation via e-mail from Nevio Forcellini Mazzoni, on who built our boat under the name CentroMarine that he is still building boats under EnterpriseMarine http://www.enterprisemarine.it/it/index.php

In respect to the dash, you could KIS and just lift the panel with the dials straight up with a spacer and keeping it at the same slant (surely your throttle handles does not travel all 180 degrees ... which would make things clear both sitting and standing ... and I can assure you that you still will have a good view forwards... I have 10" radar screen and a 15" PC screen standing up ahead of instrument panel ...and I still have a clear un-interrupted view forwards when underway...

Oh ... and in respect tot he lovely Sailor (if you really feel you want to keep it).... mount it above your head ... at the back panel of the flybridge and handset fixed on the panel just behind the side window ... or sell it and buy one with smaller footprint with the money you get for it....

Alf, always keen on the KIS concept, but I managed to get my slopes and design right, as you'll see in the following pics so slope that wheel is mounted on is the same for mounting the gauges, whereas the pod with the engine controls is modified and narrowed turning to an identical slope towards the gauges to improve visibility. Difficult to describe should be clear on the next post.
Sailor is amazingly heavy stuff, wouldn't like to have it over my head, no thanks!
Forgot to mention that I do have a Shipmate 8100 dual station bought from pete (iirc) of this forum which is not dsc (don't really mind) and is going to be installed behind the side panel with the two handsets one on each station.

hello Vas, I live in Italy do not speak English and I rely on google translater, I hope the translation is correct, I have a Versilcraft Mirage S 1972 very similar to your boat.
I look with admiration the masterpiece of rebuilding you're doing,
I'm renovating my boat and I see that in some parts we have the same damage
It 'a pleasure to see how the work

Hello there, googletranslate is doing an excellent job here :)
Would like to see your boat and the damage you're repairing.
Yes, you are right, similar boats, from the same builder, using similar hardware and detailing should fail in identical ways. So if you see what I've done you know more or less how to address the problems in yours ;)

Your translation is perfectly understandable. Welcome to the forum. Would be good to see some pictures of your boat too.
+1


And now for the update...

On Wed it took me 5h to remove the engine controls and figure out how the steering/controls pod was bolted on the surrounding cabinetry.
Succeeded but wasn't a walk in the park! All this cabling, marking unscrewing, getting out of the way was too much!

lowerhelm_refit_42.jpg


next pic shows the hole layout vs the new engine control. I guess the hole was wider due to the original DD ones, Alf? PO had to fabricate a 10mm thick black Perspex to cover the difference:
lowerhelm_refit_43.jpg


cabling was tough:
lowerhelm_refit_44.jpg


25mm can be chopped from the front side of the pod, before even considering the movement of the control to the back. Overall it looks like I reduced this horizontal panel by around 50mm:
lowerhelm_refit_45.jpg


stbrd control in right (=new) position:
lowerhelm_refit_46.jpg


detail of new position and vinyl fit:
lowerhelm_refit_47.jpg


lower helm pod fully stripped:
lowerhelm_refit_48.jpg


and finally the lower helm without the pod:
lowerhelm_refit_49.jpg


Decided to get an almost symmetrical slope on the pod towards the gauges, meaning that I'll have proper visibility when seated without having to push the gauges further away. Tested sizes, sorted out the stbrd engine control hole, measured and marked the new holes and took it to George for cutting, filling the holes and fitting the new front slanted piece. Will be ready tomorrow. Currently looks like this:

lowerhelm_refit_50.jpg


lowerhelm_refit_51.jpg


Galley new cabinet is a mindboggling exercise. Had to be built at George's workshop, so took the side lining panel to the workshop. Since the whole panel sits slanted on both axis, i had a hard time figuring how to mark and keep it upright so that the cabinet can be built and measured on it. Ended up screwing bits of timber and measuring there the vertical axis. Currently after a couple of hours with lots of headscratching we have a working model and the bottom of the cabinet ready:

galley_refit_48.jpg


The large dash had the right treatment and is now ready to come back and test fitted.

charttable_14.jpg


too tired to continue, hope for another installment on Monday most likely

cheers

V.
 

MapisM

Well-known member
Joined
11 Mar 2002
Messages
20,431
Visit site
I live in Italy do not speak English and I rely on google translater, I hope the translation is correct
Don't worry, also some British folks around here don't actually speak a proper English...
...And our English is still better than their Italian anyway! :)
Welcome to the madhouse.
 

Robg71

New member
Joined
24 Jun 2012
Messages
2,503
Location
Yorkshire/Aberdeen/Jersey
Visit site
Don't worry, also some British folks around here don't actually speak a proper English...
...And our English is still better than their Italian anyway! :)
Welcome to the madhouse.

Wot you trying to say like
I speak proper me
:) :D

Welcome
Vas, great progress and work. Ive not been keeping up at the back, but looking great all the same
 

vas

Well-known member
Joined
21 Jun 2011
Messages
8,016
Location
Volos-Athens
Visit site
tomorrow looks quite busy so better post tonight...

Saturday's session was very productive, effectively sorted the design around the helm area in a way I really like.
Basically what I get is:

Start by the helm seat with the lining on my sbrd side following the original slope (16deg outwards).
Chop it and go outwards with the panel that has all the engine/genny/bilge pumps controls
Then move inwards with the plotter, a/p and autoanchor control (plus bow thruster, trim tabs and horn)
Then reverse the 16deg slope inwards for the panel going all the way to the main dash under the windscreens.

Effectively I get a Z shaped (in plan) layout managing to gather and fit all dials/controls in the "slope change" area.
Quite excited as it's a very efficient and space saving layout whilst being quite ergonomic as well.

lowerhelm_refit_52.jpg


lowerhelm_refit_53.jpg


The Z shape shows best in the following pic:
lowerhelm_refit_54.jpg


visibility is excellent either seated or standing. The compass will be fitted on a hole in the main dash panel (was just checking position):
lowerhelm_refit_55.jpg


On the steering/engine controls pod, it came back with nicely filled holes and the proper bow facing slope. Test fitted it and it's just perfect.
Only catch is that George had already done it when I decided on the inwards slope around that area which means I have to extend the top and forward facing sides by around 60mm so that the slanted side panel saddles over it. Makes it for reasonable assembly and easy fit out. Should be able to do the addition on the spot on Tue (if I manage to steal the afternoon). Obviously I'll sand the protruding bit off the 18mm forwards slanting piece the George glued and carefully cut the holes for the engine controls.

lowerhelm_refit_57.jpg


You'll also notice where I decided to fit the Sailor. It's out of the way, nicely protruding out of the (vinyl lined) slanted panel, so quite happy to keep it there (estimate 2-3h work to get the fixing panel for it in place and properly epoxy it to the underlying frames!)

In front of the Sailor, there will be a open storing space, will be able to fit my 15inch laptop for testing/checking/backup (running OpenCPN)
Towards the bow there'll be a lid opening upwards where I'll be able to store some tools and bits and bobs out of the way so that I don't have to go to the lazarette to pick up a screwdriver/socket set or voltometer ;) and wife wont complain that the salon is littered with tools all the time.

lowerhelm_refit_56.jpg


On the galley furnishing bits, George pressed the 10mm thick iroko strips/left overs from the toe rails and capping onto 6mm marine ply to built the cabinet that will surround the oven. Currently looks a mess, but a bit of sanding and will be perfect for the job. A solid piece is epoxied on the front so that all 6mm ply is well hidden inside the cabinet. This iroko cladding will follow and cover the oven and create the lid for the cabinet between the oven and the dash. (clearer on a sketch a few pages back iirc)

galley_refit_49.jpg


Weather turned nice and sunny for the first time after a very long time, so looks like at the end of the week I'll be able to start working outside, mounting the ram for the passarelle and then moving to the f/b for the seating.

Sort of finalizing the bathing platform shape/framework/support et al but will not touch that before I finish with the passarelle.

cheers

V.
 

vas

Well-known member
Joined
21 Jun 2011
Messages
8,016
Location
Volos-Athens
Visit site
Happy easter to you non-orthodox lot (our easter is this Sunday...)

@suandeimari:

nice looking vessel you got there, haven't seen one of them live, could you post a few more pictures please?
Same yard, same year, I can spot some identical details, very much interested on the railings which seem to use the same bases (cones) as mine, same aluminum poles BUT have timber rails on top!


The nice weather mentioned in the previous post only lasted for 3-4 days enough to do some epoxying on the lower helm panels and turned nasty as I went on to upholstering and fitting the lower helm pod.

First, I mocked the side panel, then trimmed the pod and finally epoxied the triangular plotter and gauges panel, the side panel and the extensions to the pod:

lowerhelm_refit_58.jpg


lowerhelm_refit_59.jpg


lowerhelm_refit_60.jpg


lowerhelm_refit_61.jpg


Next project was cutting the holes for the engine controls. They don't make them easy to fit at all, clearances are tight and got to count for the upholstery as well.

lowerhelm_refit_62.jpg


lowerhelm_refit_63.jpg


Worked out quite well and after filling the stupidly placed by the PO aircon control (under the steering, at a spot that you could accidentally hitting it with your knee!) I upholstered the pod. Not particularly difficult but working on a keyboard for 5months doesn't help (hands are still aching 3 days after). End result is very good, even used a light padding (2mm) to make it a bid softer to touch and smoother around angles. Also upholstered the side panel where the pod fits. Straightforward easy job, no foam inside needed.


lowerhelm_refit_64.jpg


lowerhelm_refit_65.jpg


Before fitting the pod, decided that the CETREK although fully working and tested on the delivery trip, got to go so carefully removed all the bits out. That was a major task, involving sorting out cabling to and fro the lazarette, f/b and the el/panel. Happy to report that MiToS is now another 10kg lighter from all the cabling removed! I recon she going to make 30+ knots light on fuel with all the mess I've removed :p

Interesting to compare a before the rebuilt and after the full cable cleanup of the area under the lower helm. Shocking difference, and a few holes to fit:

BEFORE (sorry couldn't find an identical one):
steering_isolation_box2.jpg


AFTER:
lowerhelm_refit_69.jpg


Pod back in place, steering box secured in place, pipes tightened, 8cables connected and tested (after a slight error messing the linking between the port engine upper and lower control - fwrd on inside helm was linked to astern on upper...)


lowerhelm_refit_66.jpg


lowerhelm_refit_67.jpg


And a pic with the (rather dusty) engine gauge panel in place. Needless to say visibility is excellent even when seated ;)

lowerhelm_refit_68.jpg


In the meantime, George cut the three separators out of 15mm ply that keep the main dash panel in place. Further he cut/repaired/epoxied and pressed the dash which was slightly warped after the almost 40yrs of exposure to the elements and some nasty leaks. Tested fitted it again yesterday, and still not happy :( Since the problem is that the aft section of the panel, which is effectively smack in your face when you're inside, I decided that it's going back to the workshop for some drastic treatment: Cut a 40-50mm strip and replace with a clean cut strip of softwood. Routing a decent bevel to it and covering with a 5mm thick foam before upholstering should cover all blemishes and make for a clean finish. Over the next couple of days we will testfit and finish the iroco clad oven "box" and finalize the galley/lower helm layout detailing. Just about time as next week it will start becoming unbearable to work mid day up there.

Few small details keeping me from "closing" the galley/lower helm are the following:

Horns on the roof. Cabling routed through the roof to the ceiling and to the side. If I stick to the el.horns everything's fine, I can wire them up and be done with it. I have the upholstered ceiling panels ready, I can fit them and forget about that area.
However, I'm toying with the idea of having some proper horns. Two affordable options are:

Problem is that I then need a compressor and a 24V one with some decent duty cycle and 120-150psi. That is difficult to find at a reasonable price (i.e. around 200euro delivered to Greece that is!). In total I cannot justify (to myself, wife doesn't even know about these small "must dos") more than say 400euro for compressed air so to speak...

wipers Got the motors, got the controls, haven't drilled the holes again and haven't secured the motors in place. Reason is that I've not got any decent wiper arms and I'm not sure I'll ever get them...

placement of support gear
  1. vhf handset (vhf itself is a black box hidden somewhere around the helm area),
  2. navwatch, used to be on the helm side panel, could stay there, could be removed altogether
  3. gmi10 for checking tank levels et al. Was originally planning to install it around the helm area, now tempted to place on the galley lining.
  4. aircon control, probably close to the gauges on the funny shaped side panel towards the bow on the helm side.

Tomorrow's plan is to sort out the engine gauge panel that needs extension, dismantling, cleaning, lining and refitting and over the Easter w/e progress with the Sailor fixing and general upholstering.

cheers

V.
 

wakeup

Active member
Joined
5 Mar 2002
Messages
3,033
Location
Cote d'Azur
Visit site
Few small details keeping me from "closing" the galley/lower helm are the following:

Horns on the roof. Cabling routed through the roof to the ceiling and to the side. If I stick to the el.horns everything's fine, I can wire them up and be done with it. I have the upholstered ceiling panels ready, I can fit them and forget about that area.
However, I'm toying with the idea of having some proper horns. Two affordable options are:

Problem is that I then need a compressor and a 24V one with some decent duty cycle and 120-150psi. That is difficult to find at a reasonable price (i.e. around 200euro delivered to Greece that is!). In total I cannot justify (to myself, wife doesn't even know about these small "must dos") more than say 400euro for compressed air so to speak...

wipers Got the motors, got the controls, haven't drilled the holes again and haven't secured the motors in place. Reason is that I've not got any decent wiper arms and I'm not sure I'll ever get them...

placement of support gear
  1. vhf handset (vhf itself is a black box hidden somewhere around the helm area),
  2. navwatch, used to be on the helm side panel, could stay there, could be removed altogether
  3. gmi10 for checking tank levels et al. Was originally planning to install it around the helm area, now tempted to place on the galley lining.
  4. aircon control, probably close to the gauges on the funny shaped side panel towards the bow on the helm side.

Great progress Vas, helm control console looks bob on. Re closing up the ceiling, why not run a couple of air lines into the ceiling along with wiring for electric horn so that you can close up but if you later decide to fit some Kahlenbergs the air supply is already there. Air hose is v cheap per metre.
 

vas

Well-known member
Joined
21 Jun 2011
Messages
8,016
Location
Volos-Athens
Visit site
Great progress Vas, helm control console looks bob on. Re closing up the ceiling, why not run a couple of air lines into the ceiling along with wiring for electric horn so that you can close up but if you later decide to fit some Kahlenbergs the air supply is already there. Air hose is v cheap per metre.

yep, quite right, BUT the pipes will run and stay UNDER the roof within the ceiling. BTW, I do need electric connections for the airhorn as well (for the relay that releases compressed air)
Problem is that if I fit the final 4 pieces of the ceiling and fit the two recessed lights within it, then I'll have to disconnect the lights, remove the slats, connect up the pipework/electrics and refit. So I might as well decide within the month and go ahead with the purchases...

Forgot to mention that airhorns are going to be extremely useful as I'll be able to run a line for cleaning up all sorts of things that I work right now. So an air compressor is almost a must. At least that's how I've persuaded myself that airhorns is a good thing TM...

Thing is I rather prefer the Kahlenberg but I quite like the contrast a black horn is going to make on the coachroof. however just under a metre is a Loooooong horn, maybe stupid long for MiToS

cheers

V.
 

rafiki_

Well-known member
Joined
19 Jan 2009
Messages
11,978
Location
Stratford on Avon
Visit site
Great progress Vas, and a very happy Easter to you too. I like the helm set up, and you have got a great finish with your soft feel material. Air horns v electric is personal choice. Had twin leccy's on the previous Rafiki, but they weren't the most reliable. Air horn on the Azi needs the tubes blowing through now and again as they gather a bit of water.
Will be on board later this week enjoying a bit of rare sun and high teens temps. Can't wait!
 

wakeup

Active member
Joined
5 Mar 2002
Messages
3,033
Location
Cote d'Azur
Visit site
yep, quite right, BUT the pipes will run and stay UNDER the roof within the ceiling. BTW, I do need electric connections for the airhorn as well (for the relay that releases compressed air)
Problem is that if I fit the final 4 pieces of the ceiling and fit the two recessed lights within it, then I'll have to disconnect the lights, remove the slats, connect up the pipework/electrics and refit. So I might as well decide within the month and go ahead with the purchases...

Forgot to mention that airhorns are going to be extremely useful as I'll be able to run a line for cleaning up all sorts of things that I work right now. So an air compressor is almost a must. At least that's how I've persuaded myself that airhorns is a good thing TM...

Thing is I rather prefer the Kahlenberg but I quite like the contrast a black horn is going to make on the coachroof. however just under a metre is a Loooooong horn, maybe stupid long for MiToS

cheers

V.
Sounds like you have already convinced yourself to go Kahlenbergs Vas with some man logic which I cannot fault.:)
 

vas

Well-known member
Joined
21 Jun 2011
Messages
8,016
Location
Volos-Athens
Visit site
long time no posting (but was working, honest!)

First need to thank JTB for his refit thread as he reminded me that I ALSO have a searchlight to fit, doh! Had forgotten all about this thing and strangely there's no place to fit the controls for it. Well, control panel is the size of a small football field and original plan was that I'll dismantle the useful bits and add them on a custom panel.
In a similar line, I realized that I'd forgotten to install the bridging push button that will enable starting the engines from the service batteries. Got the relay installed in the e/r, got the cabling identified, just forgotten to drill an extra hole and fit the button. Unfortunately I remembered that a few days after finishing the side panel with the engine controls, but I carefully managed to drill an extra hole and I'm fitting it tomorrow in a slightly concealed spot above the bilge pump switches and out of the way.

So, progress report:

First, redid the engine gauges. Old panel was upholstered but GLUED on the galvanized steel panel. That's a definite NO NO as the heat and hardship meant that vinyl warped and become loose being held in place by the gauges themselves... OK, lesson learnt, all metal sheet panels are lined on the rear with pieces of timber or ply with countersunk screws and vinyl is stretched OVER that lot and stapled on the timber strips. That's how I did the engine control/genny/bilge pump panel. Whilst at it, realised that I should really turn the gauge panel upside down and get the 6 temp/oil/volt gauges above the rev counter and turbo boost ones. Makes the important bits more visible

testing visibility:
lowerhelm_refit_70.jpg


all panels temp in place:
lowerhelm_refit_71.jpg


preparing for lining:
lowerhelm_refit_72.jpg


using a thin layer of foam around 3mm to make it a bit soft to touch and make sure any tiny blemishes are covered:
lowerhelm_refit_73.jpg


finished article:
lowerhelm_refit_74.jpg


lots of cables, quite tidy still plenty of space to work in there:
lowerhelm_refit_75.jpg


back in place:
lowerhelm_refit_76.jpg


Next up was the triangular panel with all the "new" digital stuff plus some old fashion main nav switches (nav.lights, horn, trim tabs etc) Lots of different layouts were tried to decide on a simple layout, with GPSMAP 721 at the bottom, A/P and autoanchor above them and all the switches on top. Even had enough space to fit the VHF to port. Most toggles were fine (lengthwise) to fit straight on a 15mm ply, however bow thruster, horn and the trim tabs needed a thinner panel to secure them, so had to cut the panel, and "pocket" a 3mm galvanized steel patch on it. Worked out fine, so now happy to have this finished and temp fitted as well.

lowerhelm_refit_77.jpg


lowerhelm_refit_78.jpg


lowerhelm_refit_79.jpg


lowerhelm_refit_80.jpg


lowerhelm_refit_81.jpg


lowerhelm_refit_82.jpg


Also upholstered the ex massive helm side panel which is now down to just over a metre long and 40cm wide:

lowerhelm_refit_83.jpg


lowerhelm_refit_84.jpg


Test fitted the lot and the end result is extremely good and nicely detailed. Very proud of myself...

lowerhelm_refit_85.jpg


lowerhelm_refit_86.jpg


Reached the 20pic limit and my limits, so off to bed.

Hopefully tomorrow I'll get some time to post a report on the work done on the galley side. Oven cover is ready, oddshaped glass cabinet above the sink is also ready and things are progressing.

cheers

V.
 
Top