MiToS re-built/fit- versilcraft Mystery43

mnm-jkk

New member
Joined
8 Jun 2011
Messages
9
Location
Athens , Greece
Visit site
I'd rather install the hatch hinged astern.
Much better to allow a bit of fresh air inside the cabin while anchored (and hence with the wind constantly on the nose).
You know, Vas is planning to go boating in some pretty warm climates, I reckon....! :cool:

There is a safety issue to consider here, the case of the hatch somehow opening at sea in heavy weather,
it is always preferable for the hatch hinge to be on the fwd part, hatch hinged fwd.
In this way the hatch will be forced closed be waves, reducing incoming water.
 

rbcoomer

Active member
Joined
23 Nov 2010
Messages
3,329
Location
The Tropics of the English Riviera!
www.swfbr.org.uk
There is a safety issue to consider here, the case of the hatch somehow opening at sea in heavy weather,
it is always preferable for the hatch hinge to be on the fwd part, hatch hinged fwd.
In this way the hatch will be forced closed be waves, reducing incoming water.

Do they get waves that big in Greece? I thought it was always sunny... :cool:
 

MapisM

Well-known member
Joined
11 Mar 2002
Messages
20,432
Visit site
LOL, well, actually a proper Meltemi can build up very decent waves, I reckon.
Anyway, while I don't disagree with mnm-jkk on the general principle, I would still prefer a cooler cabin for better sleeping (or whatever! :p), which is something in the Med you would enjoy most of the time, rather than a hatch which is possibly safer in 0.1% of the time spent onboard, if that.
And a routine locking of hatches and portholes before cruising is a good practice anyway... :)
 

vas

Well-known member
Joined
21 Jun 2011
Messages
8,016
Location
Volos-Athens
Visit site
Alf, MM is (as always...) spot on!

this hatch is going to be my air-con when in anchor. Yes it will be hinged astern letting cool(er) air in the cabin and through the steps up to the lowerhelm galley area and off the salon doors. My main concern is mosquitos and the necessary net that I'll have to make...
Hatch is a brand new ss BOMAR one with two struts keeping it open to 90deg only, so no special stop needed. There's also a fancy scroll that activates the internal blinds, very handy for down here.

To avoid the problems that mnm-jkk rightly mentions, I'm elevating the hatch 50mm above deck level. Further there are 3 locks on the hatch, the chances of it opening are nil, the chances of leaving it open are some but I recon at worse I'm going to get a damp mattress.,.

Knackered after 12h on the road (Munich-Geneva) off to bed, did manage to design some pretty ergonomic and imho good looking fairleads, will post them tomorrow.

cheers

V.
 

vas

Well-known member
Joined
21 Jun 2011
Messages
8,016
Location
Volos-Athens
Visit site
back home, time for updates... [and I fcking lost a full page of text during editing, so typing again a shorter version!]

First of all had a [planned] visit from RIN and swmbo yesterday! I think this is the first visit of a forum member to MiToS (may be another one next week)
They were seriously impressed on the amount of work carried out (and the work remaining!) and I was equally impressed by RIN's memory. I bet he studied the 90pages of the thread the night before flying to Greece :p
Pity they were in a hurry and we couldn't spent some more time together. Richard, I hope next time you're around, MiToS will be in the water (and complete!)

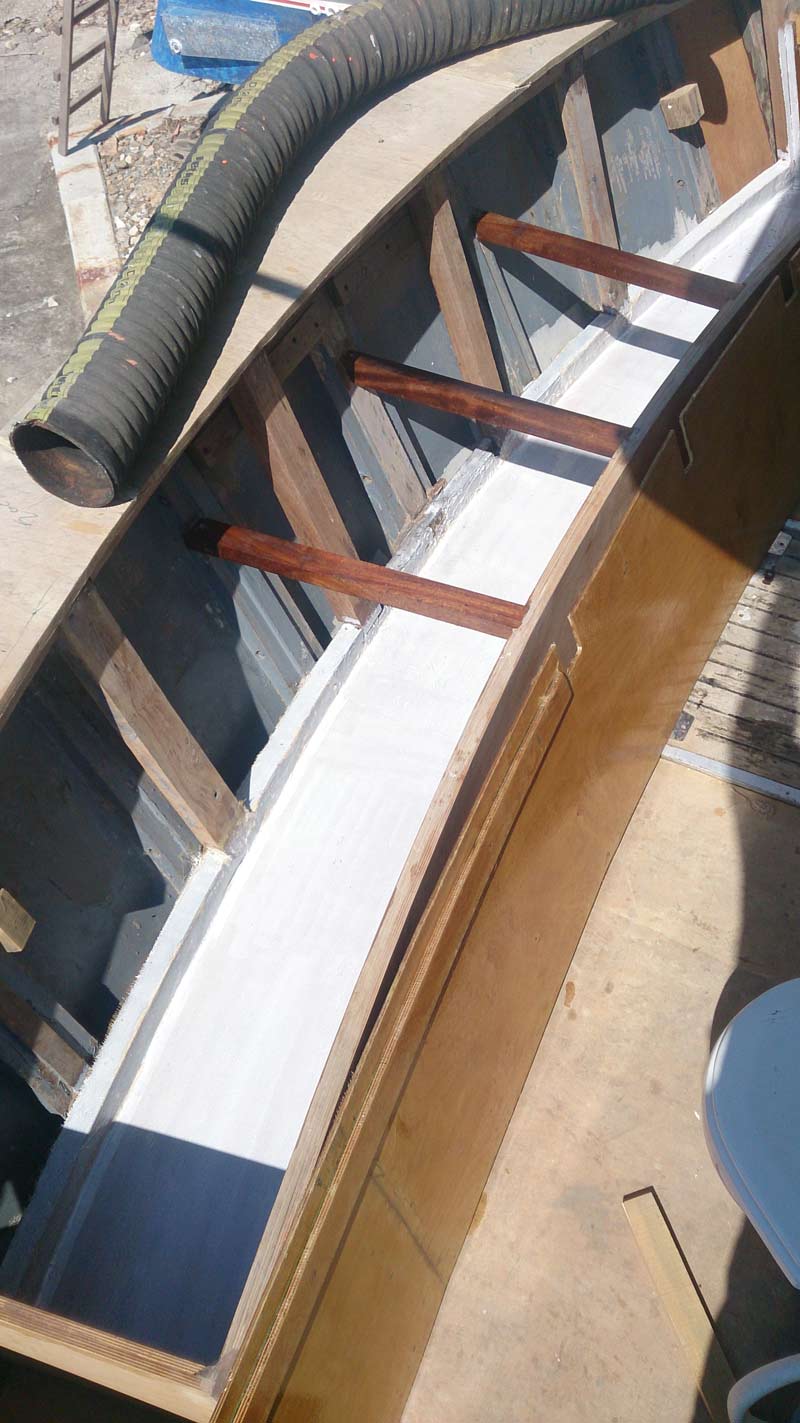
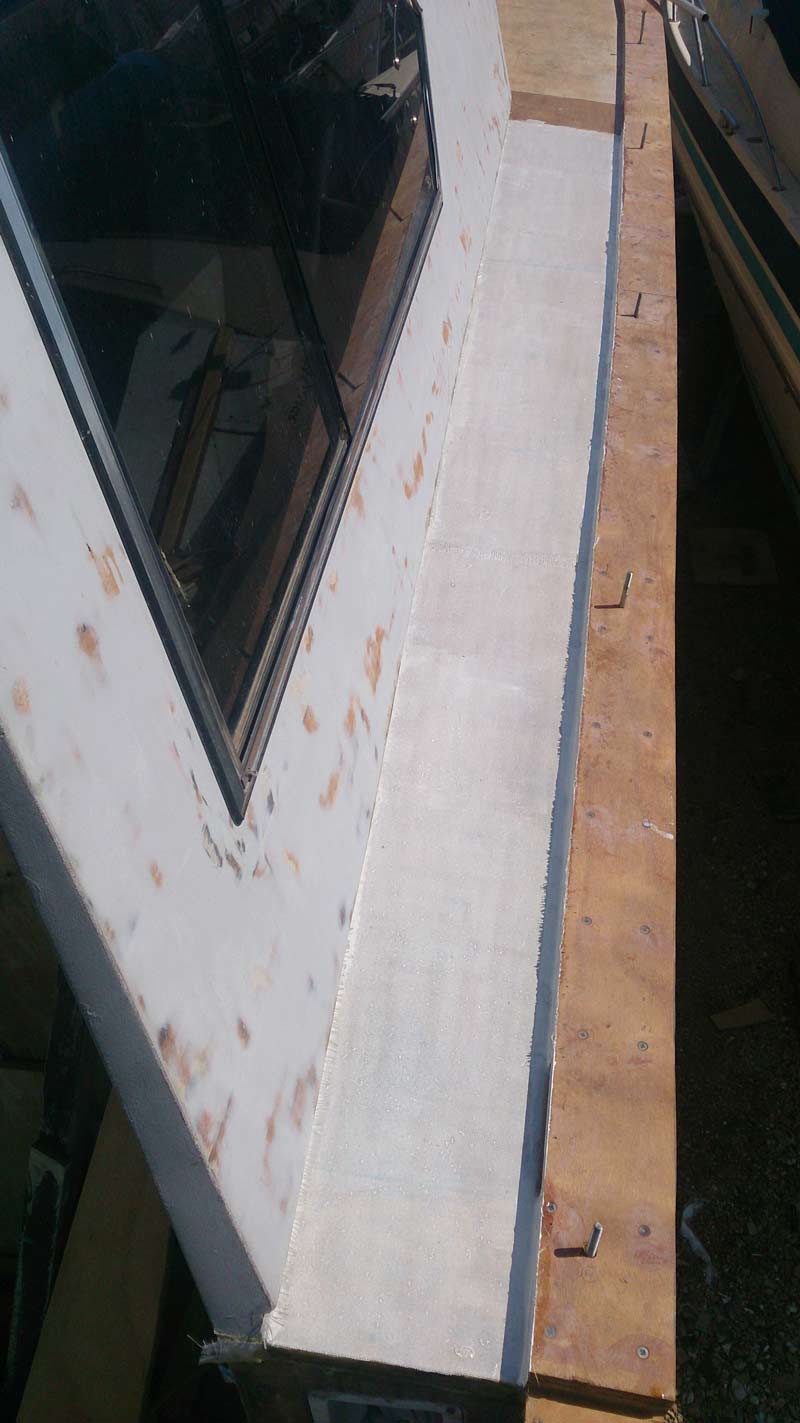
Started working on applying another 280gr/m2 mat and 4 coats of epoxy to the decks (top 3 with 20% white pigment in order to give UV protection to the epoxy and withstand the sun till I lay the teak next spring). Mat creates a sealed basin by going up on superstructure side and toe rail side by 40mm. Idea is to make sure water stays in and goes out from the designated areas and not where it feels like :rolleyes: (messing with my upholstery and cabin work in the process...)
Problem is the sun that's gone from mild to oh god that's hot in a matter of days. Had a slight sunstroke today (although I was wearing a hat!) and spent all evening in bed. It takes a month or less for the body to adapt and I can then happily work full day under the sun in July. Anyway to make it less taxing to the body, I started with the stbrd side as bow is pointing south so this side is in the shadow in the morning. Will do the port side tomorrow afternoon ;)


toerail+rubbingstrake_21.jpg


since I was epoxying with colour, I got a few coats on the aft deck main cabinet floor and back lining so that I can start assembling a few things and tidy up the space. Don't pay any attention to the exhaust hose, it's nice and soft in order to hold things without scraping them or laying pieces of ply to paint :rolleyes:

aftdeck_rebuilt_98.jpg


George prepared all the iroko pieces for the rubbing strake and I'll start test fitting and checking them tomorrow. The thin (10mm) strip that goes on the side will have to be test fitted, marked for the deck curvature, taken back to the workshop for smoothly cutting it to shape and then back to glue in place. Bit of a back and forth job but cannot be done else. The top pieces cleared out at 21mm, look nice and solid, well impressed!

Q: Is it OK to screw the 10mm thin strip with SS countersunk screws (got some v.nice ones with hex heads!) if I'm planning to keep the iroko just oiled??? I'll also use epoxy, but on test fitting it's going to be a major pain doing it with clamps... More specifically, will the ss screws stain the iroko, if all are simply visible? Got any other options? Don't want to screw it for the testing and then remove the screws after epoxying it in place, as the 3-4mm hole will be visible (me thinks at least!)

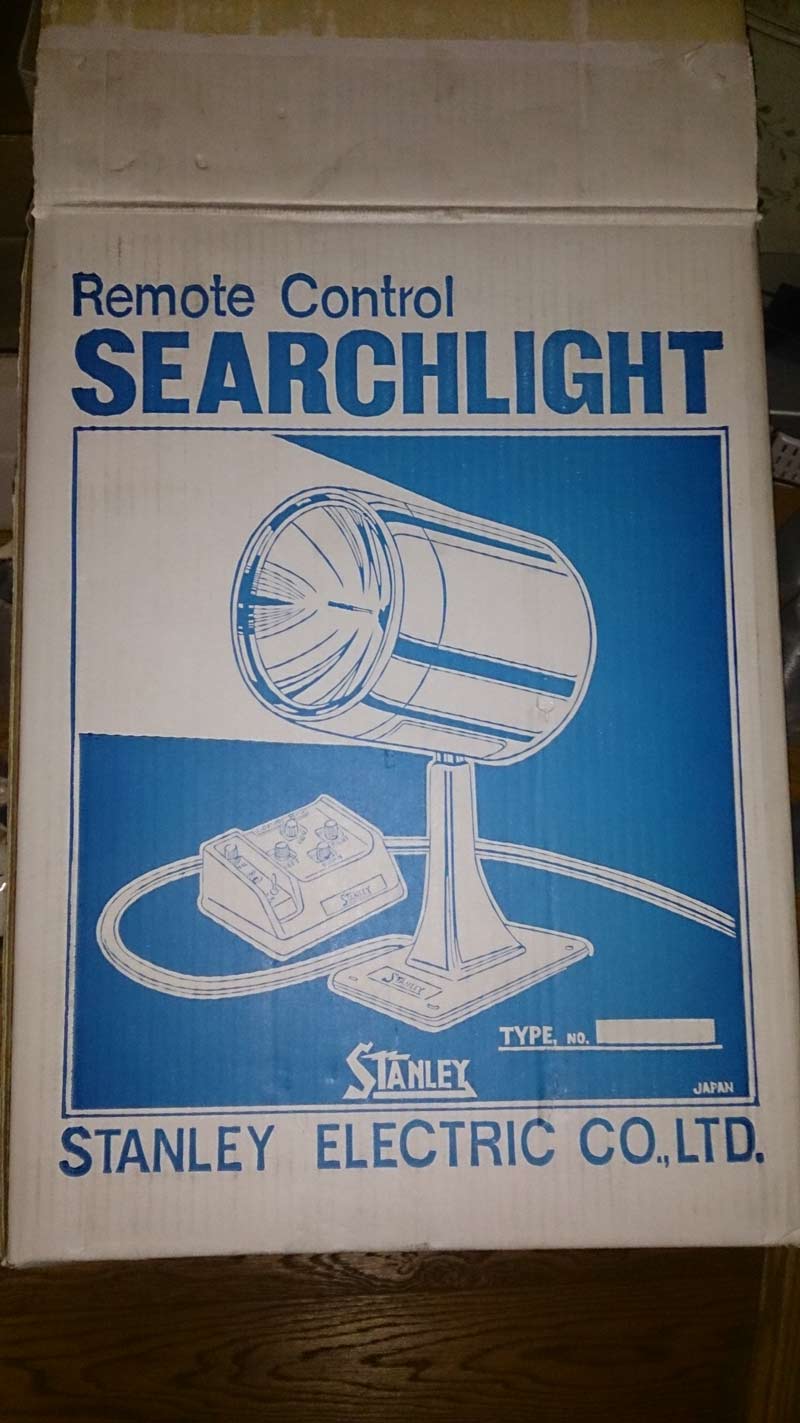
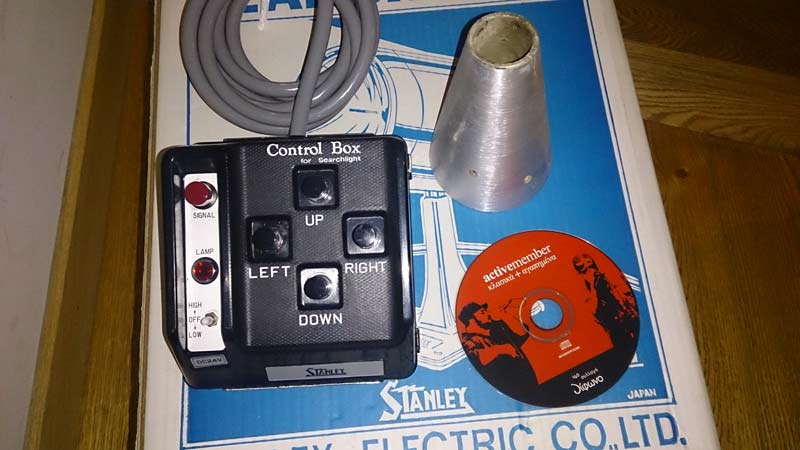
At home, I got a great shock opening the massive box of the Stanley searchlight that came through the post. I feel an 8inch search light is on the large side, but got the right place for it. What really annoyed me was the control box (it's remote controlled) which is really MASSIVE (note the CD next to it on the second pic below!). What were they thinking I wonder! so one of the winter jobs Is to open up this hideous thing extract the bits and reassemble it in an upholstered panel on the lower helm.

searchlight_1.jpg


searchlight_2.jpg


cheers

V.
 

RIN

Well-known member
Joined
2 Mar 2003
Messages
3,236
Location
West Midlands
Visit site
First of all had a [planned] visit from RIN and swmbo yesterday! I think this is the first visit of a forum member to MiToS (may be another one next week)
They were seriously impressed on the amount of work carried out (and the work remaining!)

I was impressed, swmbo was shocked!

Thank you for showing us round and for your advice on exploring the Pelion peninsula
R
 

vas

Well-known member
Joined
21 Jun 2011
Messages
8,016
Location
Volos-Athens
Visit site
Do they get waves that big in Greece? I thought it was always sunny... :cool:

LOL, well, actually a proper Meltemi can build up very decent waves, I reckon.

Had an impressively strong "bourini" for a couple of hours two weeks ago, two boats sunk in Volos. One dragged it's anchor (!) wasn't moored properly and the wind pushed it against the dock and the waves worked wonders in destroying the transom. That's an approx. 30ft sailing boat. Was brought out to the yard last week. Scary stuff, although tbh, if it had a proper mooring nothing would've happened...

bourini_1.jpg


I was impressed, swmbo was shocked!

Thank you for showing us round and for your advice on exploring the Pelion peninsula
R

my pleasure, though it would be nice if you had some more time in Volos, hope you had a nice/safe time in the silver island :p
Actually you're quite lucky as the weather turned sour over the last 3-4 days.


I think SS screws should be fine Vas. If you get any staining, this can be easily cleaned off with oxalis acid.
thanks P, went ahead with that, pics to follow.

So,

quite a bit of progress, but not according to schedule, so not v.happy. Real work is being terrible over the last week or so :(

First of all, after a lot of planning, opened the hole for the bow cabin portlight.
deckrebuilt_63.jpg


Epoxied the "ring" lifting the hatch 50odd mm above deck level

deckrebuilt_64.jpg


Added another mat+epoxy layer to seal/strengthen the hole
deckrebuilt_65.jpg


Decided on the anchor winch placement (actually not too difficult as I had the hole ready in the 50mm thick reinforcement beam running below the deck from the anchorlocker bulkhead to the tip of the bow)
Made a 20mm thick plinth to secure the windlass on (along the lines that this way it's going to be less difficult to lay teak plus no stray water will be able to enter the anchor hatch)
Epoxied it in place
deckrebuilt_66.jpg


finally got the winch in place, got new cables, wired it up to the relay and tested it.
deckrebuilt_67.jpg


deckrebuilt_68.jpg


Unsurprisingly, it worked :p (remember it was fully rebuilt a couple of winters ago with new bearings/seals/ you name it)


on the toerail/rubbing strake front, I've managed to test fit, measure, sand/cut and make a proper 100mm wide iroko strip all along the deck from stern to 3m from the bow. That's were things get a bit more interesting with the double curvature and takes a bit more time to do. Not a massive issue, but need shorter pieces (around 1.2m long) and wider (around 130mm for a final width of 100mm) as the curvature "eats" away lots of material. Overall the result is (IMHO) v.good and I'm happy with it.

toerail+rubbingstrake_22.jpg


toerail+rubbingstrake_23.jpg


toerail+rubbingstrake_25.jpg


Regarding the capping, I've testfitted, measured and marked 12m out of the 24m of bow capping. Had George scarfing a simple 45 degree joint and me spending a considerable amount of time to match them properly in situ. Joints are exactly in line with the stanchion bases (effectively the bolts that hold them in place) so bolting them all down means that the joints should be nice and firm. Last (difficult!) task on the capping front is to "trim" the 21mm iroko to the right width. Decided on 9mm offset inside and another 10-12mm outside.
Finally, since stanchion bases are 1100mm apart, decided on fitting 4 5/60 ss countersunk screws (effectively splitting the distance in 3) on recessed 12mm holes that will be covered with proper iroko bungs/plugs. Should have all capping scarfed, bolted in place by Friday in order to mark the plinth underneath and decide on how to trim it to shape.

toerail+rubbingstrake_24.jpg


Got only a 2X1m area on stbrd side of the bow portlight to do the second mat and epoxy to finish with my epoxying of the decks. Should really really have all capping glued in place by Sunday. We shall see.

On the sunny days, I'm also working smallish jobs in the shadow, one of them was rebuilding the bow roller. It's amazing what was stuck onto it, primer, carmin, silicone, epoxy, you name it, probably got it! Also lots of hammer marks. Used one of the special ss flap disks on the small angle grinder and worked my self through cleaning and finishing welds and smoothing/eliminating (if possible) marks. Still need a good few hours to polish, but should look good once bolted back in place.

bowroller_1.jpg


bowroller_2.jpg


bowroller_3.jpg


I'll try to have shorter updates more often ;)

cheers

V.
 

MapisM

Well-known member
Joined
11 Mar 2002
Messages
20,432
Visit site
Funny that you should mention this type of Osculati rollers fairlead Vas, because I'm having the very same things customised and fitted to my boat as we are speaking.
The point is, as you say, that it's impossible to fit them with their original through bolts, in the deck edge of a wooden boat (the so called "trincarino" in IT, not sure what the EN for that is#.
Otoh, those original bolts supplied with the fairlead are small masterpieces. Hard to appreciate from the pic you posted, but they have a completely flat head, self-locking in its place, so I didn't want to replace them with ordinary woodscrews.
Besides, I wanted to secure them better, considering that they can't be fitted with through bolts and a steel counter-plate.
Therefore, I thought to enlarge their base, welding an additional s/steel plate along their whole length, on the inner part, slightly rounded on its border.
And securing this additional plate to the deck with two woodscrew, plus one in the center of the fairleads themselves - forming a triangle, along the "better safe than sorry" principle!
The original bolts will be cut and welded, hence having to deal only with the rollers but not with the fairlead attachment to the deck.
A pic would have explained all that much faster and better, but unfortunately I have none #yet#. Will post the final result in three weeks or so.
Not sure if this is still of any interest V, but just to follow up on my previous comment, here's the final installation of the modified Osculati fairlead with rollers which we previously discussed. You won't find this sort of stuff on any modern plastic boat! :D
...running for cover...
Fairlead_zps007a296e.jpg
 

jfm

Well-known member
Joined
16 May 2001
Messages
23,783
Location
Jersey/Antibes
Visit site
You won't find this sort of stuff on any modern plastic boat! :D
...running for cover...
No you wont! The set up in your pic is kinda ok, but there is a nice big hawse hole there, then a small pair of rollers that obstruct the hole. If you have bulkwarks (MiToS doesn't) it's much better imho to have the rollers as an integral part of the hawsehole frame. Like on a modern plastic boat! :D Here's an example, also from Osculati catalogue
01.353.00_1.jpg
 

MapisM

Well-known member
Joined
11 Mar 2002
Messages
20,432
Visit site
LOL, didn't I see some sort of objection coming from frozen snot owners...? :D

Anyhow, just to cross Ts and dot Is:
First and foremost, the pic was meant to show the peculiarity of an installation where it's impossible to access the other side of the wooden plank, hence ruling out through bolts.
Secondly, bulkwarks on my boat are not structural, which means that they are strong enough for their purpose, but not to withstand the potential load of a mooring line - unless the hawsehole would be big enough to be actually attached to the frames, which would be both fugly and awfully expensive, 'cause necessarily custom made.
Thirdly, there aren't actually many boats where I've seen the thing you posted at the bow. That's primarily meant for stern lines I reckon - in fact, not even your small ship has rollers in her bow hawseholes, unless memory fails me? :)
 

jfm

Well-known member
Joined
16 May 2001
Messages
23,783
Location
Jersey/Antibes
Visit site
there aren't actually many boats where I've seen the thing you posted at the bow. That's primarily meant for stern lines I reckon - in fact, not even your small ship has rollers in her bow hawseholes, unless memory fails me? :)
Nah, in the >20m ish category virtually all frozen snots (including mine) have rollers in their bow hawseholes similar to the picture in my post. They generally, again including mine, also have rollers in the stern fairleads. Pic below shows this - not very well but I hope readers will forgive me :D

I hadn't appreciated that picture was your Azzurro. You've painted the hull frames and the capping rails white - big move. Do you have any pics standing back sort of showing the whole foredeck or whatever? I like it - both from practical benefits and aesthetics standpoint

cannesshow2013.jpg
 
Last edited:

MapisM

Well-known member
Joined
11 Mar 2002
Messages
20,432
Visit site
Nah, in the >20m ish category virtually all frozen snots (including mine) have rollers in their bow hawseholes similar to the picture in my post. They generally, again including mine, also have rollers in the stern fairleads. Pic below shows this - not very well but I hope readers will forgive me :D

I hadn't appreciated that picture was your Azzurro. You've painted the hull frames and the capping rails white - big move. Do you have any pics standing back sort of showing the whole foredeck or whatever? I like it - both from practical benefits and aesthetics standpoint

Yes she is. Still in my yard ATM, dealing with minor last minute issues, as always when hitting the water again after months with boat on the hard... :nonchalance:
But in a day or two, I'll be back to my home port and will wash her properly before taking a few better pics. :)

Re. hawseholes with rollers, funny, I would have sweared that yours had just plain hawseholes, like in BartW Canados for instance.
Glad to stand corrected of course, but actually your pic makes me wonder about your previous objection on my fairlead obstructing the hole.
In fact, those hawseholes on your bow seem pretty tight, and if they also have rollers (hard to see the exact shape from that pic), I would guess that the free space for lines handling is actually bigger with my setup... :rolleyes: :D
Anyway, I wouldn't call hawseholes with rollers so common, even with big(ish) boats.
I can think of various boats which don't have them - not to mention the (ugly, imho) hawseholes with the integrated small cleat which are very popular with US/taiwanese/chinese yards, also in boats above 80'.
Btw, I happen to be moored near a rather substantial expedition trawler, and took a couple of quick pics to show what I meant when I said that rollers are more common astern than at the bow...
Fairleads_zps48da1994.jpg
 
Last edited:

vas

Well-known member
Joined
21 Jun 2011
Messages
8,016
Location
Volos-Athens
Visit site
morning
not commenting on the hawsehole debate, I'll leave you and your handbags to it :p
Mind I've got two of them on the transom, and they're a fcking pain. As I have 20mm ply transom BUT also a 4mm (non structural) skin inside since frames/ply is not visible inside. Means I need two elements lined up (non structural preferably, although outer hawsehole does bolt on the edges to the frames) and all bolted externally.

On the toe-rail/rubbing strake front, all rubbing thing epoxied in place (was a pain!)
Got all iroko capping in place, scarfs all corrected and lined. Finally opted for 9mm overhang on both sides and a v.small bevel on the top to save our feet.

toerail+rubbingstrake_26.jpg


toerail+rubbingstrake_27.jpg


toerail+rubbingstrake_28.jpg


Assembled my contraption (should I patent it??? :p ) and in a couple of hours managed to trim port side (inside out) and stbrd side (inside only) Produced an awful lot of woodchip!
routing_overhangs_1.jpg


routing_overhangs_2.jpg


Didn't epoxy them in place as I wanted to be able to remove/check/trim/repair as needed before securing them in place. In hindsight I should have epoxy them first in place... Will do the stbrd side like that and finish trimming on the spot. Port side matched and trimmed:

toerail+rubbingstrake_29.jpg


toerail+rubbingstrake_30.jpg


Last evening I epoxied the first 3 on port side in place. Idea being to epoxy when it's cooler and temps more stable with no direct heat on the wood. Will do the same for the rest, so tonight it's going to be gluing in the moonlight :rolleyes:


End result looks v.good exactly as I was hoping. Well impressed with myself, maybe I should consider a career change, for sure I'll be making more money than a uni prof :(

On the same project, got all sorts of sanding/polishing disks and did a series of tests. All the harsh ones (I.e. the softest for ss) are removing the anodizing from alloys, so only helicoidally sawn cloth is to be used on the stanchions and rails. Problem is that an old accident from 30odd yrs ago, keeps appearing once I force my right wrist and this polishing does it in no time :( Got to probably get a bench polishing machine to ease the stress on it.

Stanchion bases are not anodized anymore and after all the welding and repairing are rather rough. Took me 2h last night to smooth 10of the 20 to an acceptable level in order to proceed with polishing them tonight. Got to get them right and fit them within the week so that whoever is going to do the painting can start with it.

Inside, I secured the black water tank, squeezing it alongside with a thick plank epoxied and bolted in place with a series of cross frames. Looks and feels v.solid. Sorted the inlets as well. Only thing left is to move the 1.5inch diaphragm pump 15cm aft leaving space for the cabins' autobilge pump. Want to have all that easily accessible and easily removable/dismantleable/repairable on the spot without triplejointed arms or midgets involved.

blackwatertank_7.jpg


blackwatertank_8.jpg


Also prepared two fairing blocks for the transducers (one is a depth/speed/temp N2K which will be on the portside and the other symmetrically placed on the stbrd for a garmin fishfinder) Got to epoxy them in place and smoothed the whole thing. Mind the 52mm dia hole is going to be in the square flat section in the middle. Ah, the longer (smoother) slope is pointing to the bow, shorter (steeper) slope is trailing. Hoping I'll be able to get depth readings at planning speeds...

fairingblock_1.jpg


fairingblock_2.jpg


Today is rest/work at home in the morning and 5-6h in the evening. Last few days being clocking 11h (8-3 and 6-10) and got a decent backlog of real work related stuff to attend.

cheers

V.
 
Last edited:

MapisM

Well-known member
Joined
11 Mar 2002
Messages
20,432
Visit site
You've painted the hull frames and the capping rails white - big move. Do you have any pics standing back sort of showing the whole foredeck or whatever? I like it - both from practical benefits and aesthetics standpoint
Yes she is. Still in my yard ATM, dealing with minor last minute issues, as always when hitting the water again after months with boat on the hard... :nonchalance:
But in a day or two, I'll be back to my home port and will wash her properly before taking a few better pics. :)
Following up as promised, but I thought to post the pics in another old thread where I asked for opinions before going ahead.
Don't want to go further o/t on Vas epic project... :)
http://www.ybw.com/forums/showthrea...-where-to-draw-the-line&p=4790210#post4790210
 

vas

Well-known member
Joined
21 Jun 2011
Messages
8,016
Location
Volos-Athens
Visit site
evening all,

Reasonable progress down here, weather is more or less helpful (some clouds keeping temps bearable and UV acceptable), but quite tiring overall.


Vas Great progress but do you still reckon you can get her in to the water before August?
I'll start with R., some good news:

Found the "right" guy to paint MiToS, came on Fri and had a look around, a chat and sorted a price and work pattern. Needs six weeks starting on Monday to do the job, means first week of August should be all done. Means I should be in the water before the 15th (a massive holiday down here and a period that you can be sure that all factories/merchant shops/services (bar food and drink) are shut for a week at least) Also means I have enough time to do my stuff and get her ready for the water.
R., no wont be completely ready (and tbh, don't even care when that'll be - house is still wip 8yrs after moving in!) but will be useable and safe maybe in a camping sort of way...

Regarding painting, Alekos will:

sand down everything once more (slightly as it's all epoxied with at least 3coats of penetrating stuff)
apply a special (and bloody expensive!) lightweight (foamy?) epoxy filler first
sand again, check for problems, re fill and sand again
then prime (spraygun)
finally a polyurethane top coat (again spraygun). Mostlikely not awlgrip, use it for a couple of seasons, see if any probs turn up and THEN, do a light prep and awlgrip it.
Sounds reasonable, have seen some of his work in the marina and it's really excellent, so well pleased with this.

On the work front, finished all rubbing strakes and capping, tomorrow will be finalizing the aft deck capping.

Port side is also fully checked/trimmed/sanded to 80grit, waiting for painter before moving up to 180grit and teakoil it. Stbrd side needs a morning's worth of work to trim the outside, smooth some details and sand. That's port side done, sanding gets all pieces back to base light(ish) tint and once under the sun for a few days they all become darker (and matching in colour):
toerail+rubbingstrake_33.jpg


BTW, it's 20mm thick iroko epoxied and bolted (every 350mm) to the underlying treated ply. Locals' opinion is that I shouldn't leave it untreated as it's likely going to warp and generally deteriorate quickly. I don't quite bite that, but I also don't like sanding and painting every couple of years or so. Definitely no varnish for me, impregnating oil is the most I can accept. Any other ideas, most welcomed.

At the bow area, after lots of head scratching got the slightly bent bow roller to the steel fabricator I use on all odd jobs for strengthening and modifications. He did a fairly good job (considering its 5mm ss sheet), added two cross sections to strengthen in against lateral forces and test fitted it in place to get the front iroko capping pieces nice and symmetrical in place. Bow roller will go once more to the workshop for further mods and rewelding the bow stanchion base back on at the right place (was all over the place...)
toerail+rubbingstrake_31.jpg


in the following pic you can clearly see the two draining holes either side of the roller (tbh the roller itself is also going to be used as a drain)

toerail+rubbingstrake_32.jpg


Still not decided on the seats/covers of the bench in the aft deck and the two side steps/rope storage.
Original plan was to glue two layers of 6mm marine ply in order to get the slight curvature of the 3m long seat. OK, it's in three pieces, central is fixed, two sides are opening but wont bent and look good in a single 12 or 15mm ply no matter what!
I'm now looking at all the leftovers from the rubbing strake (quite a LOT!), nice solid 10mm thick iroko, and I'm seriously thinking of getting George to cut them in identical strips (42-45mm wide) and epoxying them on top of the two layers of ply or even 1 layer of ply. Will need caulking (in black) and solid 20odd mm thick edging, but that will mean I can have reasonable finish in these seats/steps without the (necessary) upholstered cushions (that will definitely not be ready this season...)
If I go for the one 6mm ply + 10mm iroko, I'll get two 20X40 "frames" across underneath to keep the thing in shape. Objections anyone? And do you also use teak oil on strips of iroko and how does that behave on the caulking???

Had fun opening the hole for the second set of cleats aft. Retractable ones that will live on top of the bulwark way aft (possibly saving me from building two more custom fairleads for them). Tomorrow will do the port side one and cut the holes in the capping before epoxying/screwing it on.

aftdeck_rebuilt_99.jpg

aftdeck_rebuilt_100.jpg


Talking about capping the transom, if anyone remembers that was built afresh from layers of 15mm thick (so that I can bent!) iroko, angle grinder sanded to shape. Once a layer of 15mm ply was bolted on top, careful eye measurements showed a 4-5mm discrepancy port to stbrd :( It was bugging me for long, so 3h on the grinder with 24grit paper, got it all right and symmetrical. Mind it's double curvature and impossible to measure accurately (unless you got a total station and laser equipment) so the feel from my eyes is the measurement. If it feels right it means I wont be upset everytime I set foot on the deck, so I'm happy :p

toerail+rubbingstrake_34.jpg


toerail+rubbingstrake_35.jpg


Seems that I got the grips with polishing alloy, from left to right, untreaded, smoothened, polished:

stanchionbase_4.jpg


stanchionbase_5.jpg


Getting myself ready for a week long visit to the e/r for a good clean, ripping off earthing/bonding wires (pathetic condition!), completing the stripping and painting the lower part of the bilges and general tidying up.
This will be combined with some tidying up and cleaning in the galley (can only be done 7-11AM unless you like saunas...)


Progressing at a steady pace but heat/work/tiredness combo wont let me press anymore... Daughter has promised to come and help (finish off the teakoiling of the awkward bits of the cabin bilges) and son is threatening to come and help (read cause havoc) once his exams are over next Friday. We shall see :rolleyes:

cheers

V.
 

longjohnsilver

Well-known member
Joined
30 May 2001
Messages
18,841
Visit site
Great progress Vas, must be getting excited at the prospect of being afloat within 2 months. What will you do with all the extra spare time then?:)
 

BartW

Well-known member
Joined
9 Oct 2007
Messages
5,224
Location
Belgium
www.amptec.be
Hi Vas good going !

I understand your dilemma about the finish on the wood capping, had the same experience.
we tried oiling but not succesfull as we didn't regularly enough re-oil the wood
imho a high quality gloss varnish is still the nicest looking finish. We applied 6 layers of Epiphanes, and I hope that this will last at least 2 season or more,
when appliing one extra layer after the season, according Epiphanes advice...

nice to see the shiny polished rail studs, I was hoping that you would / could get that finish with the aluminium parts.

good to hear that you can finally spend some time in the engine room :)
don't remember exactly but didn't you have a issue with one of the engines, and your exhaust riser, or did you take care of that in the mean time.

I'm paying much attention on how you finish your deck surface, and get to know the result after time,
glass fabric, epoxy etc... (water proof, painting, teak sticking on top, ....) as I'm planning to do something similar in a few years time, when replacing the teak deck floor.
I like the way you made the gunwale / capping, well done !
 
Top