The major restoration of Chance (Token) James Silver Western Isles Motor sailer

jstarmarine

Well-known member
Joined
21 May 2021
Messages
470
Visit site
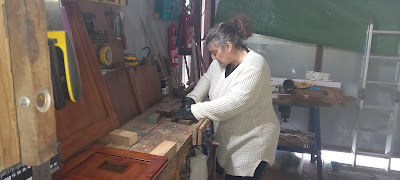
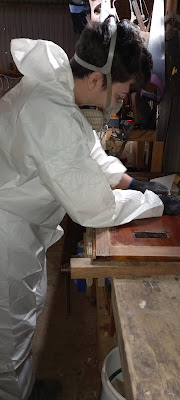
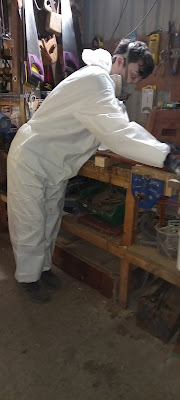
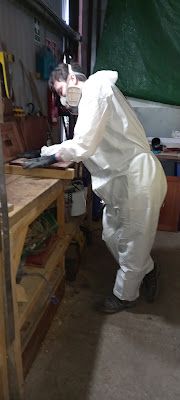
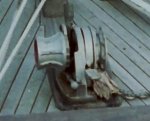
First I had to dismantle the affected doors like this door and clean up the joints and then clean the joints with acetone and then use a modern glue to glue and fix the joint back together.

Then clamp the joint together with sash clamps until the glue cures off and the clean off the excess glue and with a quick rubbing down with some sandpaper , then start to varnish the door like the rest of the doors that have already been started to be varnished.


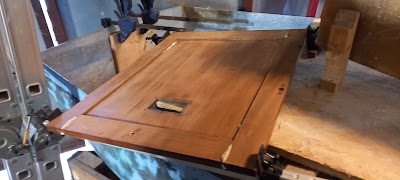
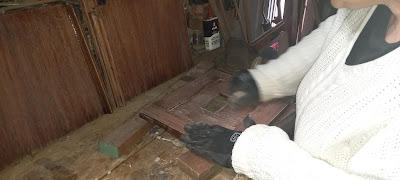
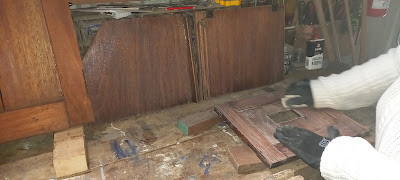
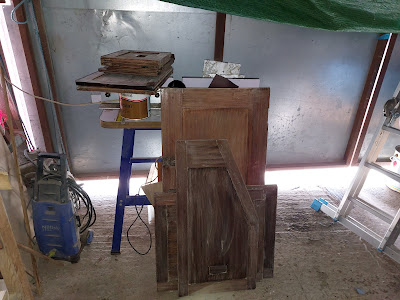
Some of the doors are having to undergo some more major work in that there are more than one part needing to be replaced, As in the case of this door in the photo below


This door is just in need of a single part of the frame of the door. Like the other doors I am dismantling the doors and cleaning the doors and then gluing them back together with modern glue and then varnishing the doors as they are being rebuild


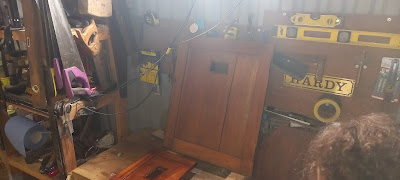
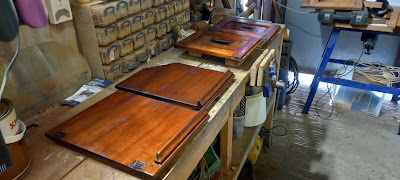
These are the doors from the galley unit which were the doors from the locker above the area where the cooker was originally fitted and above the worktop. These have had their first coat of thinned varnish and will be getting a lot more over the coming weeks.


The two halves of hatch cover over the main cabin to cockpit door. In a previous blog you can see that the main cabin door is already undergoing its varnishing treatment.


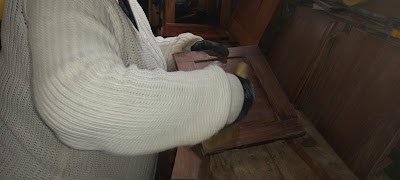
The main cabin door hatch covers and the galley doors getting more coats of varnish as we build up the layers of varnish.


jstarmarine

Well-known member
Joined
21 May 2021
Messages
470
Visit site
My wife Tricia's new job now she has retired from being a Nurse for the past 38 years

This is not her first time doing any type of rubbing down of varnish work, Tricia helped me with our other restoration project boat, our East Coast classic gaff cutter called Mai Star II


These are her first rubbing down jobs on our latest project boat the James Silver Western Isles Chance, The doors that she is rubbing down are the ones out of the galley area in the boat and are the doors from the locker above the cooker


The door below is going to need a bit of repair work to the split in the centre panel


Tricia dusting down the doors as she goes along to make sure she has rubbed down the varnish over all the doors evenly


Here are a few of the panels that Tricia has already rubbed down


jstarmarine

Well-known member
Joined
21 May 2021
Messages
470
Visit site
Our Son Michael making a start on the first of his doors off Chance, they have been varnished last week and have been left for a week for the varnish to harden off and so making the sanding down easier.


Plenty of PPE being worn to keep him safe


He is really putting his back into the job and he said after doing a few, he was enjoying doing this job ashe could see the results of his work.


jstarmarine

Well-known member
Joined
21 May 2021
Messages
470
Visit site
Our Son Michael getting to grips with sanding down the varnished doors off Chance
Our Son Michael making a start on the first of his doors off Chance, they have been varnished last week and have been left for a week for the varnish to harden off and so making the sanding down easier.


Plenty of PPE being worn to keep him safe


He is really putting his back into the job and he said after doing a few, he was enjoying doing this job ashe could see the results of his work.


jstarmarine

Well-known member
Joined
21 May 2021
Messages
470
Visit site
Micheal hard at work sanding down the doors to get them ready for the next five coats of 50% thinned varnish


All suited and booted and PPE and carefully sanding the doors down making sure to sand with the grain at all times and checking the smoothness of the varnish as he goes along


Always checking the smoothness and changing sandpaper as he goes along to maintain the sanding of the varnish


That first group of doors done and now to set them out to get them ready for the next coats of varnish to be applied


jstarmarine

Well-known member
Joined
21 May 2021
Messages
470
Visit site
Salvaging an old roof light from Chance when she was first built in1948

This cabin roof light came from Chance, it is from a time when Chance first had electric lights fitted to her early in her long life. The bulb just needed its contacts cleaned up and a pair of short wires fitted to the blub socket and then contacted to a testing battery. Eureka , it works not bad for an early light bulb and light. So when it comes time to refit the lights in the boat this will be going back in the boat


There are also a number of other lights we have been able to salvage from Chance has we dismantled the interior of the boat.Many of the other lights are still being manufactured by Davey & Co. Some of the lights need a new glass which is readily available. from Davey & Co.

So all being well we will able to refit period lighting to the interior of Chance when it comes to that stage of the restoration. The only change to modern times will be a change in wiring the lights with modern wiring and possibly new bulbs to give better lighting below decks. Also the wiring runs will be hidden as much as possible.

The positions of forecabin, galley & main cabin lights can still easily be scene from the original positions on the bulkheads and in the skylight hatches. However, in the aft heads compartment the engineering room and the aft cabin it is not possible to see their position as there are no marks on the bulkheads or the roof where they were fitted. So I will have to ask fellow James Silver owners for photos of their aft cabin and other spaces for reference for the likely position of the lights in my James Silver.
 

jstarmarine

Well-known member
Joined
21 May 2021
Messages
470
Visit site
The big difference a few days make after removing the old paint off the hull to see the extension of the amount of planking needing to be replaced

Before I started on the hull


Doing a test patch with my large sander with P40 girt sandpaper, it cut through the old paint well to leave a good surface below which will need a little light fairing once the new planks are fitted


Doing a bit of the port side to get the hang of the speed and the amount of changing discs


Then I made a start on the starboard side, to expose the fixings so that the to drill out the old putty out of the nail holes to stop any breaking out of the planks as the nails are punched out of the ribs that are getting replaced in this area of the hull.


Halfway down the starboard side only another 20ft to go on the starboard side


Along way to go, not finding too much more than, i did not know was rotten, however I was able to find the positions of the main mast chain plates under the paintwork once it was removed.


2/3 of the way there and the end of the first day of sanding


The port side well underway on the second day when I had to stop because I was exhausted from sanding and my arms felt like lead.


Something you see that often large wood worn in a topside plank


jstarmarine

Well-known member
Joined
21 May 2021
Messages
470
Visit site
Cleaning up the portside propeller Shaft & the propeller to find out the diameter and pitch & the manufacturer of the propeller
Chance like a lot of James Silver / John Bain designed boats at the time Chance was build, they were twin screw single rudder designed.
20220512_160328.jpg

The stern gear glands were of white metal and were very close fitting glands
20220512_160233.jpg

The original propellers that were fitted when Chance was originally launched in 1948
20220512_160216.jpg

The original manufacturer of the propeller can be seen as Thornycroft
20220512_160200.jpg

On this photo is can be seen that the diameter is 17 1/2 " x 12 1/2"
20220512_160151.jpg

These propeller shafts will have to be removed as there is work to be done on the stern tubes and the bearing changed to modern stern gear when Chance is re-engineered
20220512_160228.jpg
 

jstarmarine

Well-known member
Joined
21 May 2021
Messages
470
Visit site
They will be changed when Chance is re-engined with more modern engines that run at a faster RPM. The original shafts were not designed to run at much more than 1250 rpm and the more modern diesels run at twice that rpm. The original white metal bearing will not take the extra horsepower or rpm going through them.
 

penfold

Well-known member
Joined
25 Aug 2003
Messages
7,729
Location
On the Clyde
Visit site
The speed the prop runs at is down to the gearbox ratio and peak power RPM, which should be matched to prop size/pitch, max diameter generally limited by clearance. Prop vendors will advise you on this or Dave Gerr's Propellor book lays it out if you want to DIY.
 

jstarmarine

Well-known member
Joined
21 May 2021
Messages
470
Visit site
The first job with the windlass will be to give it a good cleaning down and check all the moving parts for wear and if any is find get the parts remade to fit the windlass

On the manufacturers plate it is a AFCO Marine Windlass


It is not likely that the company still is in existence, however, their windlass is still in god condition after all these years.


Once the decks are relaid it will once more be put back in its original position on the foredeck and will be put back into commission and used again


jstarmarine

Well-known member
Joined
21 May 2021
Messages
470
Visit site
Last weekend after we came back from a week away working on Chance at Woodplumpton.
It was time to unload the Trailer of the last bits of the furniture from the inside of Chance which is going to be repaired or remade as necessary. Some of the parts can only be used as patterns as they have been messed about with over the years as the people who owned Chance made improvements to her as they were living on her as a houseboat for the best part of 16 years.
There have a number of improvements that spoil the interior of the boat especially in the galley area and the aft heads, where modern water taps and in the case of the galley area a modern household sink.
With this in mind the galley sink unit front is going to have to be remade in as close to the original colour mahogany as int is possible to get in the present day and stain if necessary to match the original doors which we have been able to salvage as they were in a good condition and only needed to be sanded down and re-varnished.
The same job is going to have to be done in the aft heads compartment where the locker in which the sink sits is going to have to be remade and refitted at a later date once all the work on the bulkheads and planks and ribs in completed.
Another piece of furniture which we brought back was the cockpit chart table and drawer unit which is going to be restored. The main job with this unit is to sort out framework and the top which needs stabilizing and in some cases gluing and pinning together. Then repair or rebuild the drawers as some are in need of major work to make them useable again.
So while I am not able to get to Woodplumpton for a few weeks it will give me and the family time to sort out the parts we brought back and start to repair and rebuild the parts ready to refit at a later date when it comes times to fit the parts back in the boat after the other work is done to interior.
 

jstarmarine

Well-known member
Joined
21 May 2021
Messages
470
Visit site
This is Chance undergoing a pervious Restoration which failed to get finished as the owner at the time did not have the funds to complete the restoration it needed.


A fair amount of the planking which needed to be replaced at the time was done,however , it was not completed as the then owner did not have the funds to keep doing the restoration and the boat was moved and worked stopped and the boat deteriorated to it present condition.


Some of the work was started but not completed as in the case of the transom where at the time the starboard side was done.


A fair bit of planking was done on the starboard side both above the waterline and below


tillergirl

Well-known member
Joined
5 Nov 2002
Messages
8,459
Location
West Mersea
Visit site
The windlass looks a bigger version of the one on Tiller Girl way back when I bought her. Looks like yours has gearing, TG's didn't. Single action so bit slow. TG's windlass had a different name on it (can't remember). The central bearing was 'orribly worn but still worked. The brake was very simple but was very effective. The company had long gone.
 

Attachments

  • Image1.jpg
    Image1.jpg
    27.1 KB · Views: 2

steadyeddy

Active member
Joined
4 Aug 2010
Messages
505
Location
Kent
Visit site
Jarstar marine i saw a abrasive cleaning materal it cleaned up a sanding belt very quick it was like a bar of rubber the name had worn away i think it would save you some money if you could find some ,i will try to find some more information.Hope this helps.
 
Top