Small refit Merry Fisher 805

PaulRainbow

Well-known member
Joined
16 May 2016
Messages
16,879
Location
Suffolk
Visit site
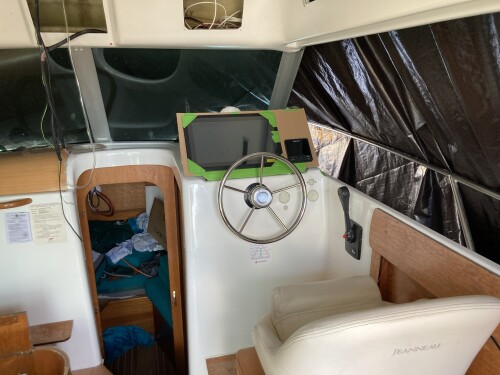
This is where I decided to bring the heater vent through. The grey pipes you see to the left are the windscreen demister pipes, I'm undecided whether to hook them back up to the engine coolant loop or if I should tee them into the eber as well. I'm going to make a removably panel in the wall so I can get back in there again in the future.
The demisters on my 805 were pretty pathetic, never did properly demist anything.
 

jakew009

Well-known member
Joined
29 May 2012
Messages
418
Visit site
The endless saga of the window replacement continues

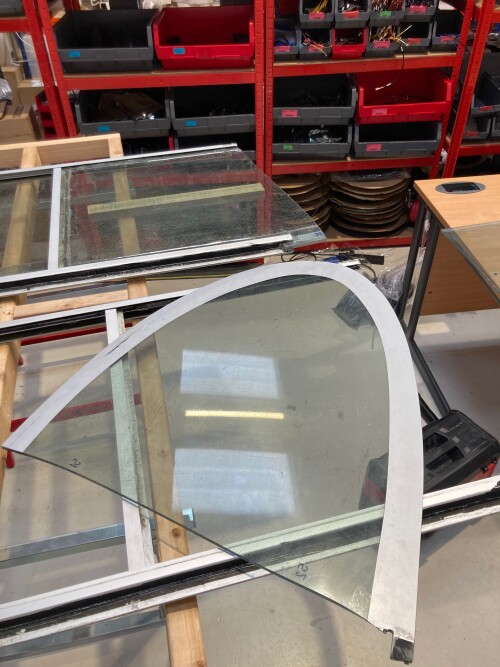
Had to painstaking tape all the bits of plastic I had to chop out back together so I could measure it all


Finally got it all back together with sellotape


Thought I better offer it back up in the boat to check it all still fits. Had to tweak one side in a makeshift vice because it either got bent when it was removed or it was always an awful fit.

Just scraping all the old sikaflex type glue out has taken 30+ hours of tedious work with a scalpel and various modified chisels.


I had another thread on where I was deciding how to refinish the frames. After much deliberation I'm going to leave the original anodising alone where it's still good, and put a 2k epoxy primer on followed by a 2k satin black. That will give me a chance to get rid of all the blemishes and I think it will look much better in black than silver. The bit that's glue into the boat in the photo above is all covered in trims when it goes back together.
Aluminium window frame - annodise or paint

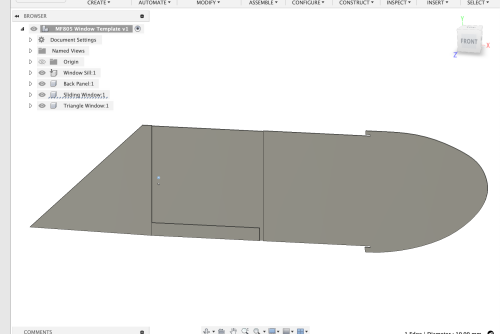
And then finally carefully measured everything and turned it into CAD drawing that I can use on the CNC router to cut the new pieces out. I still need to manually draw around the curve at the back and scan it in because it's a compound curve that'll be a nightmare to manually measure.


I think the next step is to cut some practice windows out of 8mm ply to check the templates are correct and then cut the real ones out and put everything back together. Got a bit of welding to do on one of the frames first where it's a bit correded.

If you ever see an 805 that needs it's windows replacing... run very very far away.

It also dawned on me today that if you ever accidentally smashed say the front triangle window, you would have to go through this entire process just to replace it.
 

Pleinmont

Active member
Joined
16 Aug 2019
Messages
343
Visit site
Really enjoying reading about your experiences refurbing the 805. A lot of hard work going into this one, much respect.

Definitely some parallels in a couple of jobs that I've considered doing on my 760 (heating for one).
Interestingly I looked at an Antares Serie 9 for sale recently that needed some new windows (and some other bits) and whilst it looked simple enough a little voice warned me that it would be no picnic and I sensibly declined 🙏 :)
 

jakew009

Well-known member
Joined
29 May 2012
Messages
418
Visit site
Really enjoying reading about your experiences refurbing the 805. A lot of hard work going into this one, much respect.

Definitely some parallels in a couple of jobs that I've considered doing on my 760 (heating for one).
Interestingly I looked at an Antares Serie 9 for sale recently that needed some new windows (and some other bits) and whilst it looked simple enough a little voice warned me that it would be no picnic and I sensibly declined 🙏 :)

Thanks, glad to know someone is still reading 😅 I am nearly at the more interesting bit where things will move a bit quicker as it all goes back together. Spent the last few weeks working out how I want the electrical system to be and ordering stuff.

I think the new shape dashboard and galley is going to transform the boat


kondza

New member
Joined
2 Aug 2024
Messages
2
Visit site
Funny thing, I bought Merry Fisher 805 a year ago. It is my first boat ever, and I'm constantly looking to learn something about it (and boats in general :)) and this was maybe the most detailed topic I have found :)
Since you break everything apart not only showing things from the outside haha.
I'm definitely watching your progress and wish you luck with this big project
 

kondza

New member
Joined
2 Aug 2024
Messages
2
Visit site
jakew009 - how did you remove does side planks?
IMG_4053.md.jpeg

Are they only glued originaly?

Thinking to replace mine, since they have split and in bad shape.
I do not see any screws on them, or on mine either.
 

Bouba

Well-known member
Joined
6 Sep 2016
Messages
42,190
Location
SoF
Visit site
jakew009 - how did you remove does side planks?
View attachment 183634

Are they only glued originaly?

Thinking to replace mine, since they have split and in bad shape.
I do not see any screws on them, or on mine either.
Watch out in case there are screws which are recessed in and then the top filled with a wooden plug perfectly matched
 

jakew009

Well-known member
Joined
29 May 2012
Messages
418
Visit site
jakew009 - how did you remove does side planks?
View attachment 183634

Are they only glued originaly?

Thinking to replace mine, since they have split and in bad shape.
I do not see any screws on them, or on mine either.

They are glued on with copious amounts of sikaflex and screwed from underneath.

It’s pretty much completely impossible to get to the screws, I still can’t really even understand how they did it in the factory.

To remove them I cut through the sikaflex with a cheese wire and then just levered the wood off the screws. The screws weren’t really doing anything, the glue was doing all the work.

My plan to replace them is just to glue them on I think and don’t bother with the screws. I’ve CNC cut some new ones but not fitted yet.

Sorry for lack of updates been a busy year at work :sleep: it will be ready for the Spring 😅
 

jakew009

Well-known member
Joined
29 May 2012
Messages
418
Visit site
Finally had a chance to do some gluing. I would love to know how they made these things at the factory, the whole thing feels like a giant pain in the ass.


Then cleaned the sikaflex up quickly this morning, will go round with a knife tomorrow


home straight now, the rest is easy...
 

jakew009

Well-known member
Joined
29 May 2012
Messages
418
Visit site
Gulp, more sikaflex required o_O


The cost of replacing these windows is horrendous even without any labour

£600 quid for glassmen to get the old windows out (2 people for a whole day + me)
£400 for the acrylic sheets
£200 quid paint
at least £300 quid of sikaflex & sikaflex primer

Say another £300 quid to get someone to cnc cut the acrylic
And £200 quid if you had to pay someone to weld them up if they have corrosion at the top

and then about 3 days tedious labour to get the acrylic out of the windows and clean them up
1 day labour to paint
2 days labour to glue them back together again
and a day to refit

plus another day templating and getting the cad file ready to cut :oops:

at 300 quid a day that would be nearly 5 grand for 2 poxy windows 😔
and no allowance for time spent staring at it

thank god I am nearly finished
 

Bouba

Well-known member
Joined
6 Sep 2016
Messages
42,190
Location
SoF
Visit site
Gulp, more sikaflex required o_O


The cost of replacing these windows is horrendous even without any labour

£600 quid for glassmen to get the old windows out (2 people for a whole day + me)
£400 for the acrylic sheets
£200 quid paint
at least £300 quid of sikaflex & sikaflex primer

Say another £300 quid to get someone to cnc cut the acrylic
And £200 quid if you had to pay someone to weld them up if they have corrosion at the top

and then about 3 days tedious labour to get the acrylic out of the windows and clean them up
1 day labour to paint
2 days labour to glue them back together again
and a day to refit

plus another day templating and getting the cad file ready to cut :oops:

at 300 quid a day that would be nearly 5 grand for 2 poxy windows 😔
and no allowance for time spent staring at it

thank god I am nearly finished
It certainly adds up.....just out of interest, did you ever go to a Jeanneau dealership and ask the price of replacement windows fitted ?
 

jakew009

Well-known member
Joined
29 May 2012
Messages
418
Visit site
Shopped around getting quotes to get the topsides painted on Hunter (Broom Ocean 37), cheapest came in at £12k, and up to £30k. A hang of a lot of yards are quoting late 2025 or even 2026 before they can start the job.

I think i should exit the security industry and enter the boat industry :cool:
 
Top