New Project

stelican

Well-known member
Joined
25 Nov 2004
Messages
3,239
Location
fareham hampshire
Visit site
View attachment 133528

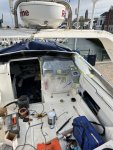
Done. Lovely new fuel lines too. Don’t think I could have done the wiring and lines any tidier or shorter so I’m happy.

View attachment 133529View attachment 133530
View attachment 133531

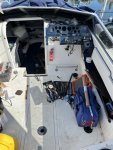
That’s the end of engine bay photos. Dash work starting soon. Found out radar works today….result!
Looking good.
Why are the battery ca l
View attachment 133528

Done. Lovely new fuel lines too. Don’t think I could have done the wiring and lines any tidier or shorter so I’m happy.

View attachment 133529View attachment 133530
View attachment 133531

That’s the end of engine bay photos. Dash work starting soon. Found out radar works today….result!
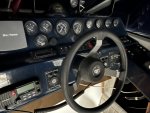
Looking very good. Why are battery cables so long - jump starting!
 

Mr Googler

Well-known member
Joined
11 Apr 2008
Messages
5,560
Visit site
Looking very good. Why are battery cables so long - jump starting!

Do you mean at the engine end? I’m going to cut and remake once the engines are back in. I just couldn’t accurately judge the length so left them long. I’d be mega pi@sed if they where short! ?

Haven’t really considered the PS location. It’s not hard to reach. You have to clamber over the engines to get to anything anyway.

I am going to knock up a removable fitted panel to sit on the engines so you can walk across them
 

Mr Googler

Well-known member
Joined
11 Apr 2008
Messages
5,560
Visit site
Big boy pants today required.

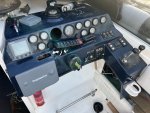
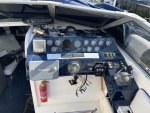
the boat came with an old radar and separate plotter both mounted on top of the dash. I hate that. If it’s not flush mounted…..I ain’t having it. Real estate is at a premium so I would normally use an android tablet and be done with it.

The boat however has a perfectly good radar so I decided to keep the kit.

I purchased a raymarine c70 as it’s the only plotter with radar that would fit in the dash where I wanted it. They are fairly chunky behind so switches (don’t like rockers anyway) and engine alarm panels needed moving. I also got a later depth sounder to match and replace the tri data.

To provide AIS and GPS it was back to Quarkelec who do a seatalk version so that will sort the plotter plus does all the data via WiFi so I can use Navionics on an iPad etc.

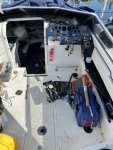
Before
8E40B93F-84D6-4639-A2A5-AE2EB712EE4C.jpeg
After
488BEF6F-AB09-4C4D-A7C4-299788FB62B3.jpegAE9FA8AC-AF0A-4A12-8A10-380D869DCC74.jpeg
FD10634D-6DFD-4444-9907-37B0CEA8A50B.jpeg
23D8B82D-20E5-431E-A9A3-D1AA3D8A40E0.jpeg

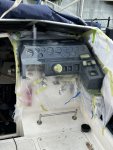
it’s a tight fit for sure but actually looks good. The photos make it look like it’s hanging right down lower than the dash but it’s not. All 4 corners are screwed into the dash. I’ll use a bit of stainless steel 90 profile just to tie the two sides together but in all honest… the dash is that thick it’s go no flex at all! Good old 80’s Sunseeker??

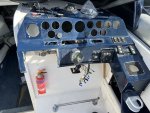
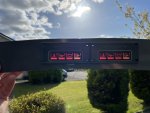
To cover the holes and move the engine lights I knocked up a section out of 2mm Ali then wrapped it. It’s got quite a curve but was easy to template and do with an oscillating cutter. Very please with the result.

4DFCFFCA-3DAD-4E10-9B8A-53EEC83A8B65.jpegA031AF3D-A826-404F-BBA7-15E59CC5FC87.jpeg

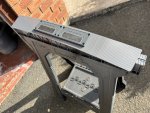
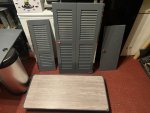
Sprayed the wooden slatted doors too. They came out really well

A9372330-4294-413C-8D22-93023C2FD34C.jpeg

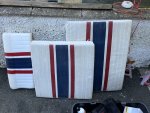
stay tuned for vinyl dying the 80’s out of the upholstery tomorrow!

3D9E2E31-9626-4E86-A658-B432DA7FF7A0.jpeg
 
Last edited:

Mr Googler

Well-known member
Joined
11 Apr 2008
Messages
5,560
Visit site
where's the port engine key going then G.? to the left of the stbrd one? is there enough space behind?
That’s it. Plenty of space and the wiring reaches too! VHF will in a kick panel start board side.

They key will be behind the wheel but easy to reach. No key chains for me ??

The panel to the right of the key will have 9 buttons. Already made it and wrapped it.
 

Mr Googler

Well-known member
Joined
11 Apr 2008
Messages
5,560
Visit site
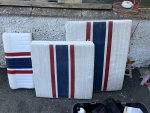
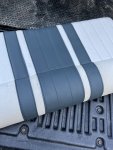
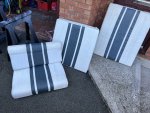
Bye bye 80’s…..hello cool!

920A0D24-6A67-4B1D-B27A-39F3F167A7FA.jpeg
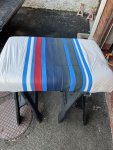
masking took a while

C7F8C9EE-9B1D-4426-82B2-908B8304F4FC.jpeg

5B612742-00BD-4356-A2A2-863317264853.jpeg

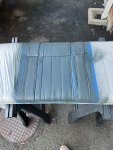
dust coat, 2nd light coat, 3rd slightly heavier coat and done. Dries in 10 mins!

ED1DB610-3F9E-41BD-8E45-8FA3C3124CBD.jpeg

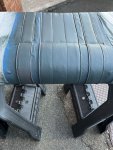
done!

922D31E7-3E2E-4E27-8A6E-EBC2BF82D103.jpeg

23C7F343-E34A-4010-A697-3B316727F1B8.jpeg

38AA6F97-C2B0-47B2-B1EC-950CBA9B0092.jpeg

The white areas need a proper deep clean but I’m well chuffed! OK……if you look really really close, you can see the odd bleed but masking flexible vinyl is tricky. A foot away….looks perfect!

£20 plus some tape
 

julians

Well-known member
Joined
11 Jun 2006
Messages
2,625
Visit site
Bye bye 80’s…..hello cool!

View attachment 133696
masking took a while

View attachment 133704

View attachment 133705

dust coat, 2nd light coat, 3rd slightly heavier coat and done. Dries in 10 mins!

View attachment 133706

done!

View attachment 133707

View attachment 133709

View attachment 133700

The white areas need a proper deep clean but I’m well chuffed! OK……if you look really really close, you can see the odd bleed but masking flexible vinyl is tricky. A foot away….looks perfect!

£20 plus some tape
Will the white bits clean up ok - do youthink?

or will you have to also paint the white bits white?
 

vas

Well-known member
Joined
21 Jun 2011
Messages
8,077
Location
Volos-Athens
Visit site
nice but I don't get it!
ok, you mask in order to paint, I get that.
But the painted gray pics are either from another panel or looks like you have sewn strips on them, seams are completely different.
What am I missing?

V.
 

vas

Well-known member
Joined
21 Jun 2011
Messages
8,077
Location
Volos-Athens
Visit site
OK, I cant sew either (but haven't tried yet :) )
what you could have done though is select the right bloody pics Mr. G!
or at least add a disclaimer!

some ppl...
:p

they do look v.good, hope they last and you don't up with gray stripy trousers and shirts!
 

Mr Googler

Well-known member
Joined
11 Apr 2008
Messages
5,560
Visit site
OK, I cant sew either (but haven't tried yet :) )
what you could have done though is select the right bloody pics Mr. G!
or at least add a disclaimer!

some ppl...
:p

they do look v.good, hope they last and you don't up with gray stripy trousers and shirts!
No chance…..it’s a dye and goes nowhere!

Cant stop dyeing stuff! ?

AFB3AB86-81D1-4E01-99D0-AC65F84C3A34.jpeg90F4C384-E5C0-45AF-B8D1-6FEDF9C354E5.jpeg

Dash painting today!

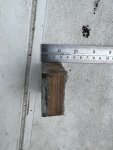
This was what I cut out of the dash…..I say again…..THE DASH!

3145638C-A1EF-4281-9E6B-48F3497F3FEC.jpeg

Sealine owners can only hope for that sort of thickness in the hull!

21DF9185-802B-4457-AE9F-C43A008864E3.jpeg

6BA9D71E-2C98-4C04-94A1-3EF65D34C0E8.jpeg

7EF957FC-E80A-4803-964F-33CCA62FFB05.jpeg

happy happy happy! Came up great!
 

dj43

Active member
Joined
20 May 2009
Messages
728
Location
cambridge/Isle of Wight
Visit site
Your really transforming your boat, looking great, like the idea of dying the vinyl, be interesting to see how it stands up,
Good to see you are getting on with it , so many people start a project then loose interest and never fully finish
 

Mr Googler

Well-known member
Joined
11 Apr 2008
Messages
5,560
Visit site
Your really transforming your boat, looking great, like the idea of dying the vinyl, be interesting to see how it stands up,
Good to see you are getting on with it , so many people start a project then loose interest and never fully finish
Thanks! I really enjoy it.

I did a rib seat with vinyl dye about 8 years ago….saw the boat last month…..still looks good!

Its not a paint…..it soaks in really fast. I tried scrapping some over spray off with a stanley blade about 10 mins after spraying it. No hope. The only thing that removed it was xylene! ?
 

LBRodders

Well-known member
Joined
3 Oct 2018
Messages
2,185
Visit site
Bye bye 80’s…..hello cool!

View attachment 133696
masking took a while

View attachment 133704

View attachment 133705

dust coat, 2nd light coat, 3rd slightly heavier coat and done. Dries in 10 mins!

View attachment 133706

done!

View attachment 133707

View attachment 133709

View attachment 133700

The white areas need a proper deep clean but I’m well chuffed! OK……if you look really really close, you can see the odd bleed but masking flexible vinyl is tricky. A foot away….looks perfect!

£20 plus some tape
Turned out fantastic. ??
 
Top