MiToS re-built/fit- versilcraft Mystery43

Bertramdriver

Active member
Joined
27 Jan 2013
Messages
1,491
Location
Oxford
www.williamsandsmithells.com
More pics

This is how the hydraulics worked out
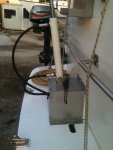
image.jpg

The transom would never carry the weight so we had to spread the load onto the swim platform
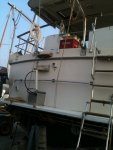
image.jpg

The transom was strengthened using a plate 18mm ply covered by epoxy resin and glass. In the process our aft cabin had to be dismembered. We then used the opportunity for a full makeover
image.jpg
 

Attachments

  • image.jpg
    image.jpg
    87.3 KB · Views: 2

vas

Well-known member
Joined
21 Jun 2011
Messages
8,016
Location
Volos-Athens
Visit site
Vas, interesting progress, and like Mike, I'm so impressed with your tenacity and problem resolution. So we have drawn a blank on the portholes? I can pm you a contact at Trend Marine, they are the biggest UK supplier of marin windows, and might have some thoughts?
thanks Paul, I recon it will take me a couple of days to fully dismantle the 10 portholes! They have something like 20+ screws (inox on ali) some rock solid and will need helicoil or larger dia screws if removed. Further, The pivot axle holding the glass frame and the solid lid onto the main porthole is a b1tch to remove! It's pressed on and isn't really a home workshop job, or at least not this time with all the other things running!

Further there are spots were there's a fair amount of ali "eaten" by the salt. Not just a sanding with 100grit and then a few coats of paint. We are talking maybe 2mm deep at spots. Now, you either go with filler, dunno if epoxy will be OK, then sand then paint.
So decided to clean polish, change seals and refit. In a couple of years time I'll do a proper restoration on the ones needing one. I guess I can save 4 or 5 of them.

Hi Vas. I've had the same problem with corrosion on aluminium windows on the Bertram. Looked at all possibilities including replacement and reanodisation. Ruled both out for cost and buggeration reasons. Finally settled on painting with Plastidip HCF applied with a foam brush. I bought white and tinted with durofix tint. It took 5 coats to get a good cover and as the paint has cured its now a hard acylic smooth satin finish which looks sprayed. The Tech guys at Plastidip were really helpful and reckon it will be at least 5 years before it needs a fresh up coat.
One point, this is not a summer job. Applying the paint at 30c means it starts to dry out before it's formed a smooth surface so either do it in October or April when it's cooler.
Good luck with the refurb. Hope to make Volos this September on the way to the Sporades. All a matter of finances.

Not familiar with Plastidip HCF, thanks will investigate.

You're absolutely right with painting... We are doing all the painting at 6:30-8:00AM. It's just about OK. Once the sun's out, no way, and no point waiting for the evening for things to cool, as air cools, but the ply/ali/metal is still radiating all the days heat.

Vas, great progress and still admire your stamina to keep going when new challenges are encountered.... interested to see the windows going in again as replacing the seals on ours is on my To-Do List...

Good luck with your aft deck !!

thanks Alf and assuming you're talking about the porthole seals, will post pics once I find a decent seal. Ah, btw, would be please post a pic of the porthole seals on yours? The ones I currently have are obviously a lousy replacement (out of the standard car door frame seals!!!) so would be nice to have a proper starting point for my search.
If you were refering to the ss window frame seals, then I've got new ones made in Athens. Exactly the same shape, perfect fit and reasonably priced. If you want (or MystereMarcus, or Pete of course) I can send you the contact and THEIR part code.

Re the aft deck, will be going a similar route to you ;)


and a mini update since I had an operation to remove a wisdom tooth and I'm not allowed to bend over, push pull or whatever I'd normally do in the boat :D

Continued the installation of the water piping: I've started the wrong way round, by setting the collectors in the MB heads and routing back through the galley and then down the e/r towards the lazerette.
So last night and today was the e/r bit. Which wasn't that straightforward as pipes went through a 5cm gap between the e/r to lazarette bulkhead exactly where the battery tray had collapsed with two batteries leaning dangerously to port.
So a piping day turned into an electricians nightmare trying to figure out what does what, why:
  • there's so many cables bolted on various batteries poles,
  • how charging works,
  • the split charger that had a nut missing and effectively one of the battery bank cables was just floating
  • the link solenoid that helps you start with the service batteries (thought there wasn't one, found it but obviously doesn't work so now have to check the lousy wiring...)
  • the 25A 24->12V dropper has the main 12V cable routed via the original chanel back up to the helm el/panel BUT there's two sets of thickish wires moving parallel along going somewhere I need to find!
  • the installer of the Victron intelligent charger DIDN'T remove the heavy, rusty, pos original charger and didn't even bypass it
  • they thought it was a smart idea to get the lazerette autobilge pump wired STRAIGHT onto the set of starting batteries

I love this de-kludging process :rolleyes:
Serious there are points that once I figure out something exceptionally odd or stupid I can only smile, or laugh :D

Anyway the big bugger original unintelligent charger is disconnected, the Victron as well, will open and check condition of capacitors (ok, visually!) plus check the 3 fans on top of it.
Need I guess the next morning to remove 50-100m of stray cabling from the e/r to the el/panel and install an IPwhatever panel for the windlass fuse (there wasn't ANY at the e/r but he'd installed a home spec fuse by the anchor locker!) the bowthruster and setup proper pick up points for 24/12V and the inverter to be installed.

a few random pics and will revive the almost two year old thread on IT->EN translation on the el/panel to check with MapisM if I found the link solenoid trigger toggle switch :D

Battery tray rotten and broken. Looking at Barts pics and following the one conclusion that seemed to be widely accepted I may go the cheap truck batteries and loads of them and go for 6 service and two start and since they wont fit in one tray, go multistorey :D we shall see.
er_electrics_1.jpg


er_electrics_2.jpg

various random cables going all over the place (and that is after removing the obvious and tidy them up:

er_electrics_3.jpg


er_electrics_4.jpg


old charger fully disconnected ready to be removed (needs angle grinder to cut two of the four screws that are rusted solid):

er_electrics_5.jpg


Excited (I know I'm sad but I really mean it!)

cheers

V.
 

Divemaster1

Well-known member
Joined
15 Jan 2002
Messages
4,450
Location
Aberdeenshire, Scotland
Visit site
thanks Alf and assuming you're talking about the porthole seals, will post pics once I find a decent seal. Ah, btw, would be please post a pic of the porthole seals on yours? The ones I currently have are obviously a lousy replacement (out of the standard car door frame seals!!!) so would be nice to have a proper starting point for my search.

If you were refering to the ss window frame seals, then I've got new ones made in Athens. Exactly the same shape, perfect fit and reasonably priced. If you want (or MystereMarcus, or Pete of course) I can send you the contact and THEIR part code.

Re the aft deck, will be going a similar route to you ;)

cheers

V.

Wow, you do have some spaghetti down there .....

Was actually referring to the SS frames, so yes please!!

My portholes are SS, but will take some pics this WE when we're up...

Cheers, Alf
 

jfm

Well-known member
Joined
16 May 2001
Messages
23,783
Location
Jersey/Antibes
Visit site
Great stuff Vas

Tiny point in the grand scheme of things, but I have checked and it turns out that both Garmin GMI10 and GMI20 have an anchor drag alarm function and a menu switchable alarm bleeper. For the GMI10 the software version has to be >= 2.80 or something, which is about 2 years ago, so the screens you have will have the required software
 

vas

Well-known member
Joined
21 Jun 2011
Messages
8,016
Location
Volos-Athens
Visit site
Wow, you do have some spaghetti down there .....

Was actually referring to the SS frames, so yes please!!

My portholes are SS, but will take some pics this WE when we're up...

Cheers, Alf

OK, looking fwd for the pics of the portholes!

The details for the guy doing the rubber seals for the ss window frames are:
http://www.benos.com.gr/default.aspx?lang=en-US

you email him and ask for the code 5892
BTW, forgot to mention if he's not willing to post to Scotland, let me know and I can pick them up and post them to you ;)

Great stuff Vas

Tiny point in the grand scheme of things, but I have checked and it turns out that both Garmin GMI10 and GMI20 have an anchor drag alarm function and a menu switchable alarm bleeper. For the GMI10 the software version has to be >= 2.80 or something, which is about 2 years ago, so the screens you have will have the required software

thanks JFM,

good to know they work, so that I can tomorrow dril the hole for the GMI10 by my side of the bed :D


After the morning session in MiToS I can report that the bloody big and heavy old battery charger is sitting on the aft deck, I've removed around 60m of cabling from the en/room batteries area to the lower helm el/panel (all threaded over the original conduit and utterly stupidly added for more or less no serious reason...), half way through sorting the cabling from the el/panel charger relay to go directly to the Victron charger.
Also removed the split charger system that was there connected to the defunct old charger, and scratching my head trying to figure out how the engines charge the two banks as it seems that the stbrd engine only charges the starter batteries and the port engine has a largish wire going from the alternator to the service bank... Pitty I'm not in the water and cannot start the engines to check what's charging what.

Hanged the Victron on the bulkhead and organising the larger size of el/box/panel I can install there to fit the 24V bar, - bar and the two relays for the bow thruster and windlass.

After a cooler spell, it's too hot so back home for a rest and may go back after 7:00pm

cheers

V.
 
Last edited:

vas

Well-known member
Joined
21 Jun 2011
Messages
8,016
Location
Volos-Athens
Visit site
transom and salon floor progress report:

ah, first I owe you a couple of pics of the helm with all windows inplace, so here they are :D

helm_ply_repairs_78.jpg


helm_ply_repairs_79.jpg


Two layers of iroco have been built up on the cleaned main transom top frame.
George did the first one in a trapezium section trying to correct the awful double curvature to a simpler one to follow. Was not particularly easy to fit and glue/screw down, but was fitted yesterday, and glued today together with the first of 5 15mm strips of iroco on top. so I'm going to have a fairly strong laminate of iroco around 240mm wide nicely secured to the corner upright beams of the transom. Should be capable of receiving the passerelle forces with no problems.
First layer of iroco in place:

aftdeck_rebuilt_12.jpg


Second layer glued in:
aftdeck_rebuilt_13.jpg


aftdeck_rebuilt_14.jpg


Spent maybe 10h stripping the old 12mm ply and cleaning the underlying 25X60 iroco beams on the salon floor. Did the port side, ready to glue new marine ply on.
On the aft side by the sliding doors, I notice the spot where water was coming in from the f/b and possibly from the sliding door frame, onto the floor, soaking it properly, dripping down to the e/r smack in the middle of the battery tray (hence the rotten battery tray and down to the bilges to be pumped out)
Further the first step into the salon from the sliding doors (which is fairly concentrated tbh) has weakened the iroco beam (which is not affected by water at the slightest!) taking all these loads. Plan is over the w/e to replace the weakened beam (it's also quite short at around 800mm) and get the new ply in place.
THEN, we'll remove the sliding doors as a lot, and see what's happening on the 70x70 iroco beam it sits on top as it seems the top 20mm are rotten on the port end of the doors. Not worried as under this 70x70 lies ANOTHER one 70x70 which is solid (the ply floor was between them and rainwater was obviously chanelled to another area and not affected the lower beam)

There's a good layer of 50mm thick glasswool (iirc the term) which is 100% sound and will reuse it.
Under the beams towards the e/r and supporting the glasswool in place is a 2-3mm perforated panel, parts of it soaked and falling apart. Will try to find same material here and replace where appropriate.

a few pics:

salonfloor_rebuilt_1.jpg


salonfloor_rebuilt_2.jpg


salonfloor_rebuilt_3.jpg


salonfloor_rebuilt_4.jpg


Not a heatwave atm, but temps steadily on the 35 mark means that by 2:30 you're completely knackered and can only work on lighter things after 8pm when things start to cool down a bit (after a reasonable siesta that is...).

cheers

V.
 

vas

Well-known member
Joined
21 Jun 2011
Messages
8,016
Location
Volos-Athens
Visit site
Wow!!! She's looking good already and utmost respect for the dedication and sheer pace of progress.

You'll sleep well when you finished that's for sure! :cool:

I'll not only sleep well (a couple of days after she's ok in her berth), but I can assure you I'll sleep A LOT!!!

Vas, are you still married? I ask because if I was in the state of commitment you're in SWMBO would have legged it years ago. Good luck to you and more strength to your arm.
passed this comment to Anna (we're together now for 23yrs) and she said she wants to meet you and discuss :D
She's endured two flats and one house rebuilt/refit, 2 cars and a few other minor "projects"
Over the last couple of months she cannot complain because she's desparetely trying to finish a long manuscript she has to submit so she's struggling and working very long hours.
OTOH she accuses me of having gradually turned her from an easy going and v.relaxed person to a workaholic (that she clearly is now...) and I'm trying to explain that if the seed wasn't there she wouldn't have been so good at it ;)

Back to the project
One thing with having 5-10 tasks open at any given point is that you have the freedom to plan the next days work in the evening over a drink and then wake up the next day and do something completely different :D
So was planning to work on the salon floor and sort out the cables on the el/panel that feed the battery charger and instead I hauled the batteries around (they are heavy buggers when you're folded in two in the e/r), remove the old battery tray, cleaned the mess, and using the hot air gun thing strip the various layers of bilge paint ready to give it a couple of coats of CPES before laying the new tray and batteries.

er_electrics_6.jpg


er_electrics_7.jpg


er_electrics_8.jpg


er_electrics_9.jpg


early stop as with the paint stripping it was a hellish sauna down there. May go back in a while.

cheers

V.
 

Bertramdriver

Active member
Joined
27 Jan 2013
Messages
1,491
Location
Oxford
www.williamsandsmithells.com
OTOH she accuses me of having gradually turned her from an easy going and v.relaxed person to a workaholic (that she clearly is now...) and I'm trying to explain that if the seed wasn't there she wouldn't have been so good at it

Obviously a family of over achievers but don't forget to find time for each other. Trouble is you learn this stuff when you're too old and decrepit to enjoy it.
 

vas

Well-known member
Joined
21 Jun 2011
Messages
8,016
Location
Volos-Athens
Visit site
Obviously a family of over achievers but don't forget to find time for each other. Trouble is you learn this stuff when you're too old and decrepit to enjoy it.

true, I'm slowly learning but still not reached fifty (er for a few months at least...) so we are getting there ;)

Vas,

Not good pictures (mobile only) ... can take better ones next WE... and take some from outside as well..

Highland-20130728-00108_zps9b3a7721.jpg

Alf, thanks for the pics, unless your thumb is 30mm (which I hope is not!) these portholes are small compared to mine!!!
Approx dia???

OTOH, interesting to see them opening DOWN compared to mine that originally opened UP with a special thin chrome plated chain with a loop holding them open. The hold down latches are v.similar. Probably keep most opening up, but could swap the two ones towards the bow to upside down, we'll see...


A lot of sweat and reasonable progress as it's getting v.hot down here.

George finished the transom ending which is now 210mm wide. Need a fair amount of sanding with close checks with the spirit level to get it right but not that difficult

aftdeck_rebuilt_15.jpg


aftdeck_rebuilt_16.jpg


First of all, managed to sort out ALL the messy cabling at the en/room battery area AND the respective funcitons at the el/panel by the lower helm. This means that the 0,1,2,3 charging dial and the analogue timer with the analogue bell dinging on the end of charge period are now completely bypassed, the battery charger has a dedicated relay on the fusebox (always had, but cabling was messed up) and even found out that the unnamed relay next to it was for the hot water tank. This means that I effectively know 98% (ok, not stupid, there may be a couple I'm missing) of the cabling in the main el/panel and that's impressive!
Found that the new genny (there must have been an old one installed before) and the aircon where unearthed, very nice but not impressed tbh. Earthed them properly :rolleyes:

Further, the bonding of engines to p-brackets to transom earth plates et al are a complete and utter mess (OK, wasn't new, but removing the battery tray helped me check a few more points). So, getting 20m new cable and lots of ending eyes (how do you call them anyway???) and will strip all bilge paint all salt deposits and sort them out from scratch. All my skin fittings are reinforced plastic so no need for bonding there (saves a few m of cable :D )

Battery tray frame in place and a 15mm ply also bolted in place this morning. Two to three coats of epoxy waiting to dry to get the first 4 batteries on it and get the victron working again (missing my fridge and lights!)

er_electrics_10.jpg


Talking about the Victron, I opened it up again for inspection and checking as I realised there's an extra Ammeter in the el/panel that is meant to measure A in the 24V charging level and is currently doing bugger all. Had this clever idea to connect the Victron to it (already has a as it turns out induction Ammeter) but it was a non starter as unless I got my electrics wrong I got to wire it in line to the main load and there's no way I can do that...

er_electrics_12.jpg


er_electrics_13.jpg


anyone thinks that these dip switches are wrong for plain non-spil batteries??? I'll download the manual and check but the dip switch that's on clearly says GEL. Oh well, it has worked for almost a decade like that...
er_electrics_14.jpg


Cleaned most battery poles, replaced the ones that's not worth cleaning, re-did the 200mm conn cables (+ to - to get me 24V ) and if the tray is dry, I'll have lights tonight!

Finally after a lot of head scratching decided on the route of the 18mm water pipe from the lazerette to the galley and managed to get the one through. If I'm very lucky I'll also have running water tonight (after 18m!)
Also removed the Merloni hot water thing and will replace it with a proper home spec sealed twin energy 80lt hot water cylinder
er_electrics_11.jpg


cheers

V.
 

Divemaster1

Well-known member
Joined
15 Jan 2002
Messages
4,450
Location
Aberdeenshire, Scotland
Visit site
true, I'm slowly learning but still not reached fifty (er for a few months at least...) so we are getting there ;)


Alf, thanks for the pics, unless your thumb is 30mm (which I hope is not!) these portholes are small compared to mine!!!
Approx dia???

........

Do not have exact, but can get head through without any problems .... will measure, but would guess opening is somewhere between 200 - 250mm ..... with outer frame being approx 300mm ....... and phone camera does make my hand look rather large ... :)
 

vas

Well-known member
Joined
21 Jun 2011
Messages
8,016
Location
Volos-Athens
Visit site
Do not have exact, but can get head through without any problems .... will measure, but would guess opening is somewhere between 200 - 250mm ..... with outer frame being approx 300mm ....... and phone camera does make my hand look rather large ... :)

OK, don't bother with exact dimensions, they are similar size to mine. A couple of more detailed pics especially the seal and how it is secured on the window frame would be nice as I need to get new seals for them!

realised that haven't updated the thread for a few days, so a more few pics (mind reached 1000pics and 70MB...)

Electrics are running again with four service batteries and as reported on the other battery thread, only two will be kept +one for genny/passerelle and got to buy 4 new service batteries soon.
Tray in place and charger /cabling reasonably sorted. Will do the proper tidying up once I get ALL cabling there in order to size a box to fit them all in.

er_electrics_15.jpg


er_electrics_16.jpg


Also got cold water after 16months of no water. That's a welcome change, but not without issues :D
No, nothing's leaking, I'm an experienced plumber... :p
BUT, I've not got an accumulator tank (find silly paying 100euro for a 1lt marine tank!) and I'm thinking of buying a 8-10lt plain domestic one. Any objections? That is assuming it's safe for drinking water as they are usually for C/H installations. Now, without the tank, supply is a bit odd and varies, so should be fixed with that. May actually have to update my pump to a larger one (or since I've found an identical one in a locker, use two in parallel). Currently 12lt/min, doesn't look enough...

Sorted out the grey water tank for the two washbasins and showers. There I seem to have some issues with the Whale gulper220 pump. Will make lots of noise and sort of suck/pump but cannot make it up to the 1m head from the bottom of the tank which is pathetic. Pump is mounted on top of the 16lt water tank. If I uscrew it and slide it down so that the pump rests at more or less level with the fluid, it sucks fine. Did a few tests, will do a few more to make sure I have a reasonable setup good for more than 3handwashes :p
I wonder if the non return flappy things in them are any good or if I should invest in a decent independent non-return valve as well.
plumbing_1.jpg


So this is under investigation, will probably report on the other grey water tank thread if I find something interesting.


Removed a big chunk of the stbrd salon flooring and realised that the flexing on the entrance to the salon was due to an odd way of supporting the 3m across 25X55 iroco beams. It seems to be the first poor constructional detail that I've spotted in this rebuilt!
salonfloor_rebuilt_5.jpg


salonfloor_rebuilt_6.jpg


Decided with George how we're treating this point, should be done tonight if the heat is bearable...


Outside, George has been tackling the engine intake openings that on the port side are delam/rotted around the edge (for around 3-5cm at places) and I've been applying more CPES on the hull below the waterline. Now on two coats and ready to tackle the few spots that the top layer of ply is off and that's going to be replaced with epoxy + mat.
Filling all minor bits, i'll then do a 120grit sanding all over and then apply a further two coats of epoxy before priming. I'm pretty sure that I can skip priming but I want something that has colour (grey most likely) as epoxy is clear, so that I can have a guide when removing a/f (black) at a later point.

Most craft around MiToS have gone so it's time to paint the hull with a spray gun (faster, better quality and more economical). Next week will be doing just that.

cheers

V.
 

vas

Well-known member
Joined
21 Jun 2011
Messages
8,016
Location
Volos-Athens
Visit site
me again :D

first of all, Searush (who I hope is not following the thread :p ) will be delighted to know that my Lumishores arrived this week, thanks EME ;)
So three poverty spec (Deleted User copyrighted I think) white e-lites are in my desk waiting for the hull treatment to finish in order to be fitted.
BTW, look really slim and nicely engineered!

On the painting front, I used a spectrum analyser (or however you call this thing) to recreate the original interior light silver/grey laquer and I think i'm quite close. TBH, don't really have anything left from the original coloured panels/cabinets so it's more that I like this colour and would like to keep it on the salon cabinets/sofa frame as it's fairly modern for a 70ies paintscheme...
Decided to paint the hull in this same silver and part of the super structure. Now which part, I'm not sure, will have to test and see on the 20th when I'm back from a short family break in Crete.

Since I've only got another full day's work before I set off, I've been working long hours for the last few days (and typically today I'm completely wasted and I'm back home recovering)
Achievements of the past few days is mainly repair in the beams of the salon flooring and replacement of all the fixed floor panels. Took two 12mm ply sheets of 1.22X2.50 to do it together with a few kilos of epoxy and around a hundred 4X35-5X50 screws (and I'm not counting the litres of water, the sweat and the hours spent as usual) Decided to add two supports from the engine mounting massive beams up to the salon floor cross beams along the engines' hatches to reduce the flexing even further. 25X55mm and 4m long iroco beams with a mid support do flex no matter what.
Also replaced half of the perforated 4mm hardboard that was lining the e/r ceiling, enclosing the insulation (over the battery tray and in the opposite side over the genny it was falling apart due to water ingress). That was the trickiest of all the work, as we both had to be folded in two in the e/r trying to get this bloody thing to fit and then hold/screw and secure in place all above our heads and upside down :( Then the cleaned insulation was placed back in place and the pieces of new flooring glued and screwed in place. Will try to seal the whole e/r carefully so that fumes and noise from down there will be kept to a minimum. A few random pics:

salonfloor_rebuilt_7.jpg


salonfloor_rebuilt_8.jpg


salonfloor_rebuilt_9.jpg


salonfloor_rebuilt_10.jpg


salonfloor_rebuilt_11.jpg


salonfloor_rebuilt_12.jpg


salonfloor_rebuilt_13.jpg


Mind, the 4 uneven in size (still trying to find out why!) engine hatches will need a full rebuilt. They are currently on a metal (crappy) rusting frame and they are generally no good at all. Not fussed though as I can load them in the car to get them to George's workshop to work on them during the winter.


A task that I wasn't happy to carry out was to sort out the extra e/r cabling from the lazarette/genny towards the lower helm el.panel. Started with relocating the control box with three relays and a few more bits and bobs that drives the auto pilot steering pump and the trim tabs controller. Identified the last 5 unknown cables dangling in the lower helm as being the original trim tab cabling, now defunct as the new trim tabs had a nice colourful cable set :rolleyes:
So rerouted all these extra cables from genny tabs and pilot through the proper conduits, and reused 3 out of the five old tabs cables for powering the a/p pump and something else I now forgot...
Also decided that the original genny "box" is too broken to be reused and scrapped all 4 pieces of it and the oily falling apart sound insulation and will built two heavy insulated partition walls to isolate it from the rest. Got it's own air intake so should be nice and cool in there :D
While at it, noticed that this grp "box" didn't quite fit the shape of the generator bolted onto the engine and I started investigating.
After a lot of hassle I found a label on the generator and it's a
mecc alte spa MR2 160/2 which is 8KVA, 50Hz, 3K rpm

futher head scratching and searching, turns out that there was a label nicely painted beige on the YANMAR mated to this generator and so I know know that it's driven by a:
YANMAR 2GMFL-G2 (a two cylinder 11HP @ 3K rpm diesel motor)

Further searching and it seems that I have something like a MASE IS7 50Hz, 3000rpm, 1992-1998 job with 900h on the dash. BTW, the on genny control panel was facing the lazerette bulkhead. I turned it round facing the stbrd engine so I can actually see the bloody thing and I now know there's a voltometer there, two schuko plugs and a set of red/black connectors. I HOPE that these can charger the starter battery of the thing (as there's no alternator on the yanmar). Spotted the seacock for the genny well hidden UNDER the genny tray and behind the manual bilge pump manifold, perfect inaccessible place! Hole to be closed once I figure out how to get my angle grinder in there to cut it off and will be repositioned next to the stbrd engine's seacock, accessible AND with a strainer (nothing is fitted now, seawater straight to the yanmar...)

Genny stripped and panel reoriented:

er_electrics_17.jpg


er_electrics_18.jpg


er_electrics_19.jpg


All very tiring and hugely satisfying once sorted :D

On the hull treatment front, I've done two coats of CPES and now I'm working with epoxy stuffed with microfibres in order to seal ply flakes, recessed screw head holes and other small blemishes. Plan is to seath the bow section (maybe the first 4m that are the ones facing most probs) with a 180g/m2 mat with epoxy. Still not happy to seath the lot, so wont do it. A fair amount of work involved and will take me at least a week before I'll be able to apply the following two coats of epoxy to the hull.

Closing with a long shot of the hull as it stands now that the surrounding craft are away ;)

hull_1.jpg


cheers

V.
 
Last edited:

rbcoomer

Active member
Joined
23 Nov 2010
Messages
3,329
Location
The Tropics of the English Riviera!
www.swfbr.org.uk
Great progress yet again - I feel tired out just thinking of all that effort in the searing heat! :eek:

Nothing like an engine bay/engine room in a boat to test the contortion abilities is there? Thought yours would be big enough to make a little easier - but obviously not...

Good call I think on the hull/CPES - I'm sure it'll be fine with some breathing space. I've read some further horror stories on 'sealing up' old wooden hulls with resin/GRP etc since this was discussed so really think you've made the right call and at least you can monitor.

Enjoy your well earned holiday! :cool:
 
D

Deleted User YDKXO

Guest
Vas, as ever, a very interesting post and once again, I have to say that I don't know how you manage to keep going on this monumental project
 

longjohnsilver

Well-known member
Joined
30 May 2001
Messages
18,841
Visit site
Vas, as ever, a very interesting post and once again, I have to say that I don't know how you manage to keep going on this monumental project

Yes, it would almost be easier to build a boat from scratch! We ought to organise a forum visit to admire the finished project and congratulate Vas in person.
 
Top