Blue Angel (Canados 70s) Rebuild thread

jfm

Well-known member
Joined
16 May 2001
Messages
23,805
Location
Jersey/Antibes
Visit site
Wow, seacocks with removable slotted scoops, that's a refinement unheard of, in more modern boats!
It's almost a pity to have replaced them... Are you going to keep the same installation, and if so where did you source those bits?
I believe that neither Maestrini nor Guidi build that stuff anymore
I'm v surprised at that comment MapisM. Sure those screw on scoops are very much in Maestrini catalogue from when I first built boats till right now, in bronze and in many shapes/sizes. But I cannot for the life of me see why you would spec them, and I never have. Six holes in the hull, and requiring much precision by the drill operator? No thanks! What's your reason for saying they're better than all-in-one (strainer + thru-hull) bronze fittings from the excellent Maestrini?
https://www.asap-supplies.com/fittings-valves-strainers/strainers-and-spares/strainers/page/5
 

Portofino

Well-known member
Joined
10 Apr 2011
Messages
12,289
Location
Boat- Western Med
Visit site

MapisM

Well-known member
Joined
11 Mar 2002
Messages
20,456
Visit site
Hang on a minute, jfm & Portofino:
My understanding was that the OEM seacocks on BA were somewhat different, i.e. made as I'm going to explain below.
Btw, it's a type of construction which I'm almost sure to have seen on a patrol boat, and possibly on a fishing trawler, but not on any pleasure boat, IIRC.
TBH, after looking at BartW pics again, I am not so sure anymore about that, but that was the rationale behind my previous post, anyway...

1) plain vanilla round seacocks, mounted almost flush with the hull;
2) oval flanges around them, sealed and screwed to the hull, meant to be never removed.
3) separate slotted scoops.
The whole point is that the scoops, rather than to the hull, are screwed to separate threaded holes in the flanges.
This way, the scoop can be easily removed and cleaned without touching neither the seacock itself nor the external flange.
Besides, if a floating object should hit a scoop strongly enough to break it, the damage is much more unlikely to affect the seacock itself compared to the all-in-one fittings, hence reducing the likelihood of water ingress.

PS: since you never know how fast brain cells can deteriorate, being in doubt about whether I'm dreaming of the above, I resorted to a bit of googling - heaven forbid!
But luckily, I did find at least one example of the type of installation I had in mind, so at least it doesn't exist only in my memory... :D - See here.
Btw, in the meantime I also had a look at both Guidi and Maestrini websites, and I couldn't find stuff like that in their catalogues, fwiw.
 
Last edited:

jfm

Well-known member
Joined
16 May 2001
Messages
23,805
Location
Jersey/Antibes
Visit site
Sure, but the ones in the pictures of Bart's boat, that you were praising, are not the ones you're now describing. Bart's strainers are just screwed to the hull with self tappers, which is definitely not praiseworthy in my book.

The ones you link to are still self tappered to the hull. Each to their own, but I would never spec that despite the slight advantages you mention. Happy to agree to disagree on that!
 
Last edited:

MapisM

Well-known member
Joined
11 Mar 2002
Messages
20,456
Visit site
Bart's strainers are just screwed to the hull with self tappers
Yup, as I said on second look I realized that they seem to be.
In the pic showing the strainers, I assumed that the ovals around them were the separate flanges that I had in mind.
Weird shape btw, I can't understand how they are built like that - and why. :confused:
Oh, well. They still enjoy at least the "Besides..." advantage of my previous post vs. the usual all-in-one things, I reckon... :)
 

petem

Well-known member
Joined
16 May 2001
Messages
18,774
Location
Cotswolds / Altea
www.fairlineownersclub.com
Sorry, I would have sweared to have heard that translation for "spaghetti allo scoglio", a typical IT recipe with spaghetti (al dente, goes without saying! :cool:) and mixed seafood.

It's not impossible that it's been described somewhere as 'Reef' spaghetti and of course that's a very descriptive word for it. I think we'd normally just call it 'Seafood Spaghetti' though. We do of course have 'Vongole' which incidentally isn't usually translated into 'Clams' in my experience.

Also incidentally, SC does have some excellent sea food. Instead of exporting the best of what they catch (like we do in the UK) they sell some of the more interesting stuff in restaurants (razor clams and all sort of funny looking things). I shall of course be working my way through the best restaurants that SC has to offer during the summer.
 

MapisM

Well-known member
Joined
11 Mar 2002
Messages
20,456
Visit site
Have you tried the Chipirones?
Sorry - thread drift - I'll stop now.
LOL, you can't be sorry for drifting towards gastronomic subjects - and I'm sure that also BartW agrees! :D
Let me just add that if you like baby squids (deep fried, I suppose?), you must try them also whenever you should go to Venice, or anywhere else in the N Adriatic.
In fact, they are one of the classics in that area - together with soft shell crabs, razor clams, mantis shrimps (I had to google for this one!), and so forth.
Don't get me started.... :p
 

MapisM

Well-known member
Joined
11 Mar 2002
Messages
20,456
Visit site
The ones you link to are still self tappered to the hull. Each to their own, but I would never spec that despite the slight advantages you mention. Happy to agree to disagree on that!
Sorry, I didn't notice your PS in my previous reply.
You mean that the inner part is self tappered, in that example? If so, I see your point, but it doesn't have to be.
You could use any round seacock with internal locknut instead.
The external oval flange otoh is indeed self tappered, but being a separate component, I don't see that as a big deal.
 

BartW

Well-known member
Joined
9 Oct 2007
Messages
5,230
Location
Belgium
www.amptec.be
How long will the project take if it all goes to plan Bart? Looks like a huge job.

planning is to leave the yard first week of April,
works are proceeding quite good, when I left last Friday, most of the gunwale work was finished, including the sanding of the teak gunwale capping.

soon they will start with preparations for the new teak:
first sanding the old teak / deck
make patterns,
produce premade pannels, 4..5mm ply, and 12mm teak on top.

I'm afraid re-installing all the bits and pieces, fairleads, anker winch and capstan, furniture fixings,... will take more time than they expect, ...we shall see,
we would like to use the boat around easter.
 

BartW

Well-known member
Joined
9 Oct 2007
Messages
5,230
Location
Belgium
www.amptec.be
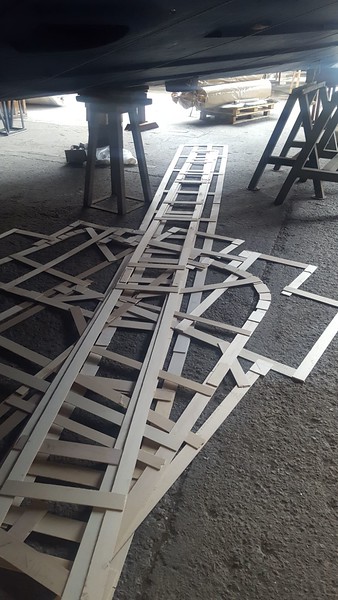
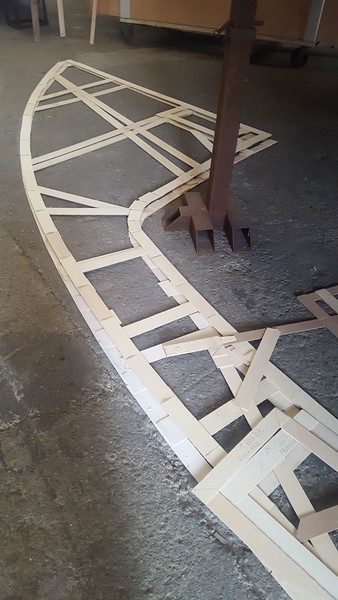
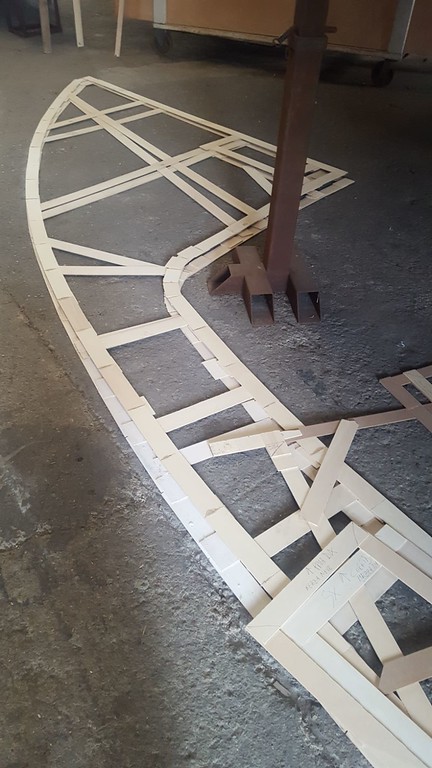
this is how they make the patterns for the new teak


from this they will make plywood panels,
and glue the new teak on them in the workshop

they will place large premade finished panels on the boat deck floor.
 

vas

Well-known member
Joined
21 Jun 2011
Messages
8,065
Location
Volos-Athens
Visit site
Bart,

how thick is the current deck? On MiToS original construction was ply panels (15mm iirc) with the last layer being teak, straight seams and caulking, not following the curvature of the deck.
4mm ply (don't think there's 5mm marine ply!) is ok albeit thin
12mm teak on top wonder who's holding whom!
how are they going to secure the new assembly onto the old deck? weights and epoxy? can they do vacuum bagging in there?

trying to figure out overall thickness and weight to BA.

cheers

V.
 

BartW

Well-known member
Joined
9 Oct 2007
Messages
5,230
Location
Belgium
www.amptec.be
Bart,

how thick is the current deck? On MiToS original construction was ply panels (15mm iirc) with the last layer being teak, straight seams and caulking, not following the curvature of the deck.
4mm ply (don't think there's 5mm marine ply!) is ok albeit thin
12mm teak on top wonder who's holding whom!
how are they going to secure the new assembly onto the old deck? weights and epoxy? can they do vacuum bagging in there?

trying to figure out overall thickness and weight to BA.

cheers

V.

Original plywood is visble in this pic


I guess it is approx 15mm, and 5mm remaining old teak on top,

the old teak will be sanded away, (they started the sanding I've been told)
and the new plywood, they talked about 4 or 6 mm
I have been thinking about the weight, there is going to be more weight anyway,
I'll asc to keep the new ply layer as thin as possible; 4mm ?
 

vas

Well-known member
Joined
21 Jun 2011
Messages
8,065
Location
Volos-Athens
Visit site
doubt it's feasible with 4mm Bart, I'm in the process of making a few pieces 60-70cm long by 30-50cm wide where i'm probably going to epoxy iroko (for the heads) I do have 4mm marine ply leftovers, but I'm probably NOT going to use it.
I'd rather get them to sand a few mill more of the original and use 6mm for the new deck.

cheers

V.
 

BartW

Well-known member
Joined
9 Oct 2007
Messages
5,230
Location
Belgium
www.amptec.be
doubt it's feasible with 4mm Bart, I'm in the process of making a few pieces 60-70cm long by 30-50cm wide where i'm probably going to epoxy iroko (for the heads) I do have 4mm marine ply leftovers, but I'm probably NOT going to use it.
I'd rather get them to sand a few mill more of the original and use 6mm for the new deck.

cheers

V.

Vas, why do you think that 4mm won't work,
the panels are flat on the old deck surface

for the shower I understand you need much more strength, (they only rest on small pads in my case)
my removeable shower panels are made from approx 15mm ply, + 12mm teak iirc

yes I hope that they will sand away all the old teak...
 

BartW

Well-known member
Joined
9 Oct 2007
Messages
5,230
Location
Belgium
www.amptec.be
Was in the yard yesterday, was pleased with what I saw
(apart from a few details that could be corrected)


the new gunwale in GRP looks really good, all as one pice, (pics will follow later when all is ready)
seams from the panels are invisible,
they use a "black" polish, for accurately showing any defects in the surface


Here the detail of the skirting of the bowbed and superstructure,
This was the situation 2 weeks ago: The old plinth surface and edge with the wall, all covered with epoxy and thin layer of fabric,


This is the situation now, finished with a silver grey plinth (premade grp panel),
And a new white grp reinforced edge


simultaniously hey are working on the teak in the carpenters hall:

from these patterns,


they made big 4mm ply panels,
and nail and epoxy the teak on top
(the teak planks have a groove on both sides !)


Progress on my neigbour boat is..... interesting !
the mahoney planks (rather beams) for the hull are 80mm thick !!!


Last edited:

BartW

Well-known member
Joined
9 Oct 2007
Messages
5,230
Location
Belgium
www.amptec.be
post nr # 900 is reserved for index of picture posts

Anker camera 730
Autopilot 731
Birthday party 420
Blackwater tank replacement 556, 592
Bladder tanks 791
Chrome modifications 109
Crew Cabin refurb 520, 593
Deck support Acrow props 543
Deck lights 125, 735
Dive tank rails 615, 660,
Electric 230V supply 749, 788
Engines MAN rebuilding 786
Engine room floor lowering 556
Engine room acoustic isolation 162
Flybridge Cover 65
Flybridge furniture 731
Flybridge Hartdtop 680, 749
Galley upgrade 594, 730
Generators 730
Gunwale Railing polishing 573, 591, 812, 834
Gunwale repairing 123, 155, 235, 753, 776, 782, 798,838, 849,863, 899
Interior curtains and carpet 783
Interior Table and Cupboards 155
Interior Led lights 115
Interior teak floor 730
Stabilizers 429, 436, 610, 611, 634, 652
Swim platform hi lo system, 25, 70, 176, 210, 228, 269, 287, 305, 729
Swim platform cleats 324
Swim platform scuba tank rails 593, 615
Tanks level sensors and display 788
Teak renew, recaulking, 894, 899,
Transom steps to swim platform 1, 3, 51, 123, 235, 254, 305
Transom Door to util and engine room 212, 123, 125, 155, 156, 254, 305
Washing machine 867
Water pumps fresh water 867
Workbench 188, 254
Yard Marseille 730
Yard Sanary sur mèr 610, 611
Yard Fiumicino 155
Yard Zelenica 782
Yard Santa Maria di Castellabate 798, 867, 899
 
Last edited:
Top