Making and fitting a new wooden rubbing strip for a dinghy

JumbleDuck

Well-Known Member
Joined
8 Aug 2013
Messages
24,165
Location
SW Scotland
Visit site
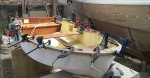
I have a Bobbin dinghy hull which I want to bring back to life as my tender for this year. All the GRP parts are there and in good condition, but the wooden rubbing strip was completely rotten and had to come off.

After some good advice and help here at the time, I have some nice green oak waiting to go on. However, I've never steamed and fitted gunwhales before, so I'd be glad for comments on how I propose to do it. I have all the bits to make a steamer, using a wallpaper stripper, a length of drain pipe and suitable fittings. The plan is therefore ...

  1. Brace the hull are regular intervals (1') so it doesn't squash too much out of shape.
  2. Steam two lengths of wood for an hour
  3. Simultaneously (I'll have help) clamp one strip to the hull at the bow on each side, bend them round and clamp at the stern
  4. Allow to cool and set, then remove
  5. Repeat with two more strips, on the outside because it's easier and almost the same shape as the inside
  6. Coat the inside surfaces of two strips with shellac based knotting solution (advised by a friendly boatbuilder because green oak is wet), then simultaneously glue to the braced hull using Sikaflex and ten clamps per side.
  7. Once the glue has set, remove the bracing and cut the two other strips to size to fit inside the hull
  8. Sikaflex and clamp the inside strips
  9. Fit knees (recovered, in good nick) to bow and quarters
  10. Fit bow piece across the cut ends of the rubbing strips.

Does that sound reasonable? Am I missing something? I want to avoid using screw fasteners because the Bobbin hull has quite a sharp curve amidships and the combination of point load and local weakening meant that the original rubbing strip had broken in three places - the screws along the sharpest curve - on each side as well as being rotten.
 
Check the grain of the spiles before you steam them. If the grain 'runs out' of the straight line then that is a weak point when bending so may need a partner (doubling piece) and be extra clamped at that point. Stagger such run out points so that good straight lengths cover the run out bits.

Green oak can be acidic so perhaps look at a Sikaflex that is suited to that.


Lots of pics please !
 
Check the grain of the spiles before you steam them. If the grain 'runs out' of the straight line then that is a weak point when bending so may need a partner (doubling piece) and be extra clamped at that point. Stagger such run out points so that good straight lengths cover the run out bits.

Thanks. It was a nice board, sawn for me by a forumite, and I will check carefully.

Green oak can be acidic so perhaps look at a Sikaflex that is suited to that.

Will do. It was very wet inside when initially sawn, but has been air-drying in my workshop for two years. Do you know if that reduces the need for knotting solution or should I still slather it on?[/quote]

Lots of pics please !

Will do.
 
Confused. You said in the first post that the oak was green and above that it has been seasoned for 2 years. If it has been seasoned then soak for a week before steaming. Unless you have some weird bends to the hull (which should be a fair curve) then I don’t understand why you wouldn’t want to mechanical fix. My preference would be copper nails and roves through both the inner and outer rubbing strips.
 
The boatyard here steams some very large planks out of doors in winter, instead of a pipe they use long tubes of clear polythene, like a condom but openable at each end, they were replanking one of those cruise boats based on a fishing boat hull with some hefty timbers but it seemed to heat up quickly and progress seemed rapid, otherwie your proposal seems sensible to me. It looked as if the tubes came from a carpet shop or similar but they can be made up quickly with flat 500g. sheet and a stapler, twin wall will heat up faster. You can't have too many cramps, most folk have 3 or 4 so worth a trip round friends and neighbours, colour code with electrical tape for identification.
 
I've just replace the oak gunnel and inwale of my Dyer dinghy. The bow is rounded so they had to bend all the way round in one piece.

The inner and outer part were fixed together with copper nails and roves. The roves on the inside were countersunk and put on 'back to front' so the domed over end was recessed.

If you have to join two lengths of rubbing strake, then polyurethane glue (eg gorilla) works well on steamed green oak as it's moisture cured.
 

Attachments

  • gunwhale.jpg
    gunwhale.jpg
    602.3 KB · Views: 39
  • gunwhale-2.jpg
    gunwhale-2.jpg
    698.8 KB · Views: 33
Last edited:
I've just done my dinghy - after initially trying a length without steaming and it snapping, I laminated up inner and outer lengths to approx the right curve, using 5mm wood and Gorilla glue,it worked well, screwed together from the inside with stainless screws. Just got to varnish it now.
 
Confused. You said in the first post that the oak was green and above that it has been seasoned for 2 years. If it has been seasoned then soak for a week before steaming.

Could be my confusion. I assumed that "green oak" was a type of oak ... does it just mean "unseasoned oak"? In which case is two years enough to season it? It's 3/4" thick.

Unless you have some weird bends to the hull (which should be a fair curve) then I don’t understand why you wouldn’t want to mechanical fix. My preference would be copper nails and roves through both the inner and outer rubbing strips.

I think glue should be sufficient and it's going to be glued anyway. What additional benefit would I get from screws or nails as well? There will be a couple of screws at each end.

The boatyard here steams some very large planks out of doors in winter, instead of a pipe they use long tubes of clear polythene, like a condom but openable at each end, they were replanking one of those cruise boats based on a fishing boat hull with some hefty timbers but it seemed to heat up quickly and progress seemed rapid, otherwie your proposal seems sensible to me.

I must remember to check that my pipe can take the heat. I'll lag it with something or other.

You can't have too many cramps, most folk have 3 or 4 so worth a trip round friends and neighbours, colour code with electrical tape for identification.

I'll ask around. I have about six big uns plus a box of twenty two-inchers I bought for the job. Colour coding is a splendid idea.

Thanks, everyone.
 
Hi JD, green oak is the name for unseasoned oak. After 2 years it is likely to be seasoned. Usual practice is therefore to soak in water for a week and then steam. Usual steaming time is 1hr per inch thickness. The other issue is grain direction; to bend it without splitting you really need the grain direction to be vertical. Glue, and in this case PU would be my choice, but secondary mechanical fixing would be prudent. You might get away with not using any but the twisting stresses on the hull transmitting to the rubbing strips could break the glue bond (or more likely split the wood fibres).

Steam boxes can be built of anything. We use large plastic bags (cylinders) with one end seal with a couple of clamp wood battens and the pipe end sealed around the steam pipe with string or cable tie (you are trying to raise the pressure a bit as well). Other options are a plastic soil pipe or a wooden box. Make sure you use thick gloves to handle the wood, it will be hot! If you have the steam bag(pie/box on the floor then some insulation underneath would help.
 
Hacker, do you mean that the grain should be vertical as one looks at the rubbing strake from a normal angle ?
 
This was my set up.

110mm PVC underground pipe sealed both ends with a very small hole for condensate to drain out drilled in the bottom of the pipe at one end and then wrapped in cheap duvets. I used a wallpaper stripper - very effective but you had to move fast after you took the steamed wood out, and yes, you need thermal gloves.

wood steamer.jpg
 
Not sure if this will help, but let's see! When building a stitch and glue dinghy, a D5, I was able to bend a strip of iroko about 1" X ¾" without steaming for use as the gunwhale. I clamped it in place using thickened epoxy, and screwed it to the plywood hull with stainless screws at about 12" centres. To make the curve, I simply drew it in section by section using the clamps.

The D5 doesn't have an extreme curvature, but iroko is notorious for having unpredictable grain. I'd certainly try it without steaming.
 
Hacker, do you mean that the grain should be vertical as one looks at the rubbing strake from a normal angle ?
Difficult to describe. If you hold the strake in its normal position against the hull and then look at the end, the grain should run vertically i.e the grain lines will be parallel to the hull side. You create the same effect as having a laminated strake so that the “plates” can slide over each other. If the grain is at 90 deg to the hull then you run the risk of it splitting when you bend. Hope that makes sense!
 
Top