DIY Chain Counter - Again!!!

Hurricane

Well-known member
Joined
11 Nov 2005
Messages
9,587
Location
Sant Carles de la Ràpita
Visit site
I decided to start this thread after several attempts at installing different chain counters since we bought our Princess 67 over 14 years ago.
I should have had a chain counter installed when we ordered the boat but - hey - thats the kind of thing I ought to be able to do myself!!!

OK - so the simplest form of chain counter is to add coloured markers or short painted sections of chain and deploy the amount of chain using coloured markers.
Well, thats what most people do so that what we have done as well.

But I thought I would make my own electronic system and designed the most complicated solution using an early single board computer called a Flyport, similar to a modern day IoT device.
Way back in 2013, I documented the design and posted my progress on this thread:-
DIY Anchor Chain Counter Project
Well, to cut a long story short, I installed it on the boat.
There was a big flash and a bank - and that was the end of it!!

A couple of years later, I dug out one of my spare Arduino boards and tried again.
All documented as usual - see here:-
Chain Counter - a Winter Project
Well, that one "kind of" worked but it was too integrated into my ships PC system and clumsy to use.

So, I decided to buy a "purpose made" chain counter/controller.
I chose one from Lofrans which I believe to have been supplied to them from MZ Electronics - see this thread:-
MZ electronic chain counter Nauti 011
I bought the wireless version because I don't have any wire space left in JW's electrical conduits to get any more wires from the flybridge down to the anchor locker.
This all worked but (being wireless) it always needed charging up.
A couple of years ago, my plan was to put a Lofrans wired hand controller (fitted in the chain locker) in parallel with the Lofrans wireless one.
Earlier this year, I checked it all out prior to adding the second Lofrans device, only to find that the buttons on the wireless controller had broken.
So, I scrapped the wireless one and fitted the wired Lofrans controller in the chain locker.
As my luck should have it, that one only lasted about 15 mins before failing.
Lofrans were very helpful but I had left it too long before fitting it and it was well out of warranty.

So, it was back to the drawing board.
What next?????
I left the boat in the middle of July this year thinking - what can I do next!!
And I have done just that - a new project - done during the summer months this year.

This is all completely unnecessary of course and definitely not a third world problem.
So, I will continue this story on subsequent posts

But just to bring those who don't know me up to date here is a thread explaining some of the various inventions (in no particular order) that I've fitted to the boat.
JW's Upgrades for 2016 - Anchoring
Actually, Ancam is one of the more successful things that I've fitted and does seem to work well.
see here:-
Adding a Camera

Anyway - I will continue the story in this thread by explaining the latest version of my chain counter - I bet you can't wait!!
 

markc

Well-known member
Joined
16 May 2001
Messages
2,154
Location
Bucks & St Raphael SoF
Visit site
I decided to start this thread after several attempts at installing different chain counters since we bought our Princess 67 over 14 years ago.
I should have had a chain counter installed when we ordered the boat but - hey - thats the kind of thing I ought to be able to do myself!!!

OK - so the simplest form of chain counter is to add coloured markers or short painted sections of chain and deploy the amount of chain using coloured markers.
Well, thats what most people do so that what we have done as well.

But I thought I would make my own electronic system and designed the most complicated solution using an early single board computer called a Flyport, similar to a modern day IoT device.
Way back in 2013, I documented the design and posted my progress on this thread:-
DIY Anchor Chain Counter Project
Well, to cut a long story short, I installed it on the boat.
There was a big flash and a bank - and that was the end of it!!

A couple of years later, I dug out one of my spare Arduino boards and tried again.
All documented as usual - see here:-
Chain Counter - a Winter Project
Well, that one "kind of" worked but it was too integrated into my ships PC system and clumsy to use.

So, I decided to buy a "purpose made" chain counter/controller.
I chose one from Lofrans which I believe to have been supplied to them from MZ Electronics - see this thread:-
MZ electronic chain counter Nauti 011
I bought the wireless version because I don't have any wire space left in JW's electrical conduits to get any more wires from the flybridge down to the anchor locker.
This all worked but (being wireless) it always needed charging up.
A couple of years ago, my plan was to put a Lofrans wired hand controller (fitted in the chain locker) in parallel with the Lofrans wireless one.
Earlier this year, I checked it all out prior to adding the second Lofrans device, only to find that the buttons on the wireless controller had broken.
So, I scrapped the wireless one and fitted the wired Lofrans controller in the chain locker.
As my luck should have it, that one only lasted about 15 mins before failing.
Lofrans were very helpful but I had left it too long before fitting it and it was well out of warranty.

So, it was back to the drawing board.
What next?????
I left the boat in the middle of July this year thinking - what can I do next!!
And I have done just that - a new project - done during the summer months this year.

This is all completely unnecessary of course and definitely not a third world problem.
So, I will continue this story on subsequent posts

But just to bring those who don't know me up to date here is a thread explaining some of the various inventions (in no particular order) that I've fitted to the boat.
JW's Upgrades for 2016 - Anchoring
Actually, Ancam is one of the more successful things that I've fitted and does seem to work well.
see here:-
Adding a Camera

Anyway - I will continue the story in this thread by explaining the latest version of my chain counter - I bet you can't wait!!
I started with a wired Lofrans one in the anchor locker but it didn't display properly, so I sent to Lofrans to repair, it came back 3 months later just as broken. Installed a wireless Lofrans one. That lasted about 3 days before breaking. I await your new solution with baited breath!
 

MapisM

Well-known member
Joined
11 Mar 2002
Messages
20,484
Visit site
the simplest form of chain counter is to add coloured markers or short painted sections of chain and deploy the amount of chain using coloured markers.
That's precisely what has worked for me, flawlessly and with zero maintenance, in the last 30 odd years.
Wake me up when an electronic gizmo with a comparable track record will be available! :cool:
 

Portofino

Well-known member
Joined
10 Apr 2011
Messages
12,293
Location
Boat- Western Med
Visit site
We have an “MZ electronic “ came with the boat .
Its a phaff to calibrate but once that’s done it’s works ok .
It wasn’t working when I got it , the fix was glue a fresh magnet on ally wheel on the windlass.
AA5C3843-E50E-4321-BDA2-D066B680CAE1.jpeg
That alloy wheel on the LHS has a little magnet embedded maybe 3x3 mm . You can see the grey wire for the pick up sensor nearby .
FD2BF5DD-BD1B-4A95-B6EB-7EDE8F0632C8.jpeg
Under the bow thruster panel.

But we hardly use it because Mrs Porto has to go fwd to un lock the anchor and she grabs the umbilical and drops it .
She reads the depth as she make her way to the bow .On retrieval it s gotta fit in the pocket and get washed if weeded up .We have a anchor wash too to blast of weed + mud clean the chain .


So she takes over that + locks it off for travel .
The Admirals learn by sight in the locker wether enough is out .
Waters pretty clear where we are , so you can see it , the chain straighten out as I obey the reverse orders .

Would i buy one , would I miss it = Nope .
Have I heard of “ MZ electronic “= Nope .
Does it work = Yes .
 

Hurricane

Well-known member
Joined
11 Nov 2005
Messages
9,587
Location
Sant Carles de la Ràpita
Visit site
That's precisely what has worked for me, flawlessly and with zero maintenance, in the last 30 odd years.
Wake me up when an electronic gizmo with a comparable track record will be available! :cool:

That's my current go to. although I do tend to forget what colour= what depth!

Yep, as I said above thats what we do.
SWMBO is responsible for the colour identifiers.
We have them stuck to the inside of the top of the chain locker hatch.
However, when we replaced the foredeck teak, I cut about 5m off the top of our chain.
I say "ABOUT" - I'm not sure EXACTLY how much I cut off.
I have been meaning to renumber the chain tags but until I've done that, we have been considering the chain is 5m shorter.
So the mental calculation is somewhat complicated.
Actually I still have the bit that I cut off so I could measure it and be more precise.
SWMBO is NOT happy about the shortage of chain!!

MapisM - you might remember that I bought 150m of 12mm chain when we were in Carloforte so we have plenty anyway!!

However, I will get it out of the locker sometime and remeasure it!!
 

Hurricane

Well-known member
Joined
11 Nov 2005
Messages
9,587
Location
Sant Carles de la Ràpita
Visit site
This next post is a bit like a requirement specification.

All my previous chain counter systems attempted to control the windlass as well as count the length of the chain.
This presents extra problems for an electronic system as it has to handle the switching of relays etc as well as reading the length of chain deployed.

But - think about it.
Virtually all boats with windlasses will usually have a simple switch to raise or lower the anchor.
On the foredeck, some boats will have deck mounted foot switches or (as in my case) a nice curly wired handheld button switch.
Most motor boats will also have switches on the helm positions (flybridge and main helms).
So, there is no need to duplicate these perfectly usable switches with complex electronics.

It is the counting of the amount of chain deployed that isn't usually offered as standard.
Most manufacturers do offer simple counters that will count the length of chain as it leaves and returns to the chain locker.
And they aren't that expensive - the Lewmar model being a few hundred quid.
Indeed, buying a Lewmar counter would probably be the easy option.
But I wanted something a little more flexible and I really liked the idea of building it myself.

With this in mind, I set about making a device that would simply count the chain as it is deployed and recovered.
Obviously, the counter should count the length (in metres) of chain that is currently deployed.
i.e. it should take account of the chain's direction (counting up as it is deployed and counting down as it is being recovered).
Also, some people prefer to deploy the chain using the windlass' motor whilst other people release the clutch and let the anchor run out more quickly.
In either case, any electronic counter system should accurately count the chain as it leaves the boat independent of whether an anchor switch is pressed or not.

So to keep the design simple, I decided to design just a counter.
It will just count the deployed chain.
Controlling the chain will be done using the anchor switches (or the clutch) already fitted to most boats.

Displaying the amount of chain deployed presents a problem.
Where can you mount a display that can be seen wherever you are on the boat - perhaps on the foredeck or on the main helm (flybridge or other).
Well - most of us have mobile phones so that would be a great way to display the amount of chain deployed.
Oh dear - I hear you iPhone lot say - will it a ?loody Android again?
Yes, the Android is a really great and easy device to use in this case but I decided to make my system work on both Androids and iThings.
In fact, it will also work on any PC - Laptops or fixed computer systems like my Jennywren's ships PC.
And, yes, I will make it work on any operating system - Apple Mac, Linux (or if you must) even Windows.

My next post will discuss the actual design.

The suspense must be killing you!!
 

MapisM

Well-known member
Joined
11 Mar 2002
Messages
20,484
Visit site
MapisM - you might remember that I bought 150m of 12mm chain when we were in Carloforte so we have plenty anyway!!
Yup, I do.
I'm not sure that knowing the length of chain deployed really matters anyhow, whenever deploying more than the typical 20 to 50 meters of Med mooring.
I mean, I can see the point of having 150m of chain of course, if you like anchoring with the lines ashore.
In fact, I half recall that you decided to fit a longer chain (and also buy some floating lines) after we anchored with MYAG in the small bay near Pan di Zucchero, deploying 100+m and reversing almost up to the beach, with two lines pulled from the stern to the shore.
But when you do that, you need a lot of chain only for the flexibility to bring the boat as close to the shore as you please.
Whether in doing that you're using 80 or 120 meters (or whatever), is totally irrelevant in practice.

Actually, nowadays I don't bother too much about the chain scope even in more ordinary anchorages, but for a totally different reason - i.e., that I'm increasingly fussy with age, and can't be arsed to move the boat in anything else than fantastic weather.
So much so, that while I used to have the Osculati marker things every 5m on the old lady, I fitted them only every 10m in the DP, and I find that good enough - the side bonus being that with fewer markers it's easier to remember their meaning... :D
This way, in most of my typical anchorages I either drop the first 2 or 3 markers (=20 or 30m), and that's OK 95% of the times.
I do care a bit more when overnighting, but still with no concern at all about the last 5 meters more or less, anyway!
 

Hurricane

Well-known member
Joined
11 Nov 2005
Messages
9,587
Location
Sant Carles de la Ràpita
Visit site
Yup, I do.
I'm not sure that knowing the length of chain deployed really matters anyhow, whenever deploying more than the typical 20 to 50 meters of Med mooring.
I mean, I can see the point of having 150m of chain of course, if you like anchoring with the lines ashore.
In fact, I half recall that you decided to fit a longer chain (and also buy some floating lines) after we anchored with MYAG in the small bay near Pan di Zucchero, deploying 100+m and reversing almost up to the beach, with two lines pulled from the stern to the shore.
But when you do that, you need a lot of chain only for the flexibility to bring the boat as close to the shore as you please.
Whether in doing that you're using 80 or 120 meters (or whatever), is totally irrelevant in practice.

Actually, nowadays I don't bother too much about the chain scope even in more ordinary anchorages, but for a totally different reason - i.e., that I'm increasingly fussy with age, and can't be arsed to move the boat in anything else than fantastic weather.
So much so, that while I used to have the Osculati marker things every 5m on the old lady, I fitted them only every 10m in the DP, and I find that good enough - the side bonus being that with fewer markers it's easier to remember their meaning... :D
This way, in most of my typical anchorages I either drop the first 2 or 3 markers (=20 or 30m), and that's OK 95% of the times.
I do care a bit more when overnighting, but still with no concern at all about the last 5 meters more or less, anyway!
Yep - I agree with all of that.
In fact, we had a really difficult experience a few years ago in Ibiza when there was a huge storm due and we had nowhere to go.
All the marinas were full so we found a small bay with some sand in the middle - set the anchor and then "wound" the boat ashore using about 120m of our 12mm chain and our super Rocna anchor dug in to th middle of the bay.
That night winds in excess of 50 knots came through, washing cars and restaurants into the sea.
But we were held firm - rock solid - I did just as MYAG taught me - tensioned everything up - we didn't move an inch.
Due mainly to that long heavy chain but also the floating rope that I also bought at the same time when we were in Carloforte.
Here's a pic showing us setting up that particular rig.

IMG_0481.resized.JPG

And this was the rain resulting from that storm


This is the excellent floating rope that we bought in Carloforte (I cut it in half so I actually have 2 of these on the boat)

20210712_125908.resized.jpg

This gives an indication of its size.

20210712_125932.resized.jpg

One of our better purchases.
I owe a lot to that experience with MYAG in the small bay near Pan di Zucchero.
 

MapisM

Well-known member
Joined
11 Mar 2002
Messages
20,484
Visit site
That night winds in excess of 50 knots came through, washing cars and restaurants into the sea.
Whoa! Good thing that such wind was blowing from the land for you, if the video is anything to go by.
If it were on the nose, I would have been very nervous with the boat so close to the shore regardless of how well the anchor holds.
Excellent job anyhow. (y)
 

Hurricane

Well-known member
Joined
11 Nov 2005
Messages
9,587
Location
Sant Carles de la Ràpita
Visit site
Just a quick addition to my previous post on the requirement.
Any electronic chain counter should keep the amount of deployed chain even if the system is powered off.
And, obviously, it's reading should return to zero when the anchor has been fully recovered.

Now on to the design

Virtually all the windlasses on the market use a magnet fitted into the windlass' gypsy.
A reed switch is then fitted into the body of the windlass.
The magnet in the gypsy causes the reed switch to make contact at every revolution of the windlass' capstan.
This "make and break" contact is used by chain counters to record the number of revolutions of the capstan/gypsy.
The software in an electronic chain counter then multiplies the number of revolutions by the circumference of the chain round the gypsy.
The result is the length of chain deployed.

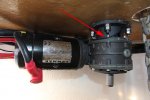
Here is a photo of the wire that connects to my windlass reed switch.
The wire feeds through the windlass flange to below the deck just above the windlass gearbox.

IMG_3140.resized.JPG

The trick of any electronic chain counter is not to "miss" any rotations (reed switch switching) nor to get any false rotations recorded (reed switch contacts bouncing etc).
In my previous designs, I relied on interrupts which are "low level" software routines that a CPU/chip will execute when a specific event happens.
These interrupts take priority over anything else that the CPU/chip might be processing at the time thus allowing that specific event to be processed without missing that event.

The difference in my new design is that it doesn't attempt to operate the windlass so the logic is much simpler.
In this latest design, I chose to work the logic as follows:-
Every time that the reed switch is closed (the rising edge of the switch) the system will consider the chain to be deploying, unless the powered "up switch" (hand held, foot operated or helm switch) is closed.
In which case, the system will consider the chain is being recovered.
Using this approach, the counting device only needs two interrupting inputs.
This simple logic works in all cases - even if the anchor is deployed using the windlass clutch.

The other challenge that a chain counter has to overcome is to display its results.
In my case, I want to use mobile phones, tablets and computers to display this information.
That means lots of specific Apps to display the deployed amount of chain on all device platforms - i.e. mobile devices and all types of computer.
or
.
.
.
.
Make it work using any device's web browser.
Then all you would need to do is "browse to the chain counter" to see the amount of chain deployed.
To make that work, the device would need to include a web server but then it would work on any device.

So now we get to the crunch.
What did I use to count the revolutions and display the results using a web server.

Some of you may have guessed - it is a Raspberry Pi.

For those of you who have never heard of a Raspberry Pi.
The Raspberry Pi was designed in the UK by the Raspberry Pi foundation, primarily as an aid to teaching children basic programming skills.
It is a credit card size SBC (Single Board Computer) and costs about 35 quid.
Over the years, the Raspberry Pi foundation has improved the design and supply a number of different designs and there are now, literally, millions of them in use around the world.
Their current flagship version is the Raspberry Pi 4 which (importantly for this project) includes USB and Ethernet ports, internal WiFi and a multi header connector that can connect to external inputs and outputs.
I used that multi connector header to sense the windlass capstan reed switch and detect the anchor "up button".
Actually, I used an older model - the Raspberry Pi 3 which has most of the features of the Raspberry Pi 4.
Over the years, the "Open Source Community" has worked with the Raspberry Pi Foundation and now offers a fully featured version of the Linux operating system.
Linux is a free Open Source alternative to the other big expensive operating systems.
There are literally thousands of applications that will run under Linux on the Raspberry Pi

Here is a photo of a Raspberry Pi 3
91zSu44+34L._AC_SX450_.jpg


One application that is used everywhere on the internet these days is "node.js" which allows Javascript applications to run.
node.js allows addon software libraries and, importantly for this project, node.js runs on the Raspberry Pi.
One such library for node.js that I found is called "onoff" and works really well with the Raspberry Pi Input/Output header.
And a big bonus, that library also takes all the hard work out of using interrupts.
I did a few tests and proved that it doesn't miss switches and incorporates a "debounce" facility to stop any unwanted switching.
Another feature of node.js is that it can also be used as a web server.
The web server is a bit strange if you are used to a conventional web servers but it does the job for this little application.

So, to recap, the design that I adopted uses a Raspberry Pi, Linux and node.js.

If it isn't too boring, I will discuss my actual implementation and software in subsequent posts.
I have a few photos of it working as well so watch this space.
 
Top