What Type of Hatch Bolts and Glue?

The Real Flipper

Well-Known Member
Joined
16 Feb 2022
Messages
185
Visit site
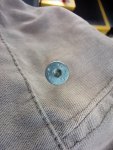
I am rebedding a leaky modern Lewmar hatch that was badly fitted to the boat. Four bolts (see attached) are missing so I need to identify the correct type. They say 'R.S A2 70' and I'm guessing R.S means Rustvrijstaal or stainless steel.
Question is this: Isn't the hatch aluminum? And aren't you supposed to not mix steel and aluminum because corrosion? Then it's more confusing because there doesn't appear to be any corosion.

So which bolts do I buy??

Easier question: what kind of silicone should I use to seal it? I have both 'mastic' and 'bath and shower anti fungus'. Leaning toward the later but I don't know...
Thanks again for any suggestions :)
 

Attachments

  • IMG_20220821_132711_103.jpg
    IMG_20220821_132711_103.jpg
    704.4 KB · Views: 52
A2 stainless is fine. Bed on a non setting sealant such as butyl from a tube or as a tape, and put a smear around the screw thread and under the head. That will be sufficient to keep the stainless away from the aluminium. Do not use bathroom type sealant as it does not adhere well to GTP and aluminium.
 
Stainless would be usual choice and with Duralac applied as anti-corrosion barrier :

Duralac Anti Corrosive Compound for Stainless and Aluminium (PB) 115ml

As to sealant ... I assume you mean around the joint ? I'm sure many are going to point at various brand names or types ...

Many Household Silicon based are unsuitable ... I much prefer a soft sealing gasket instead of 'liquid' .... but that's me.
 
The members of this forum have concurred in previous threads that silicone sealants have no place on a boat.
Tranona mentions butyl tape and Refueler mentions a soft sealing gasket, which pretty much amounts to the same thing.
Search the forum, or Google, which will more efficiently bring you to relevant threads on the forum, to find out the technique for using butyl.
You could of course use a marine sealant in a tube, but use a sealant , not an adhesive sealant. There are refinements to the use of these, also to be found on previous threads, or in PBO knowledge articles on the YBW website.
For isolating the s/s from the aluminium, Duralac is fine. There is another, less messy, (reputedly), brand, whose name escapes me at the moment. Other members will come along with the name, as will those who wish to recommend various types of marine and construction sealant.
 
When I fitted a new Houdini hatch a couple of years ago, the fitting instructions specified using a butyl sealant in preference to a silicon sealant, and a cartridge of butyl sealant was in fact supplied with the hatch.
 
Oh felluhs thanks again for the assistance. Now off to the hardware store for some butyl sealant and stainless bolts.

I'm also thinking of adding some kind of mosquito screen, and a sun screen as well. Something that might slide out or roll back would be great. This time of year The Netherlands has no shortage of mosquitos and early morning sun ;-)
Those items would undoubtedly be available as accessories from the manufacturer of the hatch.
 
Those items would undoubtedly be available as accessories from the manufacturer of the hatch.

Guess I'm showing my 'rookiness' again. But I have been thinking from the beginning that the hatch didn't look exactly great.
You can see the boat frame from under, and headlining is just left loose hanging there, and there's a big ugly gap all around.

And just now while googling 'Lewmar hatch bug screen' I discovered that a bug screen comes with the hatch trim, a part that's (now obviously) missing from my boat.
Again more weirdness with this boat- first it's a 12,000 Euro engine, they didn't bother properly aligning, now it's an 800 Euro hatch without trim.
What will I find next, a keel with no weights inside LOL.

Anyway, you're absolutely right, the OEM hatch trim is clearly the solution to a few problems- the ugly gap, the loose hanging headlining, and a mosquito/bug net.
Not to complain. I feel lucky now that I know how much this hatch costs! And that there is a clean solution to a few problems, not requiring duct tape :)

I'm willing to DIY most stuff to save a few bucks, but in this case I'll kick for the trim and screen as I'll probably spend half as much in materials and come up with something that looks crap in comparison. This one's a no-brainer.

Thanks again!
 
So I finished the job, and I ended up using this stuff (see pic below).

Problem is it's not drying. It's been two warm days and it's still wet and gooey.
Should I keep waiting? Did I miss something? A required hardener?

01.jpg
 
Butyl doesn’t harden. You should expect some creep out and you might need to retighten the fixings. Just cut away the excess.

Oh crap. so the butyl is not not actually providing any structural support. Funny sea water doesn't just wash it away eventually, if it doesn't ever harden.
I guess then it won't hurt to do another round of tightening as the stuff is still soft so it won't hurt anything to cinch it down a bit.

By the way I found the Lewmar trim piece with bug screen for a hundred Euros from Poland. Says it's real. That will make it look a whole lot cleaner.
 
I use Butyl tape and fit a stainless washer between the hatch and deck. The Butyl won't be squeezed out when bolts tightened. Works for me and not so messy as tubes of sealant.

Yeah I hear you. I might do the same next time as well. I just assumed I preferred to tube as I'd worked with silicone in this way before, so how different could it be. I didn't want to complain but that sealant was one heck of a mess to clean up. I managed to get the stuff everywhere. And just cleaning my hands was like a side job. LOL.
 
So I finished the job, and I ended up using this stuff (see pic below).

Problem is it's not drying. It's been two warm days and it's still wet and gooey.
Should I keep waiting? Did I miss something? A required hardener?

View attachment 141548
If the hatch was previously sealed with a silicone sealant it is quite likely that it is inhibiting the cure of the butyl. This is a very common problem with many paints and sealants. As said, butyl does not harden fully and will extrude from between bolted surfaces but it should definitely not be wet and gooey.
 
If the hatch was previously sealed with a silicone sealant it is quite likely that it is inhibiting the cure of the butyl. This is a very common problem with many paints and sealants. As said, butyl does not harden fully and will extrude from between bolted surfaces but it should definitely not be wet and gooey.

Oh no... Well I cleaned it up as best I could given the heat and humidity circumstances lately, and the boat being in the middle of shade free black asphalt.
In my not so very uh- 'athletic' condition I considered it a victory that I didn't pass out.
Excuses aside- it wasn't a perfect clean of the silocone. There were little bits here and there. I scraped it a lot but some seemed like it really had to be sanded to remove and I wasn't quite prepared to do that to my fancy Lewmar hatch.

I'll take all the four letter words offline if I have to do this job again :)
But it's definitely wet and gooey. Was yesterday anyway. Haven't been out yet today.
Fingers crossed.
 
So I spent the weekend on the boat and (I think it was Vyv_Cox's) advice to wash the boat to help keep the moral up.
Unfortunately this revealed more issues.
The hatch that I just resealed leaked. And the butyl is not curing or drying at all. It's just sticky and gooey.
And there is another problem which I almost out of desperation hoped wasn't a problem and tried to work around but probably shouldn't have.
Anyway, whoever installed the new Lewmar hatch just threw it in there and drilled and didn't center it front to back.
So it's touching the wood support structure on the fore side, and basically the bolts are in thin air on the other side (see photos) held in place only by washers. I'd hoped the sealant would provide some support and hold it all in place but no. I used a dremmel to drill a few shallow troughs for the bolts to rest in and hoped the washers would hold it all steady. But now I think it needs some kind of support in there.

BTW, I thought of leaving the side and fore bolts alone and just pulling the one's without support (aft bolts) and just putting a piece of wood or something in there, but I don't know.

Once again, any suggestions?

Aft:
Aft (1).jpgAft (2).jpgAft (3).jpgAft (4).jpgAft (5).jpg

Fore:
Fore (1).jpgFore (2).jpg

Sides:
Sides (1).jpgSides (2).jpgSides (3).jpg
 
Not easy to see from the photos but it looks as if you need to fill in the gap between the deck and the hatch frame. You could use a piece of suitable thickness marine ply to make a frame. Take the hatch out and lay the ply on the deck and scribe the opening; then centre the hatch on this and scribe that. You will have something resembling a picture frame. Assuming not significant camber to the deck this should provide a suitable fill. This needs to be well sealed in epoxy (3 coats). Use thickened epoxy to fit to the existing deck ply and fix with screws into the ply (ideally bronze). When you fix the hatch down use the over sized holes filled with epoxy to stop any potential water ingress to the ply. If the opening size won’t take the picture frame then just line with suitable sized infills but treat as above. I’m sure others will have alternate options.
 
Looks like it is the wrong size hatch for the hole, probably because a direct replacement was not available. Probably needs removing and starting again by building a new frame inside the old. Difficult to determine exactly how to go about it without seeing what the original hole is like and the dimensions of the new hatch, The flange of the hatch needs to land on something solid across most of its width and bolts go through something solid. Otherwise it will be difficult to seal.
 
Top