The major restoration of Chance (Token) James Silver Western Isles Motor sailer

jstarmarine

Active member
Joined
21 May 2021
Messages
436
Visit site
I'm looking forward to watching the reconstruction.

I must start a thread on my little refit project.
Hi Ben,
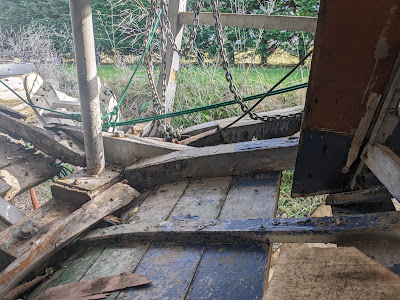
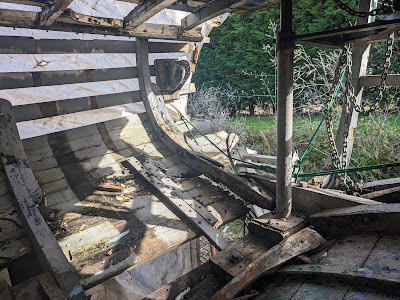
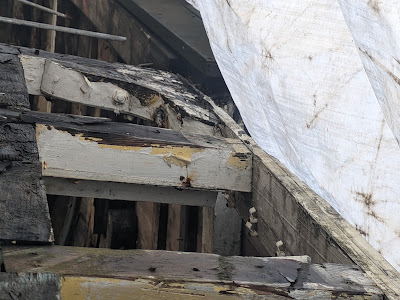
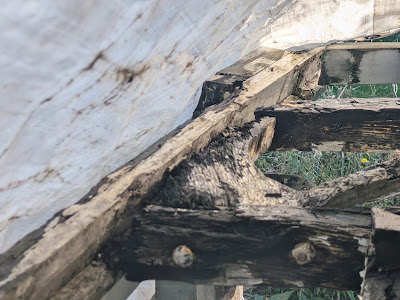
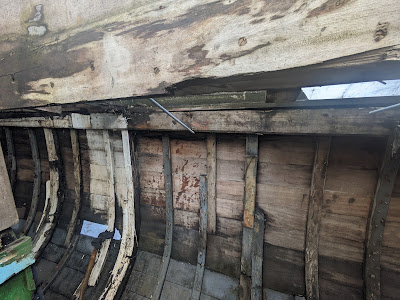
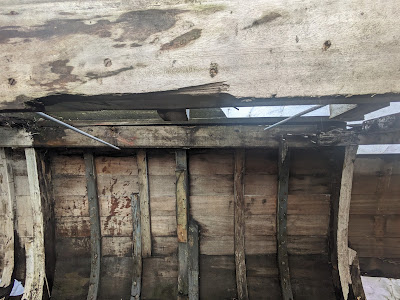
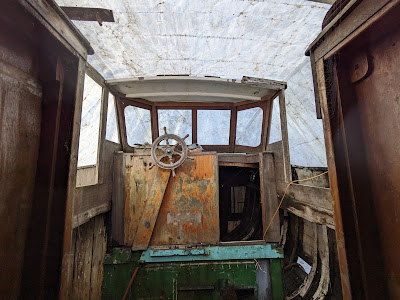
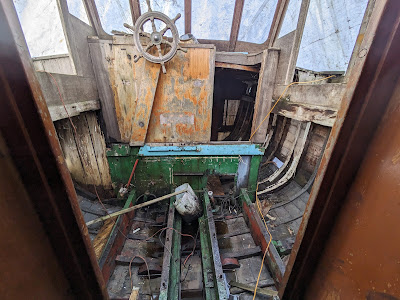
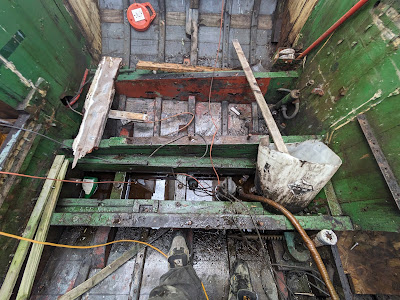
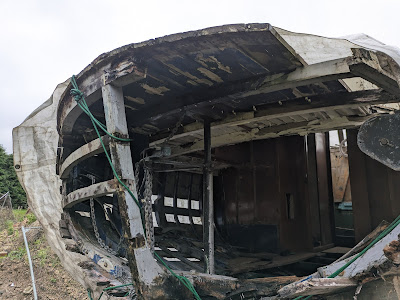
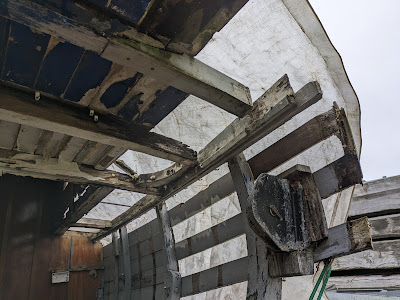
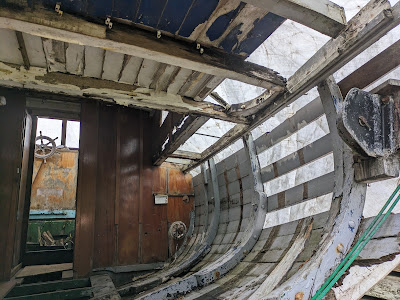
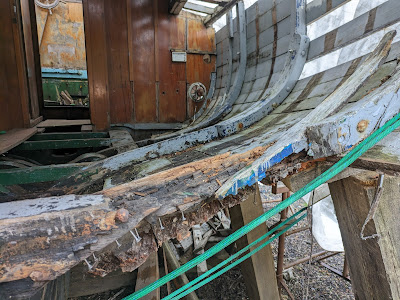
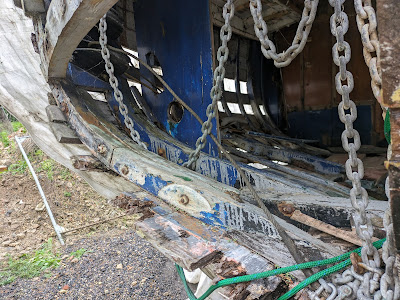
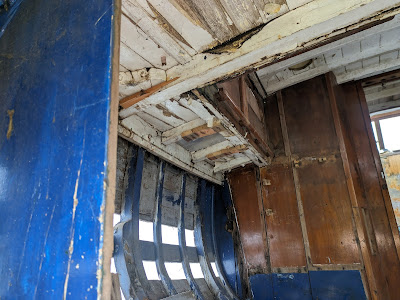
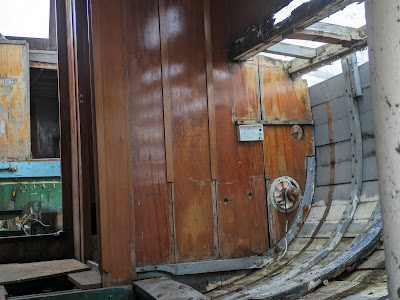
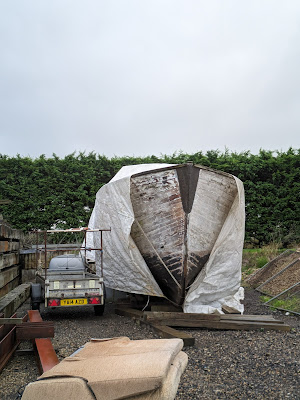
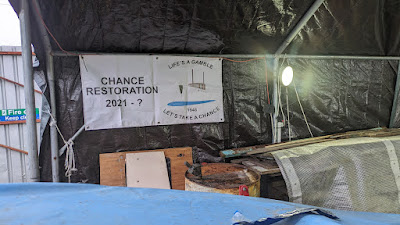
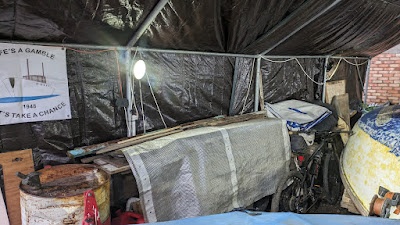
It will be good to get back to working Chance and Mai Star II again now that I have an extra pair of skilled hands and can help me with some of the more major tasks which lay ahead. The first job of both boats is to make up a list of priority jobs that need doing before any of work can get underway. in the case of Chance it will be to sort out the frames on the starboard side which are out of shape because of the beam shelf been not connected to the carlin and the whole area was unsupported for a long time. So there going to have to be a lot of extra shoring up to be done to bring that part of the boat back into shape . Once the hull is back in its correct position then the frames and ribs can go back in and the new beam shelf can be made and fitted and the tie rods can be made and fitted along with new deck beams along the starboard side deck and the aft deck beams replaced at the same time. So a lot of fun ahead over the Autumn and winter months to come.
 

jstarmarine

Active member
Joined
21 May 2021
Messages
436
Visit site

Next major project on Chance, Starboard beam shelf and deck beams and transom framework.​

The next major job that will be undertaken by the Chance Restoration team will be the removal of the starboard beam shelf the short side deck beams and the aft deck beams.
The first part of this job will involve removing all the teak laid deck along the starboard side deck and then across the aft deck and along the port side to expose the aft deck beams, so that they can be removed and new deck beams made to replace the old damaged beams which had been cut off when the starboard side deck beam was replaced at sometime in the past. The deck beams along the starboard side deck will have to be renewed as well as they had the same treatment as the aft deck beams, Cut off short and not refixed to the new beam shelf when the beam shelf was replaced. Also along the starboard side the tie rods that connect the beam shelf to the carlin were cut through and not remade and new tie rods fitted to connect the parts of the hull structure together. if this job had been done correctly we would not be facing this problem now.

At the same time as the beam shelf is being sorted the last frame in the starboard side will have to be remade and fitted. Once this is done the framework for the transom can be made up and once the starboard side as been brought back into its correct shape and position then the transom can be reskinned in the way it was originally made up.
 

jstarmarine

Active member
Joined
21 May 2021
Messages
436
Visit site
At long last got a cover bigger enough to cover Chance and keep out the weather from the boat while we work on her over the next few months
At long last got a cover that is able to cover the top of Chance and down the sides to keep the weather off Chances's hull and deck and make it able to work on the inside over the winter and beyond.


Now it is just a matter of getting the cover over the stem and over the top of the cabin and the rest of the superstructure and then try it down.


With a bit of careful pulling we were able to get it over the top of the foredeck and then over the wheelhouse and over the aft cabin and now it is done it is time to get to work on the inside as well as the starboard side and transom.


jstarmarine

Active member
Joined
21 May 2021
Messages
436
Visit site
The first job to do over the next couple of weeks, The last two frames on the starboard side of the hull towards the transom & the removal and replacement of the beam shelf.
Looking aft at the last two frames on the port side, it is possible to see the problem there is with the starboard side.


The starboard side is rotten and broken and is not connected any part of the boats hull and that the starboard side as fallen away badly and is going to need a lot of shoring up to get it back into the correct position once more.


As can be seen from this photo the starboard side is in a very poorly condition with out a lot of connection between the beam shelf and the lodging knees which are all going to need replacing in due course.


This lodging knee is so rotten that the only thing that can be done is to take a pattern of what is left and take another of the port side to see how much of the starboard side knee is missing and make up a new knee to put in place of the rotten and broken starboard knee.


Also the starboard beam shelf is in three pieces at the moment which we will put back in two pieces with a long step scrape in the mid section and will be fixed to the frames and to the carlin with deck beams and tie rods to be the same method as it was when Chance was originally build.


jstarmarine

Active member
Joined
21 May 2021
Messages
436
Visit site
This area was neglected for so many years, One of the major jobs in this area will be to a deep clean and dry the whole area out and get rid of all the old items that are not going to be used again.


So it is out with the cleaning gear and empty the bilge and wash down the bilges and get rid of all the rubbish that as find its way into bilges.


We got to start some where and it might as well the cockpit and then work out from there.


These old gear shifrs are coming out as they are no longer going to be used and take up room in the cockpit bigles.


The seacocks will be comiong out and get serviced and put back in later in the restoration.


jstarmarine

Active member
Joined
21 May 2021
Messages
436
Visit site
Be a good idea to check those sea cocks can flow enough water for your proposed engines, they don't look very substantial.
Hi Penfold,
The old engine were 3 litre engines and they were up to the job, however, I understand your advice, the bore on the inlets are 1" bores and the bore I think is up to the job. However, I will ask my engine manufacturer to let me no what bore inlets he feels is the correct bore for the engines I am wish to put in place of the old engine and be guided by his advice.

Regards

Simon
 

penfold

Well-known member
Joined
25 Aug 2003
Messages
7,733
Location
On the Clyde
Visit site
It's not just the inlet bore, the outlet bore and how restrictive the strainer is are also important; the type made of perforated sheet metal have very poor flow characteristics even when new.
 

jstarmarine

Active member
Joined
21 May 2021
Messages
436
Visit site
It's not just the inlet bore, the outlet bore and how restrictive the strainer is are also important; the type made of perforated sheet metal have very poor flow characteristics even when new.
Hi Penfold,
That is why I am taking advice from the engine people about how large an intake they feel is going to be the correct size for the engine and will be guided by their advice on the size of the intakes. The old intakes will be coming out either way as they need servicing if nothing else. The gear shift units as well as they are in the way.

Regards

Simon.
 

jstarmarine

Active member
Joined
21 May 2021
Messages
436
Visit site
Good grief. That level of repair scares me to death. Good on ya.
Hi Ben,
The scale of the repairs are great if you take it as one, I have broken it down to areas to be done one at a time. Some of the areas overlap each other. However, if you break it down to smaller jobs and tackle one at a time and do not rush the job you will get there in the end. One of the reason I am doing the job is to train my apprentices how older classic vessel were constructed and how they have to be repaired and restored. So that we do not lose the skills to repair and restore these old classic boats and have than round for future generations to enjoy.

Regards
Simon
 

jstarmarine

Active member
Joined
21 May 2021
Messages
436
Visit site

At last we have the materials to get on with the starboard side beam shelf and the transom rebuild, so we can get the work underway over the next few months between other work comittments
 

jstarmarine

Active member
Joined
21 May 2021
Messages
436
Visit site
The size of the task ahead is large if you take as a whole job to do in one hit. That is why we are doing a bit at a time.


The first job is to get the starboard side back into position by shoring up the starboard side. That will be done by taking a pattern of the port side that is in the correct shape.


So the first job is to take all the bits that are holding the starboard side in the wrong position and parts that are heavy such as the steering turning block and its backing pad.


Also the lower part of the rotten frame which needs removing to let the whole of the starboard side be loose to be able to move to whatever position need to move it to to that it back where it should be. So we are going to use jacks and blocks and shores to get the shape back and also block and tackles to pull the starboard back to to the position it should be.As can be seen in the photos the starboard side as moved out by an inch and half from its original position.


The port side although in a poor condition is for the best part in the correct position and we are able to take patterns off the side to make up the starboard frames.


jstarmarine

Active member
Joined
21 May 2021
Messages
436
Visit site
Now that the cover is over the superstructure the inside can start to dry out and make it possible to work on the inside.


So we can do areas one at a time. The largest job is going to be sorting out the aft cabin and get the deck removed to get the beams and beam shelf removed and replaced on the starboard and remove the aft deck to make ne aft deck beams to tie the aft end of the boat back together again.


Once the aft deck is removed we will be able to make new quarter knees for the transom and connect the transom to the beam shelf back together again and that way the back of the back of the boat will be able to keep its shape once more.


At last now we have a cover over the superstructure the boat will stay dry. We just have to get small covers for the ends to completely cover it in and keep any weather or rain out of the boats superstructure.


jstarmarine

Active member
Joined
21 May 2021
Messages
436
Visit site
Sorting out a small area in my yard where I can sort the floorboards under cover and so they can dry out over the past few months.


The many problem with the floorboards was that they have been in Chance for such a long time without any chance to dry out and so became water logged ad so they were taken off Chance and brought to my yard and under cover and so they could dry out.


Now that Chance as a cover over her the floorboards in some parts of the boat can go back in position and help us be able to set up a small bench in the main cabin and a small galley area so we can keep ourselves warm with a brew during the time we are working on Chance inside as well as outside over the winter.


Picking up the floor bearers we have got left when Chance was dismantled and see which can be reused and which can be repaired and what will need replacing so that the floor can go back down in the fore cabin galley and main cabin and the compainway from the aft cabin to the cockpit.


Starting to clean off years of paint and old fixing where they are still in the bits of floor bearers


Some just need a cleaning and sanding back and a fresh coat of paint


Top