Repairing a Quicksilver inflatable dinghy

ProDave

Well-known member
Joined
5 Sep 2010
Messages
15,519
Location
Alness / Black Isle Northern Scottish Highlands.
Visit site
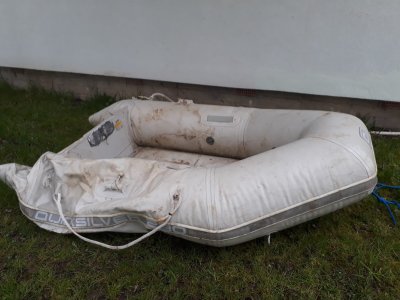
Today I was gifted a Quicksilver inflatable, not been used for many years, just been in it's bag in his garage. I have got it home, unpacked it, removed the dead rat!!!! and tried inflating it.

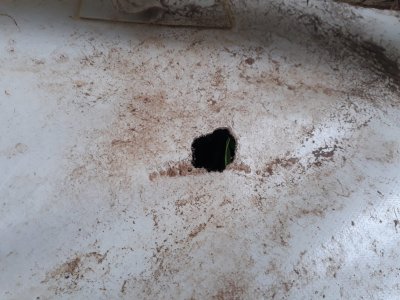
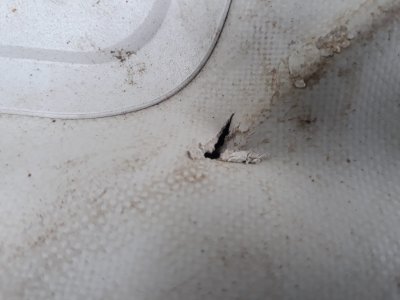
Starboard tube, front tube and keel tube hold air, port tube has one leak and floor also has a hole. It's my opinion it is worth trying to repair it. I suspect the rat was the culprit that made the leaks, not rotten material.

I intend to repair it, thinking a patch on the one tube leak, and a patch inside and outside on the hole in the floor.

So first question has to be what material will this be and hence what type of patch and what adhesive.
WhatsApp Image 2023-05-01 at 16.33.21.jpeg

WhatsApp Image 2023-05-01 at 16.33.40.jpeg

WhatsApp Image 2023-05-01 at 16.34.07.jpeg
 

diverd

Member
Joined
27 Mar 2020
Messages
59
Location
aberdeen
Visit site
Thats an easy fix, and you could do it a few ways. I did one with similar damage for a friend recently, and though the way i did it is not by the book it works well. The boat came with a small piece of the tube fabric. I cut a disk a little bigger than the hole, cleaned it inside with toluene on a cloth pushed through the hole and then applied bostic 2402 to the inside of the tube. I did the same with the patch, and then pushed it through the hole and manouvered it into place. Usually you would wait till the bostic is touch dry before putting the patch on, but thats just not possible with an inside patch, so i put it in with the glue 2/3 dry, and though it slipped arount a bit it cured and made an airtight inside patch, where the pressure increases the seal. Once this was fully cured, i heated aquasure in hot water to make it thin and runny, and rubbed it into the outside of the patch with a wet finger, rubbing it into the visible canvas and around the edge of the hole / patch. I left it to dry and then did it again, both coats super thin, soaking into the damaged canvas like material where the rubber of the fabric had been abraded away. I left this overnight to cure, and then put on a traditional external round patch, after cleaning the tube with toluene and giving it a very light sanding. Once this was cured i again put on a super thin smear of hot aquasure round the outside, just to soak into the edge of the patch, where the canvas middle layer of the patch was visible.
There are plenty of repair kits for dingys on line, and some list quicksilver in their description and come with glue.
 

ProDave

Well-known member
Joined
5 Sep 2010
Messages
15,519
Location
Alness / Black Isle Northern Scottish Highlands.
Visit site
Thanks. This one is clearly an old model, it's model No on the rating plate is AA230QSON It has a hard floor. (not fitted in my photo)

The nearest I can find from the current range is this one, but that says PVC. TENDY 200 / 240 | Quicksilver Inflatables

Any way to determine beyond doubt if PVC or hypalon.

The tube leak, good idea to try and slip a patch inside and then another outside.
 

ProDave

Well-known member
Joined
5 Sep 2010
Messages
15,519
Location
Alness / Black Isle Northern Scottish Highlands.
Visit site
I have just been searching through all the "bits" i got with the boat and found a "repair kit" which contains a number of repair patches and a dried up tube of glue.

The glue describes itself as "Boat Repair Cement, Contents: Polyurethane MEK"

Any suggestions what glue to buy?
 

blush2

Active member
Joined
26 Dec 2008
Messages
263
Visit site
When we needed to repair a burst seam in our XM dinghy I found a site that explained whether it was PVC or hypalon, think it was via Bayside marine.
 

ashtead

Well-known member
Joined
17 Jun 2008
Messages
6,373
Location
Surrey and Gosport UK
Visit site
We have a slightly larger and healthier quicksilver which dates from circa 2001 and going strong. It came with a manual and a round plastic tube contains patches plus glue (now rather dead I suspect) but it occurs to me that a manual for quicksilver might be a source of info? I’m not near the manual but maybe one is on the web etc. I was going to say that diverd description look worth keeping for future reference though. The other thing you might find is you need a new bag as the original one is a real pain to use once on board. How do you propose to clean it up once patched?
 

ProDave

Well-known member
Joined
5 Sep 2010
Messages
15,519
Location
Alness / Black Isle Northern Scottish Highlands.
Visit site
I don't have the manual, but would be interested in a copy if anyone knows where one can be downloaded bearing in mind this appears to be an old model no longer available with some differences to the current offerings.

To clean it I will start with a blast from the pressure washer then some elbow grease with detergent. I am waiting to do that until at least the tube leak is fixed otherwise I could get water inside the tube that I can't remove. For the tube leak I will first just clean the patch area carefully.

I am going to the chandlers today with my repair patches and tube of dried up glue to see if they can recommend the correct glue for the material (assuming the supplied patches are the same material as the actual tubes)
 

andsarkit

Well-known member
Joined
27 Aug 2015
Messages
1,258
Location
Dartmouth
Visit site
Is this any help? Ribstore
I haven't tried it, but I suspect if you attack a corner of the repair patch with a soldering iron, PVC will melt and the hypalon will just smoke.

Edit. Just tried this test and the hypalon seems to be completely heatproof. Ideal if making a quick exit from a burning boat. A PVC tender would turn into a useless molten lump.
 

ProDave

Well-known member
Joined
5 Sep 2010
Messages
15,519
Location
Alness / Black Isle Northern Scottish Highlands.
Visit site
It is PVC, glue bought yesterday, test of a fragment of repair patch shows the glue works.

I did @diverd method a small bit of patch wriggled through the hole and forming a small patch from the inside, then almost immediately inflated just a little to try and hold it in place. That seems leak tight.

Today having left the first patch a good time for the glue to cure, I inflated it further to get the tube to something like it's proper shape. The small internal patch was holding. So now the proper outside patch has been glued on.held down to keep it still and keep pressure on it with duck tape.

Then I did the floor patches inside and out, now sitting with a heavy object to apply pressure to keep them helt together while the glue cures.

Now back to waiting while the glue cures properly on the repairs.

Pictures will follow later.
 

ProDave

Well-known member
Joined
5 Sep 2010
Messages
15,519
Location
Alness / Black Isle Northern Scottish Highlands.
Visit site
All completed I think.

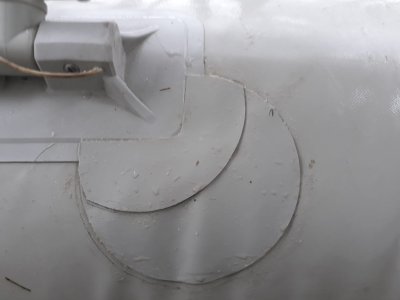
The repair to the tube leak was close to one of the rowlocks, so I cut the corner off a patch so the patch was not going up a step. I then felt I wanted a bit more coverage in that area so put a second patch covering the "joint" That was probably unecessary.

WhatsApp Image 2023-05-05 at 09.48.10.jpeg

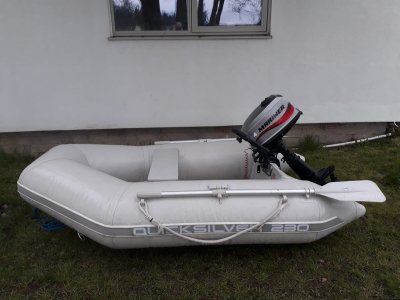
And here is the complete boat cleaned up a bit and fully set up.

WhatsApp Image 2023-05-05 at 09.48.30.jpeg

Getting the floor in was a right difficult job, it is 3 solid boards in this boat, not something I want to repeat in a hurry.

The motor a 4HP 2 stroke Mariner came with it. All that needed was the old gummed up fuel removing and filters cleaned and it started first pull. The motor is dated 2003 so 20 years old so I would have a guess the boat is the same age.

4HP is a bit big for using it as a tender, it will apparently get on the plane with that.

Give it a few days to make sure nothing deflates and it will be ready for sea trials.
 

ProDave

Well-known member
Joined
5 Sep 2010
Messages
15,519
Location
Alness / Black Isle Northern Scottish Highlands.
Visit site
I thought inflatable floor versions the floor was built in?

I will treat it as a miniature rib, and never take the floor out. I can carry it as it is on the roof of my car or in my trailer and tow it behind our boat as a tender. So no need to ever fully deflate it and fold it up.
 

ashtead

Well-known member
Joined
17 Jun 2008
Messages
6,373
Location
Surrey and Gosport UK
Visit site
No on our slightly longer version the floor and and a separate inflatable centre piece I think lift out so you can remove sand and grit etc. if you plan on planning yours some form of tiller extension might help for weight distribution we find.
 
Top