Nimbus spruce up

colhel

Well-known member
Joined
9 Jan 2011
Messages
3,979
Location
Gillingham(Dorset) Boat Weymuff
Visit site
So now Infinity has been hoisted and is out of the water for the first time since December 2019 the planned spruce up can get underway. The amount of work I attempt will depend on my enthusiasm, the weather and other stuff getting in the way. It might end up that I just squirt it with a jet washer in March and launch in April.
boat.jpg

Looking first at the outside jobs that need doing.
First thing I noticed was the prop anode had completely gone. Bit of an unusual set up due to the shaft having no tapped hole to fix an anode so I made my own prop nut out of alli bronze to accept an off the shelf anode.

Prior to launch in 2019
prop new.jpg

A few days ago
prop old.jpg

Some damage to the topsides needing some tlc
scratch.jpg

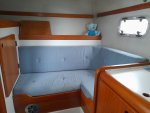
I've made a start on the woodwork.

Riders On The Stormthe doors 1.jpg
 

colhel

Well-known member
Joined
9 Jan 2011
Messages
3,979
Location
Gillingham(Dorset) Boat Weymuff
Visit site
As wood renovation is something I've never really tried, I started on the easy bitstrim prep.jpg

trim fitted.jpg

These are the door frames and trim that are in the entrance to the pointy bit

trim 2 1.jpg

trim 2.jpg

Stripped, scraped and sanded where necessary

trim 2 2.jpg

and varnished ready to fit

trim 2 4.jpg

This either the heads or side cabin door with a coating of stripper bubbling away

door one.jpg

After scraping with a cabinet scraper, I used Wessex's two part teak cleaner and renovator
door 3.jpg

door 2.jpg

When it dries, more of the old varnish becomes visible. so more scraping needed

door 4.jpg
 

swifty

Member
Joined
14 Jun 2005
Messages
135
Location
Cambridgeshire
Visit site
I did the same with the wood on my Nimbus and restored it, when I refitted the parts where the screws were seen. I used what you call mirror fixings where the screw is used to attach the item then a screw in cover covers the screw. There is a big selection of these I used ones that had a brushed stainless steel effect they look good.
 

colhel

Well-known member
Joined
9 Jan 2011
Messages
3,979
Location
Gillingham(Dorset) Boat Weymuff
Visit site
I did the same with the wood on my Nimbus and restored it, when I refitted the parts where the screws were seen. I used what you call mirror fixings where the screw is used to attach the item then a screw in cover covers the screw. There is a big selection of these I used ones that had a brushed stainless steel effect they look good.

The saloon cushions are attached to the trim by press studs. I tapped a hole in a bit of aluminum bar and wire brushed them. I like your idea better though.
stud polish.jpg
 

colhel

Well-known member
Joined
9 Jan 2011
Messages
3,979
Location
Gillingham(Dorset) Boat Weymuff
Visit site
Looking good. Would love to see the full cabin before and after


Working from the aft cabin forward.
Not much to do in the aft cabin really, but am wondering if the vanity unit is worth keeping or would it be better to make it into more storage. The lid is closed in these pictures, but under the formica lid there's a sink with a hot and cold tap. I've probably used it once, much preferring the sink in the main heads. The steps are looking scruffy though


aft cabin.jpg

I would like to change the access though. At the moment you have to remove the cushions and slide the perspex hatch open. I don't know how it'll work out, but I think if a hatch wasmade that was hinged at the top it could just be lifted without having to move too many people from their seats and the cushions could still stay attached.aft access.jpg

aft access.jpg

So looking forward from about where the hatch is

saloon.jpg

The cooker and sink unit needs a tidy up. I have removed all the screws that I can see that fixes the unit to the wall, but its still not budging. Maybe its glued or there's more screws that I haven't spotted. I'd much rather remove it (a) so I can refurb it at home and (b) because behind there is the calorifier and heater. There might be other stuff behind there I can play with too.cooker unit.jpg


sink unit.jpg

The dash
dash.jpg

The pointy bit

pointy bit.jpg

side cabin.jpg

I've reached my forum limit on pictures, so luckily you've been relieved of a Heads picture
 

Attachments

  • aft cabin 2.jpg
    aft cabin 2.jpg
    284.1 KB · Views: 8

Bigplumbs

Well-known member
Joined
7 Nov 2015
Messages
6,675
Location
UK
Visit site
Looking good you have made a very good start. I think posting progress on here is good for motivation as well
 

Greg2

Well-known member
Joined
24 Jun 2002
Messages
4,295
Visit site
I am just starting on part 2 of our refit to do the things that lockdown prevents me from doing last year. I have some woodwork to titivate and would be interested to know which varnish you are using?
 

colhel

Well-known member
Joined
9 Jan 2011
Messages
3,979
Location
Gillingham(Dorset) Boat Weymuff
Visit site
I am just starting on part 2 of our refit to do the things that lockdown prevents me from doing last year. I have some woodwork to titivate and would be interested to know which varnish you are using?

I've only done some of the trim so far and used International Gold Spar Satin. But the woodwork inside the cabins is a lot darker and glossy. My biggest hurdle was getting the paint stripper to work on the doors, maybe they were originally done in 2 pack or the paint stripper I'm using isn't strong enough.
International Goldspar Satin Varnish | Force 4 Chandlery
 
Last edited:

colhel

Well-known member
Joined
9 Jan 2011
Messages
3,979
Location
Gillingham(Dorset) Boat Weymuff
Visit site
Hi Colin if you are intent on stripping the woodwork Back rather than sanding, why not try a professional furniture strippers they will dip and strip the doors etc for you ,


Good idea! Stripping the old varnish is definately the biggest job on this project. Luckily its only the door panels (I think) that are laminated and need a delicate touch. The units in the cabin seem to be solid wood where I should be able to be a bit more aggressive with the sand paper. If I feel brave enough to remove some of the more intricate mouldings, I'll definately follow your suggestion.
 

colhel

Well-known member
Joined
9 Jan 2011
Messages
3,979
Location
Gillingham(Dorset) Boat Weymuff
Visit site
A couple of other things I want to look at is replacing the helm and nav seats with single seats. I think the doubles fitted as standard take up too much room in the cockpit and are a bit small for 2 adults anyway. On this pic I previously posted you can see the 2 black seat runners on the white topped bit of the cabinet. Also the sink and taps will need replacing. If anyone can recomend any suppliers or ideas, I'd appreciate it.
There'll be no progress now for a few weeks due to Christmas parties and stuff.20211128_152305.jpg
 

Farmer Piles

Well-known member
Joined
6 Oct 2020
Messages
765
Location
Deepest Kernow
Visit site
Good idea! Stripping the old varnish is definately the biggest job on this project. Luckily its only the door panels (I think) that are laminated and need a delicate touch. The units in the cabin seem to be solid wood where I should be able to be a bit more aggressive with the sand paper. If I feel brave enough to remove some of the more intricate mouldings, I'll definately follow your suggestion.
Just might need to do some re-gluing if you have them dipped. Not saying not to, just that it is strong stuff that they use and the woodwork is immersed.
 
Top