chriss999
Well-Known Member
Hello all,
No electrical background myself, but I need to draw out the wiring of my Sadler 26, so I can understand which wires do what, where they are going, and to understand previous owner additions.
Part of this will be to label the wires, and I have got myself a Brother printer for that.
My question is, what are the options for a workable labelling convention? Eg:
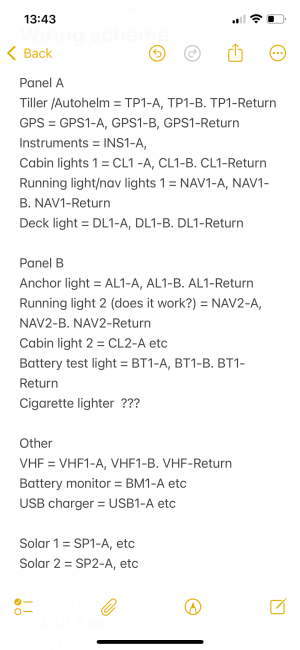
Start at 0001 and go up incrementally, randomly allocating a number to each wire?
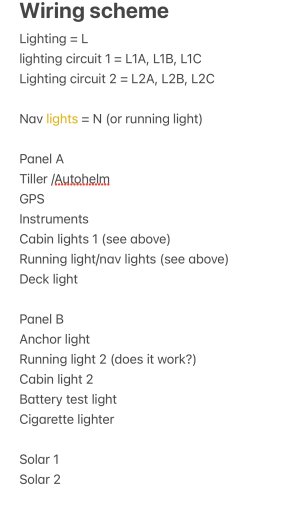
Name the wires from what they do, eg ‘Interior lights’, ‘Solar’, ‘Masthead nav’ etc?
Some combination? Or something else altogether?
I can see the advantage of the wire label saying what it is. But it could get unwieldy.
What has worked for you, please?
No electrical background myself, but I need to draw out the wiring of my Sadler 26, so I can understand which wires do what, where they are going, and to understand previous owner additions.
Part of this will be to label the wires, and I have got myself a Brother printer for that.
My question is, what are the options for a workable labelling convention? Eg:
Start at 0001 and go up incrementally, randomly allocating a number to each wire?
Name the wires from what they do, eg ‘Interior lights’, ‘Solar’, ‘Masthead nav’ etc?
Some combination? Or something else altogether?
I can see the advantage of the wire label saying what it is. But it could get unwieldy.
What has worked for you, please?

") as most of my labels ended up detaching themselves over time.
as most of my labels ended up detaching themselves over time.


