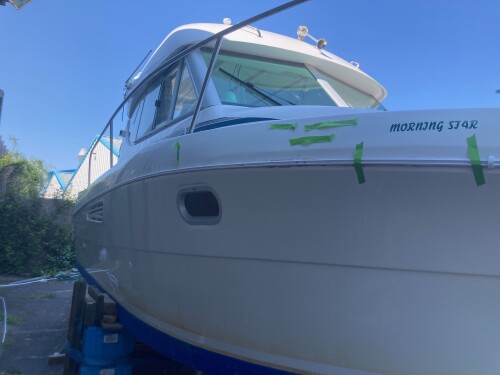
Small refit Merry Fisher 805

j24jam

Active member
Joined
17 Jul 2011
Messages
241
Visit site
The boat lives on a swinging mooring so an induction hob is probably not the most obvious choice.

My reasoning was:

a) I wanted to get rid of gas, no real reason other than I dislike everything about gas bottles. And I hate cleaning gas hobs.

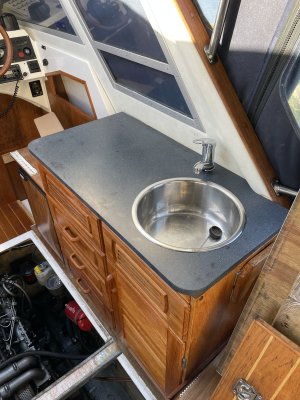
b) I wanted a minimal kitchen look with the most worktop space possible, and I’m going to cnc router the worktop so the sterling hob sits completely flush with the worktop. So when you are not using it you don’t even know it’s there.

c) I don’t think we will use it to cook on very much anyway (the saving will pay for one of those little transom barbecues).

d) I’ve got space to put some massive solar panels on the flat roof

e) I’m going to try and fit 3 x 300Ah lithium batteries so I’m going to have a vast amount of power. Theoretically I could run the induction hob at its highest power setting (1500W) for nearly 7.5 hours or its lowest setting for over 50 hours.

My company builds off grid solar powered cctv systems so I have access to trade pricing and we import our own batteries from China. Lithium is insanely cheap now.

The saving on the sink and induction hob vs a Smev style gas unit (which look naff imo) will easily pay for the inverter.
Very interesting, I was in a similar position to you, in that our boat had a paraffin cooker when we purchased, lit it once and the whole boat smelt like it was on fire! So that went in the bin and when I fitted a new worktop I didnt bother fitting a new hob as we simply would rarely ever use one. Ive got a portable 1800W induction hob, which we can run off shore power, but it has always been nagging me that when we come to sell, I can see buyers moaning that there is no way to cook off shore power. So have always been on the look out for other options.

With your lithium set up, then really it is a perfect solution.

Before and after pics of our set up...
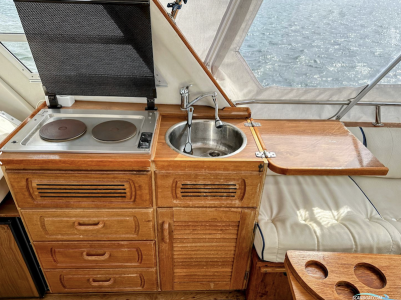
Screenshot 2024-05-08 at 09.40.09.png
IMG_4663.JPG
 
Last edited:

jakew009

Active member
Joined
29 May 2012
Messages
372
Visit site
Very interesting, I was in a similar position to you, in that our boat had a paraffin cooker when we purchased, lit it once and the whole boat smelt like it was on fire! So that went in the bin and when I fitted a new worktop I didnt bother fitting a new hob as we simply would rarely ever use one. Ive got a portable 1800W induction hob, which we can run off shore power, but it has always been nagging me that when we come to sell, I can see buyers moaning that there is no way to cook off shore power. So have always been on the look out for other options.

With your lithium set up, then really it is a perfect solution.

Most of the boat industry is still living in the dinosaur age as usual, but lithium really is the way forward. Shore power / generator should be connected to a big battery charger and nothing else.

Everything else is powered off the inverters and the power system becomes very simple.
 

Alicatt

Well-known member
Joined
6 Nov 2017
Messages
4,460
Location
Eating in Eksel or Ice Cold in Alex
Visit site
Yes, very interesting, I, and the wife, would rather be all electric on the boat, but when we did the costings she balked at the cost of going all electric and said just put the gas back.
running a new copper gas pipe from the gas locker in the stern to the galley was a right pain, thank goodness all the bends in the pipe were in areas that are easily accessible, the rest was a straight run.

As we don't plan on keeping this boat, and will be planning moving to something larger in a year or so we don't think splashing out large sums of money on what is a "price conscious" 45 year old river boat. ;)
 

jakew009

Active member
Joined
29 May 2012
Messages
372
Visit site
Yes, very interesting, I, and the wife, would rather be all electric on the boat, but when we did the costings she balked at the cost of going all electric and said just put the gas back.
running a new copper gas pipe from the gas locker in the stern to the galley was a right pain, thank goodness all the bends in the pipe were in areas that are easily accessible, the rest was a straight run.

As we don't plan on keeping this boat, and will be planning moving to something larger in a year or so we don't think splashing out large sums of money on what is a "price conscious" 45 year old river boat. ;)

Yeah I think if you are going to embark on a refurb project it’s important to buy the correct boat in the first place.

You need something that is popular / in demand and you need to make sure you buy the cheapest one on the market (within reason, don’t want to buy something that needs major mechanical / structural work).

Then you can spend the difference between what you paid and the best one on the market and still come out above water. I’ll have spent about 10k on mine by the time it’s done and I paid 31k for the boat originally.

Contrast that to my friend who bought an unusual Bayliner with an petrol outdrive, spent loads of time / effort fixing the out drive, only to have to rip it all out this year and replace it with an outboard. He’s put a massive amount of effort into it but he would never get most of the money back.

Even then though it still makes no sense financially because you are effectively working for free. But the way I look at it is to buy a new Merry Fisher 895 offshore is 180k and I’d need to buy shares in a petrol refinery.
 

PaulRainbow

Well-known member
Joined
16 May 2016
Messages
15,925
Location
Suffolk
Visit site
Do you plan on using the hob via inverter, or shore power only?

I hadn't seen such a low power 1kw induction hob before, so it's a nice idea. If running via inverter, how much battery Ah do you need for say 30 mins of cooking time at max power?
1kw through an inverter will draw 100a from 12v batteries. A 100ah battery will, at those figures, be 50% discharged in 30 mins. That's a 100ah battery in perfect condition, so in reality it will usually be less than 30mins.

If you need to operate an induction hob for 30 mins you might want to look at more efficient cooking methods. We have an Instant Pot (electric pressure cooker, basically) and a thermal cooker, both save lots of power. We can do a pot roast in the thermal cooker with about 15 mins of electric, including veg.
 

jakew009

Active member
Joined
29 May 2012
Messages
372
Visit site
1kw through an inverter will draw 100a from 12v batteries. A 100ah battery will, at those figures, be 50% discharged in 30 mins. That's a 100ah battery in perfect condition, so in reality it will usually be less than 30mins.

If you need to operate an induction hob for 30 mins you might want to look at more efficient cooking methods. We have an Instant Pot (electric pressure cooker, basically) and a thermal cooker, both save lots of power. We can do a pot roast in the thermal cooker with about 15 mins of electric, including veg.

300Ah batteries are less than $300 ex works from China now. Prices have halved in last 12 months (and profit margins have doubled as the retail price has barely changed).
 

jakew009

Active member
Joined
29 May 2012
Messages
372
Visit site
Pathetic progress today

Mocked up how the sink and induction hob will fit. The sink will be under mounted so the edges aren't visible and the induction hob thing will be flush mounted in a recess.


This is the worktop, compact laminate.


This is along the idea of what the machine will cut out. The rebate around the sink is for a second piece of worktop that will sit in to cover the sink when not in use. But I'm not sure how practical it will be having to lift it out every time you want to use the sink so may skip that bit.


Annoying the Sterling induction hob arrived broken :(


This is the vinyl wrap that all the faded plywood will be wrapped in.


jakew009

Active member
Joined
29 May 2012
Messages
372
Visit site
Swapping from cable steering to hydraulic steering is a much bigger job than it looks...

Stripped off the old Teleflex stuff, it was all siezed and you are lying in the lazarette working at the very back. I'm glad it's completely empty fuel tank and all.


Finally gone. You have to work with your hand in that hole to undo the bolts. I thought about making it bigger but the fibreglass is fairly smooth inside there and it wasn't too bad...


Had to break out the big guns to get the tiller arm to release


Then went for a walk, someone stole my mooring


Took a photo from through that hole to see what it was like inside. The fibreglass is really thick 25mm or so. The fibreglass above the section with the hole in it is much thinnner so you couldn't mount the ram there.


Working out the geometry is a complete and utter pig. So much trial and error and the ram is stiff to move so you have to bolt it in properly each time to test it after drilling new holes.

I couldn't mount it where the old ram was because that one (the cable push pull) had a longer stroke. The Vetus tiller arm has 4 holes in it but the one I needed to use to match the new ram was only pilot drilled. So had to mess around putting the arm on the mill. And then I had to mill it down because the hole was sort of recessed. It seems a totally stupid design i can't understand it at all. Forgot to take photos of that bit I was getting annoyed. Still need to chop the end of it off once I'm happy it's all going to work.

The difficult part was that the idea is that the ram is perfectly 90 to the arm when it is at the two extremes of it's travel, and when it is in the middle, the ram should be pointing towards the transom slightly. If you don't do it that way you end up with the ram pointing towards the bow at the extremes of travel and there is a risk it could 'flip' over and invert itself breaking the ram in the process. If you always keep the angle pointing towards the transom this cannot happen.

The problem I had is that with the shorter tiller arm, there wasn't enough fibreglass to mount the ram far enough forward to maintain the required angle. I also needed to increase the height of it by about 20mm as the old bracket was much taller.


8 hours later and I had a plywood template that looks like it's going to work. The plywood part will be laser cut from some aluminium plate and then bolted & sikaflexed to the original mounts. I think it will be plenty strong enough as the force is actually spread over a much larger area.


Then decided to pull the hydraulic lines through and rip the teleflex cable out. I'm fitting autopilot pump so needed a breather pipe to go from the helm to the pump which will be in the lazarette locker. I decided to run it through some conduit as it looked a bit feeble and would be lying in the bilge of the boat against the rough hull interior.


And through. The hydraulic pipes are vastly more flexible than the old Teleflex thing. The hydrodrive pipes are also real hydraulic pipes, not the naff nylon stuff that other brands of steering seem to use. As a bonus there will be lots more space behind the helm with the teleflex box removed.


The pipes go to the helm via this hole in the front right of the lazarette. This seems a better way to run other cables to the helm as well rather than going around the water tank.


Removed the original steering wheel


Mocked up the new one


Removed all the old Teleflex helm


Bit of a cumbersome thing to remove, I didnt even bother trying to detach the cable.


Anyone want it before it goes in skip?
 

jakew009

Active member
Joined
29 May 2012
Messages
372
Visit site
The endlessness continues

Had to enlarge the hole for the helm pump, used a random piece of flooring as a template to guide the hole saw.


Bet I couldn't do that again if I tried


Test fit


The new helm pump is slightly smaller than the old one (you can see the outline of where the old one was) so you need to be super accurate with your positioning. You can just see the edge of the old bolt holes on the top and bottom.


Test fit the wheel, it's a bit smaller than the old one and mounted closer to the dashboard so more leg room.


Plenty of space for the new square hole pattern.


All buttoned up. Sacked off Mr Hydrodrive's advertising sticker but the kit is really good quality.
I'm really pleased with it think it looks much sleeker.


Then started on fitting the Planar heater. Lots of faffing around working out how to route the exhaust so it doesn't clash with the engine exhaust pipe that goes above it.


And then got the exhaust through hull fitted.
 

jamie langstone

Active member
Joined
22 Dec 2013
Messages
521
Visit site
You may have to be careful when using fenders as it looks like the exhaust outlet is where the back fender would be. It great seeing the outfit of the 805 and keep up the good work. Are you thinking of changing the side windows as mine need changing and it would be helpful to see how its done before i tackle mine.
 

jakew009

Active member
Joined
29 May 2012
Messages
372
Visit site
You may have to be careful when using fenders as it looks like the exhaust outlet is where the back fender would be. It great seeing the outfit of the 805 and keep up the good work. Are you thinking of changing the side windows as mine need changing and it would be helpful to see how its done before i tackle mine.

Yeah I thought about that about 3 seconds after starting to drill the hole. Hence why I have a 5mm pilot hole to fill :LOL:

I think in it's current position the fender will just about be ok. I looked at photos of boats with fenders out and they all seem to have them in from the stern a bit (I guess so the fender cannot slip around to the transom).

E61A7DAC-4970-4200-8934-BB571858584C.jpeg

CE5A94EF-D433-4F1B-B30C-A92F1E13A787.jpeg

4ED1ABA2-21B5-406D-9581-E51AF6945C18.jpeg

I spent half the weekend pondering where to mount the heater. I think the Jeanneau fit was on the engine bulkhead but that seems an awful position to me making access to under the kitchen even worse, and impacts the locker space. My plan is to mount it above the rudder and then run the heater pipe around the outside of the fuel tank and then in above the calorifier. That way I can have an outlet in the cabin and another in the v berth.

I also wanted to keep the swan neck on the exhaust as high as possible and the only place you can really do that is either at the engine bulkhead or at the transom. Otherwise there is not enough space in the bulwarks to loop the exhaust up.

The only downside with having it on the transom is you have to navigate around the engine exhaust pipe (plus the steering ram).
 

jakew009

Active member
Joined
29 May 2012
Messages
372
Visit site
Yet more endlessness

Anyone who is thinking about a boat project... don't do it :LOL:

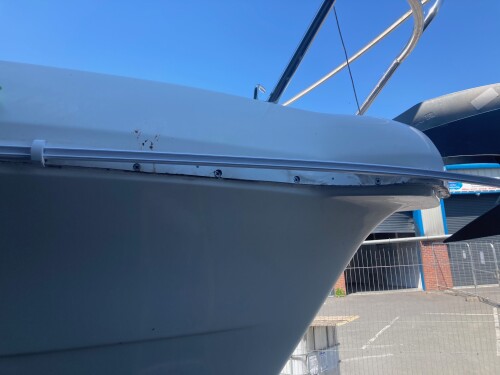
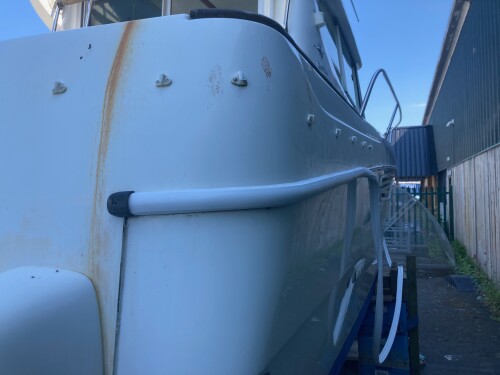
Decided to get the new bumper strip mounted, what a tedious job. 80 odd screws that all had to be drilled out, countersunk, sikaflexed and screwed in.


Bending the PVC strip around the tight bends at the bow was a bit of a pain in the ass


On the home straight


Temporarily put a bit of the strip on to check it fits ok. I 3D printed the end caps as I wasn't about to pay £200 for a set of 6 :LOL: Will print some white ones now I have the size worked out.


Also removed the last of the 20 year old vinyl decals... so the boat is now completely free of that awful green colour :) I think it will look a lot more modern with the white bumper strip and a black Merry Fisher decal.

The next big job is replacing the damn side windows and then I am on the home straight. But I think replacing the windows is going to be a pig of a job. Anyone ever done an 805 side window before? Any tips?
 
Last edited:

Greg2

Well-known member
Joined
24 Jun 2002
Messages
4,301
Visit site
Yet more endlessness

Anyone who is thinking about a boat project... don't do it :LOL:

Tell me about it! 😳

Every weekend all winter I have been toiling on our boat and finally got the engines back in and re-launched a week or so ago. If I find time I will post something on here.

Looks as though you are doing a great job!

The annoying thing with projects is that you will appreciate the result and forget the grief involved iso when another project comes along it will seem like a good idea! 😁
.
 
Top