Martin_J
Well-Known Member
After having played a bit with NMEA 2000 communications last week (see Engine Room temp sensor thread) I read this thread with more interest and ordered a couple of BMP180 sensors.
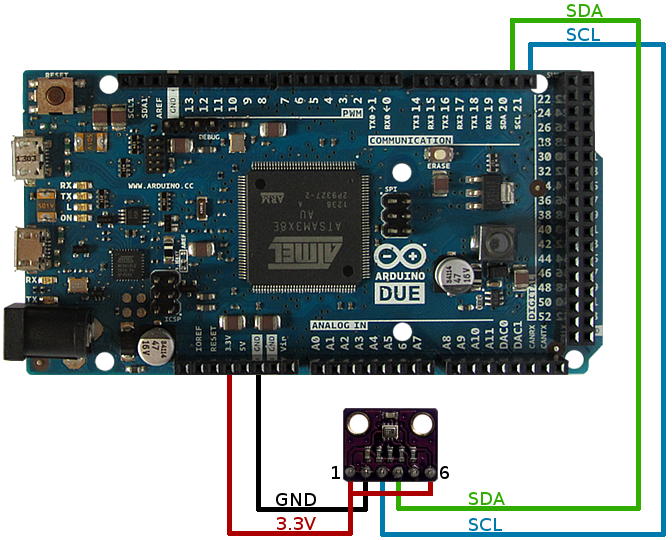
I couldn't understand how you came to connect them to 5v since the first ones I found were all for 3.3v (with 3.6v max supply). I ordered anyway and since that's what the Teensy 3.2 (similar to an Arduino) runs on then they will be perfect. If anyone else has ordered some then I would suggest checking the permitted supply voltage before connecting to 5v.
Initial thoughts were that output to PGNs 130310 or 130311 could be quite easy but I see they're now marked as deprecated. I might have to look at what my displays will currently listen to and are capable of displaying.. Another project for when I find the time")
If anyone is interested I'll update this post with any progress... but for starters, take a look at Timo's NMEA2000 library and I'll try and help where needed..
Timo lappalainen - NMEA2000
I couldn't understand how you came to connect them to 5v since the first ones I found were all for 3.3v (with 3.6v max supply). I ordered anyway and since that's what the Teensy 3.2 (similar to an Arduino) runs on then they will be perfect. If anyone else has ordered some then I would suggest checking the permitted supply voltage before connecting to 5v.
Initial thoughts were that output to PGNs 130310 or 130311 could be quite easy but I see they're now marked as deprecated. I might have to look at what my displays will currently listen to and are capable of displaying.. Another project for when I find the time
If anyone is interested I'll update this post with any progress... but for starters, take a look at Timo's NMEA2000 library and I'll try and help where needed..
Timo lappalainen - NMEA2000
 )
)