dunedin
Well-Known Member
OK, bear with me as I am a bit of a newbie to doing electrics properly.
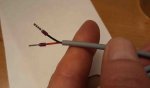
So what is the best way to extend a thin wire, needed for fitting a replacement bow navigation light (see picture). Wire join will need to be up in a fairly awkward to get at space underneath the toerail.
So options seem to include
1) Small chocolate bar connector - using bootlace ferrule on the other wire to match. (Quickest and simplest to do?)
2) Remove ferrule on wire, twist wires together and then solder plus a heat shrink wrap. (Tricky space to solder in but not entirely impossible)
3) Heat shrink connectors with copper insert (Also easy to do?)
https://www.amazon.co.uk/dp/B0725GL3ZJ/_encoding=UTF8?coliid=IQ91JCQM2DN1I&colid=1W9928G2DF3WS&psc=0
4) Something else !
Views?