Solar panels

Posse

New member
Joined
9 Jan 2011
Messages
80
Location
Copenhagen
Visit site
I am planning my solar panel installation on the targa arch, and would like your advice. The installation is intended for Atlantic/Pacific cruising.

To maximize area, I expect the panels to be mounted in the same orientation as the boat. On each side of the back stay I have just about 110 cm available.

This would allow 2x 100W panels side by side on each side of the arch, giving a total of 400W nominal power. The panels would "hang" about 45 cm in front and in back of the arch. Each panel measures 120x55 cm.

Or, I could put 1x 300w on each side, totalling 600W. They would "hang" about 65 cm in front and in back of the arch. Each panel measures 165x99 cm.

Of course, 600W would be better than 400W, but I am concerned about windage and stability in rough conditions.

Another concern is whether it is more practical to adjust the angle of four smaller panels, or two very large panels. And if the mounts will be able to hold the large ones angled in other than very calm conditions.

And last, if I needed do remove the panels for some reason (storm preparation?), the large ones would not go through the hatch to store below. The smaller panels would be relatively easy to stow away.

My boat is same model as the photo, and my arch will be very similar. Only, the panels would be oriented differently.
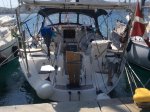
arch.jpg
 
Last edited:

macd

Active member
Joined
25 Jan 2004
Messages
10,604
Location
Bricks & mortar: Italy. Boat: Aegean
Visit site
We have 4 x 85W panels mounted exactly as you describe in your 4 x 100 option. They provide all the power we need (we're in the E Med) right through to November unless we get a succession of cloudy days. The boat is quite energy efficient, with LED lighting throughout and a keel-cooled fridge with extra insulation. Peak output is around 25A at a nominal 12V. The batteries are usually fully charged by lunchtime (checked by battery monitor and, from time to time, by SG test.)

There is some shading from the backstay but the effect is modest. With a large array, making them adjustable is an expensive faff which, in our case, is simply not necessary. We've never felt the need to remove them because of high winds.

Whatever else, you should carefully consider your wiring options. Ours run in series (to an MPPT controller), so output at around 80V. This comfortably allows us to use wiring originally installed for just two panels wired in parallel. I keep meaning to change this to two parallel pairs, left and right hand, running in series, i.e. at 40V. This would decrease shadow effects whilst still maintaining fairly low voltage losses.

If you're crossing oceans you will need to factor into your calculations the drain of any power steering which, if electronic, will be considerable if used 24/7: far more than a typical fridge.
 

Yngmar

Well-known member
Joined
6 Dec 2012
Messages
3,085
Location
Gone cruising
Visit site
I went with the 2x 300W and am pleased with the results. The panels are mounted on their intended mounting holes (no modifications to the panels whatsoever, so the 10 year warranty remains intact). This is done by mounting each on two square aluminium profiles, with stainless bolts and nylon washers exactly as per solar panel specs. Those profiles are then bolted onto the stainless stern arch and give excellent support. They are not adjustable (I briefly looked at that, and the extra fuss and wobblyness aren't worth the hassle unless perhaps you sail in high latitudes). The panels themselves are rated to 160 knots wind speed for house roof installations, but the full installation is only good for roughly 100 knots before the aluminium profiles go and I suspect with the boat heeling and no house roof under the panels, the glass will simply blow out long before that. Panels can be strapped down to the big aft mooring cleats with ratchet straps over the top of both of them, should it come to that, but in such wind speeds the lost solar panels are probably the least of our worries.

Our panels do fit down the companionway hatch, but removing them and maneouvering them there in rising wind conditions would probably not go well, so for panels of this size that's a rather theoretical concern unless you get a long warning time ahead of bad weather.

You'll want to wire them in series, to get the high voltage into a MPPT controller (Victron MPPT 100/50 - good stuff) that lets you get maximum low light performance - that way they'll start producing useful output earlier in the morning and longer in the evening. The charger is to be installed as close as possible to the battery bank, so you have a short low-voltage (12V) run and a long high-voltage (less lossy) run from the panels. Victron has a calculator for wire sizes (XLS) somewhere that can be quite helpful.

Oh, here's a picture:
songbird_culatra.jpg
 
Last edited:

Posse

New member
Joined
9 Jan 2011
Messages
80
Location
Copenhagen
Visit site
@Yngmar
Thanks for the input (and photo!). How do your panels keep up with power needs?

Do you have any more photos? I would very much like to see how you have constructed and attached the reinforcement profiles. And actually also how your targa arch is constructed and attached, since your boat is very similar to mine :)
 

Bow42

Member
Joined
13 Jul 2016
Messages
95
Visit site
Not claiming to be any type of expect
Having them wired up in series , wouldn't that mean if part of any panel is shaded , it would make all the panels inefficient? .
Also wouldn't it mean you be losing current. ?
Would you not say it better to have 600w at 12v then 300w at 12v?
 

RichardS

N/A
Joined
5 Nov 2009
Messages
29,236
Location
Home UK Midlands / Boat Croatia
Visit site
Not claiming to be any type of expect
Having them wired up in series , wouldn't that mean if part of any panel is shaded , it would make all the panels inefficient? .
Also wouldn't it mean you be losing current. ?
Would you not say it better to have 600w at 12v then 300w at 12v?

I have 4 100W panels mounted 2 either side of the boom such that the boom shadow falls across the 2 panels on one side or the 2 on other side . I've experimented with both permutations of 2 in parallel and 2 in series and by far the best option which generates around 50% - 75% more power is with the 2 on the same side of the boom which will both fall into shadow at the same time in series and the two series pairs wired in parallel. This is with an MPPT controller.

Richard
 
Last edited:

macd

Active member
Joined
25 Jan 2004
Messages
10,604
Location
Bricks & mortar: Italy. Boat: Aegean
Visit site
I have 4 100W panels mounted 2 either side of the boom such that the boom shadow falls across the 2 panels on one side or the 2 on other side . I've experimented with both permutations of 2 in parallel and 2 in series and by far the best option which generates around 50% - 75% more power is with the 2 on the same side of the boom which will both fall into shadow at the same time in series and the two series pairs wired in parallel. This is with an MPPT controller.

Which, Bow42, is precisely why I referred in post #2 to doing the same when I get around to it. In our case (as perhaps in Richard's) for most of the time the only source of shading on our panels is the backstay. On many cruising yachts, there are others (including the daftest set-up of all, commonly seen, of a radome and wind-gen mounted adjacent to the panels). However, the effect (again in our case) isn't dramatic. We usually generate more power than we can use. Boat's more constrained for space inevitably need to harvest solar more carefully.

Also worth noting that yachts planning long trips in the Trade belt might have regard for mounting any shadowing hardware to suit: to starboard in the N hemisphere, the opposite in the S. When at anchor in the Trades, of course, the effect is opposite. Such is life.
 

whiteoaks7

New member
Joined
29 Nov 2002
Messages
570
Location
South Wales, UK
www.seasolutions.co.uk
There's a lot of good info on this thread. The only thing I would emphasise is that shading can really take the output down, something as simple as the ensign waving across a panel can have a huge effect. It's also a really really good idea to have a mount that can track the sun and, yep, Victron MPPT controller. My old PBO piece is still on the PBO website if you want to calculate the amount of energy you'll get (I should get paid for this :( ). One odd point is that the weight of the panels high up on a structure can induce considerable loads as the boat rolls accelerating the mass from side to side so make sure the fastenings are up to it. Good fastenings should also eliminate the need to remove them for storms too, or are you in the southern ocean? Here's the PBO link: http://www.pbo.co.uk/expert-advice/solar-panels-everything-you-need-to-know-24455
 

nortada

Well-known member
Joined
24 May 2012
Messages
15,468
Location
Walton-on-the-Naze.
Visit site
Oh, here's a picture:
songbird_culatra.jpg

Like the pic.

Looks like taken in the Lagos anchorage, with Foia and Monchique in the background?

There is a very good solar shop at Aljezur about 15k noth of Lagos. They normally fit out camper vans but will help with boats if requested.

Oh yes, had solar panels for the last 15 years - one of the best things we did!
 
Last edited:

Yngmar

Well-known member
Joined
6 Dec 2012
Messages
3,085
Location
Gone cruising
Visit site
@Yngmar
Thanks for the input (and photo!). How do your panels keep up with power needs?

Do you have any more photos? I would very much like to see how you have constructed and attached the reinforcement profiles. And actually also how your targa arch is constructed and attached, since your boat is very similar to mine :)

Will snap a few more pix when we're back at the boat next week!
 

Yngmar

Well-known member
Joined
6 Dec 2012
Messages
3,085
Location
Gone cruising
Visit site
More photos, as requested. After long and hard thinking, I decided the only sensible and visually inoffensive way was to attach the arch to the pushpit. So we welded four "horns" on the pushpit to keep it removable, and the arch slides on those and is affixed with a bolt through each. While the pushpit was at the welder, I made up some large stainless backing plates for its toerail bolts. The rest should be fairly obvious from the photos. It's all 25mm tubing, but the long pieces across the beam have a 22mm tube inside the 25mm, which according to the builder was stronger than any thick-wall tubing he could find, and I've learnt to trust the guy. Before mounting anything on it, I've done a few pull-ups in the center of the top beams and it did not invert. I'm not the slimmest ;)

To reduce shear, there is one brace going from a tang to an inboard corner of the pushpit. This is not yet installed in the photo, but you can see the tang and a bungee cord in the approximate location. I can climb up the sides to clean the panels and it does not bend much. It's also a great place to lash more stuff onto! ;-)

Visually, I made sure the arch extends the angle of the forward vertical tube of the pushpit, so it wouldn't look funny and then raised it high enough so I could step off the aft deck (it's a CC, unlike yours) without mashing my head into a solar panel, and step through the transom as well. This puts it neatly behind the backstay, with the panels protruding forward (and aft) of it on both sides. I also made sure the panels were well within the bounding box of the hull, so the boat length wouldn't increase and the panels couldn't hit anything if maneuvering near tall objects (walls, pilings, etc.). It's wise to angle the panels slightly aft and outwards so the water can run off them and doesn't fall noisily on the transom (we sleep there). Panels are two LG Neon 300W 1.6x1m size.

The panels are attached with stainless bolts as per the LG installation manual, except with additional insulating nylon washers between the stainless bolts and the aluminium. The clever part (a friend came up with the idea) was how to clamp the profiles to the tubes. You can see the two plastic bridges around the tube, and a third one (with nuts held in place by a bit of hot-glue) is hot-glued to a piece of slim cable trunking and slid into the profile from the end until the holes line up. Then the bolts are tightened into those and the cable conduit simple pulled out with a tug, which breaks the hot-glue off cleanly. Looks nice and vastly cheaper than any square-to-tube clamps I could find.

arch8.jpg

solarattach1.jpg

solarattach2.jpg
 

Posse

New member
Joined
9 Jan 2011
Messages
80
Location
Copenhagen
Visit site
Finally had the arch completed, and panels installed. I went for the 4x100W option. They are 36V panels, so I opted to install them in parallel to a Victron MPPT controller. They are virtually never shadowed and seem to provide plenty of power on sunny days, although I have not tested at anchor for extended periods yet.

Thanks for your very useful input.

31301569_10157262176344018_4340350351401025536_o.jpg
 

RichardS

N/A
Joined
5 Nov 2009
Messages
29,236
Location
Home UK Midlands / Boat Croatia
Visit site
Finally had the arch completed, and panels installed. I went for the 4x100W option. They are 36V panels, so I opted to install them in parallel to a Victron MPPT controller. They are virtually never shadowed and seem to provide plenty of power on sunny days, although I have not tested at anchor for extended periods yet.

Thanks for your very useful input.

View attachment 71335

I would have thought that with no shadows and the Victron MPPT, you would be better to have at least some series wiring to increase the voltage to the controller and reduce cable losses provided your controller can accept the max voltage.

Richard
 
Last edited:
Top