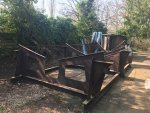
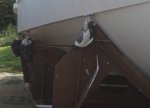
My Steel Boat Build - "Dufton" (Bruce Roberts Euro 1200 Aft Cab)

Dufton

Member
Joined
26 Aug 2018
Messages
46
Visit site
Following John Pete’s brilliant posts on here documenting his build and launch of his beautiful steel build, I have been asked by a couple of people if I can give some details of my own build. I will happily do so but I certainly would not wish for direct comparisons to John’s fantastic story and wonderful finished vessel as everyone’s experience has to be put in the context of their own individual circumstances, resources, and skill set. Decisions are made along the way, the reasons for which may not be particularly obvious to others, or even the best in hindsight, but they had to be made in the light of the knowledge, circumstances and pressures at the time.

When I embarked on my build journey in 2005 and which turned out to last 14 years, I had literally absolutely zero experience of boating or boats! Nor had I experience of welding or working with metal! Indeed, this mad basic plan was hatched whilst talking to an almost equally inexperienced friend during a party on one evening! It came at the time I was nearing the completion of my extensive renovation project of my home, a listed old hall, and I was looking for another ‘project’. My friend and his family had just completed a one week day skipper tuition charter on a motor boat in Minorca and he was telling me how much he had enjoyed it but how expensive buying a suitable boat to continue his new hobby would be. Rather weirdly, I had literally dreamt on three or four occasions over the previous couple of years to this that I had built a big steel ‘ship’ in my garden, so it just seemed this was my destiny!

So it was that we embarked on a partnership - he would fund it and I would build it and together we would own it. As it turned out, due to a change in his circumstances, it actually became in the end a solo project that I built and financed - which partially accounts for a build time-line of 14 years instead of the initial (of course, totally unrealistic) estimation of 3-4 years! All that said, my friend has remained committed in other ways to seeing the project through to finish, and has been very supportive as a sounding board throughout the build (remember most of this was at a time of excruciatingly slow internet, and forums like this were virtually non existent!).

My degree and background is in agriculture and after leaving college I was a lecturer and training advisor in the industry. However, I have always also been quite a practical person and have been able to turn my hand to most jobs - indeed, as a former training adviser I know any practical job can be broken down into individual manageable tasks and with some careful analysis most skills can be quite quickly mastered. I have also always been quite entrepreneurial and tenacious and have set up and run several businesses in various sectors and disciplines. I love the learning curve and challenge of hatching and implementing a plan - the more challenging the better!

So, following a few months of detailed research I decided to base a build project around plans from Bruce Roberts - the Euro 1200 aft cabin. I also looked at the plans for the Almarine vessel that John Peet built which is very similar in design, but along the way I had formulated dreams of taking the finished boat through France to The Med and preferred the integral swim platform steps on the BR model which I felt would be better for stern-to mooring. I also realised that I needed to keep the LOA to slightly under 12m as this seemed the cut-off point for many aspects of practicality such as for easier RCD compliance, availability and reasonable cost of mooring fees etc. To make best use of my time it was important to me that I undertook the project at home in my garden alongside my existing workshop - even though space seemed a little restricted in width (which actually turned out to be a big advantage - see later post). The big downside however was that as my house is historically listed, I could not build a shelter for the project and everything had to be done in the open outside. This gave many challenges and restrictions to how/where/when I could work.

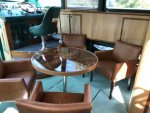
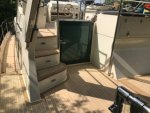
So, below is a couple of pictures of the finished vessel and a link to a video of “dufton” (named after the small Cumbrian village where she was built and I still live).

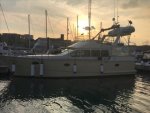
IMG_4650.jpegIMG_4607.jpegIMG_4032.jpegIMG_4055.jpeg

Her principal characteristics are:
  • 2 double cabin, 6 berth motor yacht
  • Steel with fibreglass topside seating and cupboard units
  • Aft cabin
  • Semi displacement
  • RCD category ‘C’ and MCA Category ‘2’ coded
  • Single inboard engine (Perkins 225ti with Hearth gearbox)
  • Length of Hull 11.95 m
  • Beam of Hull 4.32 m
  • Maximum S/W Draught (at max loaded condition) 1.38 m
  • Air Draft (rear canopy and mast down at minimum operating condition) 3.40 m
  • Mass of Empty Craft - 18,000kg
  • Mass at Maximum Loaded Condition - 20519kg
  • RCD - Maximum Load as on Builder’s Plate 790kg (450kg crew + 240kg baggage + 100kg stores)
  • Maximum Capacity of Fixed Fuel Tanks (674L) 566kg
  • Maximum Capacity of Fixed Water Tanks (340L) 340kg
  • Maximum Capacity of Fixed Black Holding Tank (137L) 137kg
  • Victron full AC/DC System
  • 7.5 kw Cummins generator
  • Vessel remote monitoring and automation system
  • IP camera system
  • Electric windlass with Auto Anchor
  • Bow and stern electric thrusters
  • 2 x electric crane davits for lifting dinghy
  • NMEA 2000 system
  • Vetus hydraulic steering system
  • Coppercoat and ultrasonic antifouling
  • Custom faux teak decking
She was launched in 2019.


The video was taken just recently, as she is “lived in” whilst at our current mooring on the Saone river in France and after emerging from the canal system earlier this year.

I will try to add instalments covering various aspects of the build project as and when I can get the time. Briefly looking back now though, it seems that for some aspects I do not have that many pictures so my apologies if some areas of my account seem to lack detail. I will however try to answer any questions anybody may have - but please bear with me if my responses and updates are somewhat late and/or spasmodic! I do still have a business to run and my time is sometimes limited. Thanks. Steve
 

JOHNPEET

Well-known member
Joined
24 Sep 2002
Messages
459
Location
Anglesey
Visit site
From you John, that's some compliment!!
Just speaking the truth!

I totally agree with the words used within your introduction - you have to be there at the time to fully comprehend the decisions and choices that you have to make. There is no right or wrong - just what’s right or seems right at the time for you as the builder when faced with so many influencing factors!

You’ve been there and done it, experienced the pain, the excitement and the joy! Hat’s off to you Sir! ?
 

Dufton

Member
Joined
26 Aug 2018
Messages
46
Visit site
IMG_0238.jpeg

Before covering my actual build itself, I think it will be of interest to outline and explain a few general points. My next couple of posts will attempt to do that.


Plans and Instructions

Having decided to base the build on the BR Euro AC 1200, a full set of hull plans and cutting files was purchased.

I printed out a full set of plans and mounted them on a board in my workshop (A0 size) and I also had electronic copies which I could view on my phone or ipad at any time. Both mediums proved invaluable and meant I always had them to hand for reference. The plans, amounting to some 20 or so sheets, contain all the information needed to have the steel plates CNC cut and then assembled to make the basic hull. The construction plans include bending and welding schedules and finished parts layouts. Suggested internal layouts and generic engineering solutions are also included as is a full set of lines drawings and a hydrostatic and stability booklet.

List of drawings - Euro 12, Page 1.jpeg
The accompanying very basic written instructions document the order of assembly, which is very important to adhere in order to ensure a fair hull.

As a complete novice fitter (my experience was mainly with wood), I found the written instructions to be a little lacking in detail at points, particularly with any helpful techniques, but to be fair, as someone with such little experience of metalwork, I was probably not the expected person to be embarking on such a major metalwork project!!! However after some serious studying and re-studying of the plans, careful thought and research, and plenty of trial and error, I did manage. The only real problem I came across when building was from a recently changed design to the swim platform stairs by BR, but which had not been followed through to all the plans supplied - so there were some anomalies to the shape of some of the cut plating for the stern. However, on eventually speaking to BR, a corrective fix around the problem was found.

The basic order of assembly (which I will describe more fully for my own build in later posts) is:
  • Assemble the jig.
  • Bottom plates into the jig; line up the markings for frames and tack weld bottom plates together.
  • Assemble web-frames in accordance with drawings.
  • Position bottom longitudinal stiffeners on bottom plates.
  • Position frames over longitudinal stiffeners onto bottom plates, starting with the middle frame, working aft ships and then from the middle to the bow.
  • Tack-weld frames in position, observing the markings on the plates indicating the correct position of the frame. The direction of the arrow in the marking indicates the direction of the plate thickness. Start tack welding at the bottom centreline working outwards.
  • Tack-weld bottom longitudinal stiffeners to web-frames
  • Insert side longitudinal stiffeners into web-frames and continuously check the frame spacing.
  • Position side-hull plates starting at transom and tack weld to web-frames only.
  • Tack weld longitudinal stiffeners to side and aft-hull plates. Start each at the bottom and work upwards.
  • Position rear hull panel (transom) and tack-weld to bottom and side plates.
  • Position longitudinal deck-stiffeners and tack-weld to web-frames.
  • Position deck-plates starting aft and tack-weld to web-frames only.
  • Tack-weld deck-longitudinal stiffeners to deck plates.
  • Position superstructure walls and tack-weld to web-frames.
  • Position and tack-weld roof-plates to deck.
  • Bend and position flats to the inside profile of each frame.
  • Weld the tack-welded assembled hull in accordance with the welding schedule.
 

Dufton

Member
Joined
26 Aug 2018
Messages
46
Visit site
IMG_0027.jpeg

Welding and Plates and Plate Markings


Welding
As I have previously said, before embarking on this project I had little welding experience and the little that I did have was from many years previously. So between ordering and delivery of the plates, I booked myself on to an evening welding course. This was really helpful, if for no other reason than to give me more confidence to start!

The initial assembly of the whole basic hull involves only tack-welding of the bits together and so my inexperience of welding did not prove any real issue. Of course, particularly as I could only work outside, I did on occasions have to grind out and redo some welds but by the time I had assembled everything I had a lot more confidence and ability in both stick and mig welding.

The provided welding schedule calls for small runs of weld on alternate sides of the hull when doing the final welds. This is of course to avoid hull distortion. Again, these welds proved largely unproblematic. However, I was very conscious throughout the build that I would eventually be needing someone to insure the vessel so I took the decision - even though by then I actually by then felt competent myself - to have the seam welds on the big side and bottom plates welded by a professional coded welder. This has since proved a very good call, as also is the fact that I had arranged progress inspections and reports along the way by a very well respected marine surveyor.

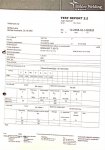
One thing also to note about welding is that for RCD (and later insurance) purposes, I had been made aware that it is important to only use Lloyds approved and batch tested and certified welding rods and wire. This added significant costs and often unwanted delays as these consumables were only available to order through specialist suppliers. I also found out that some of the most readily available suitable rods and wires sometimes proved trickier to weld with.
19 Oct, Document 54, Page 1.jpg


Plates and Plate markings
The various plates were cut by a CNC router out of certified Lloyds Registered Grade A/LR hot rolled shipbuilding steel plate which was pre-treated with Sigma-Weld weld-through primer. As part of the CNC process, the cut pieces were also marked with important detail such as identification codes and various assembly markers. Thus, together with the construction plans, determining assembly positions for each was usually relatively straightforward. However, as described later, what did prove more problematic for me was acquiring the techniques to manipulate the various pieces into their correct positions for tack-welding.
PICT0752.jpegPICT0827.jpeg
 

Dufton

Member
Joined
26 Aug 2018
Messages
46
Visit site
Build site preparation

From the outset, I really wanted to build the project in my garden but before any firm plans or preparations could be made, I needed to be sure that once built, I would be able to get my creation lifted out of the proposed site and thereafter out of the village itself along the narrow winding and undulating lanes to the nearest major trunk road at three miles away and then onwards. I arranged to meet a boat haulier one day when he was passing through Cumbria and drove him to the site for a recce visit. He gave me assurances that one (only) route out of the village was certainly viable but to bear in mind that tree growth etc over the number of years that it can often take to build, can scupper what seems now as perfectly doable. He also confirmed that the boat could be lifted okay with probably a 100t crane if the crane could be sited between the build site and the road on what is common land village green. The area would thus need tracking to be laid to support the crane during the lift.

Convinced the build would only take me 3-4 years, and the tracking would be no problem, so it was that I was determined to build the vessel in my garden next to my workshop as this would allow the maximum use of any free time that I had; and would give easy access to my existing and trusted tools and equipment.

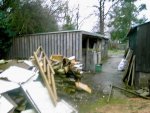
However that meant some groundwork improvements were needed before the build could start. Therefore I made use of the three month period between ordering and delivery of the cut steel to move some sheds and stores and to borrow a JCB to dig out and lay some sub-base to the build area which would have to accommodate the expected final 20 tonnes or so of the boat and it’s cradle and supporting frame.

Picture 146.jpegPICT0730.jpeg
 

Dufton

Member
Joined
26 Aug 2018
Messages
46
Visit site
Steel delivery

This actually turned out to be one of the most memorable days of my life!

All the plates had to be cut in Holland as, from what I could understand, there was at that time no CNC facilities available in the UK to cope with the size of flat sheet plate called for by the nesting plans (the four largest of the cut plates measured 6m by 2m x 5mm each and weighed 500kg each). That wasn’t in fact an issue in practice and after placing the order everything went smoothly - up until the point of delivery that is!

The delivery instructions I received were that the plates would be delivered on a Friday afternoon at approximately 4pm. I was given two hours maximum to unload the plates and profiles which would all arrive on wooden pallets on a curtain-sider wagon. I should arrange for a suitable fork lift to be on site. Any delays over the two hours would be charged for; and if the driver was delayed such that he would miss his return ferry that evening then further HEFTY penalties would be charged for. Given the circumstances I thought that was all understandable, if not a little scary, but nonetheless would be irrelevant as I was sure I was in fact properly prepared with a large 4T Manitou forklift ready and waiting at the said time.

The wagon arrived on time. The driver pulled back the curtain on the roadside to reveal the prepared steel on just two standard size wooden pallets, each loaded with six tonnes of steel. He then sat in his truck with the door closed refusing to communicate further but after he first made it known that he couldn’t speak a word of English, but that the clock was ticking! And so, my first lesson of handling plate steel was very quickly learnt - you can lift long plates at any point along their length but the ends don’t necessarily move at all! So the forklift tried to lift the pallets but all that happened was the pallet itself was raised with the steel on it but the bendy steel ends stayed firmly on the truck bed! The Manitou wasn’t big enough! WTF! After a few minutes of trying, the spectacle had attracted quite an audience of the obligatory village naysayers who seemed to find the situation very amusing!

Because of the positioning and layout of the truck, road and build site, and the restrictions of time, individual plate offloading one at a time just wasn’t really an option at that point. The only solution was larger handling machinery, and quickly! But I live in a small village in a very rural area and I thought I had actually done well in securing the 4T Manatou. I did some head scratching (and sweating) and made a few urgent phone calls to local businesses but nothing bigger existed anywhere. I decided the only option now was to send the driver and the steel back to the docks and get it offloaded there as there would surely be something suitable there. I could then make arrangements at leisure to collect from there. However before giving those instructions it passed through my mind to first just make a quick phone call a local scrap dealer who had given me his card only the week before after picking up an old car - I thought if anyone would know something suitable more local, he would. So I rang his mobile. I explained the situation. His response was to tell me that he was at that very moment driving along the busy A66 road nearby and looking in his mirror he could see a crane. Did I want his number?!

A short detour for the crane, a £80 cash payment and the opening of the wagon’s curtain top wiped the gleeful smile off some faces, but brought a big grin to mine!

I only hoped my good fortunes (and their corresponding misfortunes) would remain for the rest of the build……..
 

JOHNPEET

Well-known member
Joined
24 Sep 2002
Messages
459
Location
Anglesey
Visit site
Steel delivery

This actually turned out to be one of the most memorable days of my life!

All the plates had to be cut in Holland as, from what I could understand, there was at that time no CNC facilities available in the UK to cope with the size of flat sheet plate called for by the nesting plans (the four largest of the cut plates measured 6m by 2m x 5mm each and weighed 500kg each). That wasn’t in fact an issue in practice and after placing the order everything went smoothly - up until the point of delivery that is!

The delivery instructions I received were that the plates would be delivered on a Friday afternoon at approximately 4pm. I was given two hours maximum to unload the plates and profiles which would all arrive on wooden pallets on a curtain-sider wagon. I should arrange for a suitable fork lift to be on site. Any delays over the two hours would be charged for; and if the driver was delayed such that he would miss his return ferry that evening then further HEFTY penalties would be charged for. Given the circumstances I thought that was all understandable, if not a little scary, but nonetheless would be irrelevant as I was sure I was in fact properly prepared with a large 4T Manitou forklift ready and waiting at the said time.

The wagon arrived on time. The driver pulled back the curtain on the roadside to reveal the prepared steel on just two standard size wooden pallets, each loaded with six tonnes of steel. He then sat in his truck with the door closed refusing to communicate further but after he first made it known that he couldn’t speak a word of English, but that the clock was ticking! And so, my first lesson of handling plate steel was very quickly learnt - you can lift long plates at any point along their length but the ends don’t necessarily move at all! So the forklift tried to lift the pallets but all that happened was the pallet itself was raised with the steel on it but the bendy steel ends stayed firmly on the truck bed! The Manitou wasn’t big enough! WTF! After a few minutes of trying, the spectacle had attracted quite an audience of the obligatory village naysayers who seemed to find the situation very amusing!

Because of the positioning and layout of the truck, road and build site, and the restrictions of time, individual plate offloading one at a time just wasn’t really an option at that point. The only solution was larger handling machinery, and quickly! But I live in a small village in a very rural area and I thought I had actually done well in securing the 4T Manatou. I did some head scratching (and sweating) and made a few urgent phone calls to local businesses but nothing bigger existed anywhere. I decided the only option now was to send the driver and the steel back to the docks and get it offloaded there as there would surely be something suitable there. I could then make arrangements at leisure to collect from there. However before giving those instructions it passed through my mind to first just make a quick phone call a local scrap dealer who had given me his card only the week before after picking up an old car - I thought if anyone would know something suitable more local, he would. So I rang his mobile. I explained the situation. His response was to tell me that he was at that very moment driving along the busy A66 road nearby and looking in his mirror he could see a crane. Did I want his number?!

A short detour for the crane, a £80 cash payment and the opening of the wagon’s curtain top wiped the gleeful smile off some faces, but brought a big grin to mine!

I only hoped my good fortunes (and their corresponding misfortunes) would remain for the rest of the build……..

I think that it’s very likely that our steel kits were cut in the same yard!
What you have described above is an almost identical situation to what I remember of my delivery! Same packaging and same issues with lifting the plates. The time constraints were slightly different for me though. Living on Anglesey meant that there was no threat of the return ferry crossing that day, but there were other goods on the trailer to be delivered to another customer that day.
We just set to with our tele handler and offloaded the steel in much smaller batches and often, one sheet at a time for the larger pieces. From memory, it took us about three hours, of which about half an hour was spent moving the pallets of drums that were on the back of the trailer, to the front once the steel was off. A few days later, I did receive an email regarding an additional charge from the carrier for additional time, but heard nothing after explaining that we had assisted the driver in sorting his remaining load out and that we may charge for that! My steel was offloaded into a field at my in-laws farm, which then had to be moved again into dry storage in the sheds over the following couple of days.
That all seems like a lifetime ago now!
 

Dufton

Member
Joined
26 Aug 2018
Messages
46
Visit site
I think that it’s very likely that our steel kits were cut in the same yard!
What you have described above is an almost identical situation to what I remember of my delivery! Same packaging and same issues with lifting the plates. The time constraints were slightly different for me though. Living on Anglesey meant that there was no threat of the return ferry crossing that day, but there were other goods on the trailer to be delivered to another customer that day.
We just set to with our tele handler and offloaded the steel in much smaller batches and often, one sheet at a time for the larger pieces. From memory, it took us about three hours, of which about half an hour was spent moving the pallets of drums that were on the back of the trailer, to the front once the steel was off. A few days later, I did receive an email regarding an additional charge from the carrier for additional time, but heard nothing after explaining that we had assisted the driver in sorting his remaining load out and that we may charge for that! My steel was offloaded into a field at my in-laws farm, which then had to be moved again into dry storage in the sheds over the following couple of days.
That all seems like a lifetime ago now!
Haha! Probably the same driver too John! Although I was extremely lucky on the day, the only problem I had with my alternative arrangements was that it all had to be stored some 50m away from the build site which then meant I had to get a tractor with a fore-end loader with chain/plate clamp in order to move it to the site storage position one plate at a time. Dry storage!? If only!!!
 

Dufton

Member
Joined
26 Aug 2018
Messages
46
Visit site
Frame Assembly

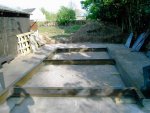
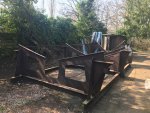
Once the steel was delivered, the first job was for the supporting ‘castles’ or jigs which were supplied to be erected on a frame of 12” RSJ steel girders which were separately sourced.

PICT0741.jpeg
PICT0745.jpeg


The jig needs reinforcement for it to take the full weight of the build in its later stages. Rather than wait until then, I actually did this much earlier on and also took the opportunity to fabricate bottle jack mounts on each castle to allow lifting of the hull to give full access for painting etc. I was also uncomfortable about resting the hull plates onto the sharp edges of the castle plates for any prolonged length of time so I capped each edge which was to come in contact with the boat with a 70mm x 4mm flat bar shaped and bent to fit, and with some rubber carpet underlay stuck to the surface.
IMG_4585.jpeg
28 July 2008 3.jpeg


Lifting Gantry
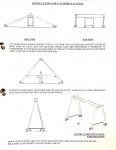
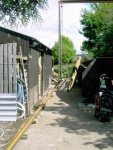
It was also necessary to erect a large custom made gantry over the site from which two block and tackles could be mounted and moved to allow lifting of the plates and other gear as required. To give longitudinal travel, the gantry was supplied on casters and two 25m long x 100mm ‘U’ channel rails were installed either side of the boat cradle frame. The plan was to store cut plates on a stage of wooden pallets forward of the bow position of the boat, so they could be individually selected, suspended and then transported to the installation point with the gantry and rails. The gantry was effectively made up from an RSJ which was suspended on two A frames. It came ‘flat packed’ and was cleverly designed to be erected by using a chain winch between the legs on each side.


Gantry design, Page 1.jpeg
2003-07-08 21.31.30.jpeg
PICT0762.jpeg
PICT0788.jpeg
 

Attachments

  • IMG_4585.jpeg
    IMG_4585.jpeg
    135.2 KB · Views: 3
  • 28 July 2008 3.jpeg
    28 July 2008 3.jpeg
    31.6 KB · Views: 4

Dufton

Member
Joined
26 Aug 2018
Messages
46
Visit site
You chaps are simply incredibly. You certainly put my antics to shame
Very kind of you to say so but I maintain that most jobs can be broken down to manageable parts and within the ability of many who think otherwise - it just takes confidence to "have a go" and not to be fazed by the enormity of the overall project.
 

voyager35

Member
Joined
17 Sep 2011
Messages
133
Visit site
It is lovely to see pictures of your boat on the water and being used. I watched it slowly evolving over the years (i am a frequently in Dufton) and at times thought the project had stalled, then one day it was gone. She looks wonderful , you must be very proud and pleased with the result.
I always thought getting the boat out of the village would be a final challenge for you to overcome
 

Dufton

Member
Joined
26 Aug 2018
Messages
46
Visit site
It is lovely to see pictures of your boat on the water and being used. I watched it slowly evolving over the years (i am a frequently in Dufton) and at times thought the project had stalled, then one day it was gone. She looks wonderful , you must be very proud and pleased with the result.
I always thought getting the boat out of the village would be a final challenge for you to overcome
Thank you! I'm afraid it's the nature of the beast that it appears that a lot of progress is made at the start, particularly when tack-welding the plates together, and then limited visual progress. The reality was that there were very few weeks during the fourteen years of build that I wasn't working on something!
 
Top