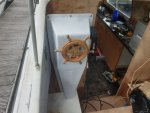
Fairline Fury MK1 restoration/refurb

waynes world

Well-known member
Joined
7 May 2011
Messages
1,568
Location
Manchester
Visit site
Things are looking good for the dodgy engine.

As we had this head off it i found the first exhaust valve seat past repair but for fitting a new valve seat. And with all the rest of the head a bit naff i decided to get another.

This is alot better and came off a running engine that somebody is breaking, MMmm maybe i should of bought the full engines ha ha.

so from this

20210412-190302.jpg


20210412-190249.jpg


to the new to me head

20210421-174329.jpg


So next il get that stripped and cleaned up and check the valves, infact i have checked one already and it well within the tolerances.


And next mage bonus is the drive plate that is looking not to good.

Well got one from the same chap :)

These buggers go for around £400 and this one a bargain at £50 :) happy days.

20210421-174341.jpg


And why finish there. this was the state of the bores.

20210411-145240.jpg


I took it to an engine shop as they said they would take a look and see whats what.

And after a short few minutes with a honing tool then a flexible one they look good.
So when i get the bore gauge ill check them out for sure.


20210425-092219.jpg


I will be repainting the engines and got some stripper to have ago with, what a waste of time this one is.

I just wish i could use my sand blaster but thats not the best way to go is it. and it wont work with soda so ts either get it dipped or wire brush it.

20210423-162824.jpg


Oh yes on this project for the first time ever i am going to keep a cost sheet. I did for a while on the ;last boat but when it got well into the £000`s i stopped.
Just curious if i will break even on this one as the other i near did, and could of but wanted a quick sale to get this boat. .


The other day T gave me a hand again starting to remove the windows for refurbing. removing. We got one out, and what a faff.
I was glad though as we managed to save near all the inner wooden frame. I think its Teak so i will replace the rotter sections.

I have a steam bender here so if needs must and we find a rotten curved section i can make a replacement.

20210425-092227.jpg


20210425-092310.jpg


No wonder there were leaks from the windows, they near fell out.

20210424-165712.jpg


20210424-165706.jpg


Better stock up on the Butyl tape ;)

Love of my life :) :)

20210416-164616-Copy.jpg
 

waynes world

Well-known member
Joined
7 May 2011
Messages
1,568
Location
Manchester
Visit site
You should consider fitting easier access drain taps to the exhaust manifolds to enable you to easily drain off after use.

Ill look into that as unsure what you mean.


This weekend then, got a little done as i am still trying to finish a job on another chaps boat.

So plan is, engines will be left to one side untill i decide what to do with them, either rebore or not. there not to bad on one engine. worst bore being just 3 Thou out of ovality. all have a few thou taper. Anywya there the winter project.

SO now i can crack on with the windows and transom. We got out two windows as third was stopped due to rain. Doing one side at a time.

These are going to need a good amount of new brackets making. There in aright old state. rainy day work these. Atleast now i can work out what seals and how much is needed. upto know its standard 9.6mm x 12/15mm x 5mm channel seals and flocked runners. even the P seals are standard :)

20210503-164905.jpg


20210503-164919.jpg


20210503-164930.jpg


20210503-180634.jpg


20210503-180639.jpg


20210503-180642.jpg


all be worth it :)
 

Ferris

Active member
Joined
23 May 2016
Messages
333
Visit site
We rebuilt the windows on a Broom 37 and the fixings and frames were identical. We managed not to break any of the corner brackets but thats obviously not much of a problem, especially for you.

FYI we didn't use new seals but rather bedded the window panes in Sika in the frame channel, let is cure halfway and refitted the window frames into the opes. I think we made work for ourselves to be honest. They don't leak however and that was 10yrs ago.
 

waynes world

Well-known member
Joined
7 May 2011
Messages
1,568
Location
Manchester
Visit site
I couldnt wait so i just did it.

This transom shield or plate had to come off. Jut needed to find out what was going in underneath it.

Not top hard a job once the drive collars were removed.

I am tempted to sand blast these to get them smart aswell as the drives then teat them .

20210510-192449.jpg


th epain was the dam screws, some came out some didnt so just drilled them out enough to get the plate off.

T-reoving-Moment-6.jpg


T-reoving-Moment-4.jpg


20210510-192501.jpg


20210510-192351.jpg


i am a little surprised as the timber seems ok on quick look over. and the laminations on it. ill tap test it later to see.
And it doesnt look to have anew outer skin either.

20210510-192354.jpg


20210510-192403.jpg


20210510-192358.jpg


So thinking ahead here. if when i have tap tested it etc etc and its good i will either see how the collars fit as is and just put them back as they should be or use smaller stainless shields for each drive just a bit larger than the drives and following the profile.

Can i show my motivation a si have been so motivated since i found this pic of where we want to take it for a few weeks or months once we have trialed it at the mooring we have for it.


91189979-10222529914421454-3230934511860580352-n.jpg


just ;love that place.
 

vas

Well-known member
Joined
21 Jun 2011
Messages
7,897
Location
Volos-Athens
Visit site
well done, makes you wonder why they got into the trouble to put that sh1t up in the first place!
getting the screws out to do some gel or whatever repair on the holes will be fun :)

V.
 

waynes world

Well-known member
Joined
7 May 2011
Messages
1,568
Location
Manchester
Visit site
well done, makes you wonder why they got into the trouble to put that sh1t up in the first place!
getting the screws out to do some gel or whatever repair on the holes will be fun :)

V.

Its going to easy that bit, just going to dig the screws out with a grinder as to my disappointment the hull is painted so it doesnt matter, just fill the holes with epoxy filler.
The inside of the transom had evidence of being fettled but ill look more into that maybe this weekend.

still we have once again a happy Captain Faffer :)
 

Restoration man

Active member
Joined
3 Jun 2012
Messages
365
Visit site
That transom does look ok strangely enough,

My transoms got lots holes where bathing platforms and ladders have been added and then removed and filled badly, the rest of the hull looks ok , I’m thinking of wrapping the transom in navy blue and seeing how it looks on the water if it looks nice I might paint it in the future or if the wrap falls off,
it might save you from trying to Match the paint
Nick
 

waynes world

Well-known member
Joined
7 May 2011
Messages
1,568
Location
Manchester
Visit site
That transom does look ok strangely enough,

My transoms got lots holes where bathing platforms and ladders have been added and then removed and filled badly, the rest of the hull looks ok , I’m thinking of wrapping the transom in navy blue and seeing how it looks on the water if it looks nice I might paint it in the future or if the wrap falls off,
it might save you from trying to Match the paint
Nick

I hear a few folk wrapping there boats nowadays. I like the idea and upto now no bad feed back from it. not sure yet what ill be doing. I am thinking on spraying it. Have to see what i can about a cover/tarp around the boat though, just upto the gunnel though.

I am looking forward to making the swim platform :)
 
  • Like
Reactions: JAH

longjohnsilver

Well-known member
Joined
30 May 2001
Messages
18,841
Visit site
I couldnt wait so i just did it.

This transom shield or plate had to come off. Jut needed to find out what was going in underneath it.

Not top hard a job once the drive collars were removed.

I am tempted to sand blast these to get them smart aswell as the drives then teat them .

20210510-192449.jpg


th epain was the dam screws, some came out some didnt so just drilled them out enough to get the plate off.

T-reoving-Moment-6.jpg


T-reoving-Moment-4.jpg


20210510-192501.jpg


20210510-192351.jpg


i am a little surprised as the timber seems ok on quick look over. and the laminations on it. ill tap test it later to see.
And it doesnt look to have anew outer skin either.

20210510-192354.jpg


20210510-192403.jpg


20210510-192358.jpg


So thinking ahead here. if when i have tap tested it etc etc and its good i will either see how the collars fit as is and just put them back as they should be or use smaller stainless shields for each drive just a bit larger than the drives and following the profile.

Can i show my motivation a si have been so motivated since i found this pic of where we want to take it for a few weeks or months once we have trialed it at the mooring we have for it.


91189979-10222529914421454-3230934511860580352-n.jpg


just ;love that place.
Where is it?
 

longjohnsilver

Well-known member
Joined
30 May 2001
Messages
18,841
Visit site
I did wonder.

A mate of mine almost bought Watermouth about 30 years ago. He’s regretted not doing so ever since. It is a lovely place on the edge of Exmoor.
 

waynes world

Well-known member
Joined
7 May 2011
Messages
1,568
Location
Manchester
Visit site
Having a chill i thought i would update on what been going on in the world of Faffer.

I am afraid nothing much has been done to the boat but for removing a few windows. Still happy though with progress as the progress will be of benefit to Faffers Fury.

The workshop roof really needed doing so this has delayed work on the boat a bit. Omcd done though i can take engine and drives etc indoors to fettle them.

But the real reason for a bigger all in one workshop is i plan to make gear for boats and anything really to help pay for the boat. Upto now its Bathing platforms, i will be making the first for Faffers Fury. Also LPG cylinder carriers as its not easy to find them for boats. Out Drive stands, also boat props and anything else i can think of for my portfolio.

Oh and GRP parts onc ei get more moulds made. I made these for a few folk now.

Resized_20200630_140037.jpegResized_20200630_140037.jpeg

And they will be coming in different styles, some with foot rest .


Now then my birthday week last week we was going away for a few days. hell me do that when got things to do never lol.

My amazing wife T helped me as still struggling to do things helped me on this, new roof went up. Once i rebuilt the wall and framed out with new cladding etc etc etc etc

did i mention the garden aswell ha ha

IMG-20210530-WA0007.jpg


New wall up, well added a few sqm aswell :)

20210614-191424.jpg


frame work then roof. need to finish off the roof a bit still but getting there now.

20210620-192848.jpg


20210620-192809.jpg


T is a good un, she helped me here a bit

dividing wall had to come out to make one big workshop as two was getting annoying.

20210623-094606.jpg


20210623-103738.jpg


20210623-104519.jpg


then clad it :)

IMG-20210624-WA0000.jpg


Still need to as said the nest rear roof section and then concrete the floor level. the bet it rewired.

I have also been buying new toys for it already. had a play with one tonight as it arrived early :)

oh the plan

Untitled.png
 
Top